Homemade Breadsticks (Easy, Beginner-Friendly Recipe)
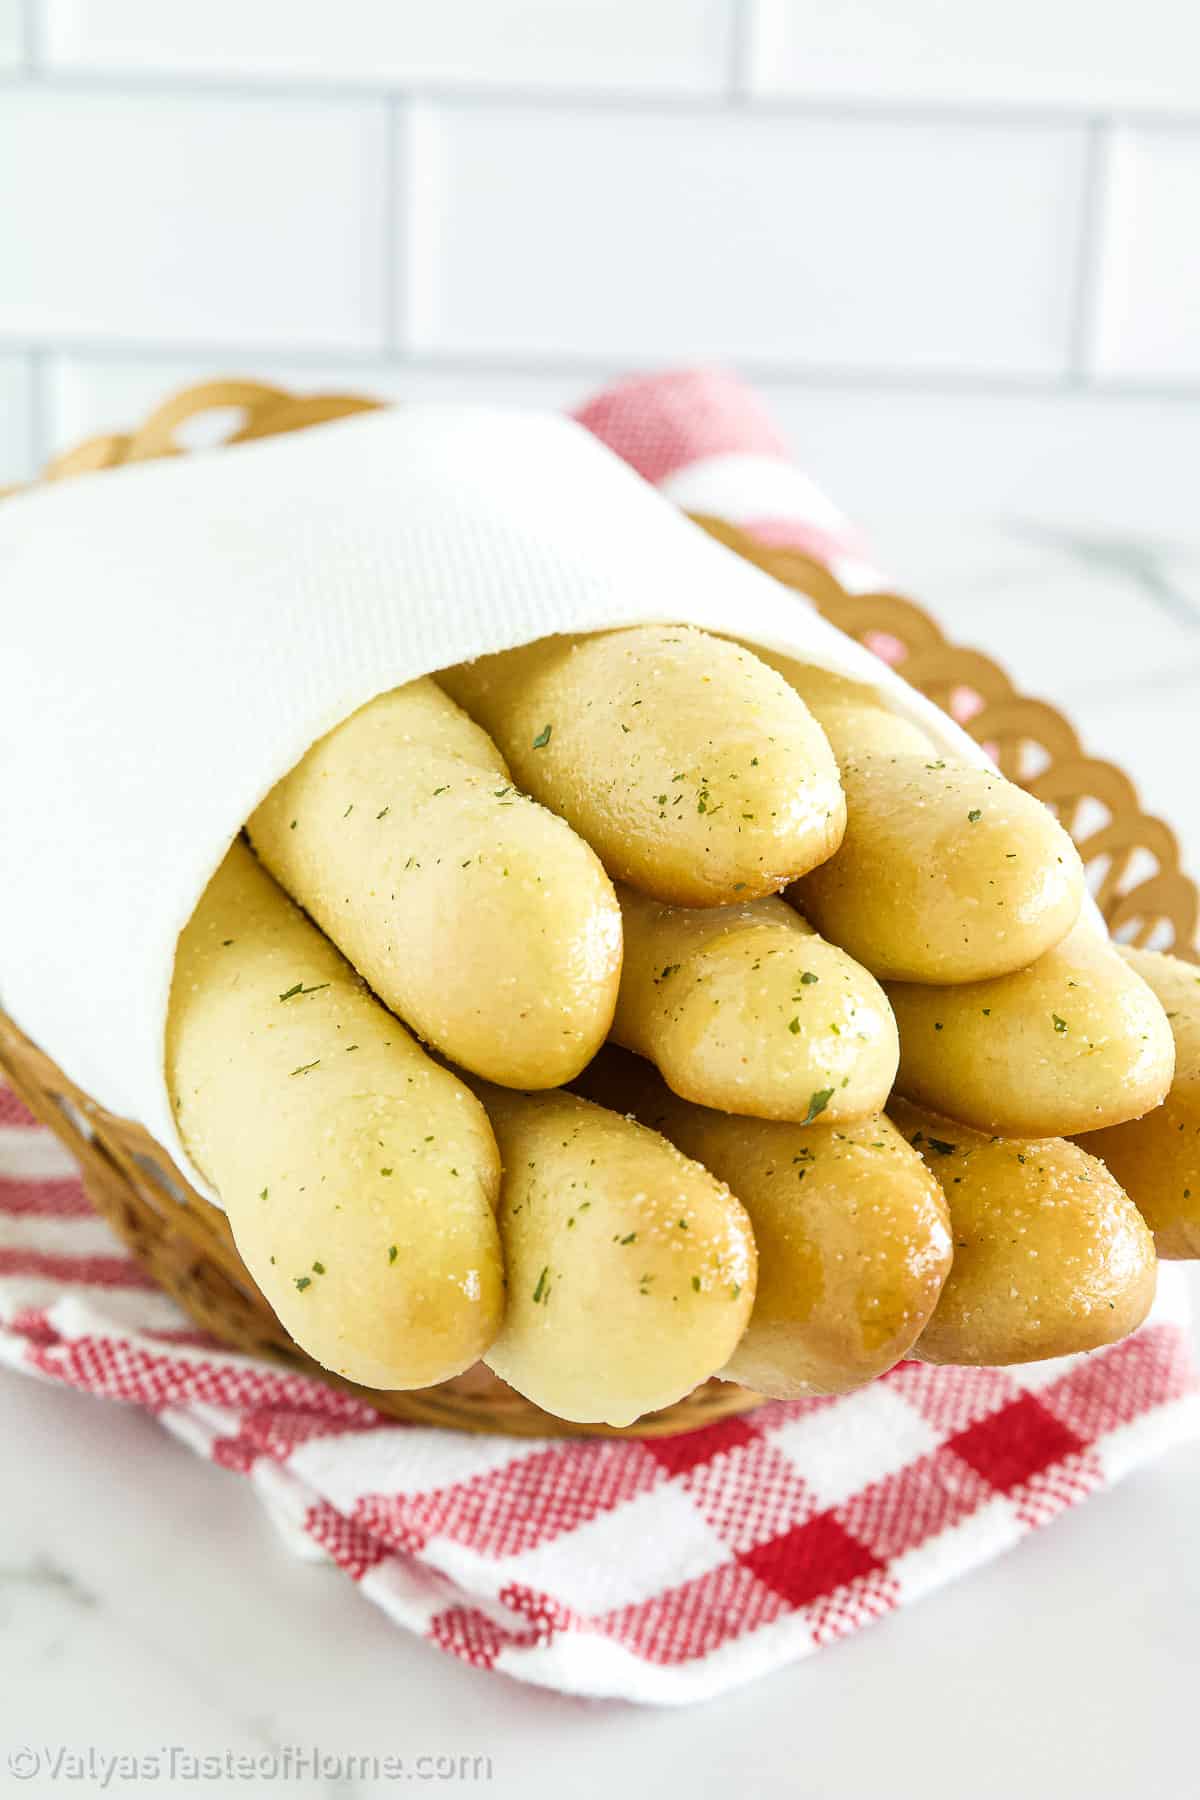
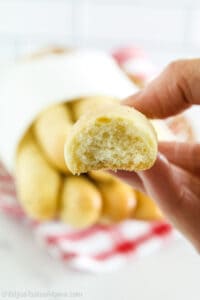
These homemade breadsticks are incredibly light, fluffy, and soft with the perfect crust but are easy to make from scratch.
This is a great recipe to try for any beginners looking into baking some bread. The dough is forgiving and easy to work with. Once you’re done making it, you’ll get the best homemade breadsticks that go well with just about everything!
They’ll make your house smell amazing while you’re baking them and provide the best comfort food for your family.
Want to learn how to make these delicious breadsticks? Then keep on reading!
What are Breadsticks?
Breadsticks come in many different forms these days, from thin ones that are super crispy to bigger ones that are often served with spaghetti and used to soak up the extra sauce.
Breadsticks, which are also called grissini, grissino, or dipping sticks, are usually pencil-sized sticks of dry, crisp bread that originated in Italy.
There is also a soft-baked breadstick variation that is popular in North America and is frequently served with various sauces or spaghetti at many pizzerias.
The delicious soft, fluffy baked ones are what we’ll be making today. Not only are they incredibly delicious but the perfect comfort food too!
Why You’ll Love These Easy Homemade Breadsticks
You and I both know that handmade bread tops store-bought bread every time! Nothing beats freshly baked bread made to your preferences. It’s the best gift for your family, and everyone appreciates it at the dinner table!
While you’re making these breadsticks, your house will smell amazing! I enjoy making these at home since you can customize the size of the breadsticks to your taste.
If you’ve ever loved olive garden breadsticks, then this is the perfect recipe to try at home to satisfy your cravings! You can munch on them or have them with dinner.
They are filling enough on their own, but they also pair beautifully with homemade spaghetti or soup!
They’re light and delicious, and if you put them in a Ziploc bag, they’ll stay moist until the next day.
I understand that baking bread might be frightening for some people, but preparing these breadsticks is simple, and the dough is easy to work with.
What You Need to Make Breadsticks at Home
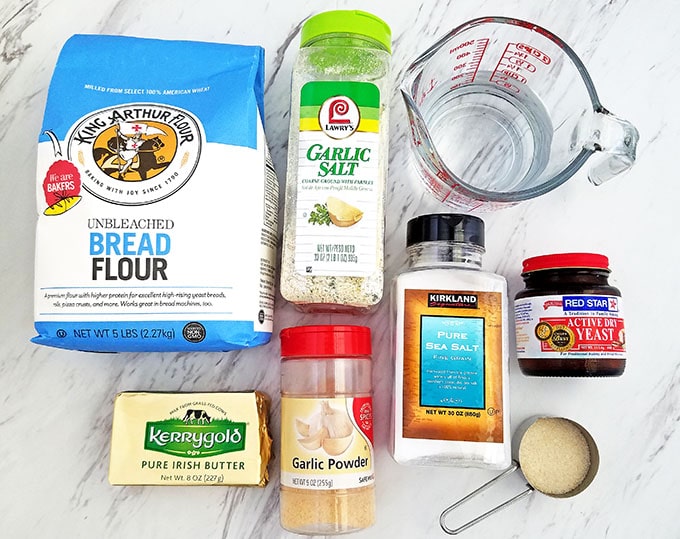
All you need are some basic ingredients to make these breadsticks. Let’s look at what these are one by one:
Bread flour: We’ll be using unbleached bread flour for this recipe instead of all purpose flour since it has more gluten and will help the dough be more elastic.
Yeast: Next, you’ll need some active dry yeast as the main leavening agent for our breadsticks instead of instant yeast. The advantage of baking with active-dry yeast is that it can be guaranteed to be alive by blooming it in water. There’s no way to tell if instant yeast is still active if you mix it with flour and salt.
Sugar: Sugar helps to activate the yeast and make the process faster as the yeast will have something to eat. It also helps to make the bread softer as some of the water will be absorbed by it and it slows down the formation of gluten strands.
Water: We’ll be using some warm water to assist us in activating the yeast properly along with the sugar.
Salt and garlic powder: You’ll need some salt and garlic powder to lightly flavor the breadsticks.
Butter: We’ll be using some unsalted butter to add to our breadsticks which will make them soft, and fluffy but with a crispier crust.
How to Make Homemade Breadsticks (Step-by-Step)
Making these delicious homemade breadsticks is super easy. Here’s what you need to do step by step:
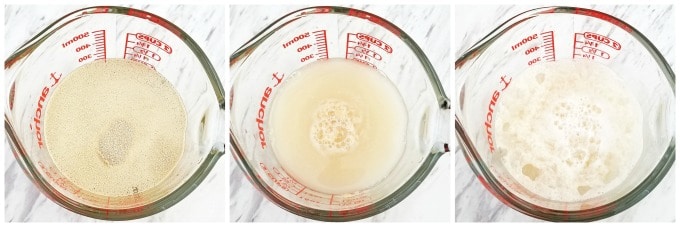
First, start by dissolving sugar and yeast in warm water. Let it rest for 15 minutes to allow the yeast to become active. This is when it becomes foamy on top.
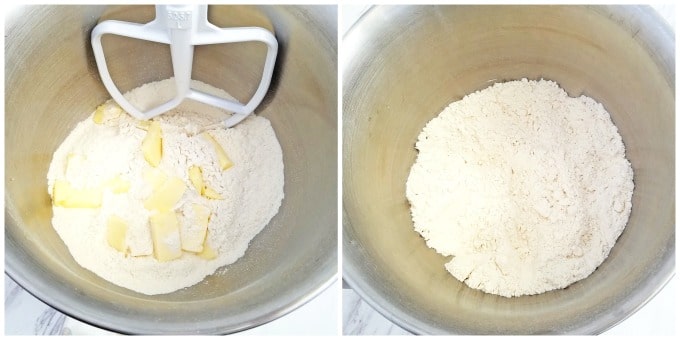
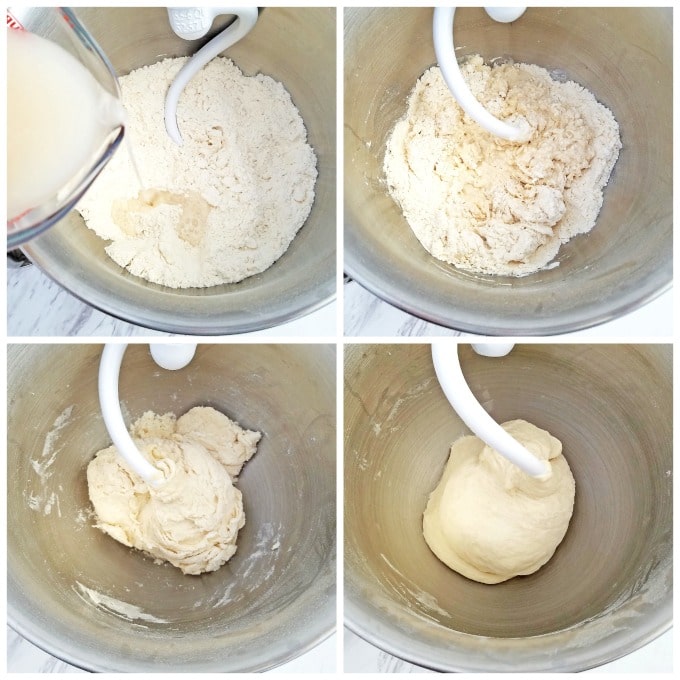
Next, combine flour, butter, and salt in a large bowl. Using a paddle attachment in a stand mixer, mix the butter and flour or until the butter is well incorporated. This will take about 5 minutes.
Then switch the paddle for the dough hook attachment. With the mixer running, pour the water/yeast mixture into the flour, and let it knead for about 10 minutes until it starts looking smooth and elastic.
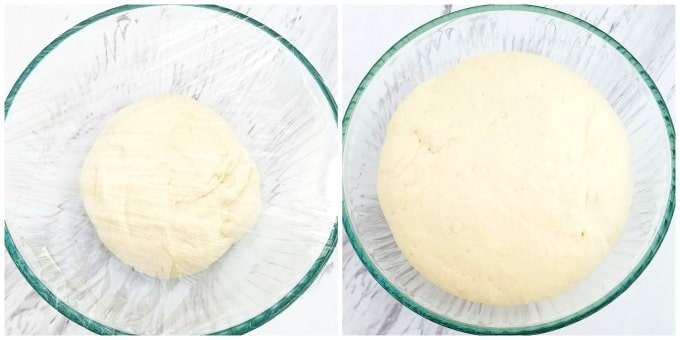
Transfer the dough to a large oiled bowl and cover with plastic wrap. Poke about 6 holes in the plastic wrap, cover with a clean cloth and let the dough proof for 1 ½ hour in a warm place or until it doubles in size.
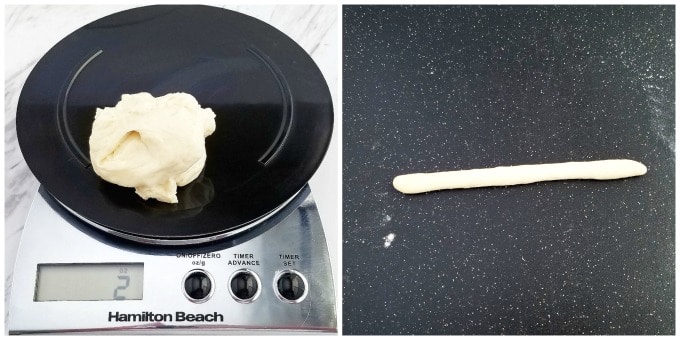
Once the dough has proofed, measure out 2-ounce portions and roll the dough on a flour-dusted surface to form breadsticks, about 8 inches long.
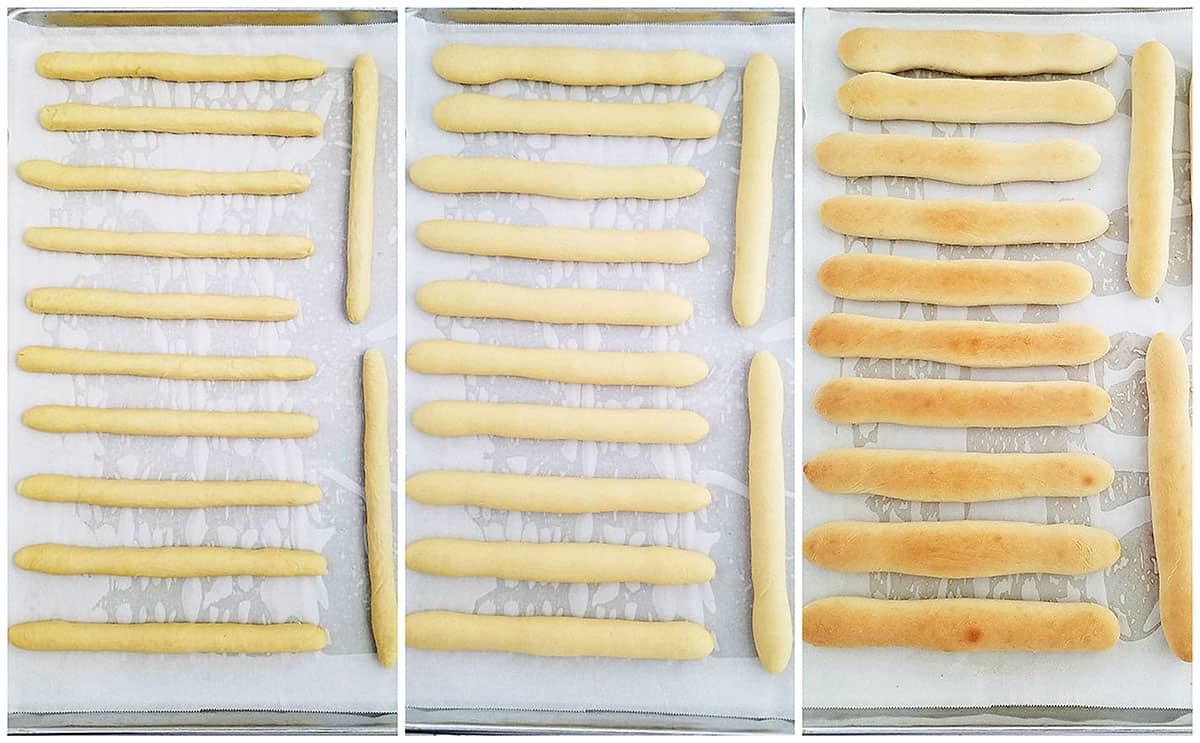
Place breadsticks dough on baking sheets lined with parchment paper. Cover with a towel and let them rise for 1 hour.
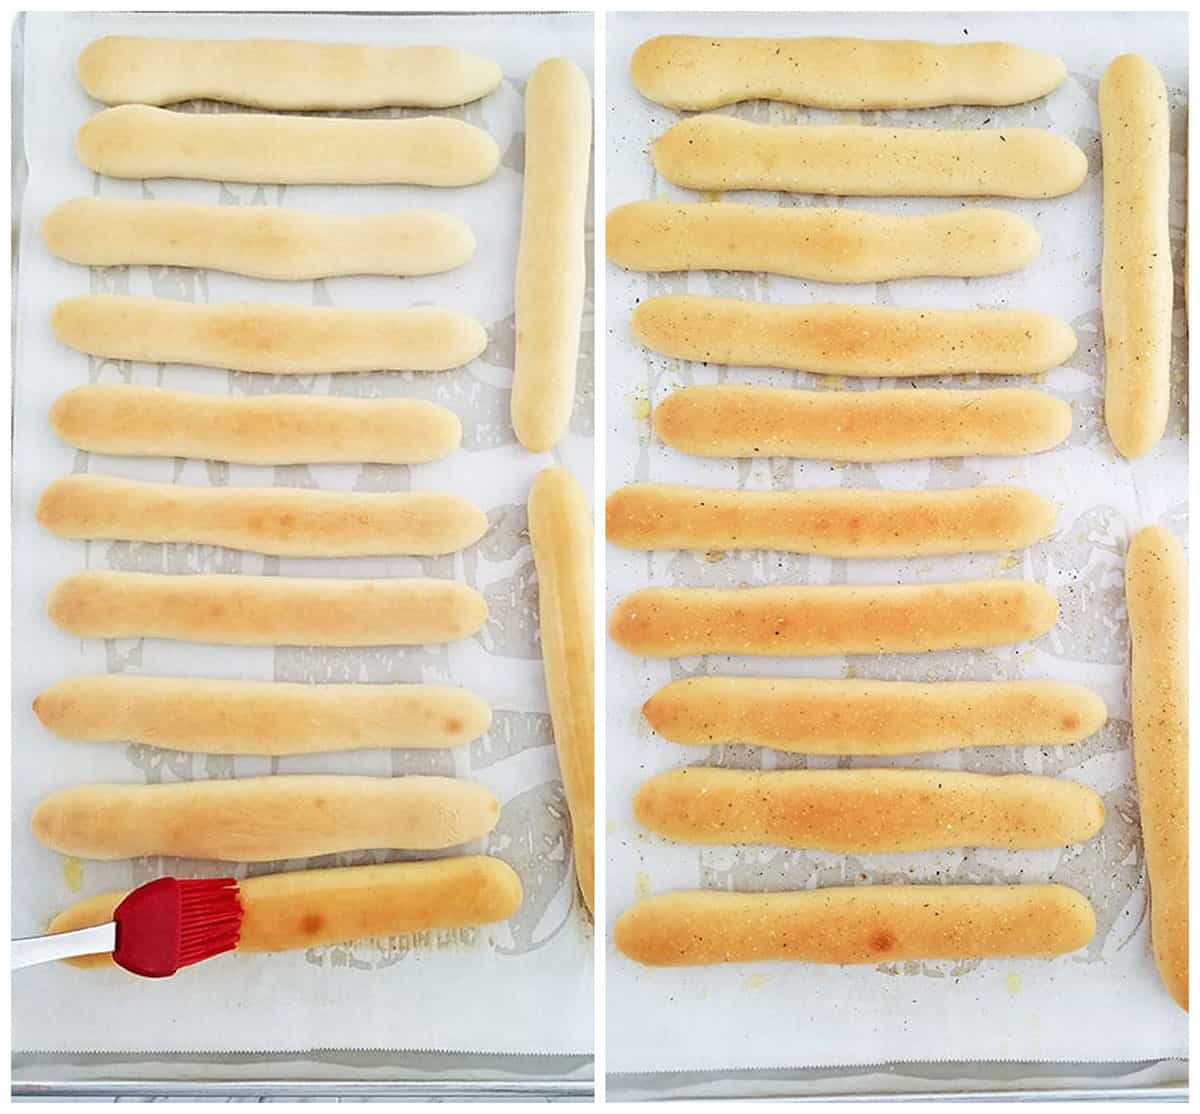
Now preheat the oven to 400 F (205 C). Bake breadsticks for 15 minutes or until golden brown.
Remove from the oven, and immediately brush each breadstick with melted butter and sprinkle with garlic salt or garlic powder.
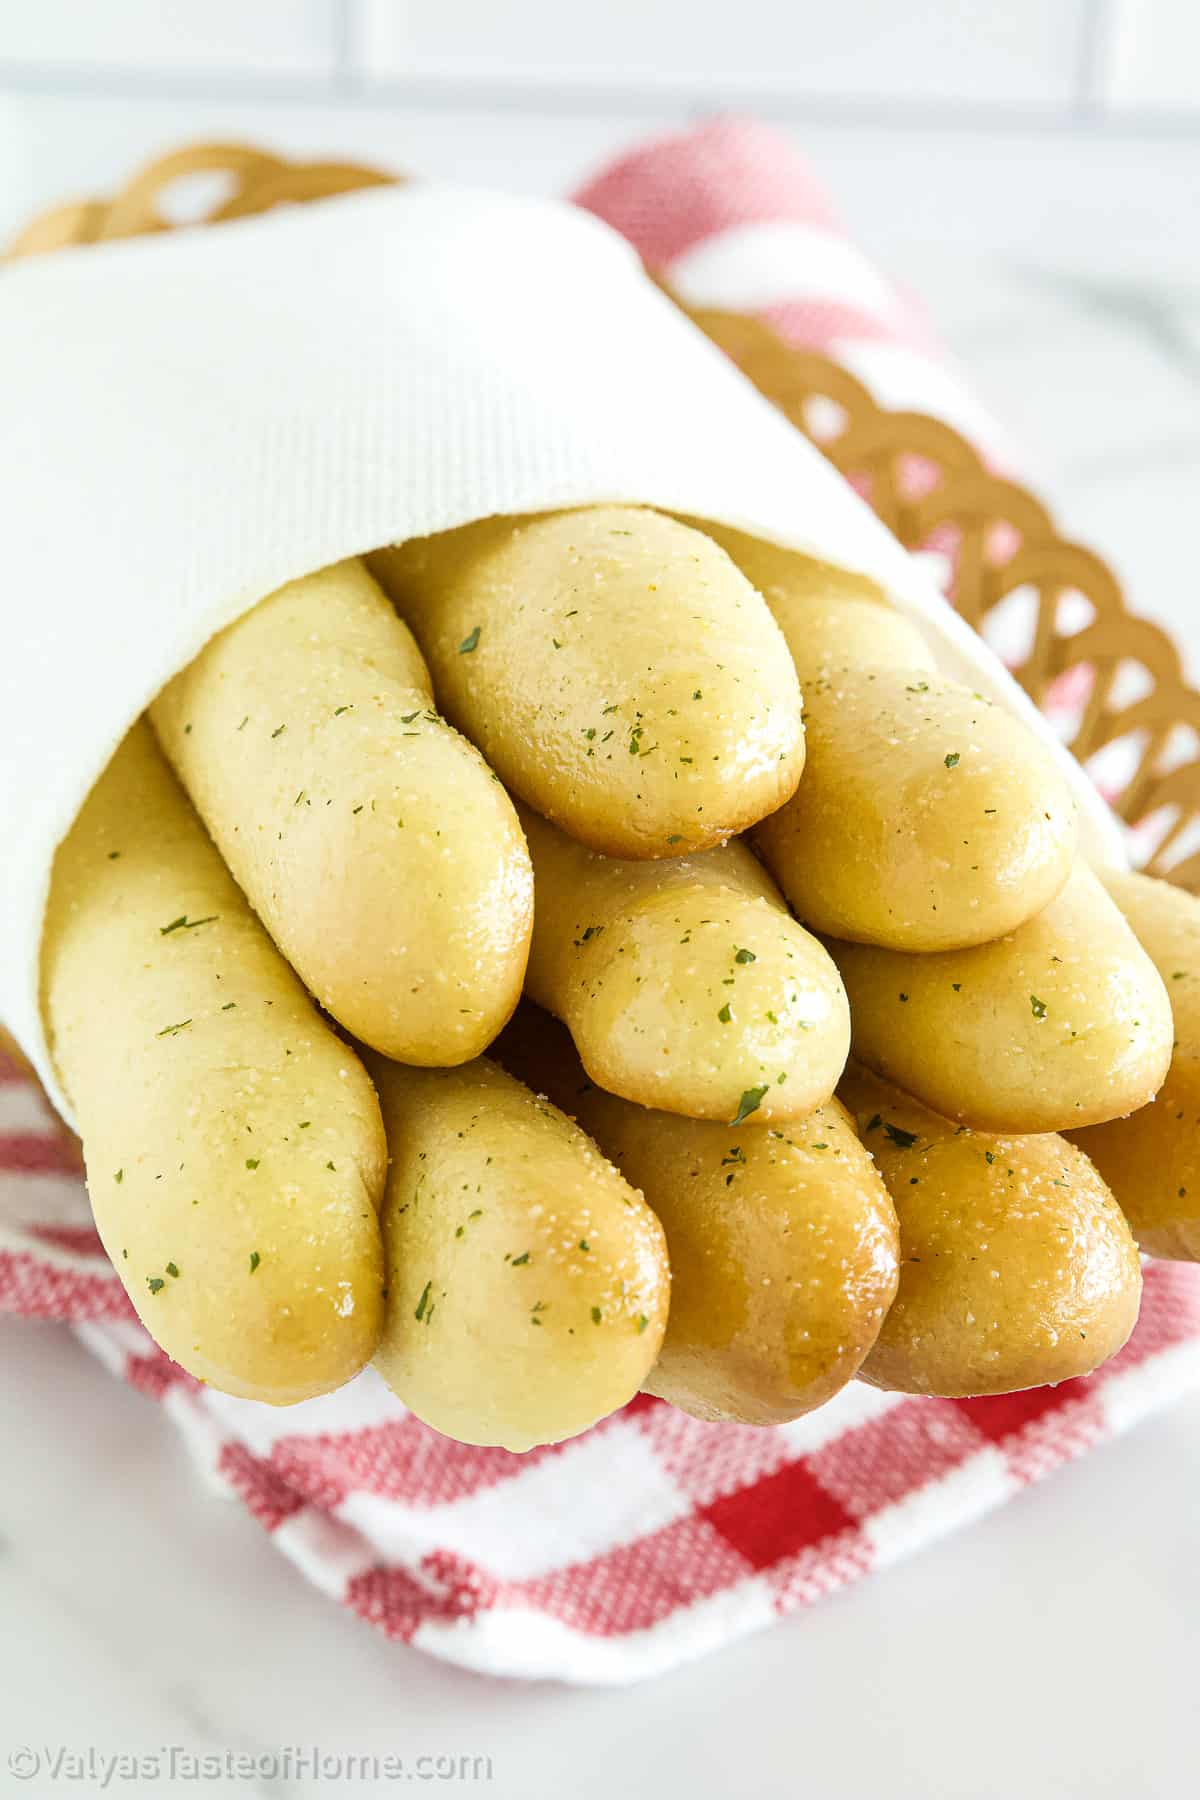
Your delicious homemade breadsticks are ready to be served!
Breadstick Variation Ideas You Can Try
These breadsticks are incredibly delicious and turn out perfect every single time! But if you want to customize this recipe according to your preferences, you definitely can.
Here are some recipe variation ideas you can try out:
Try some garlic butter with parmesan: You can add a table of parmesan cheese to homemade garlic butter and brush it on top of your breadsticks before serving.
Add some sesame seeds: Another thing you can try is adding some sesame seeds by brushing the breadsticks with some egg wash and sprinkling some sesame seeds on them. You can press the sesame seeds gently on the breadsticks with the back of a spoon to help them stick and then bake them!
Try some herbs: You can also add some dried herbs to the bread, such as oregano or basil for a more herby touch!

How to Store Breadsticks
You can store these delicious breadsticks in an airtight container or Ziploc bag for up to 5 days in the fridge.
Can Breadsticks be Frozen?
Yes, you absolutely can!
To store the breadsticks, put them in a Ziploc bag, squeeze out as much air as you can, seal the bag, and put it in the freezer. They can be stored in the freezer for up to three months!
Put as many frozen breadsticks as you want to thaw on a plate that can go in the microwave and heat for a few seconds. They’ll taste like they’re fresh out of the oven.
What To Serve With Breadsticks?
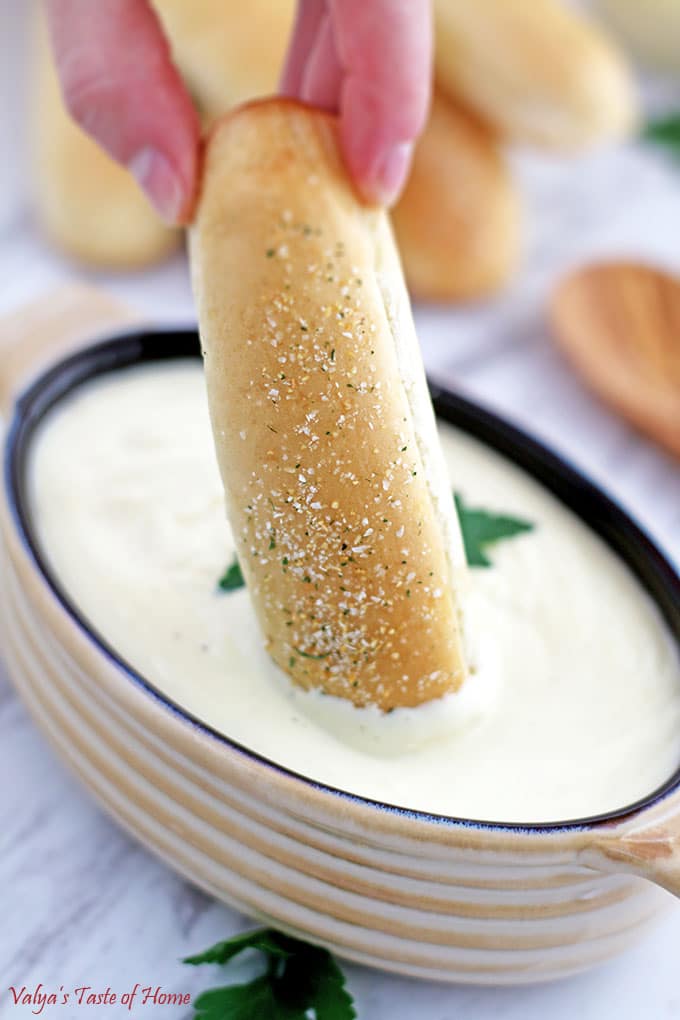
These breadsticks go great with different kinds of pasta, salads, and soups! They make an ideal starter for almost any dinner. You may also dip them in your favorite sauce (I recommend marinara sauce!).
While it would go marvelously with any main course, it tastes especially scrumptious with Homemade Creamy Alfredo Sauce and Zuppa Toscana Soup
When it comes to saucy dishes, breadsticks are my go-to choice rather than dinner rolls; you should absolutely give them a chance the next time you make something similar in the kitchen.
Similar Bread Recipes
- Dutch Oven White Crusty Bread Recipe
- Homemade French Bread
- Mashed Potato Dinner Rolls Recipe
- Garlic Dinner Rolls
See all bread recipes.
Homemade Breadsticks (Easy, Beginner-Friendly Recipe)
Ingredients
Homemade Breadsticks Ingredients
- 2 Tbsp. – organic sugar
- 3/4 tsp. – dry yeast
- 1 cup + 1 tbsp. – warm water
- 3 cups – unbleached bread flour
- 1 ½ tsp. – salt
- ¼ cup ½ stick – unsalted butter (room temperature)
- 3 tbsp. – butter (melted)
- Garlic powder or salt
Instructions
How to Make Homemade Breadsticks
- Making these delicious homemade breadsticks is super easy. Here’s what you need to do step by step:
- First, start by dissolving sugar and yeast in warm water. Let it rest for 15 minutes to allow the yeast to become active. This is when it becomes foamy on top.
- Next, combine flour, butter, and salt in a large bowl. Using a paddle attachment in a stand mixer, mix the butter and flour or until the butter is well incorporated. This will take about 5 minutes.
- Then switch the paddle for the dough hook attachment. With the mixer running, pour the water/yeast mixture into the flour, and let it knead for about 10 minutes until it starts looking smooth and elastic.
- Transfer the dough to a large oiled bowl and cover with plastic wrap. Poke about 6 holes in the plastic wrap, cover with a clean cloth and let the dough proof for 1 ½ hour in a warm place or until it doubles in size.
- Once the dough has proofed, measure out 2-ounce portions and roll the dough on a flour-dusted surface to form breadsticks, about 8 inches long.
- Place breadsticks dough on baking sheets lined with parchment paper. Cover with a towel and let them rise for 1 hour.
- Now preheat the oven to 400 F (205 C). Bake breadsticks for 15 minutes or until golden brown.
- Remove from the oven, and immediately brush each breadstick with melted butter and sprinkle with garlic salt or garlic powder.
- Your delicious homemade breadsticks are ready to be served!
Thank you for following me on Instagram, Facebook, and Pinterest!
This recipe was originally posted on Aprit 28, 2017 (original picture below), and updated for a better user experience. The post may contain affiliate links. Read my disclosure.


I made these last night per my daughter’s request and they turned out fantastic!! Soft and garlicky delicious breadsticks. The recipe was very easy to follow (followed to a T); didn’t even use my stand mixer, just did everything by hand, was still easy. I didn’t notice the unbleached “bread” flour and used regular unbleached flour and couldn’t see a difference, it still turned out very good. Homemade breadsticks will definitely be on REPEAT. I urge everyone to try this winner recipe
Thank you for coming back and leaving an amazing review! 🙂
Hello Valya! ????
We ran out of bread and I decided to bake these breadsticks. Now the bread is proofing (its 9pm) and it needs another 2 hours before I can bake them.. (didnt realize it takes over 3 hours total) and I dont feel like staying up til midnight to bake them. Can I just let it proof til the morning? ????
Hi Inna! Place the dough into the fridge in a large bowl (because the dough will rise slowly in the fridge so it has enough room to expand) covered (so it doesn’t dry out) and then shape and bake them in the morning.
If the bread is already proofing then you don’t need another 3 hours to get them done. Let them proof in the warm oven for 30 minutes that will speed up the process. Then baking shouldn’t take very long either. You should have them done in no more than an hour! I hope that helps. 🙂
Hi Valya,
Just stumbled upon this post while looking for some bread recipe to go with borscht that I’ll be making for lunch today. These breadsticks look AMAZING!! I really wanna give them a try but I don’t have a scale to measure out the 2oz. Is it still possible to make these without a scale?
Yes, totally! Measured out dough will not change the taste, just makes it even looking bread. You can just eyeball it 😉
This is a wonderful recipe! You can use olive oil and also get amazing results. The technique of working the fat into the flour first makes it wonderfully soft!
Thank you! 🙂
Lovely photos you have there!
The recipe looks pretty easy to make! and it’s straightforward!
Thank you! Hope you enjoy it! 🙂
Would you recommend using the bread making machine for mixing and rising the dough? Thanks
Yes, it’s ok to use a breadmaker machine to make these breadsticks. Enjoy!
I made this yesterday with regular flour. And they didn’t turn out great at all. They didnt rise well and they didn’t turn golden at all when cooking, just remained white. I even cooked it a lil longer and tried broiling it, but underneath it turned golden.
I wonder if there was a mistake with only 3/4 of a teaspoon of yeast? That seems too little. Is that a mistake? And did you mix the sugar with water first and then mix in the yeast and let it sit that long? That part is a little confusing.
I’ve always used bread flour to make these breadsticks. And the 3/4 tsp. of dry active yeast is the correct amount. It’s hard for me to tell what went wrong with out actually seeing entire possess. Is your oven working properly? I would recommend to check oven bake elements, they may be burned out. Otherwise try using bread flour next time you make them. I hope this helps.
I think it was the yeast part that went wrong. The amount of yeast didn’t seem enough and it didnt bubble. That makes it sound like the yeast wasnt good, but I bought it new.
I get dry active east at Costco and keep it in the freezer the whole time. You never know how long yeast have been seating on the shelf at the grocery store.
Can you use rapid rise yeast? If so, when would you add it and when would you add the warm water/sugar? Thank you
Hi Barbara. I would use rapid rise yeast the same as the ones I used, except skip the main rising step. I hope this helps.
I’m sorry to sound stupid – but do you mean skip the fermenting of the yeast (15 minutes) or the actual rising as noted in step 4? Thanks again
Not step 4, but skip step 1. Thanks for asking.
So i made them yesterday with all purposw flour, they turned out very soft! We loved them, thank you!
That’s awesome! Thank you for experimenting this recipe with a different kind of flour and leaving your feedback, other readers may have the same question. I really appreciate it 🙂
Can i use regular flour for this recipe?
I’ve always used bread flour to make these breadsticks. I don’t think they will turn out as soft. But if you try using regular flour, let me know how it turns out for you.
Hi,valya,i made the bread stick’s yesterday,everyoñe liked them,by the time I came home from work,theywere gone,i only got a chance to try 1 1/2 small one’s before I went to work. Thanks for the recipe. Do have a recipe for buns??
LOL, that happens to a lot! At least you got to try some 😉 I will post hamburger buns recipe sometime soon since grilling season already. Thanks for trying out my recipe and your amazing review!
So did you use all purpose flour as written, or bread flour as in your picture? Thanks for the post…
I used bread flour showed on the picture. Thank you for catching that, it’s fixed.
Thank you for the recipe. Made them for today’s dinner. Ended up with little more than I thought. Will freeze them for next time :-)))
You are very welcome! I hope you liked them.
These bread sticks look sooooo beautiful and delicious! You did an amazing job with producing such Amazing pictures! Thank you Vera and Valya for sharing your talents and jewels! I will be making these tomorrow!
You are very welcome Tonya! Let me know how it turns out for you. Enjoy!
Looks so good, you can eat the screen. I’ll be making this recipe as soon as I get bread flour. Thanks for amazing recipe!
I know, sometimes I wish that could be possible, lol. Thank you and would love to hear your review!