The Best Chocolate Sponge Cake (Faultless Result Every Time)
This recipe has the secrets to making a perfect light and fluffy Chocolate Sponge Cake, which melts in your mouth without being overly sweet or rich. It has a great flavor and is relatively easy to make. This cake is a chocolate-lovers dream. Combining chocolate cake with chocolate frosting is the tastiest combination, and my recipe will show you how to do it!
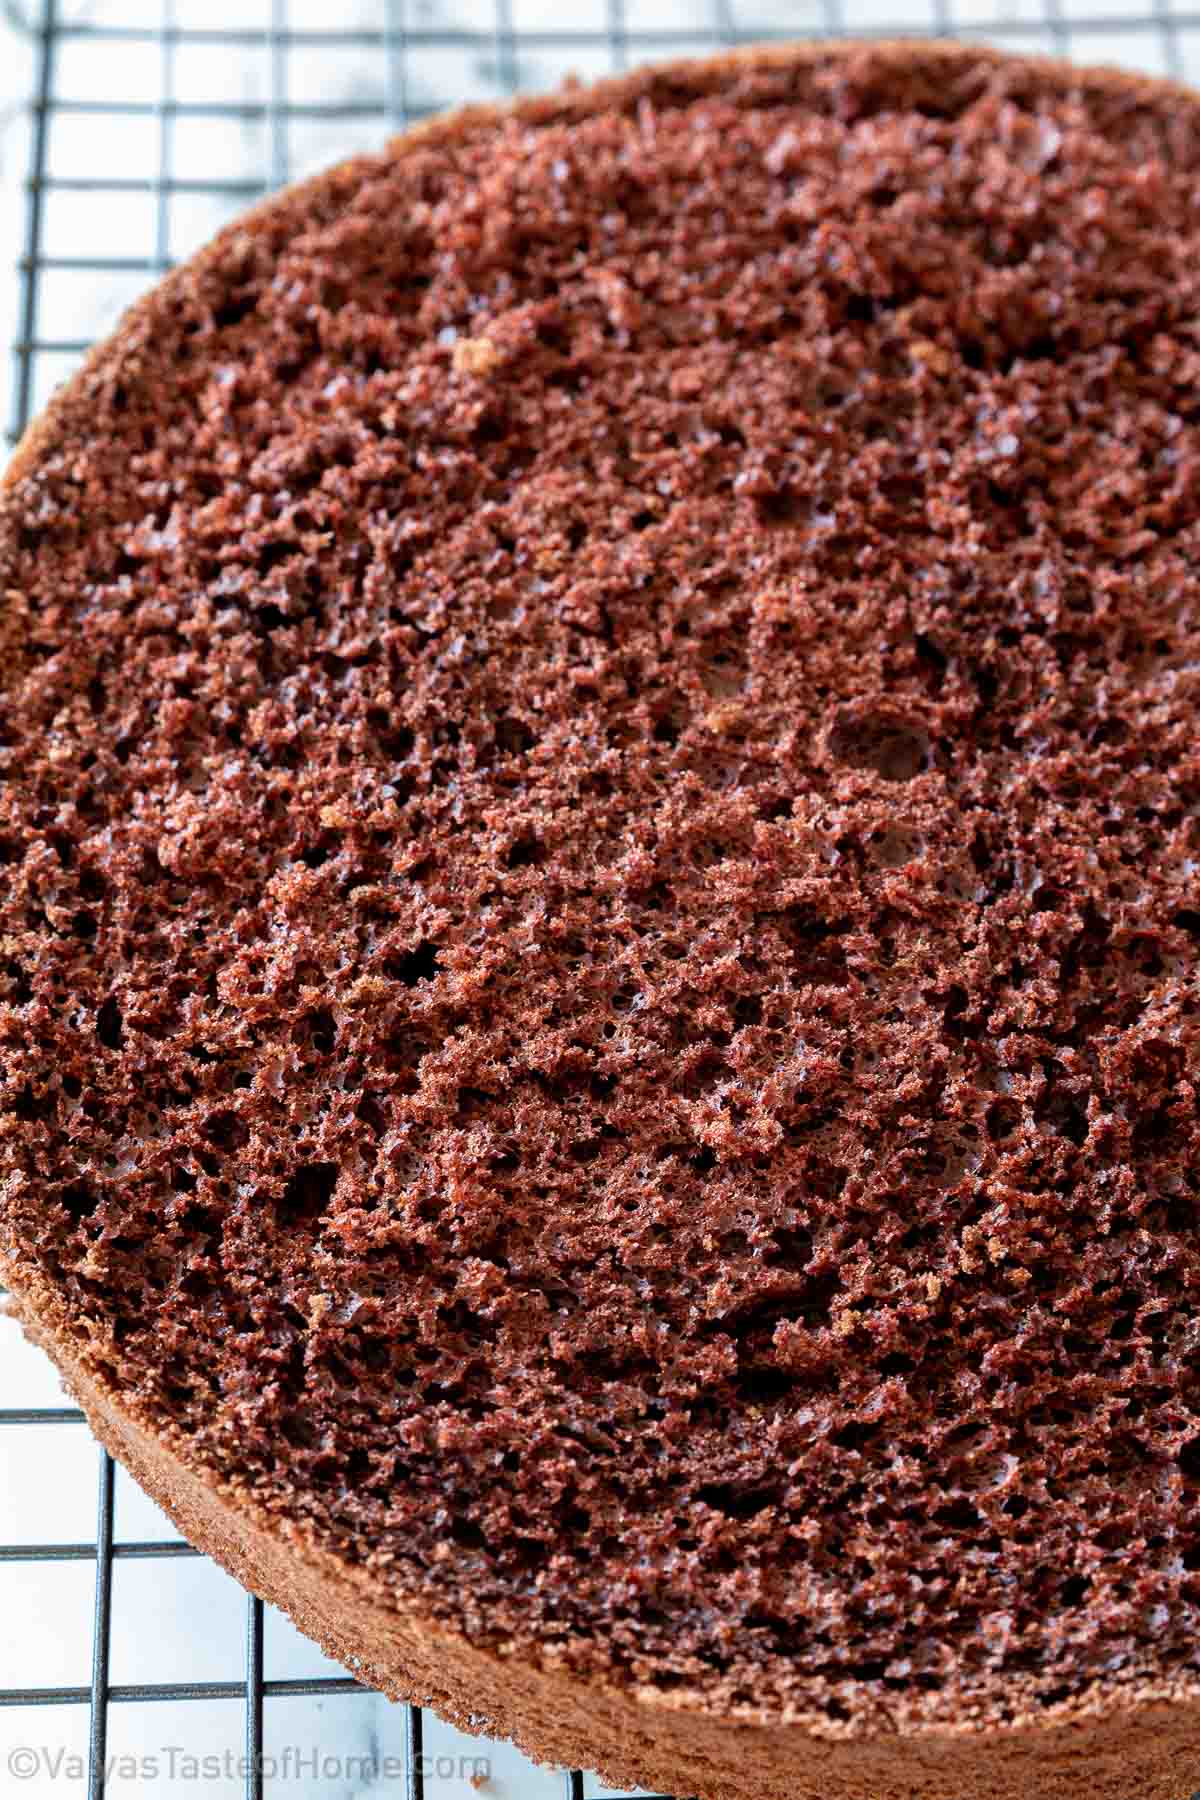
This chocolate sponge cake is light and airy, moist and tender, and rich, with a great chocolate flavor. These chocolate cake sponges are also known as chocolate Biskvit. It is very similar to the traditional white vanilla Biskvit except for the addition of cocoa powder and a little less flour to make those perfect chocolate sponge cakes.
This cake serves as a base for many different chocolate cake recipes or desserts. It can be eaten as-is with some chocolate ganache or made into one of the delicious cakes listed below. I’ve even included 7 other dessert ideas that you can try using this delicious sponge cake So, roll up your sleeves, and let’s get baking this delicious and versatile dessert!
Want to learn how to make Chocolate Sponge Cake? Then keep on reading!
What is Chocolate Sponge Cake?
A Chocolate Sponge Cake is the chocolate version of the classic sponge cake. It’s a light and fluffy cake that includes cocoa powder for that delicious chocolate variation. It is moist, tender, and rich in flavor, with the perfect balance of sweetness and richness.
Since it’s a sponge cake, the fluffy and light texture comes from beating the eggs with sugar till they’re light and pale in color. Whipping eggs this way incorporates air into the batter that allows the sponge cake to rise to the right level.
What’s best is that this type of sponge cake is very versatile and can be used as a base for many different chocolate cakes or desserts. It’s easy to make and can even be sliced in layers to make layered cakes.
What Makes This Chocolate Sponge Cake Recipe Special?
Simple ingredients: This chocolate sponge cake recipe requires very few ingredients. Most of them are probably already in your pantry!
Great taste: Chocolate sponge cake has a deep chocolate flavor but without being overly sweet. This makes it a great base for different frostings or other cake variations.
Delicious texture: You don’t need any complex techniques to make this dessert. It comes out light, fluffy, and moist every time!
Versatile: What’s best is that you can use this base recipe to make a bunch of different cakes and I’ve shared some of my top variations below as well!
Foolproof: You’ll get a delicious, perfectly risen cake every single time! That’s thanks to the combination of ingredients I’ve used in this recipe to make sure it rises perfectly.
What Can You Make Using this Chocolate Sponge Cake Recipe?
This chocolate sponge cake recipe is incredibly versatile. Here are some other ideas of how you can use it to make some delicious desserts:
- Chocolate trifle: Cut the chocolate sponge cake into small cubes and layer them in a glass bowl with chocolate mousse, whipped cream, and chocolate chips. Repeat the layers until the bowl is full, and top with more whipped cream and chocolate shavings.
- Chocolate cake pops: Crumble the chocolate sponge cake and mix it with cream cheese frosting to form a dough. Roll the dough into small balls and insert a lollipop stick into each one. Dip the cake pops into melted chocolate and decorate with sprinkles.
- Chocolate tiramisu: Substitute chocolate sponge cake for the ladyfingers in a traditional tiramisu recipe. Layer the cake with mascarpone cheese, whipped cream, and espresso.
- Chocolate truffles: Crumble the chocolate sponge cake and mix it with melted chocolate and cream. Roll the mixture into small balls and coat in cocoa powder or chopped nuts.
- Chocolate ice cream cake: Layer slices of chocolate sponge cake with chocolate ice cream, caramel sauce, and crushed cookies in a springform pan. Freeze until firm, then remove from the pan and serve.
- Chocolate berry parfait: Layer sliced strawberries or raspberries with whipped cream and cubes of chocolate sponge cake in a tall glass. Repeat the layers until the glass is full, and top with more whipped cream and fresh berries.
- Chocolate mousse cake: Line a springform pan with chocolate sponge cake and fill it with chocolate mousse. Chill in the fridge until set, then remove from the pan and garnish with whipped cream and chocolate shavings.
These are just a few ideas, but the possibilities are endless! Get creative and experiment with different combinations of flavors and textures.
What You Need to Make Chocolate Sponge Cake at Home
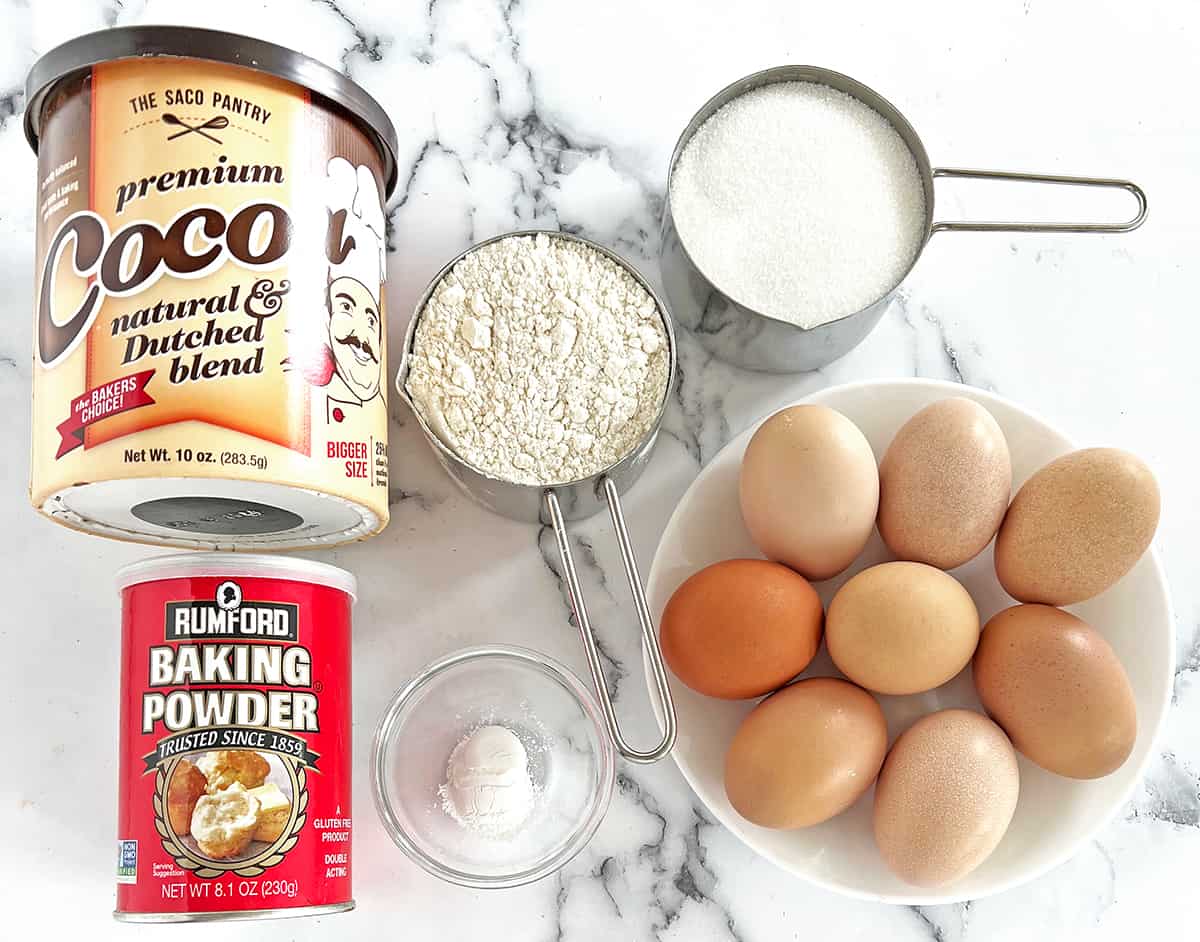
All you need are some simple, pantry staple ingredients to make the tastiest chocolate sponge cake you’ve ever had. Let’s look at each of them in more detail:
- Eggs: First, we’ll need several eggs for this recipe. Fresh eggs will make a big difference in how fluffy and airy you can get the batter to whip up.
- Sugar: Next we need some sugar, either white or organic, for this recipe. Don’t use brown sugar as it doesn’t work with this cake.
- Flour: We’re going to need all-purpose flour for this cake too. This means you don’t need any fancy cake flour for this recipe. Regular high-quality flour works well to give you the perfect texture!
- Cocoa powder: I prefer using dark cocoa powder or organic cocoa powder. It elevates the taste of chocolate in the cake sponge without being overly sweet.
- Baking soda and powder: We’re already adding a lot of eggs which will make this cake rise. However, using baking soda and powder will help it rise to the right amount with a tender crumb every time. This makes this recipe absolutely foolproof!
- Salt: A pinch of salt will really bring out the flavors of the other ingredients. It also helps balance out some of the sweetness in the cocoa powder and sugar.
How to Make Chocolate Sponge Cake (Step-by-Step)
Making this delicious Chocolate Sponge Cake is easier than you think. Here’s what you need to make it at home step by step:
How to Make Chocolate Sponge Cake Batter
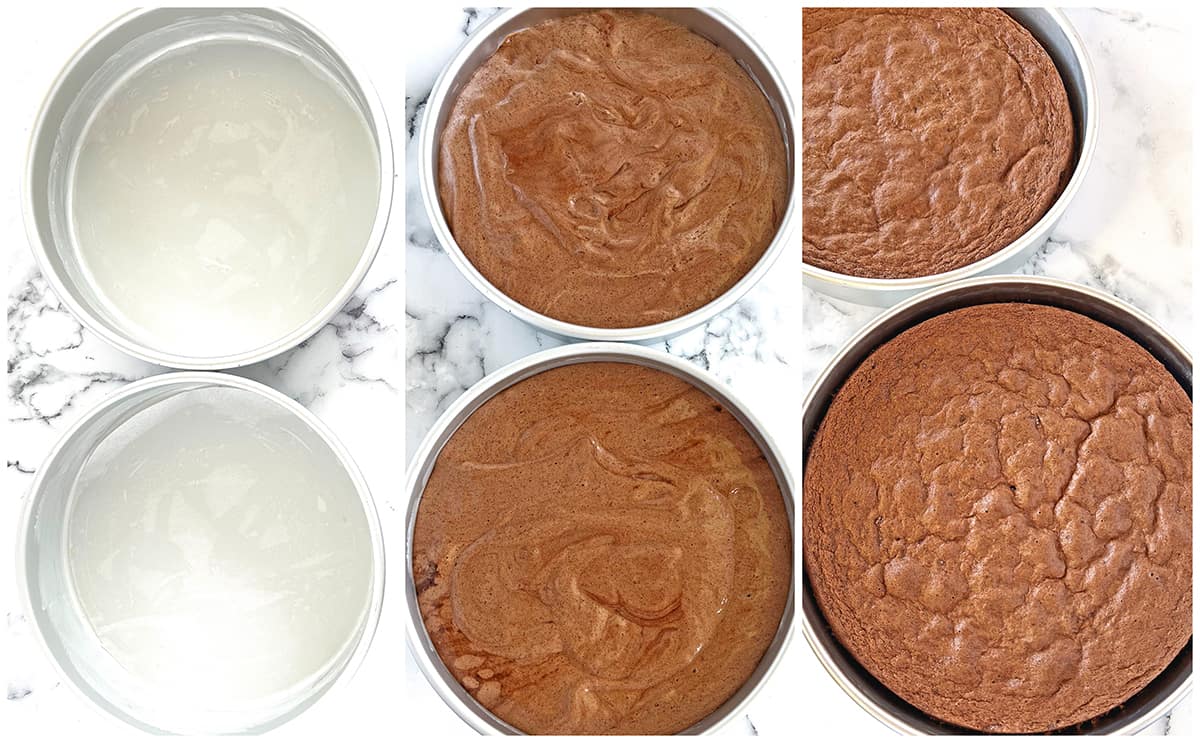
Let’s start out by preparing the cake pans. Grease the entire pan with butter and place parchment paper that is cut out to fit the bottom of the pan.
Next, preheat your oven to 350°F (325°F if you’re using a convection oven).
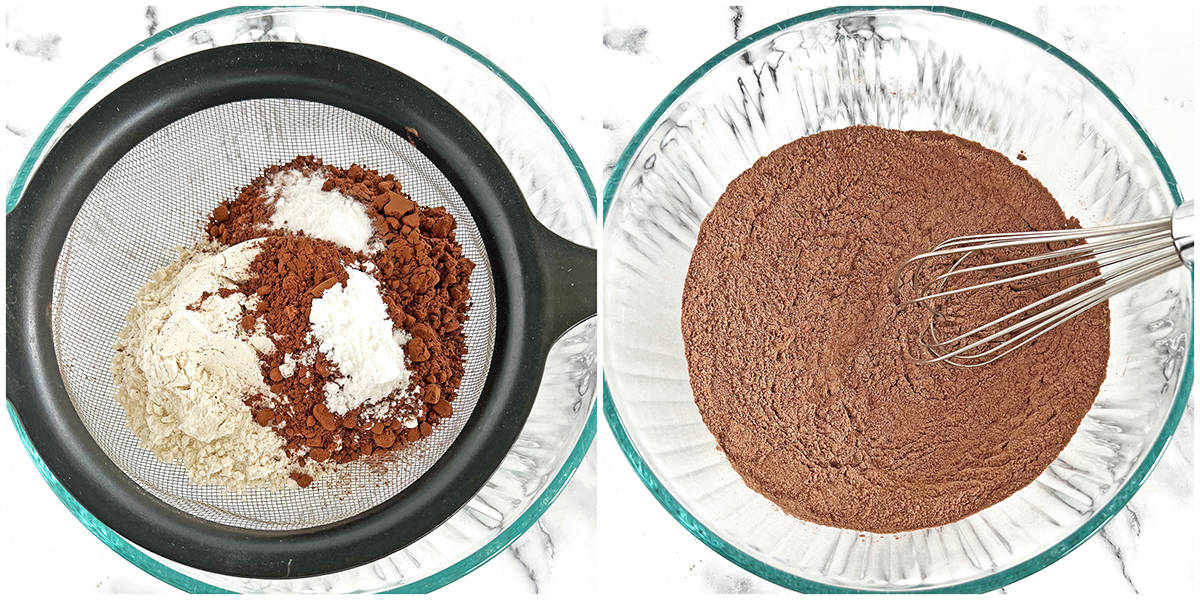
After that, sift the dry ingredients (flour, cocoa powder, baking soda, baking powder, and salt) into a bowl. Whisk them together to combine by using a hand whisker or electric mixer. Set aside until ready for use.
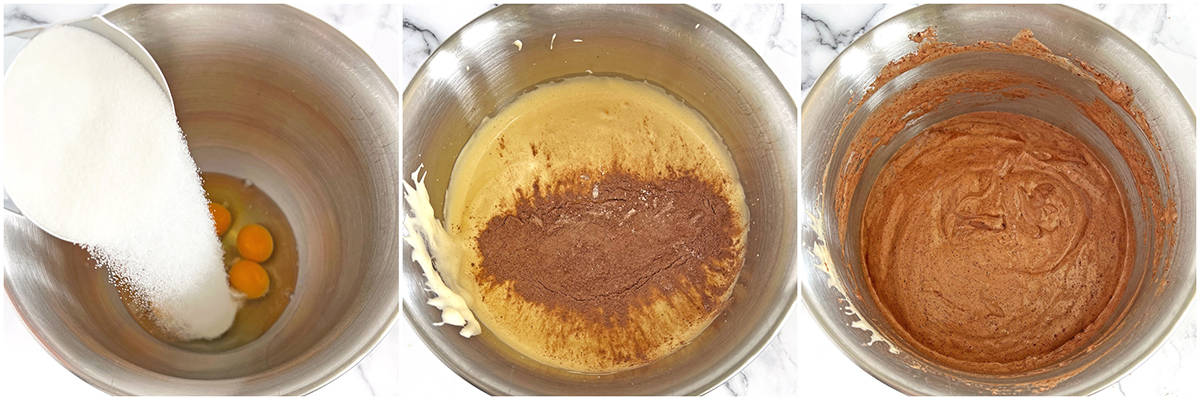
Whisk the eggs and sugar with a stand mixer until fluffy and pale in color, for about 15 minutes.
Tip: This step is very important. Not whipping the egg mixture long enough will yield dense, hard, and heavy cake sponges. The mixture should flow off the whisk attachment very slowly like a thick ribbon.
Next, add the flour mixture in 3 separate additions. Use a hand whisker or silicon spatula to fold it in very carefully, and try not to deflate air pockets as much as possible.
Divide the batter into two separate baking pans and bake.
Baking Pans and Baking Time
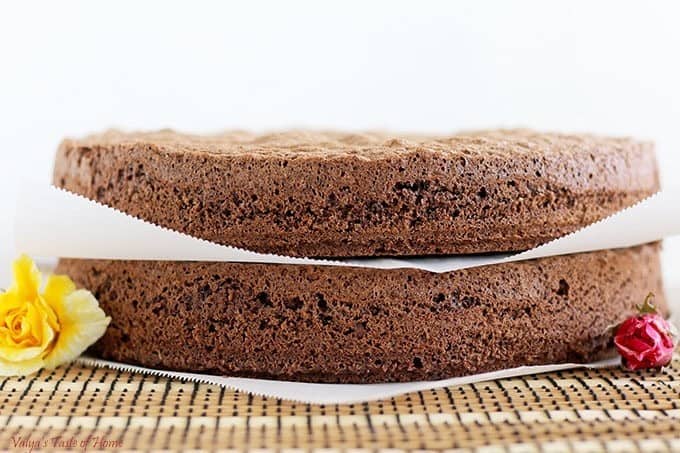
This recipe requires using two cake pans. Using smaller baking pans will result in 2 tall cake sponges that you can easily cut into 2 layers each and assemble into a 4-layer cake.
- Two 8-inch cake pans’ baking time is 35 minutes.
- Two 10-inch cake pans’ baking time is 25 minutes.
Bake in a preheated 350°F (325°F if using convection) oven, on the middle rack for the time specified above, or until a toothpick inserted in the middle comes out clean. Do not open the oven sooner than 15 minutes into the baking process, this will disturb the cake rising and the cake sponges will not be tall and fluffy.
After the cake sponges are done baking, remove both cake pans from the oven. Allow the cakes to rest for 5 to 10 minutes before transferring them onto a cooling rack.
Invert the sponge cakes onto the cooling rack, and peel off the parchment paper from the base of each cake. Allow them to cool completely before using them for any recipe that calls for a chocolate cake.
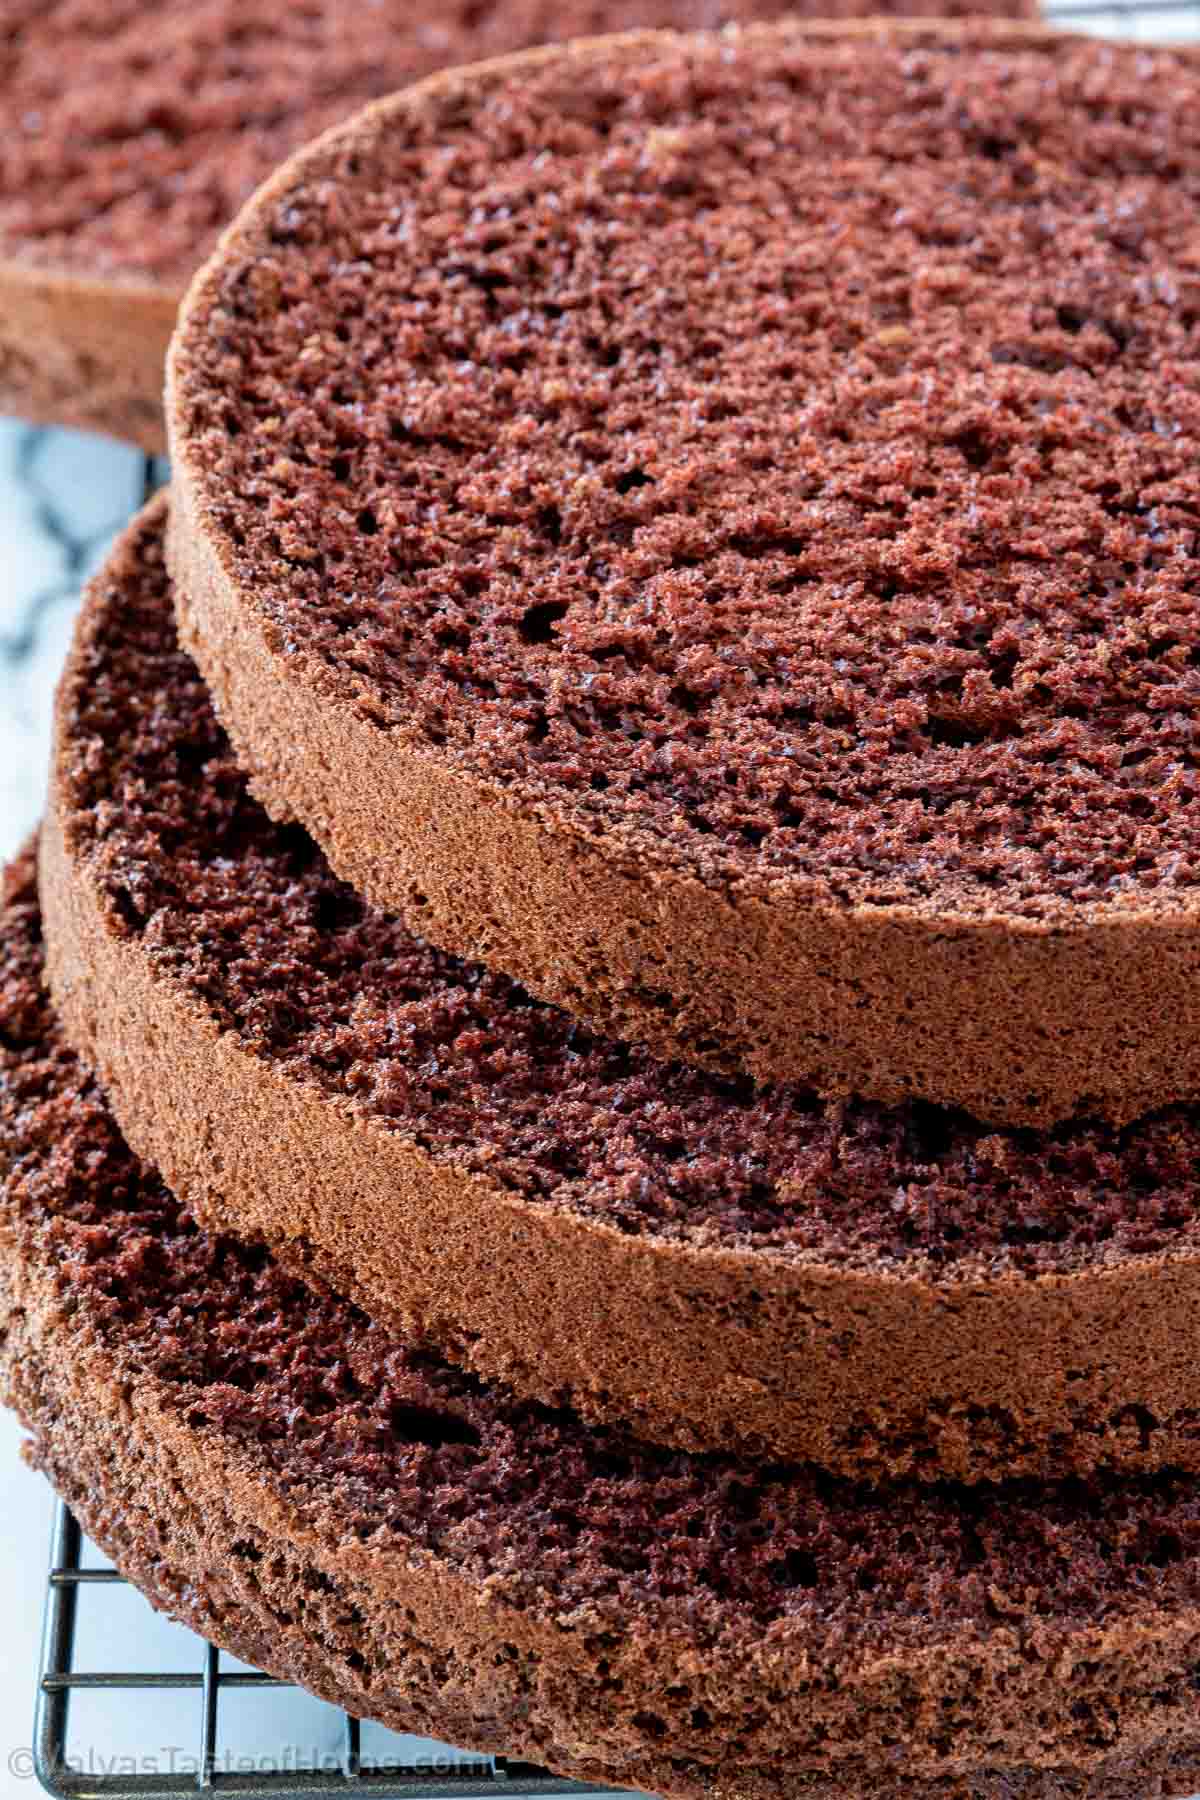
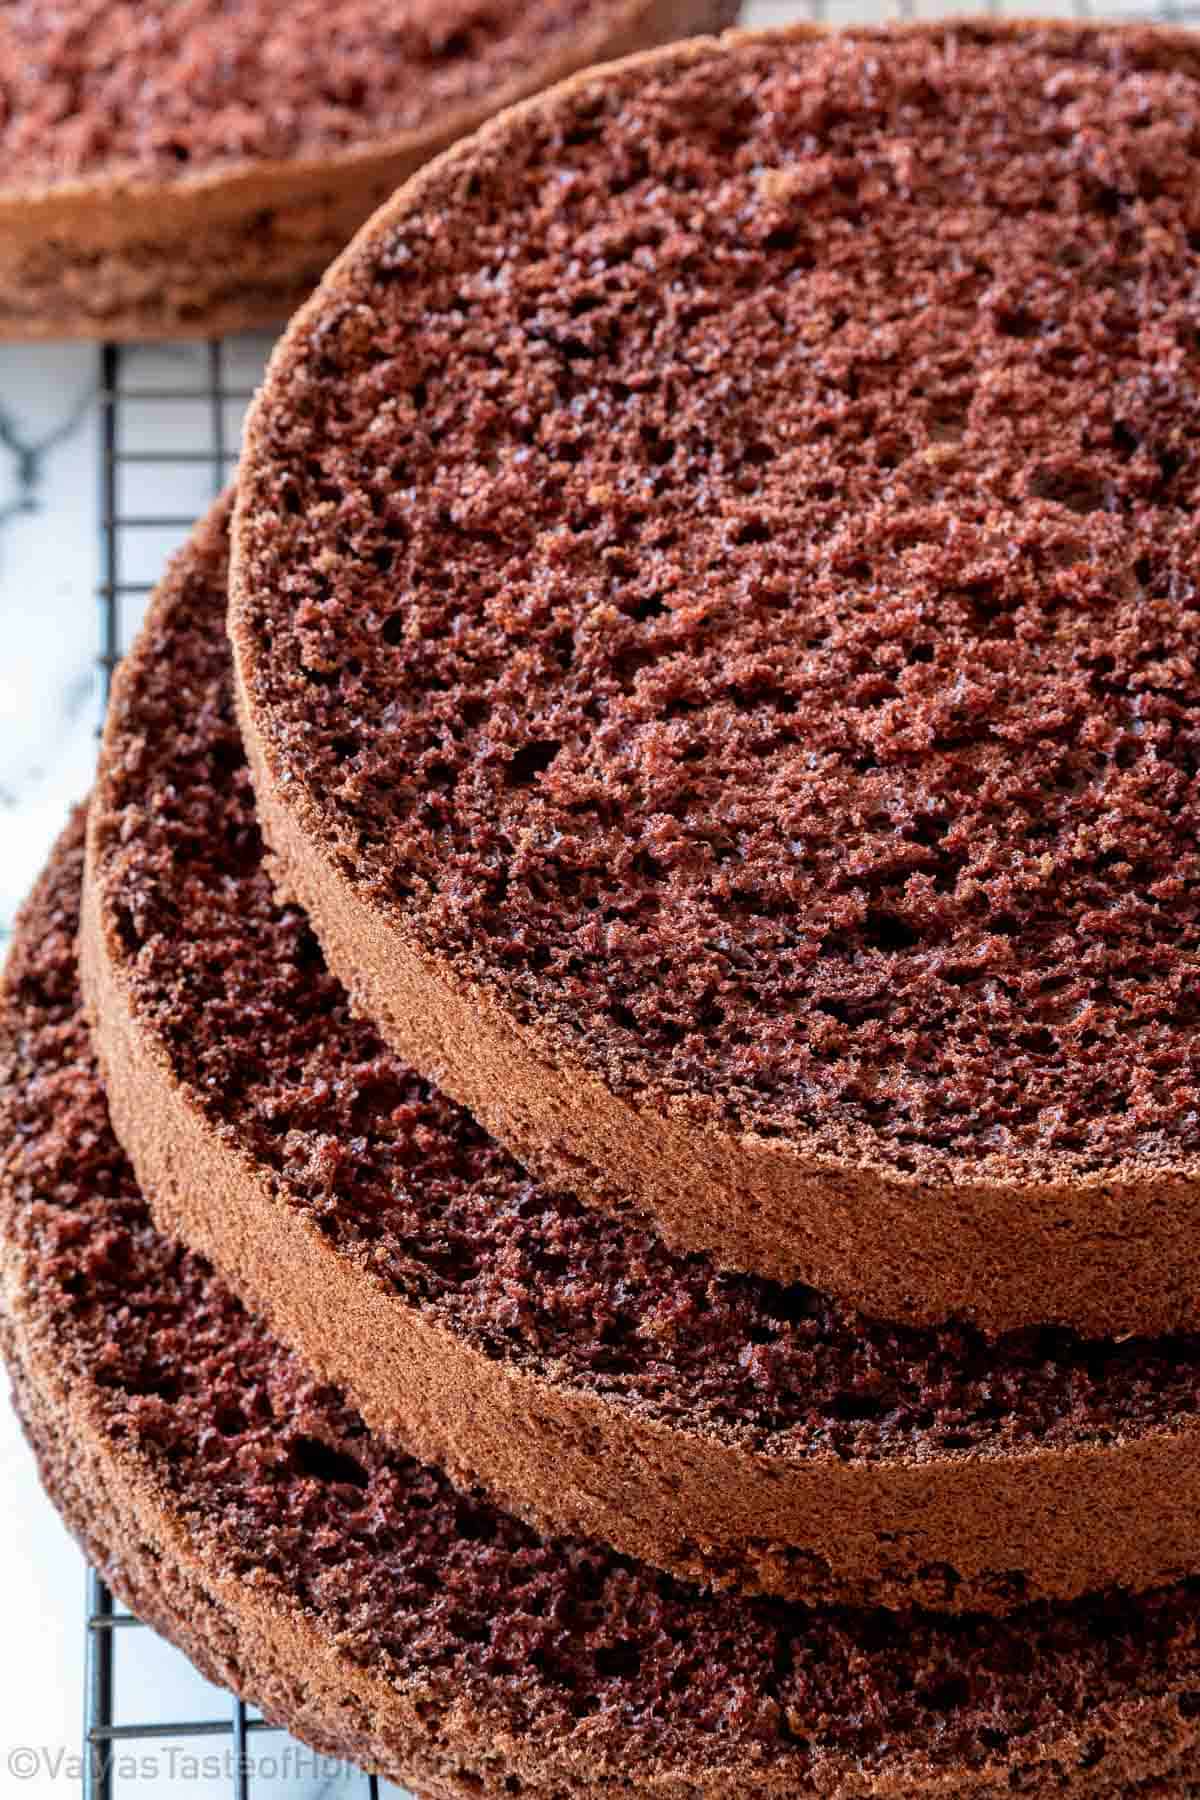
How to Split the Cake Sponge into Two Layers
Place one hand on top of the cake to steady it and use a knife with the other hand. In the middle of the cake side, score a line half an inch deep with a gentle sawing motion all the way around.
Use a piece of floss or a sewing string to finish slicing the cake sponge in half. This is the only way I’ll slice a cake in half because it results in perfect and even sponge slices.
Separate the two layers.
Tips for Making the Best Chocolate Sponge Cake Ever
Use room temp eggs: Make sure your eggs are fresh and room temperature before making this recipe. They’ll absorb the sugar easier this way, which prevents overbeating.
Sift the dry ingredients: Sifting the dry ingredients helps remove any lumps and gives the cake a lighter texture.
Don’t overmix: Overmixing the batter can result in a dense, heavy cake sponge. So, once you add the flour mixture to the wet ingredients, mix only until everything is combined.
Can I Make This Chocolate Sponge Cake Ahead of Time?
Yes, of course! You can make these cake sponges ahead of time and store them in the fridge or freeze it for later.
Why is My Sponge Cake Sticky?
Covering or wrapping the cake in plastic wrap before it’s completely cooled traps moisture inside, causing that sticky texture. To avoid this just let the cake sit on a wire rack until totally cool and the outer layer dries out.
Why Did My Sponge Cake Deflate After Baking?
This is usually due to the loss of heat because the structure of the cake hasn’t set enough to hold its shape.
So, with that being said, as mentioned above do not open the oven until 15 minutes into baking time. The cake sponges will not rise again even if the oven regains the correct baking temperature.
How to Store Leftover Chocolate Sponge Cake
To store leftover chocolate sponge cake, wrap the cake in plastic wrap or aluminum foil and place it in an airtight container. Refrigerate for up to a week or freeze for up to 3 months.
If freezing, slice the cake before freezing so you can easily thaw single servings as needed. Wrap each individual cake sponge slice with plastic wrap when freezing it.
To defrost frozen sponge cake, place them into the fridge (do not remove the plastic wrap) allowing them to thaw for 12 hours or overnight.
Easy Recipes That Use Chocolate Sponge Cake
Now that you have mastered how to make a chocolate cake sponge base, you can create some amazing cakes and desserts. Here are a couple of recipes to try:
- Mint Chocolate Cake
- Chocolate Cherry Cake
- Honey Chocolate and Strawberry Cake
- Chocolate Meringue Cake Recipe
I’ve also shared tons of other ideas above that you can try to use this delicious chocolate sponge cake!

The Best Chocolate Sponge Cake (Faultless Result Every Time)
Ingredients
Soft and Light Chocolate Sponge Cake Ingredients
- 8 large – room temperature eggs
- 1 cup – granulated sugar
- 1 cup – all-purpose flour
- ½ cup – cocoa or cacao powder
- ½ tsp. – baking soda
- ½ tsp. – baking powder
- Pinch of salt
Instructions
How to Make Chocolate Sponge Cake Batter
- Let’s start out by preparing the cake pans. Grease the entire pan with butter and place parchment paper that is cut out to fit the bottom of the pan.
- Next, preheat your oven to 350°F (325°F if you’re using a convection oven).
- After that, sift the dry ingredients (flour, cocoa powder, baking soda, baking powder, and salt) into a bowl. Whisk them together to combine by using a hand whisker or electric mixer. Set aside until ready for use.
- Whisk the eggs and sugar with a stand mixer until fluffy and pale in color, for about 15 minutes.
- Tip: This step is very important. Not whipping the egg mixture long enough will yield dense, hard, and heavy cake sponges. The mixture should flow off the whisk attachment very slowly like a thick ribbon
- Next, add the flour mixture in 3 separate additions. Use a hand whisker or silicon spatula to fold it in very carefully, and try not to deflate air pockets as much as possible.
- Divide the batter into two separate baking pans and bake.
Baking Pans and Baking Time
- This recipe requires using two cake pans. Using smaller baking pans will result in 2 tall cake sponges that you can easily cut into 2 layers each and assemble into a 4-layer cake.
- Two 8-inch cake pans’ baking time is 35 minutes.
- Two 10-inch cake pans’ baking time is 25 minutes.
- Bake in a preheated 350°F (325°F if using convection) oven, on the middle rack for the time specified above, or until a toothpick inserted in the middle comes out clean. Do not open the oven sooner than 15 minutes into the baking process, this will disturb the cake rising and the cake sponges will not be tall and fluffy.
- After the cake sponges are done baking, remove both cake pans from the oven. Allow the cakes to rest for 5 to 10 minutes before transferring them onto a cooling rack.
- Invert the sponge cakes onto the cooling rack, and peel off the parchment paper from the base of each cake. Allow them to cool completely before using them for any recipe that calls for a chocolate cake.
Thank you for following me on Instagram, Facebook, and Pinterest!
This recipe was originally posted on May 31, 2016 (original picture below), and updated for a better user experience. The post may contain affiliate links. Read my disclosure.


Do you have a specific frosting or options that you like most? If so, please share recipe(s)
Yes, here are my few favorite frostings that are perfect for chocolate sponges:
1. Caramel frosting
2. White frosting
Thank you for asking!
Can this be made in a jelly roll sheet pan? If so, would I need to adjust the recipe for it?
Yes, but I would have to test the size of the pan to use.
Valya, I’m wanting to make a regular biskvit sponge, will leaving out the cocoa work? Or do you have a separate recipe you use ? Thank you in advance!
You would add an additional amount of flour to substitute the cocoa or cacao. Otherwise, the batter will be too thin.
How much more flour I need to add to make it just plain ?
To make vanilla, not chocolate substitute the amount of cocoa powder with flour.
Hello there! If I’m baking two 12in cakes, what would the ingredients be?
I would increase by another half of the original recipe. For example, the recipe asks for 8 large eggs and you will need 12 large eggs instead. I hope that makes sense. Thanks for asking!
Yes thank you so much!
You’re most certainly welcome!
Can you bake this in a bundt pan l am would l still bake it for 25 min
You sure can. Grease the pan well though. I would bake it for 20 min and then check if baked through using a toothpick. Prevent shacking the cake while checking in case it’s not baked through all the way. Hope this helps.
Thank you so much for an amazing recipe. This is my go to recipe now. I love that you put everything in grams it helps me a lot 🙂
You are very certainly welcome Anna! I’m so happy to hear that! Thank you for an awesome review! 🙂
Hello! If I’m making 10″ cakes, how long do I bake for? Thank you!
You need to bake 2 – 10” cake sponges for about the same time about 20 – 25 minutes.
Greetings! Very helpful advice on this article! It is the little changes that make the largest changes.
Thanks a lot for sharing!
True that Lucy! You are very welcome! I’m glad it was helpful to you. Thank you for stopping by!
Hi! What kind of frosting would go best with this type of cake?
Hi Viktoriya. You can use any cream of your choice. If the cream doesn’t have sour cream or Greek yogurt in it, than soak the sponges a little with any kind of syrup, the cake will be moist. Thanks for stopping by and commenting 🙂