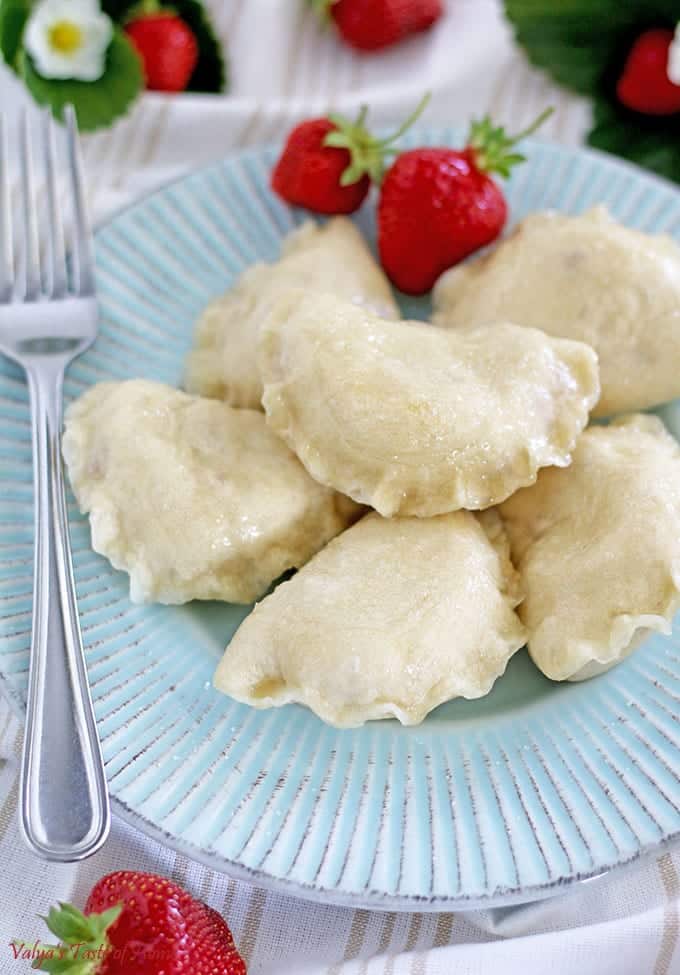
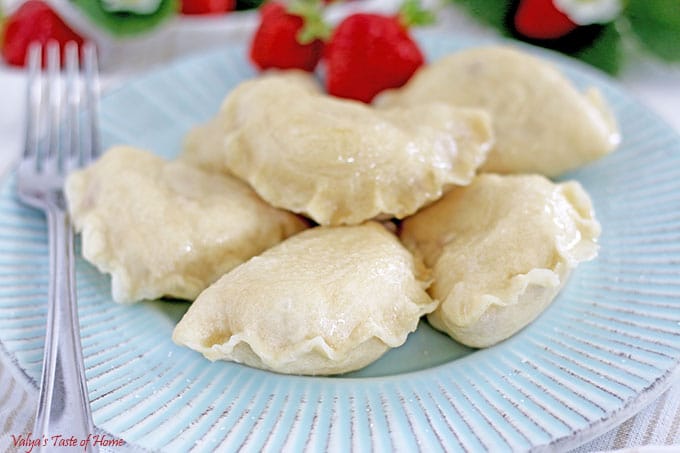
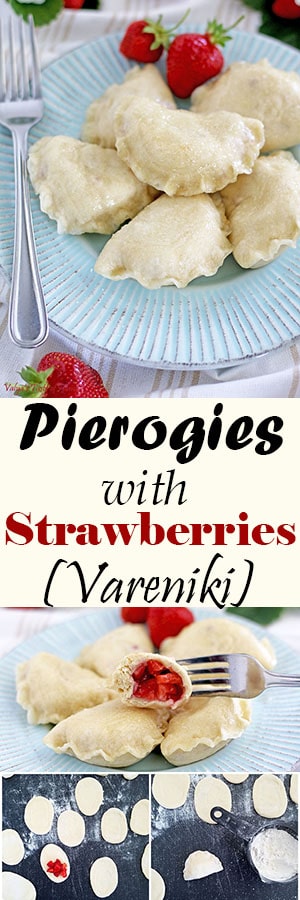
Pierogies with Strawberries – Vareniki
This is a familiar dish to most people, as pierogies are becoming a favored food in multicultural cuisines. You can find the cheddar cheese and potato version in the frozen boxed-meals section in practically any grocery store today.
The version of pierogies I’m posting today appears to be on the dessert side of food, but like with crepes, pierogies have endless filling variations. They may be a salty dish, with meat or vegetables, or a sweet dish with fruit or curd cheese. On either end of the spectrum, pierogies have always been served as the main course, regardless of the filling.
This staple food holds a great sentimental value in the common Slavic culture. Strawberry Pierogies often fills folks with nostalgia, tender memories and feelings of their childhood and upbringing. In my personal experience, it represented a special treat – a blessed time – when my mom made this meal for us.
It meant an abundance in crop, happy summer days, or simply just mom wanting to treat her children to a delicious treat. One that not a single child (in a large family) would refuse or leave leftovers. They can be made year round, and to me, they simply represent love, happiness and family unity. It’s tradition!
My mom had a certain way
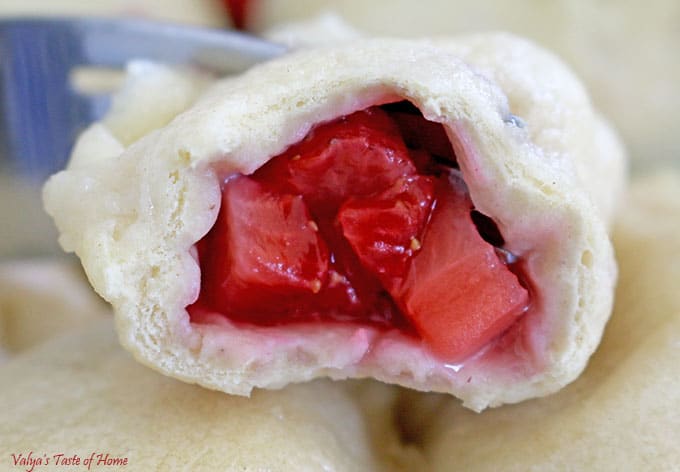
… of making them. It’s not very easy to pull off the task in order for them to turn out as plump and fluffy as my moms. Simple errors and overcooking quickly result in a thin, translucent layer of dough that easily tears. Mom’s pierogies had a thick, generous bread-like spongy layer over a delicious filling inside.
They were the ultimate success to mastering the trick to get that perfect, spongy result. Fantastically fluffy, soft, and absolutely satisfying and filling. That’s is why they are made as a single main course because after three or four of them you’re full. But really, who can stop at just four?
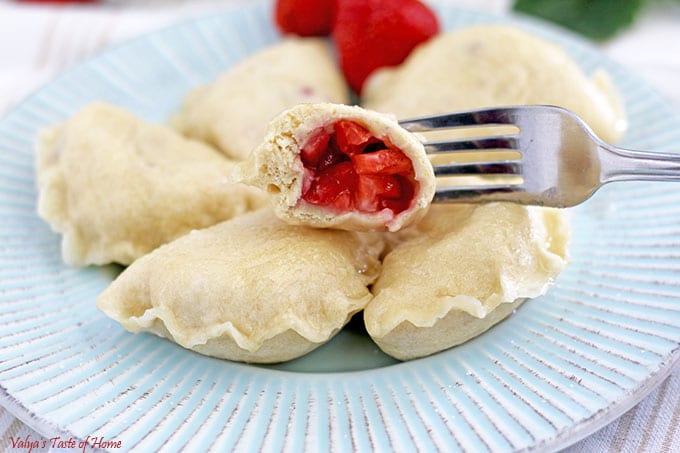
They make for an unbelievably tasty meal with meat or veggie filling as well, but Pierogies with Strawberries is a kids’ favorite way to eat them. It’s a very special recipe to me, so I really hope you enjoy it as I do. Or if you already love pierogies but feel like you don’t quite have the right touch down in order to get them soft and fluffy, don’t give up before you give this recipe a try.
My mom always made the dough by hand, which is harder but possible. However, today we have the added blessing in the wonderful KitchenAid mixer to do the heavy lifting of kneading for you. So it makes this dish that much easier for even a novice to tackle perfectly. Try it for yourself. I’d love to hear about your own cooking experience and family memories this dish brings to you as well.
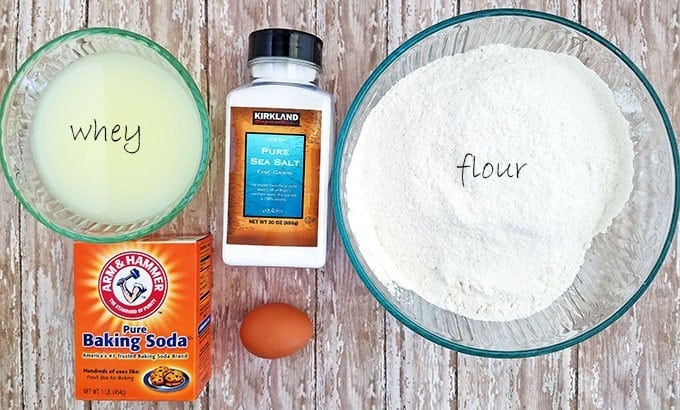
Ingredients:
2 cups (475 ml) – whey
1 large – eggs
5 cups (625 g) – all-purpose flour (sifted)
1 tbsp. (15 ml) – baking soda
¼ tsp. (1.25 ml) – salt
Instructions:
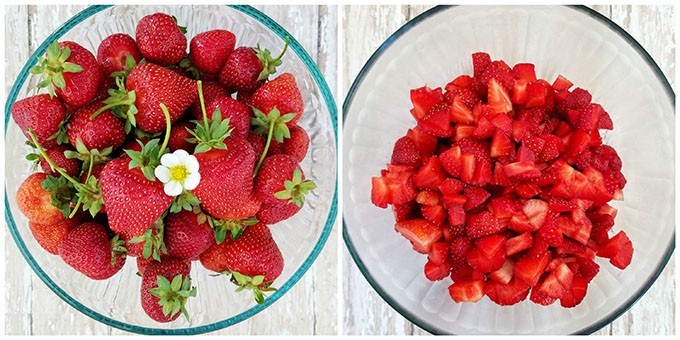
2 lbs. – (900 g) – strawberries
Rinse strawberries, cut out the cores and dice them into small pieces. (My 11-year-old, Ella, picked these from the garden and placed a little strawberry flower on them and said, “Mom, include the flower in the picture for cuteness.” How adorable is that? 🙂 And a good idea for display.) Refrigerate diced strawberries until ready. (If they sit on the counter too long, once cut, they start to decay in room temperature.)
Dough Instructions:
I use this dough recipe for both Vareniki (Pierogies), with many filling variations, and for Pelmeni (Meat Dumplings).
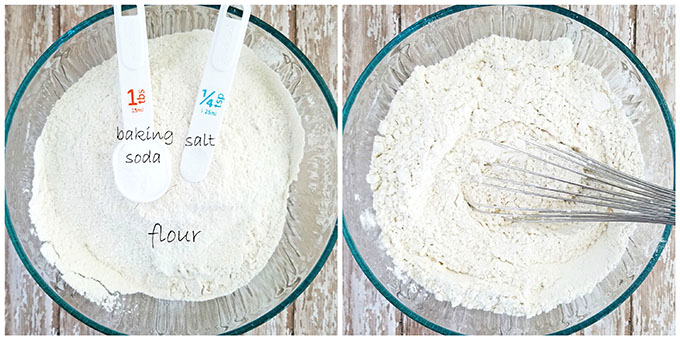
1. Prepare the dry ingredients first. Sift flour into a medium bowl. Add baking soda and salt. Combine dry ingredients and set aside until ready for use.
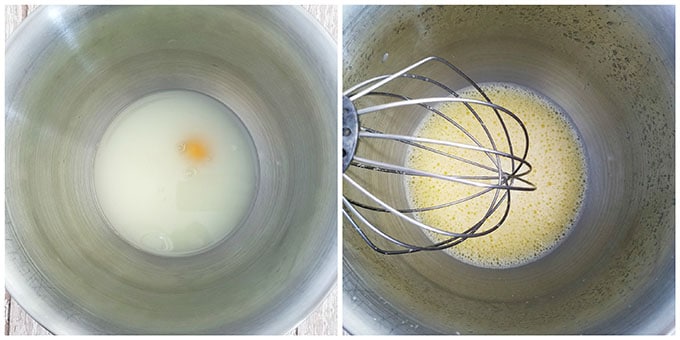
2. Pour whey into the electric mixer bowl, then add egg. Mix on medium speed for a minute or until well blended.
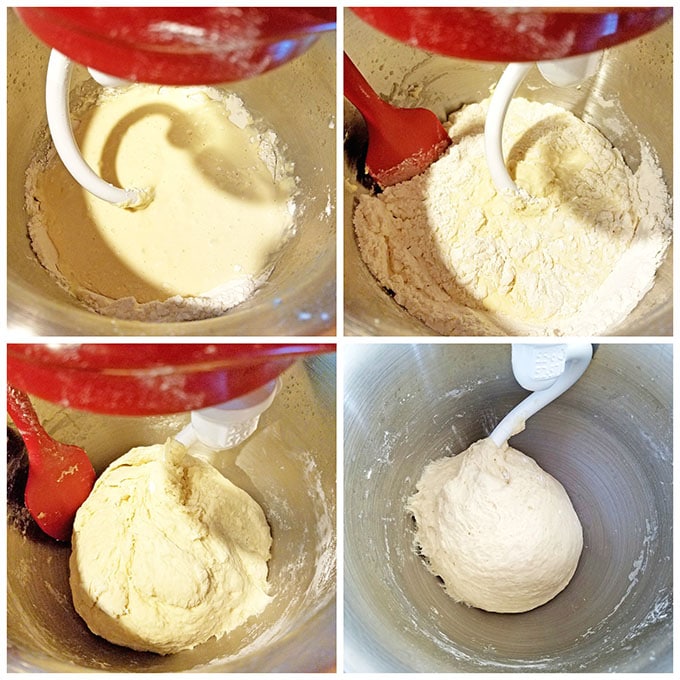
3. Add half of the dry ingredients into the whey mixture and mix with the dough hook attachment on the lowest speed. Add the rest of the flour mixture ½ cup at a time, afterward. Scrape down the sides of the bowl with a silicone spatula occasionally to mix in all the flour. (Failing to do this step leaves out some measured out and necessary ingredients, and so changes the consistency of the dough. After all the flour mixture is incorporated, the dough shouldn’t be as wet and sticky.)
After all of the ingredients are well combined, continue mixing the dough for a couple of minutes to knead out any clumps. Now the dough is ready for multiple uses. It’s really as simple as that!
Cutting out the Dough for Vareniki:
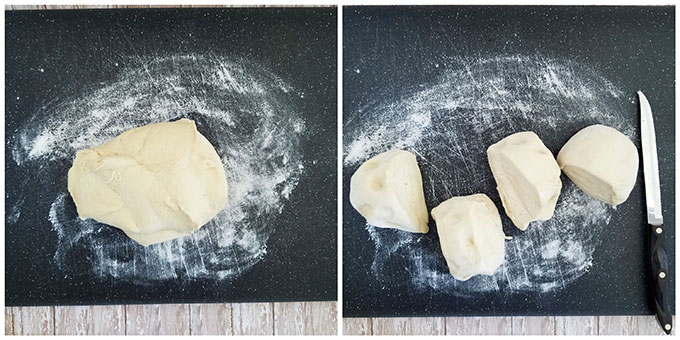
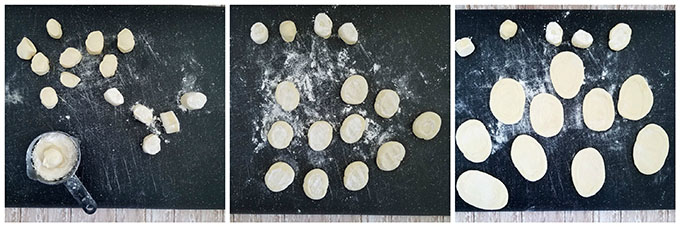
1. Remove the dough from the bowl with a spatula. (It’s easier than using unfloured hand, which the dough would stick to.) Place dough onto a lightly floured working space. Shape the dough into a log. Cut it in half and then each piece in half again (so you have 4 equal size chunks).
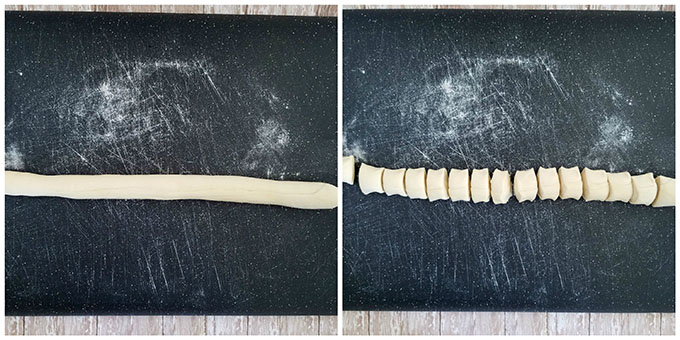
2. Place three of the chunks back into the bowl until ready for use, and cover with plastic food wrap (to prevent from drying and crusting). Work with one chunk of dough at a time. Roll it out into a fairly thin and long log (about 1” in diameter). Then slice the log 1” apart (to give you 1” in height and 1” in width dough pieces). Many cooks will roll out a large thin circle and press out circular pieces with a round cookie cutter or the rim of a glass.
I found this way to be more straining and time consuming, as it requires more rolling. In this approach, you would need to knead the leftover dough back into a sphere, roll out another flat circle, and then press out more small circles, and repeat these steps until you’ve run out of dough. But more crucially, this process requires more flour for kneading and rolling. As a result, your dough becomes more compacted and dense, which makes it tough and rubbery once cooked. I found that after several kneading/rolling cycles the dough was not as soft anymore; it becomes tougher and loses elasticity.
My mom preferred to use the approach in this post, and I absolutely loved how much quicker it was to section out and roll each varenik portion individually. Especially if you have a partner helping you. One person may roll out the portions while the other makes the vareniki. A cooking buddy will help you slash the prep time quite a bit.
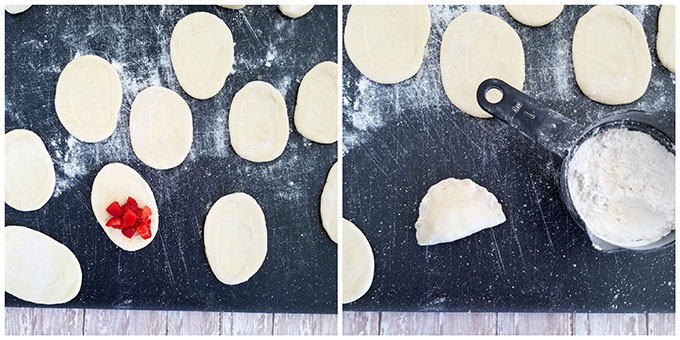
3. Dip each sticky side of the dough portion into flour. Flatten it down with your hand and roll it out with a roller. I make the portion disks more of an oval shape. I find it easier to form and pinch vareniki dough together when you have a little more dough to work with. Plus it makes the completed varenik look more round than long.
4. Place strawberry filling on the dough disk, fold together the flaps, and pinch the edges together from one end to the other to make a tight zigzag. Turn the varenik over in your hand and repeat the pinching and shaping step. Repeat all of the above steps with the remaining dough.
Cooking Instructions:
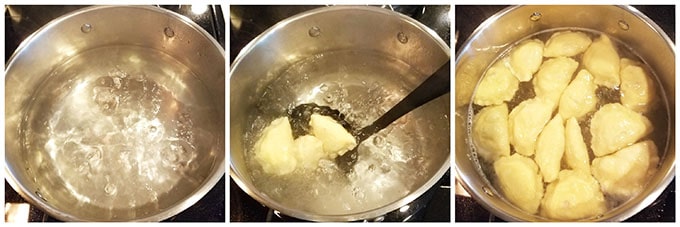
1. Bring water to a boil. Reduce to a gentle boil – on medium setting. Add vareniki into the boiling water. Cook for 3 minutes, turning them over every 30 seconds or so. Not turning them over will allow too much exposure to air and cooler temperature and cause tearing or uneven cooking.
This step is important to achieve the desired plump and fluffy results you want. (Also, don’t cook too many vareniki at once because it will take you a bit more time to take them all out, and the last ones out will overcook.)
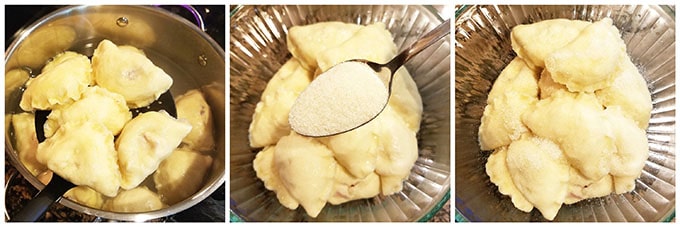
2. Remove vareniki from the water and into a bowl with a lid. Sprinkle with sugar. Cover with lid and swoosh the sugared vareniki around in the bowl to glaze them so that they won’t stick to each other once cooled.
Serve warm with a cup of cold milk. Yum, yum! Enjoy!

Perogies with Strawberries - Vareniki
Ingredients
- 2 cups 475 ml – whey
- 1 large – eggs
- 5 cups 625 g – all-purpose flour (sifted)
- 1 tbsp. 15 ml – baking soda
- ¼ tsp. 1.25 ml – salt
- 2 lbs. - 900 g - strawberries
Instructions
- Rinse strawberries, cut out the cores and dice them into small pieces. (My 11-year-old, Ella, picked these from the garden and placed a little strawberry flower on them and said, “Mom, include the flower in the picture for cuteness.” How adorable is that? 🙂 And a good idea for display.) Refrigerate diced strawberries until ready. (If they sit on the counter too long, once cut, they start to decay in room temperature.)
- Dough Instructions:
- I use this dough recipe for both Vareniki (Pierogies), with many filling variations, and for Pelmeni (Meat Dumplings).
- Prepare the dry ingredients first. Sift flour into a medium bowl. Add baking soda and salt. Combine dry ingredients and set aside until ready for use.
- Pour whey into the electric mixer bowl, then add egg. Mix on medium speed for a minute or until well blended.
- Add half of the dry ingredients into the whey mixture and mix with the dough hook attachment on the lowest speed. Add the rest of the flour mixture ½ cup at a time, afterward. Scrape down the sides of the bowl with a silicone spatula occasionally to mix in all the flour. (Failing to do this step leaves out some measured out and necessary ingredients, and so changes the consistency of the dough. After all the flour mixture is incorporated, the dough shouldn't be as wet and sticky.) After all of the ingredients are well combined, continue mixing the dough for a couple of minutes to knead out any clumps. Now the dough is ready for multiple uses. It’s really as simple as that!
- Cutting out the Dough for Vareniki:
- Remove the dough from the bowl with a spatula. (It's easier than using unfloured hand, which the dough would stick to.) Place dough onto a lightly floured working space. Shape the dough into a log. Cut it in half and then each piece in half again (so you have 4 equal size chunks).
- Place three of the chunks back into the bowl until ready for use, and cover with plastic food wrap (to prevent from drying and crusting). Work with one chunk of dough at a time. Roll it out into a fairly thin and long log (about 1” in diameter). Then slice the log 1” apart (to give you 1” in height and 1” in width dough pieces). Many cooks will roll out a large thin circle and press out circular pieces with a round cookie cutter or the rim of a glass. I found this way to be more straining and time consuming, as it requires more rolling. In this approach, you would need to knead the leftover dough back into a sphere, roll out another flat circle, and then press out more small circles, and repeat these steps until you’ve run out of dough. But more crucially, this process requires more flour for kneading and rolling. As a result, your dough becomes more compacted and dense, which makes it tough and rubbery once cooked. I found that after several kneading/rolling cycles the dough was not as soft anymore; it becomes tougher and loses elasticity. My mom preferred to use the approach in this post, and I absolutely loved how much quicker it was to section out and roll each varenik portion individually. Especially if you have a partner helping you. One person may roll out the portions while the other makes the vareniki. A cooking buddy will help you slash the prep time quite a bit.
- Dip each sticky side of the dough portion into flour. Flatten it down with your hand and roll it out with a roller. I make the portion disks more of an oval shape. I find it easier to form and pinch vareniki dough together when you have a little more dough to work with. Plus it makes the completed varenik look more round than long.
- Place strawberry filling on the dough disk, fold together the flaps, and pinch the edges together from one end to the other to make a tight zigzag. Turn the varenik over in your hand and repeat the pinching and shaping step. Repeat all of the above steps with the remaining dough.
- Cooking Instructions:
- Bring water to a boil. Reduce to a gentle boil - on medium setting. Add vareniki into the boiling water. Cook for 3 minutes, turning them over every 30 seconds or so. Not turning them over will allow too much exposure to air and cooler temperature and cause tearing or uneven cooking. This step is important to achieve the desired plump and fluffy results you want. (Also, don’t cook too many vareniki at once because it will take you a bit more time to take them all out, and the last ones out will overcook.)
- Remove vareniki from the water and into a bowl with a lid. Sprinkle with sugar. Cover with lid and swoosh the sugared vareniki around in the bowl to glaze them so that they won’t stick to each other once cooled.
- Serve warm with a cup of cold milk. Yum, yum! Enjoy!
If you make this Pierogies with Strawberries – Vareniki recipe please share a picture with me on Snapchat, Facebook, Instagram or Pinterest. Tag with #valyastasteofhome. I’d love to see your creations! 🙂
Kitchen tools I used in making this recipe:
(If you need any of these items, simply press on the picture to order. Thank you for your support!)


PIN ME!


Wow, they look absolutely amazing! I didn’t know that you could make a dough with whey, that’s completely new for me. Thanks for sharing the recipe … I also love your photos!
Greetings from Germany,
Caro
Hi Caro! Thank you so very much! Yes, after making farmer’s cheese do not trow whey away, you can make pierogis or pancakes with it.
What can I use instead of whey and how much?
You may substitute with buttermilk. Not really sure how much, I have to make it to know the amount.
I’ll try making it with buttermilk and update the recipe for you (I’ve made it with buttermilk before, but used it “on the eye” like they say and never got to actually measure out how much buttermilk the recipe takes). Thank you for asking, that’s an awesome question! 🙂
Oy Valya, I’ve never seen such puffy pierogis! My fruit ones always end up flat 🙁 My dough recipe calls for sour cream instead of Milk or whey. I’ll have to give your recipe a try!
Thanks so much!
We love soft an fluffy perogies ?. Let me know how you like it.
I’ve never seen pierogis made as a dessert. I love the cheddar and potato kind you mention in the beginning of the post. They are really good with red and green bell peppers with onions and olive oil. Or, I use butter and onions only.
I may have to try a homemade recipe sometime!
You kidding me? You must try it with strawberries! You will be hooked, lol.
I too, only knew peirogies to be made with potao, cheese and onion…I WISH i had the skills to create this recipe!! I am so impressed. To be honest, I found the strawberry variety at a local discount grocery…and was online to find what was appropriate to “season” them with. I sprinkled them with sugar, and they look perfect. Sour cream was also suggested?…Wondered what you thought?
Hi Hiedi! Yes serving them with sour cream is totally fine. After cooking them, I sprinkle vareniki with a generous amount of organic sugar and serve them with a cup of cold milk, but that’s my family’s preference. But potato and cheese vareniki I serve along with sour cream. I hope this helps. Thank you for reaching out! 🙂
Omg valya looks really way good and delish totally love strawberries my favorite fruit gotta try these sometime gr8 to know that I can use buttermilk or kefir in place of the whey thanx tons for posting darlin cheers
Strawberries are my favorite fruit too. Thanks for stopping by and commenting 🙂
Anytime my pleasure question do these freeze or fridge well
Hi dear. They do freeze perfectly. Cooking steps are a little different for frozen vareniki thought. Thanks for asking. 🙂
I made these the other day, but used blackberries instead of strawberries since they’re in abundance right now.. I doubled the recipe, and had to use on about a cup more of flour because the dough was too runny. Also, I steamed them instead of boiling because we like them more that way. But the end product was delicious and my whole family loved them! So thank you so much for this wonderful recipe!:) Blessings!
Hmm… So you used 1/2 cup more flour per single recipe, right? Its not that much more, it depends how we do our cup measuring. It’s always best to add more flour into a recipe that putting too much, right? Steaming is a great idea, you have more control of varenik not cracking during steaming. Thank you for awesome feedback Annie 🙂
Ti sho!! This recipe is the bomb . com! Most of us don’t have the pleasure of enjoying food straight out of your kitchen, like myself, but let me vouch for these wonderful pierogies,the dough is just explainable. Fluffy and so delicious – and that’s even before you get to the real treat inside.. Mmm…so good!
P.S. Thank you for the recipe, in “exact measurements,” instead of that “eyeballing the ingredients” business. With years of baking experience, I bet one can get there, but for people who don’t LIVE in the kitchen its a bit harder to do. Also, it would be nice to see the buttermilk version as well, when we don’t have whey on hand. Thanks again for all your hard work, Valya! Keep it up, your blog is truly a gem. God bless you! 🙂
Thank you Dear for such a sweet comment. To have a right measurement is very helpful to get that perfect fluffy dough. Be careful, they can be pretty addicting thought 😉 Gods blessing to you as well Nina.
You are one of those Super Moms out there! How did you manage to get so many yummy recipes from your mom when you got married pretty young and lost your dear mom very soon after? Kudos to you! My mom uses very similar recipe to this. Just if there is no whey, we replace it with kefir or buttermilk. My mom just has “na glaz” recipes in her head. I used to get quite frustrated when my dough would come out too rubbery or sticky because I didn’t know exactly how much flour to add.
Thank you so much for sharing this recipe and the sweet memories it brings to you and your family! Good tips about cooking and turning vareniki over, periodically. Never really thought that it could make such a difference in the outcome.
Keep up the outstanding job you’re doing food blogging and raising such sweet and hard-working people of future society. May our Lord bless you with good health and keep you and your family safe!
Hi Larisa. Yes, we lost her shortly after I got married at age 20, so I had plenty of time spent in the kitchen with her, helping, and watching her cook.
Yes, butter milk is what I’ve been using too if I don’t have whey. I think you will need less flour though.
Oh, tell me about the “na glaz” theory, lol. I’ve been cooking na glaz until I started blogging. My younger (I’m the oldest in the family) siblings really wanted to make some of mom’s recipes so they kept asking me how certain recipes are prepared and I would tell then “na glaz” this and that. Now my accurate recipe measurement helping them a lot to make their childhood meals.
Thank you very much Larisa for such a beatiful words. May God bless you and your family as well! I really appreciate your awesome comment 😉
Ouch! I mean parovie in steamer. Cook them for 5 minutes in steam
Valya ti prosto chudo!!! This dough for parodies vareniki. Try making them in the steamer super!!! even better.
That’s a good idea. Thanks for your comment Yelena 🙂