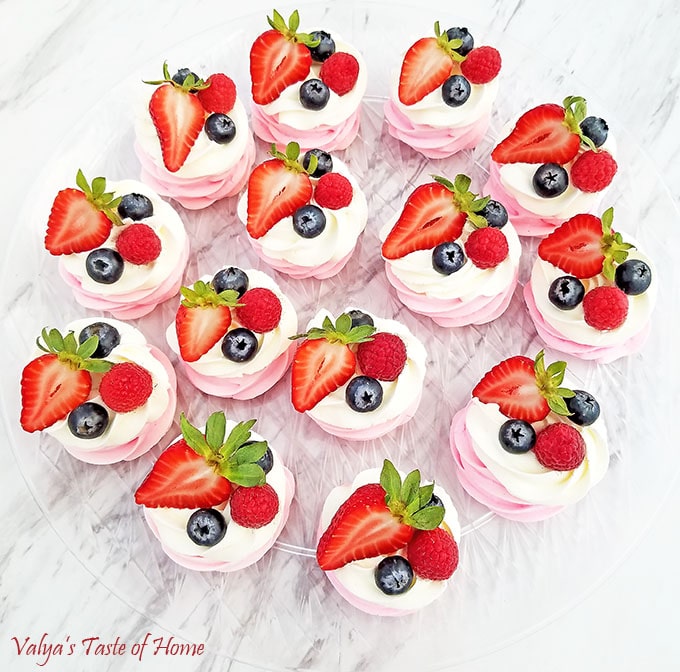
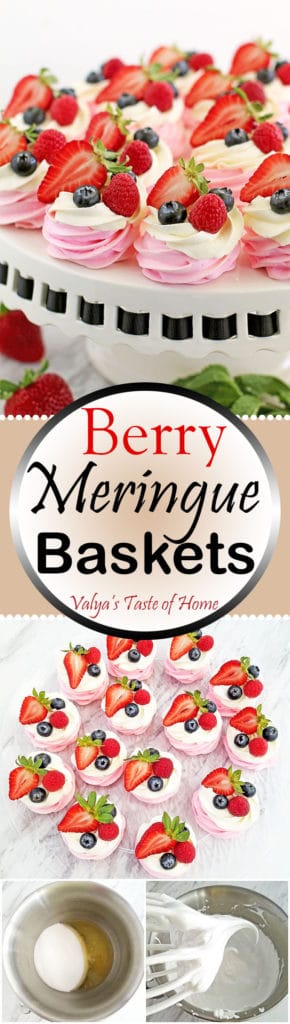
Berry Meringue Baskets Recipe
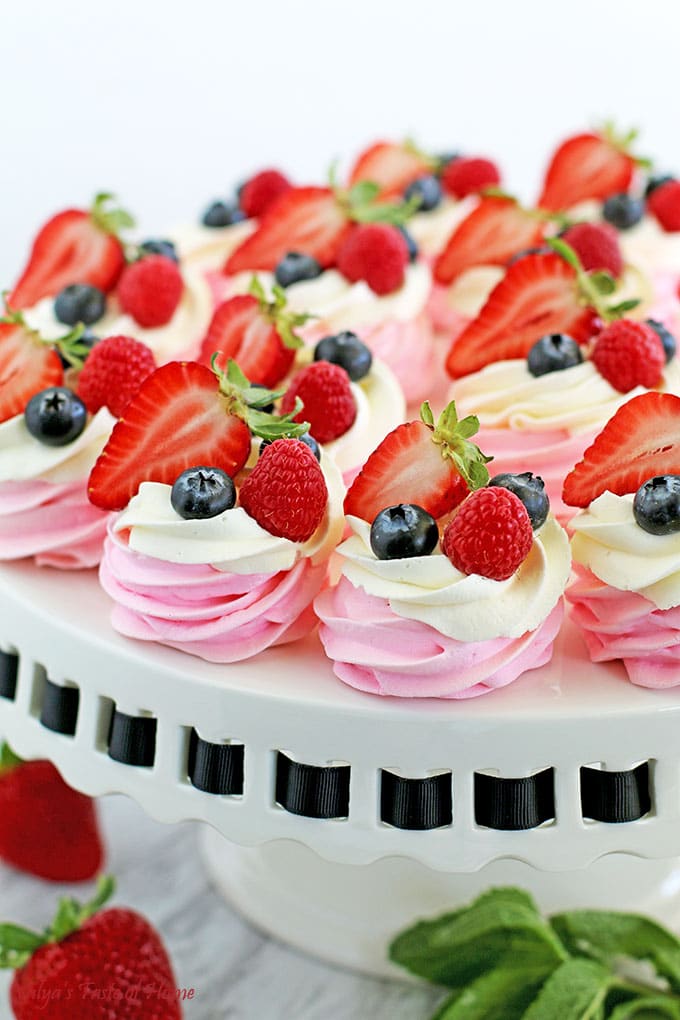
I don’t know about your household, but in mine, there are not a lot of things that make it on everyone’s favorite list. Even dessert. My Meringue Fruit Baskets is such a dessert. It’s like cotton candy. I know this may not help the matter, but I thought, why not try a new twist with them? These Meringue Baskets are very similar to the ones I posted last year, but they are naturally colored and topped with berries, which makes them all the more attractive. They’d be a perfect fit for the upcoming Mother’s Day.
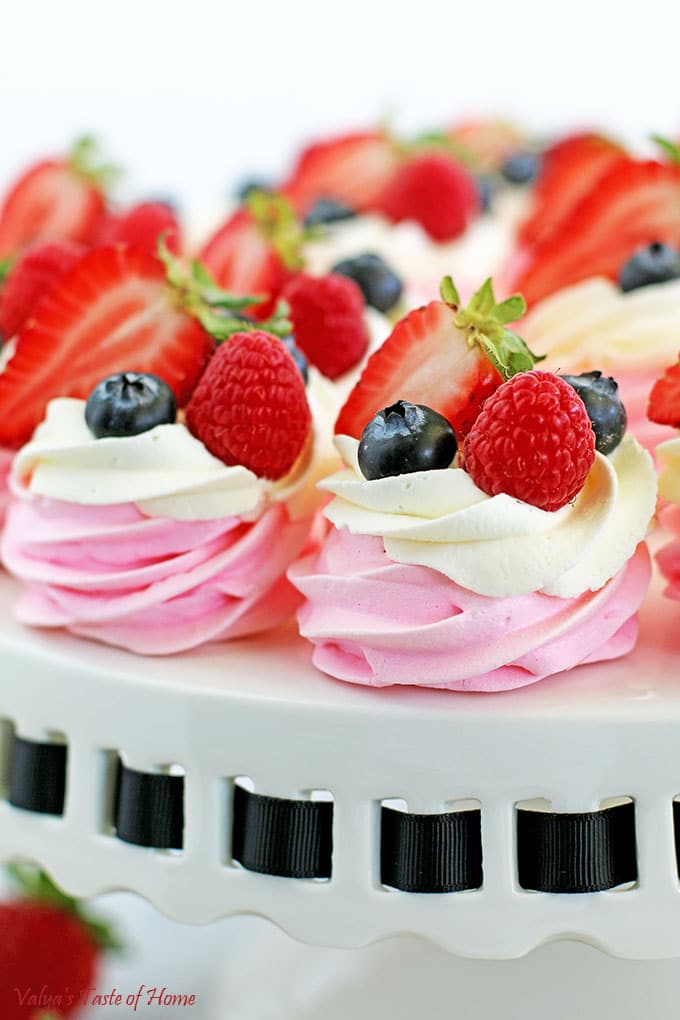
Maybe that’s why I made them? Have I mentioned before that this dessert is a big-time weakness of mine? Hmm… Berries go hand in hand with the smooth cream, and the delightful crunch of the sweet meringue that just melts in your mouth, makes for a child-like enjoyment.
These gems also look beautiful on the dessert table and are a huge hit. EVERY TIME. So, make your mom smile this coming up Mother’s Day. And don’t forget that they lighten up any holiday or occasion, really. Enjoy, and Happy Mother’s Day to all mamma’s out there! 😀
Ingredients:
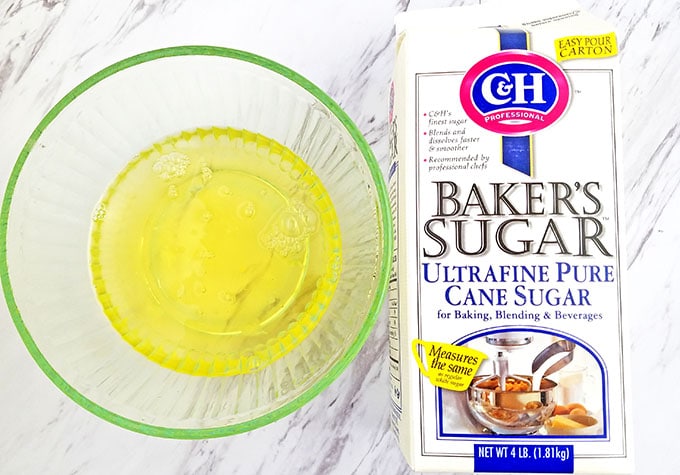
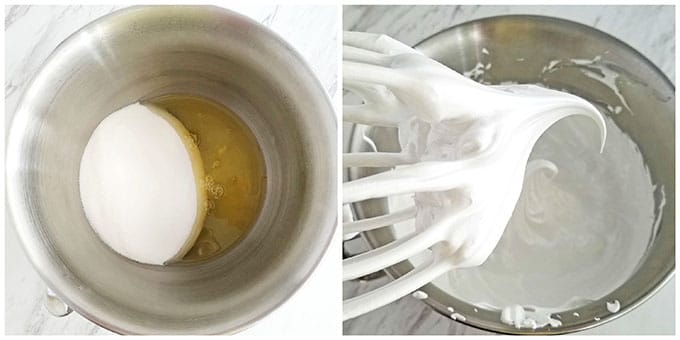
10 – egg whites (from large eggs)
3 cups (725 g) – Baker’s Sugar (or granulated sugar)
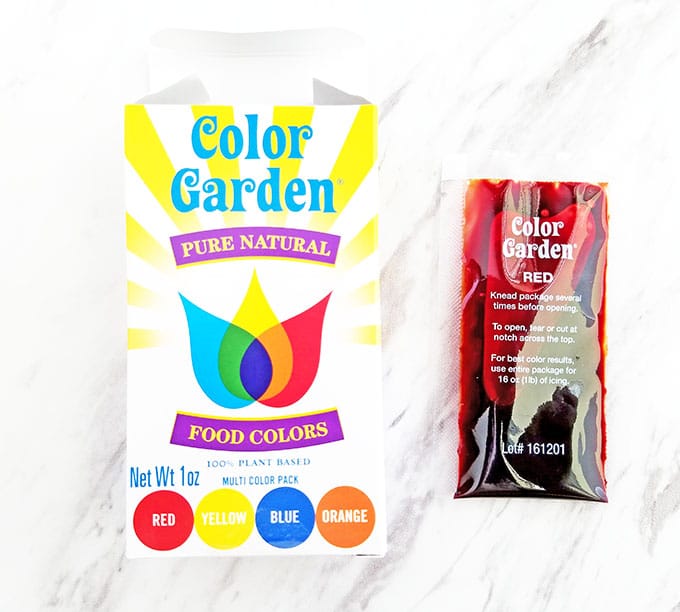
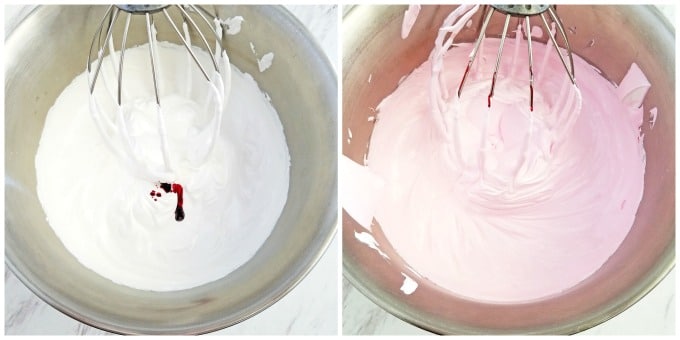
Food coloring (I used Color Garden Pure Natural, made out of red beets from Natural Grocers)
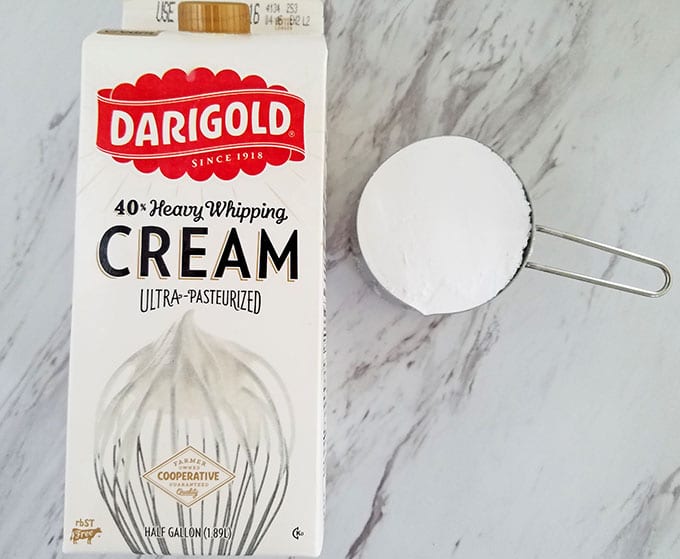
5 cups (1200 ml) – Heavy Whipping Cream
1 cup (225 g) – confectioners’ sugar
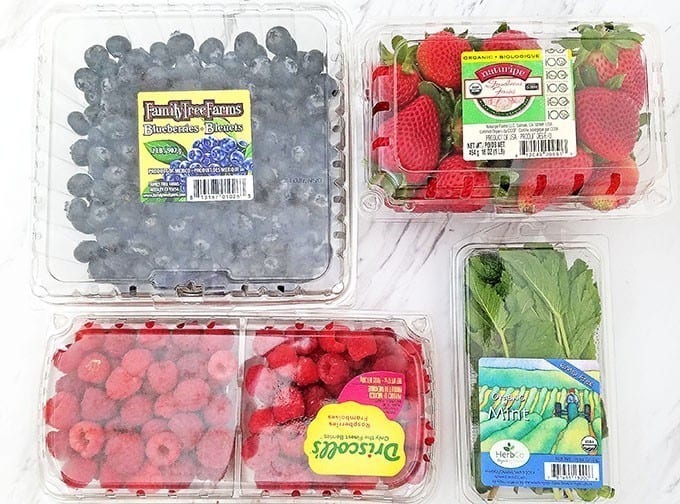
Strawberries, blueberries, and raspberries for topping
Mint for decorating (optional)
Meringue Instructions:
1. Preheat oven to 270 F (132 C). Beat egg whites and sugar on high for 10 minutes. Scrape down the sides of the mixer bowl with a rubber spatula, and mix again on high for 5 more minutes.
2. Add ½ packet of food coloring and beat for 2 – 3 minutes. The meringue will be slightly thinner than regular white meringue with the addition of natural food coloring.
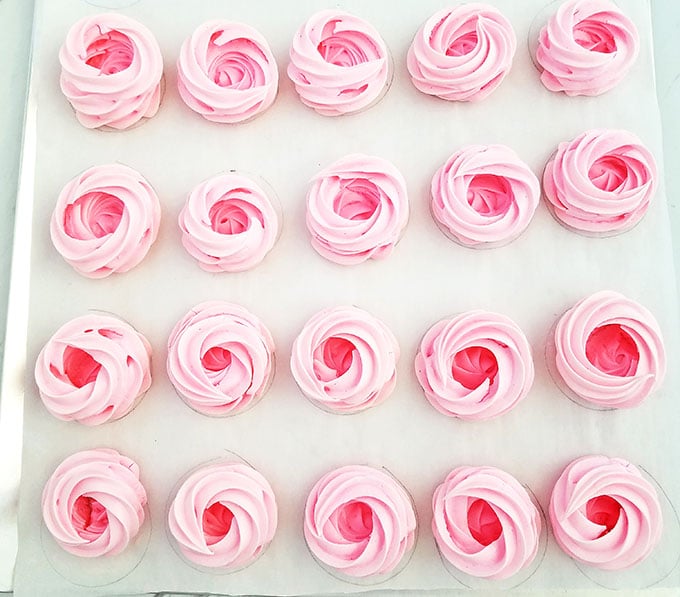
3. Place 1 M large cupcake tip attachment inside the piping bag and fill it ¾ full with meringue.
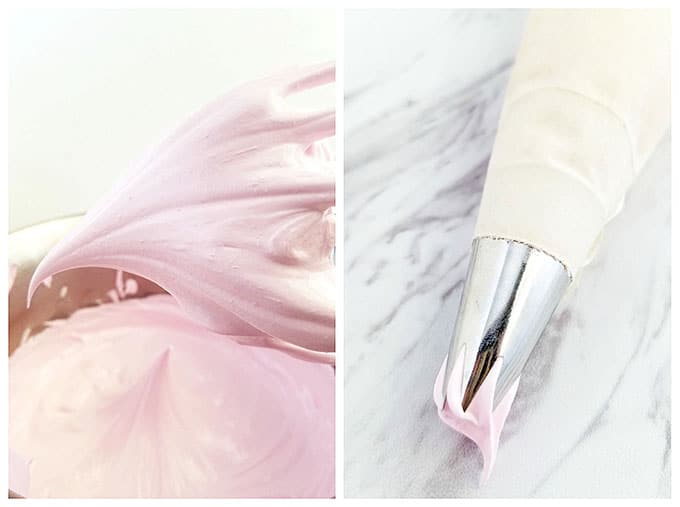
4. Pipe out the baskets in a circular motion, leaving an empty space inside to form the baskets.
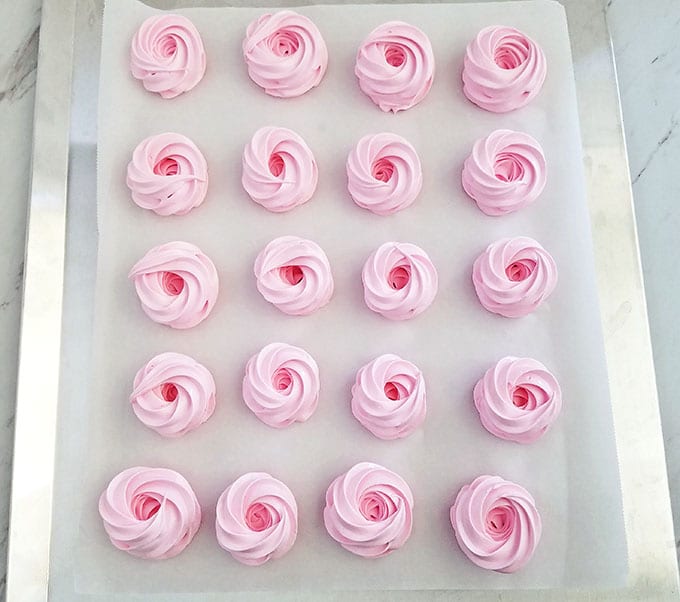
5. Use a flat Insulated Aluminum Cookie Sheet to transfer parchment paper with piped meringue baskets directly onto the oven wire racks. Bake for 7 minutes at 270 F (132 C), then reduce the heat to 200 F (90 C) and allow them to bake/dry for 1 hour and 30 minutes more. Then turn the oven off and let the meringues cool completely in the oven. (Do not open the oven door while they’re cooling as the temperature will drastically change and cause the meringue to crack). Remove from the oven and decorate them with cream and berries.
Cream Instructions:
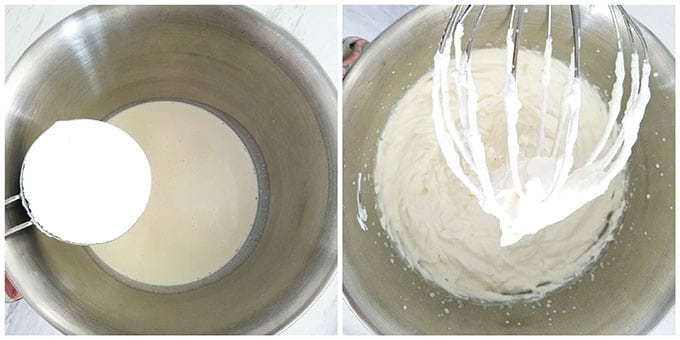
Beat heavy cream and confectioners’ sugar for about a minute or just as soon as it becomes thick. Do not over beat.
Assembly Instructions:
1. Pipe cream into and over cooled meringue baskets.
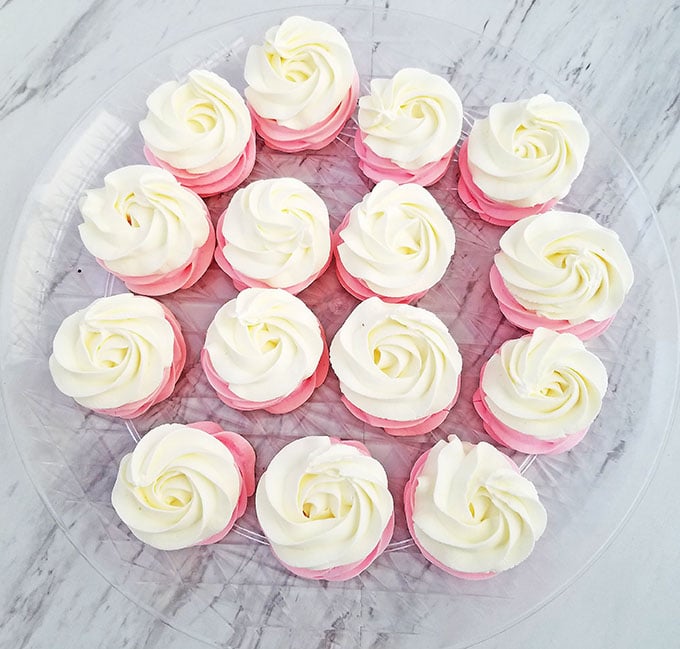
2. Rinse fruit and dry with paper towel. Place fruit on top of the piped cream. Keep them refrigerated in the plastic box or plate uncovered for 1 hour before serving.

Berry Meringue Baskets Recipe
Ingredients
- 10 – egg whites from large eggs
- 3 cups 725 g – Baker’s Sugar (or granulated sugar)
- Food coloring I used Color Garden Pure Natural, made out of red beets from Natural Grocers
- 5 cups 1200 ml – Heavy Whipping Cream
- 1 cup 225 g – confectioners’ sugar
- Strawberries blueberries, and raspberries for topping
- Mint for decorating optional
Instructions
- Preheat oven to 270 F (132 C). Beat egg whites and sugar on high for 10 minutes. Scrape down the sides of the mixer bowl with a rubber spatula, and mix again on high for 5 more minutes.
- Add ½ packet of food coloring and beat for 2 – 3 minutes. The meringue will be slightly thinner than regular white meringue with the addition of natural food coloring.
- Place 1 M large cupcake tip attachment inside the piping bag and fill it ¾ full with meringue.
- Pipe out the baskets in a circular motion, leaving an empty space inside to form the baskets.
- Use a flat Insulated Aluminum Cookie Sheet to transfer parchment paper with piped meringue baskets directly onto the oven wire racks. Bake for 7 minutes at 270 F (132 C), then reduce the heat to 200 F (90 C) and allow them to bake/dry for 1 hour and 30 minutes more. Then turn the oven off and let the meringues cool completely in the oven. (Do not open the oven door while they’re cooling as the temperature will drastically change and cause the meringue to crack). Remove from the oven and decorate them with cream and berries.
- Cream Instructions:
- Beat heavy cream and confectioners’ sugar for about a minute or just as soon as it becomes thick. Do not over beat.
- Assembly Instructions:
- Pipe cream into and over cooled meringue baskets.
- Rinse fruit and dry with paper towel. Place fruit on top of the piped cream. Keep them refrigerated in the plastic box or plate uncovered for 1 hour before serving.
- Enjoy!
If you make this Berry Meringue Baskets Recipe please share a picture with me on Snapchat, Facebook, Instagram or Pinterest. Tag with #valyastasteofhome. I’d love to see your creations! ?
Looking for more dessert recipes? Check them out HERE.
Kitchen items I used in making this recipe:
(If you need any of these items, simply click on the picture to order. Thank you for your support!)


PIN ME!


They are definitely delicious. Thank you fo shearing the recipe.
You are more than welcome! Enjoy!
How many days ahead can I make these?
I made 2 batches of these when I was blogging them. One in the evening (so I have some ready for final pictures while the sun is still up) and another batch the next day to show step by step instruction. I still have some left not decorated (that means kids did’t see them, otherwise they would be gone). They still taste fresh and tasty for being a week old. Just store them in a dry place with a lid crack open for air circulation. After filled with cream keep them refrigerated uncovered for up to 12 hours. I usually decorate with fruit right before serving so they looks fresh and beautiful. I hope that clarifies more. Thanks for stopping by Marina 🙂
what a beautiful photograph! You Valya have grown heaps as a photographer! I have followed your blog since it started and the improvements are massive. This is definitely a wow factor desert and a photograph. Thanks for all your hard work!
Aww…, you are so sweet!!! Thank you so much for following along since begging of my blogging journey! That means a lot to me and my family and I really appreciate it!
I looked at some of those old pictures and wanted to retake them, but then decided to keep it as a memory. Thanks again for kind words Irina! 🙂
Can you freeze these?
No, you cannot freeze them. The moisture will make them soft. Great question! Thank you for asking! 🙂
These look amazing!!! They are my favorite! Valya, thank you for sharing your picture with us. 🙂
We have something in common, lol. It’s so hard not to go for a third and fourth… :/ You are very welcome, enjoy!