BBQ Pulled Chicken Sliders (Everyone Will Love!)
BBQ Pulled Chicken Sliders are a top-tier choice when it comes to crowd-pleasing comfort foodare a top-tier choice. These bite-sized sandwiches pack all the smoky, savory flavor of classic barbecue into a perfectly portioned bun.
Whether you’re feeding a hungry game day crew, prepping an easy weeknight dinner, or planning a casual party menu, these sliders deliver every time.
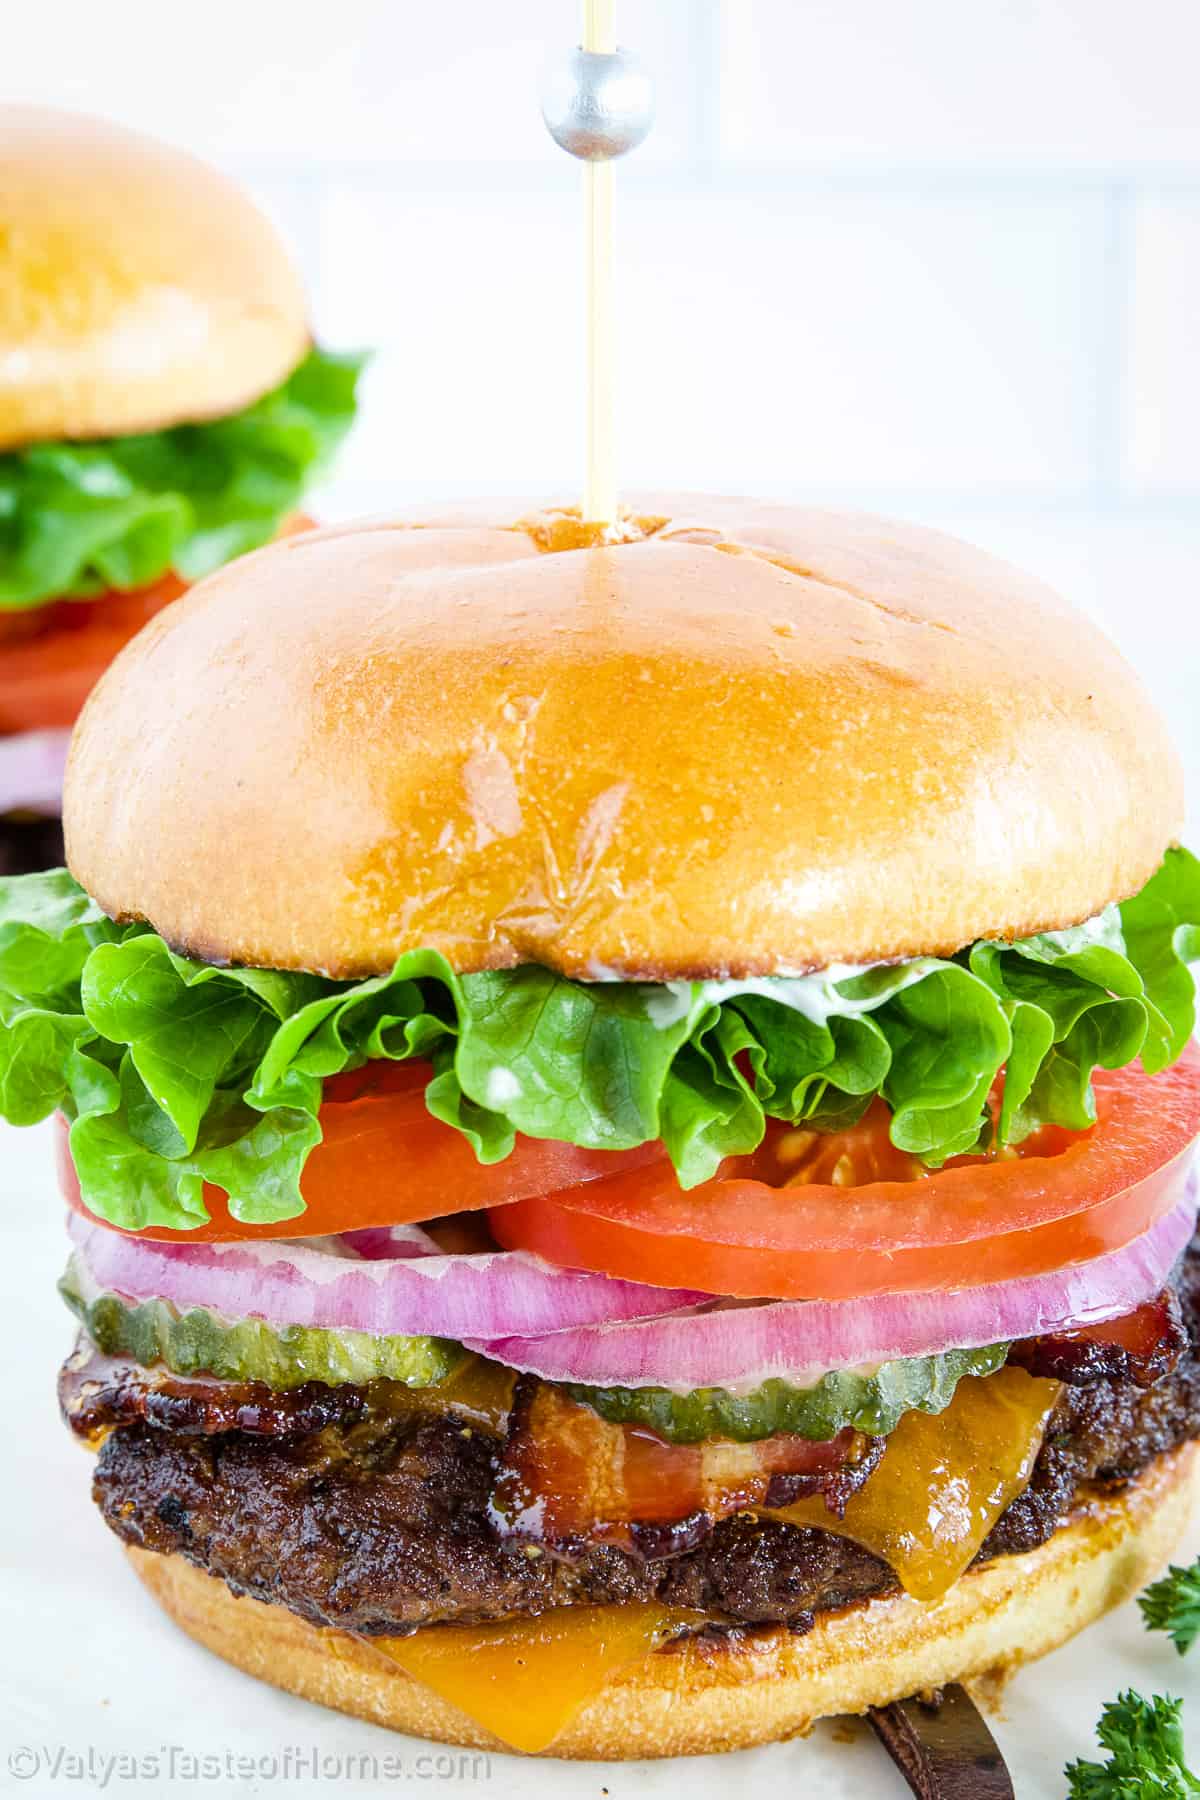
What makes them so special? It starts with tender, slow-cooked pulled chicken that’s drenched in your favorite BBQ sauce – sweet, tangy, smoky, or spicy. Piled high on soft slider buns and optionally topped with crunchy slaw or melty cheese, they strike the perfect balance of textures and flavors. Plus, they’re incredibly versatile: you can use a slow cooker, oven, or even leftover rotisserie chicken for a quick shortcut.
BBQ Pulled Chicken Sliders are simple to make, endlessly customizable, and always a hit. Serve them up as a main dish or a party appetizer, and watch how fast they disappear!
Why You’ll Love This Recipe
- Easy to Make: Whether you’re using a slow cooker, Instant Pot, or stovetop, this recipe comes together with minimal effort and simple ingredients.
- Perfect for Any Occasion: From game day parties to casual weeknight dinners, these sliders are a hit with both kids and adults.
- Big Flavor in Every Bite: Juicy, tender pulled chicken soaked in smoky BBQ sauce delivers bold, satisfying taste in a fun, handheld form.
- Customizable: Add cheese, coleslaw, pickles, or switch up the sauces—these sliders are easy to make your own.
- Great for Meal Prep: The pulled chicken can be made ahead of time and reheats beautifully, making these perfect for make-ahead meals or party planning.
Key Ingredients
- Pulled BBQ Chicken: The star of the show – tender shredded chicken tossed in your favorite BBQ sauce. It brings bold, smoky, and slightly sweet flavor to every bite. You can use homemade pulled chicken or take a shortcut with rotisserie chicken and bottled sauce.
- Slider Buns: Soft, slightly sweet slider buns are the perfect vehicle for all that juicy filling. Their pillowy texture soaks up the BBQ without falling apart, making them ideal for handheld eating.
- Cheddar Cheese: A melty layer of sharp cheddar adds richness and a creamy contrast to the tangy BBQ. It also helps hold everything together in each slider.
- Butter: Brushing the tops of the buns with melted butter before baking adds a golden finish and enhances the overall flavor.
- Garlic Powder: Just a sprinkle mixed into the butter gives the sliders a savory, aromatic boost that complements the BBQ and cheddar beautifully.
Substitutions and Variations
- Chicken: Swap pulled chicken with shredded rotisserie chicken for a quick shortcut, or use pulled pork for a more traditional BBQ feel. For a vegetarian option, try jackfruit or shredded mushrooms.
- BBQ Sauce: Use your favorite store-bought BBQ sauce, or go homemade for a more personalized flavor. Try spicy chipotle, tangy Carolina-style, or sweet honey BBQ, depending on your taste.
- Slider Buns: Brioche slider buns are a great choice for their slight sweetness, but you can also use Hawaiian sweet rolls, dinner rolls, or even mini pretzel buns for a twist.
- Cheddar Cheese: Not a fan of cheddar? Swap it with mozzarella, pepper jack cheese, gouda, or even a dairy-free cheese if needed.
- Garlic Butter Topping: Add a pinch of Italian seasoning, parsley, or grated Parmesan to the butter for extra flavor. You can also skip the garlic powder for a milder finish.
How to Make BBQ Pulled Chicken Sliders
Prepare BBQ Pulled Chicken
If you’re starting from scratch, cook and shred chicken breast (see how to make a quick Instant Pot BBQ Pulled Chicken).
Assemble BBQ Chicken Sliders
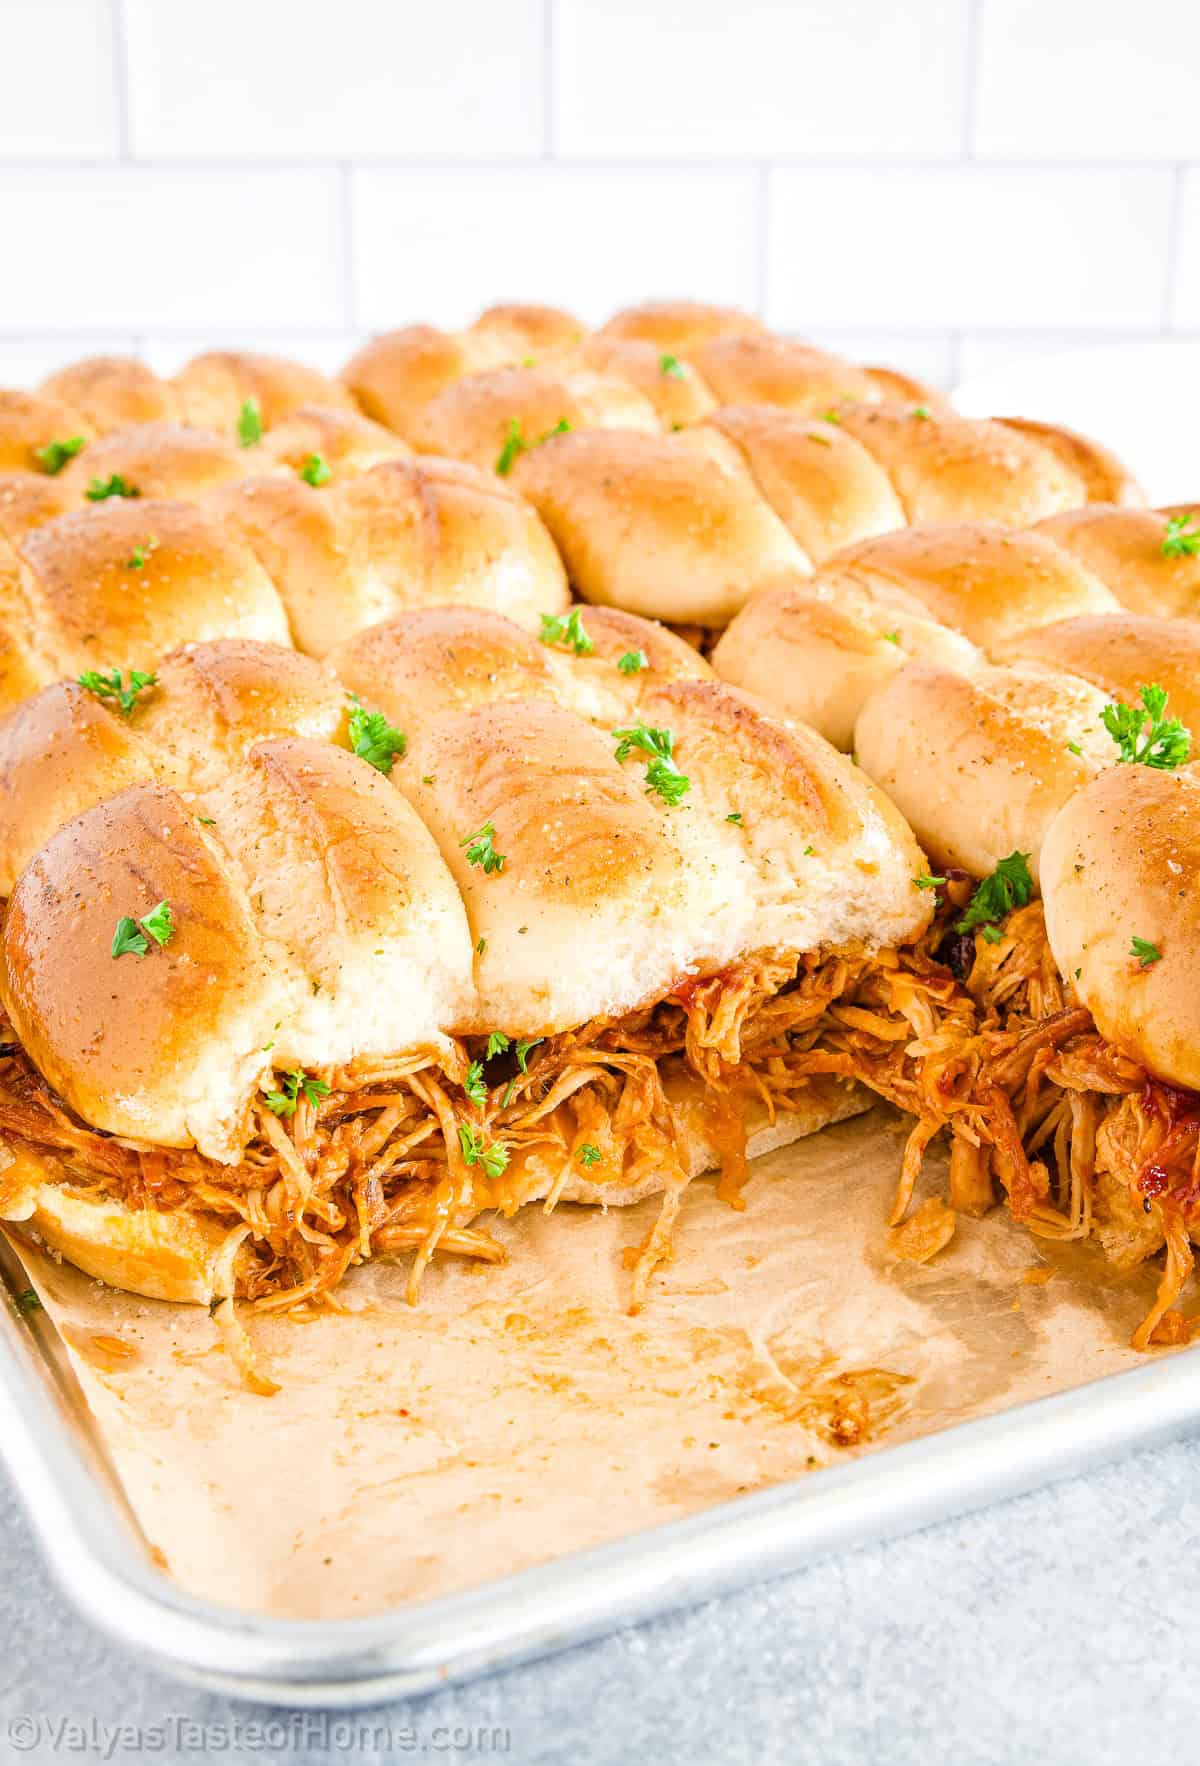
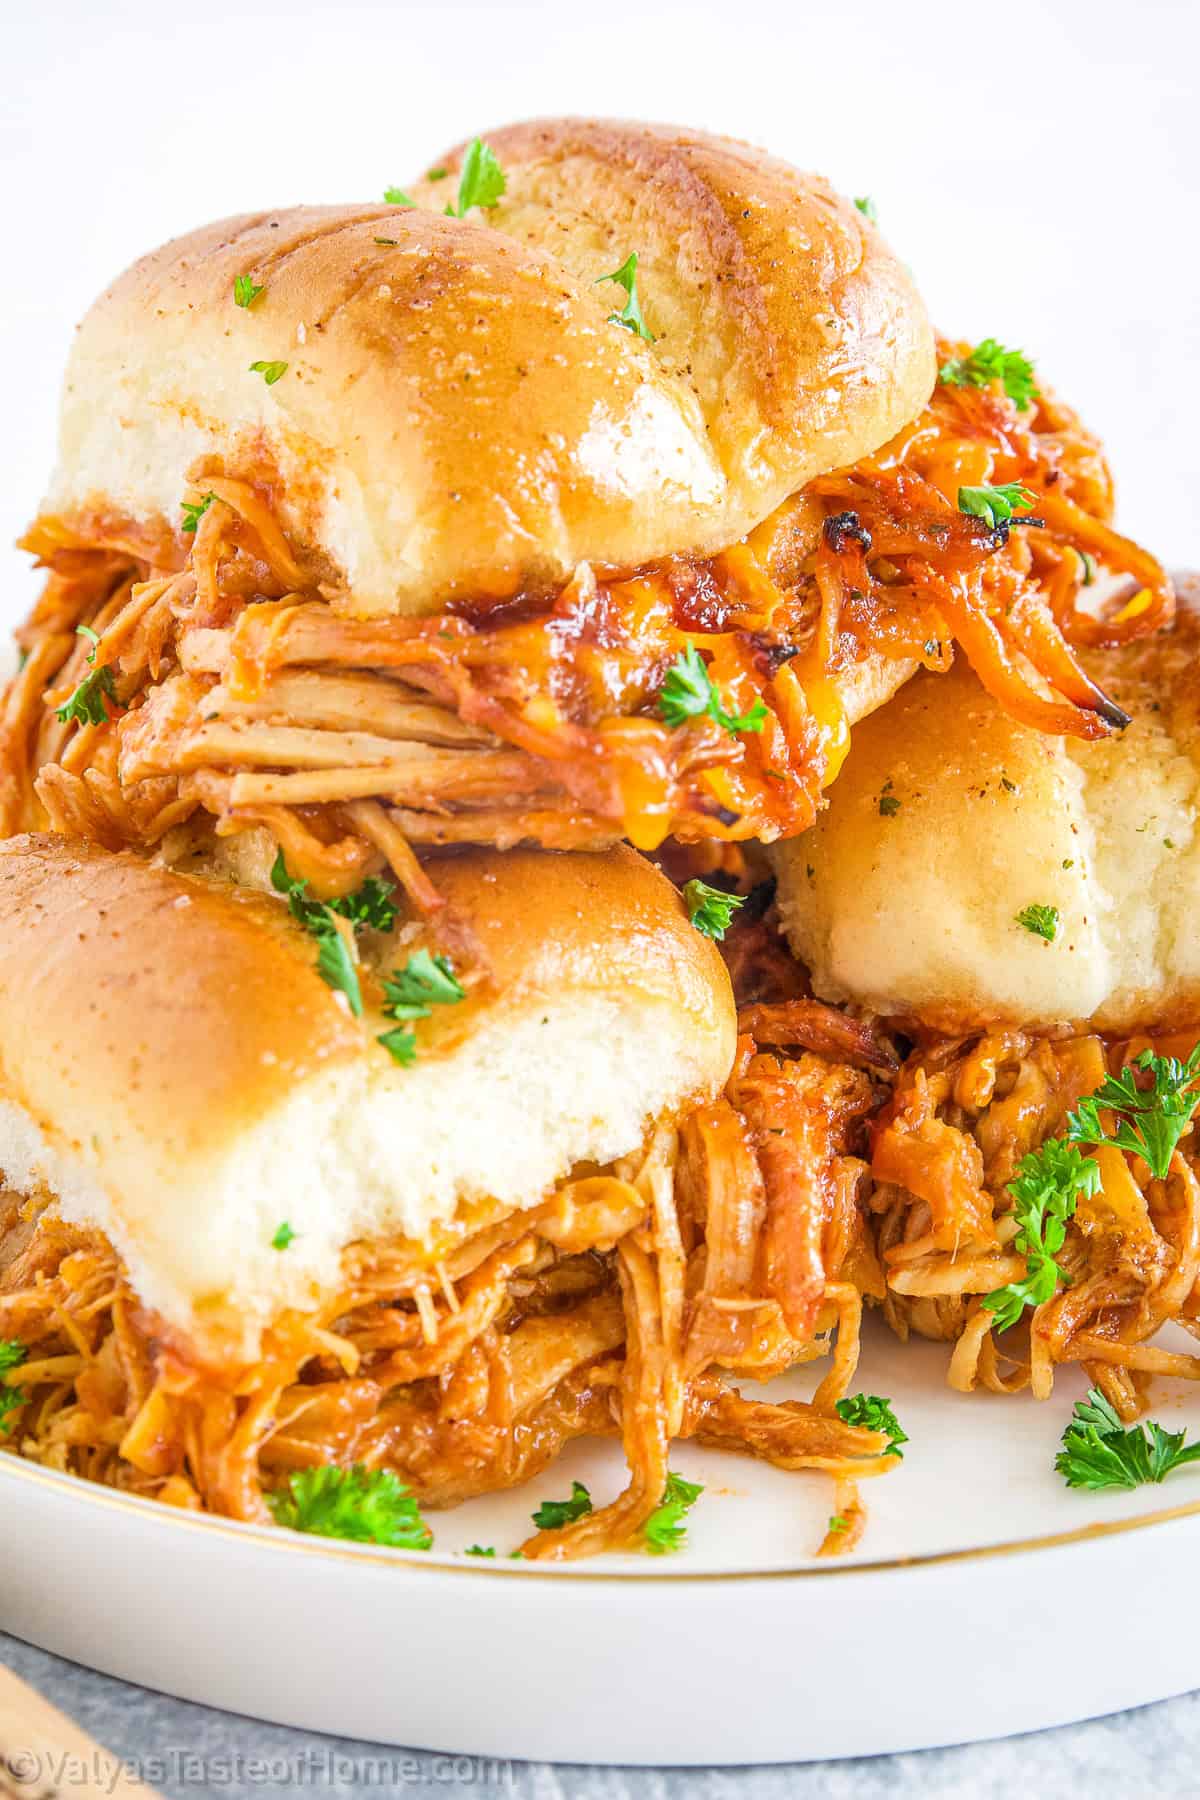
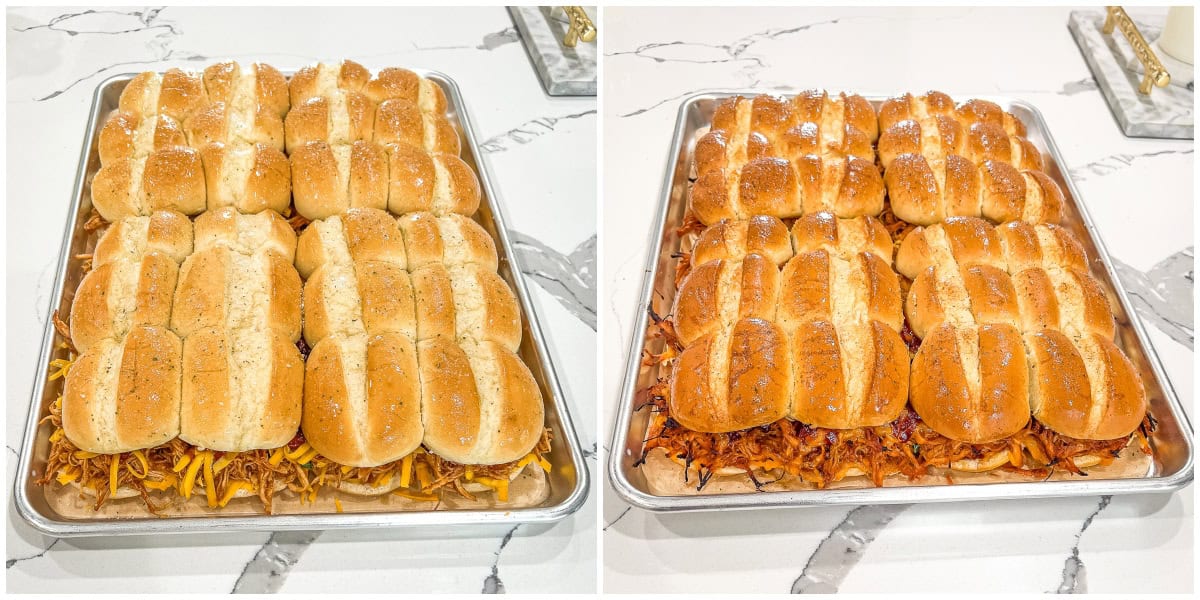
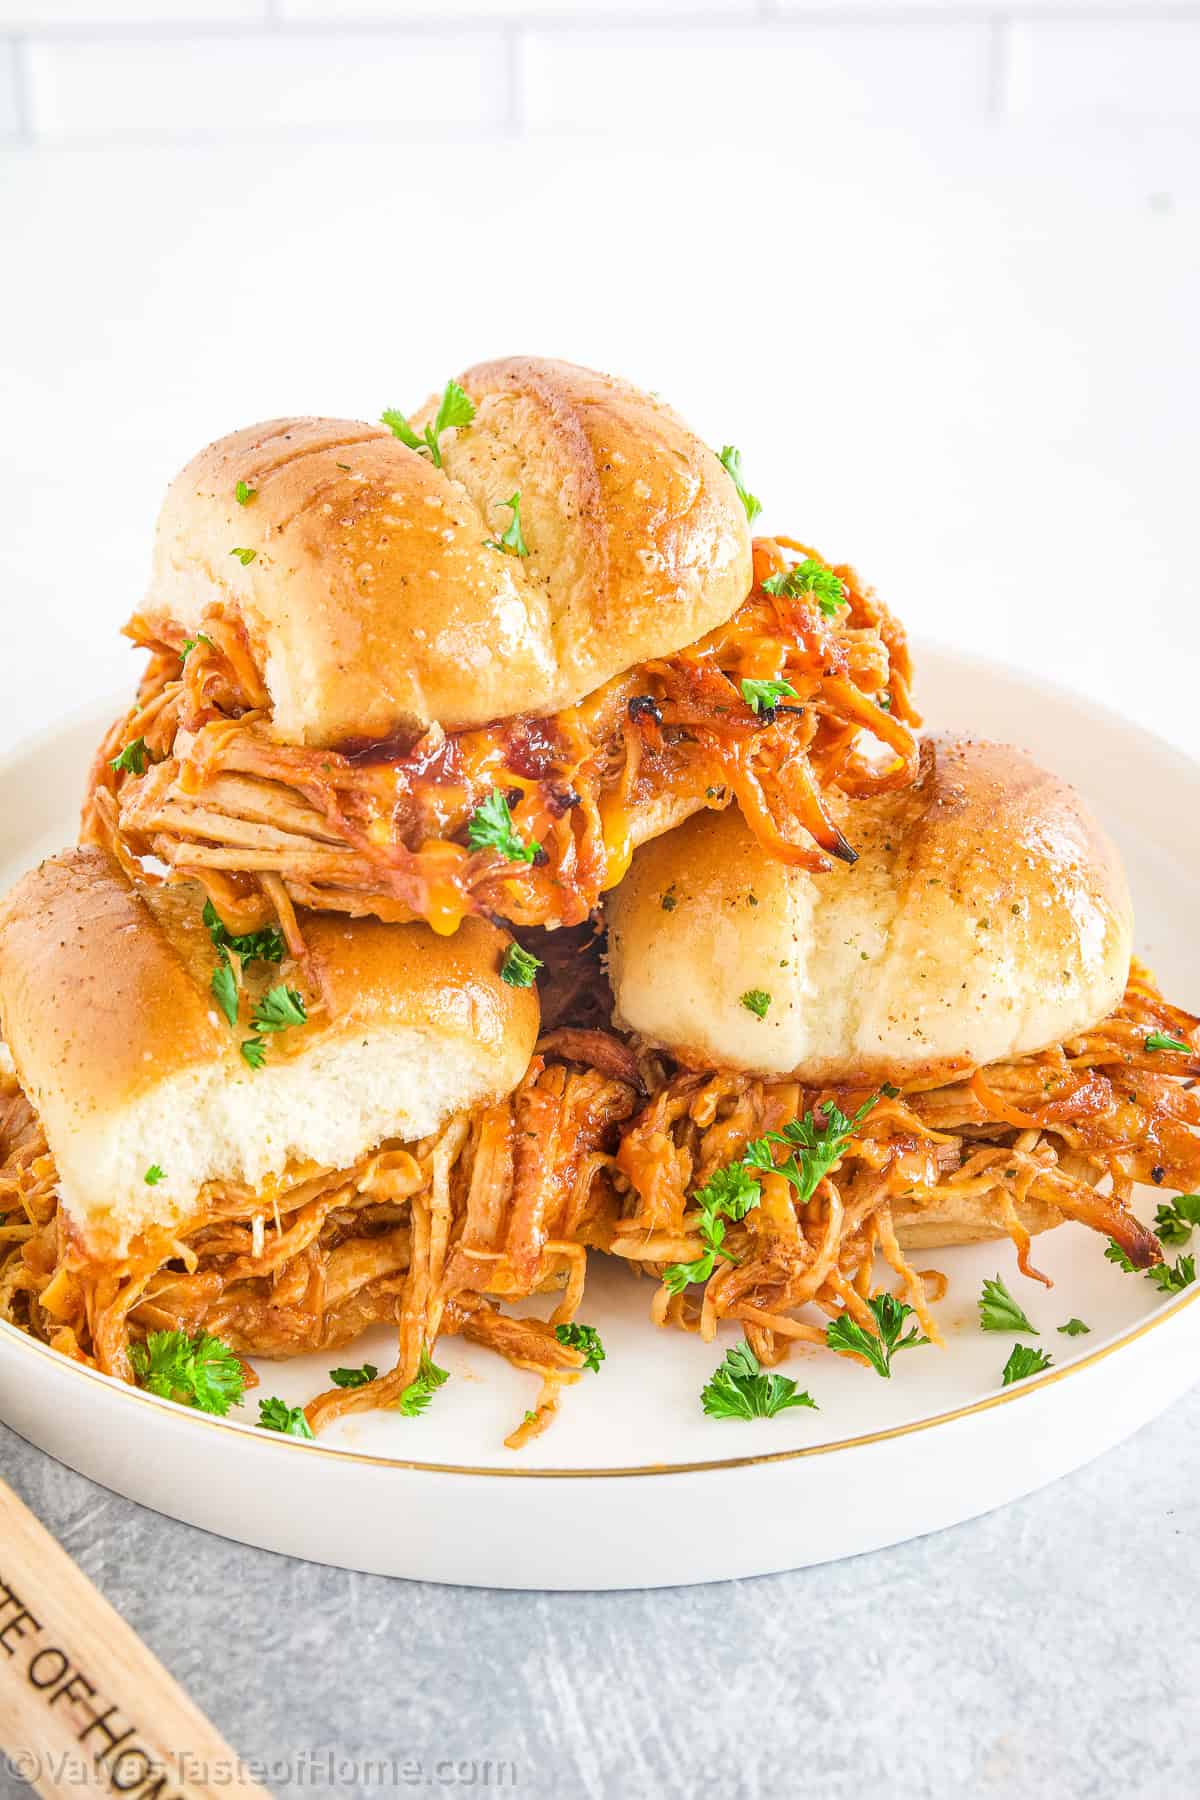
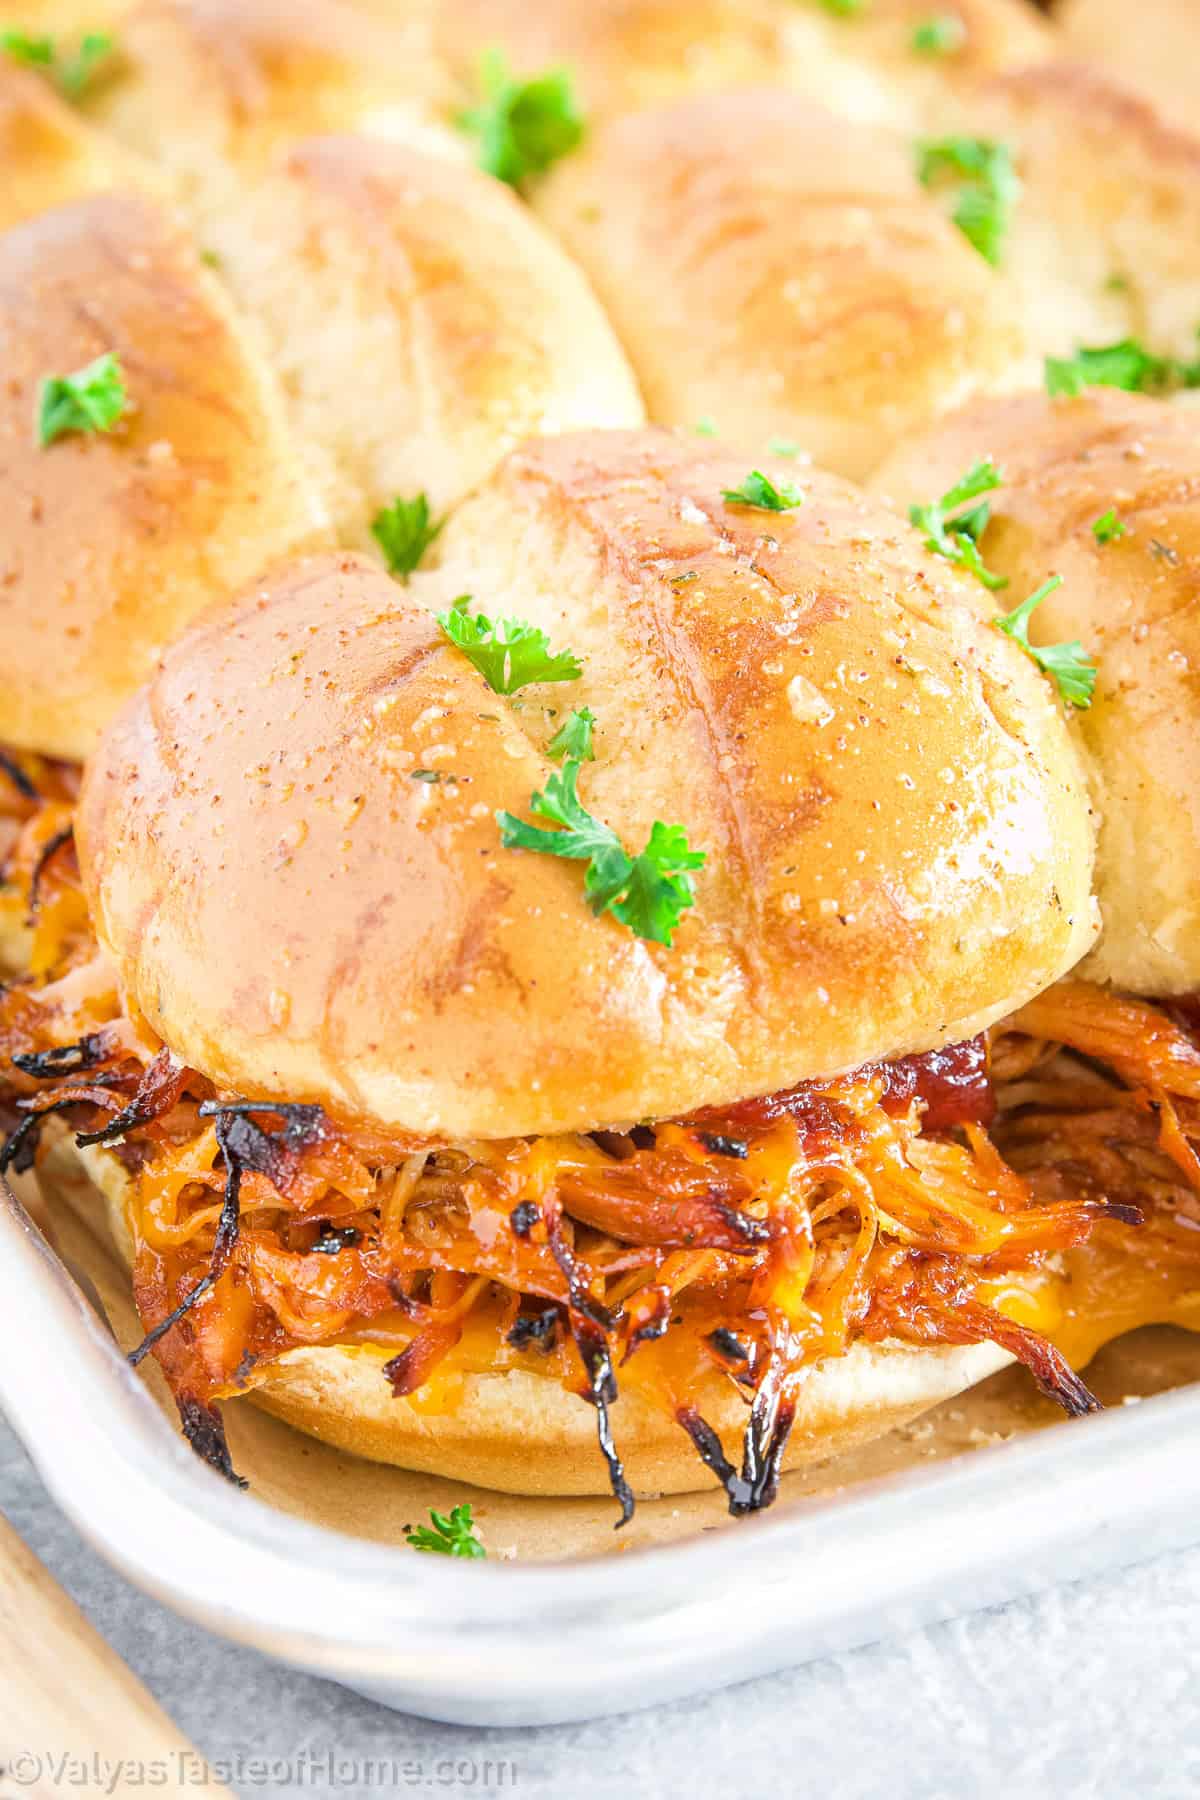
Slice your slider buns in half horizontally (keep the bottoms and tops connected if using a sheet of rolls). Place the bottom halves on a baking sheet or in a baking dish. Spread the BBQ pulled chicken evenly across the buns (you can drizzle more barbecue sauce over the chicken), then sprinkle with shredded or sliced cheddar cheese.
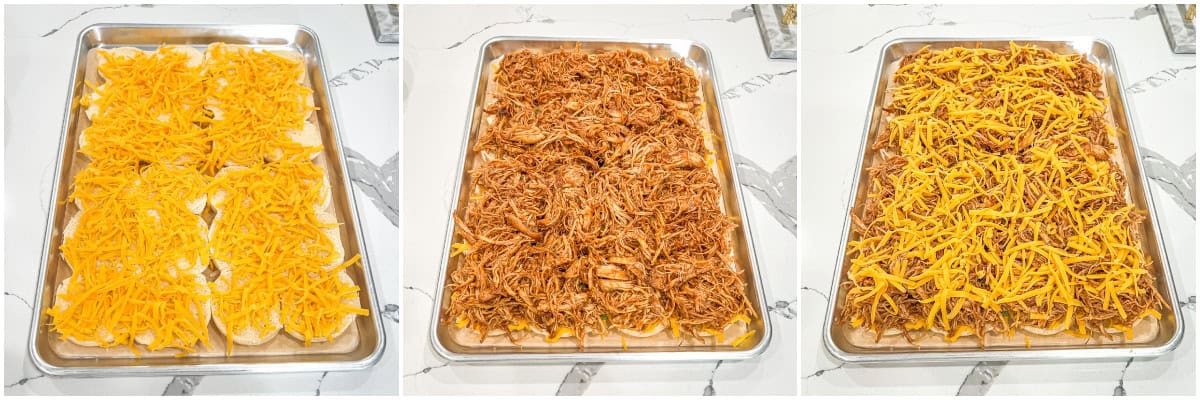
Place the top halves of the buns over the chicken and cheese to form the sliders.
Melt butter and mix in garlic powder (and optional parsley or seasoning). Brush generously over the tops of the buns.
Bake BBQ Pulled Chicken Sliders
Preheat your oven to 350°F. Bake the sliders uncovered for about 12–15 minutes, or until the cheese is melted and the tops are golden and slightly crispy.
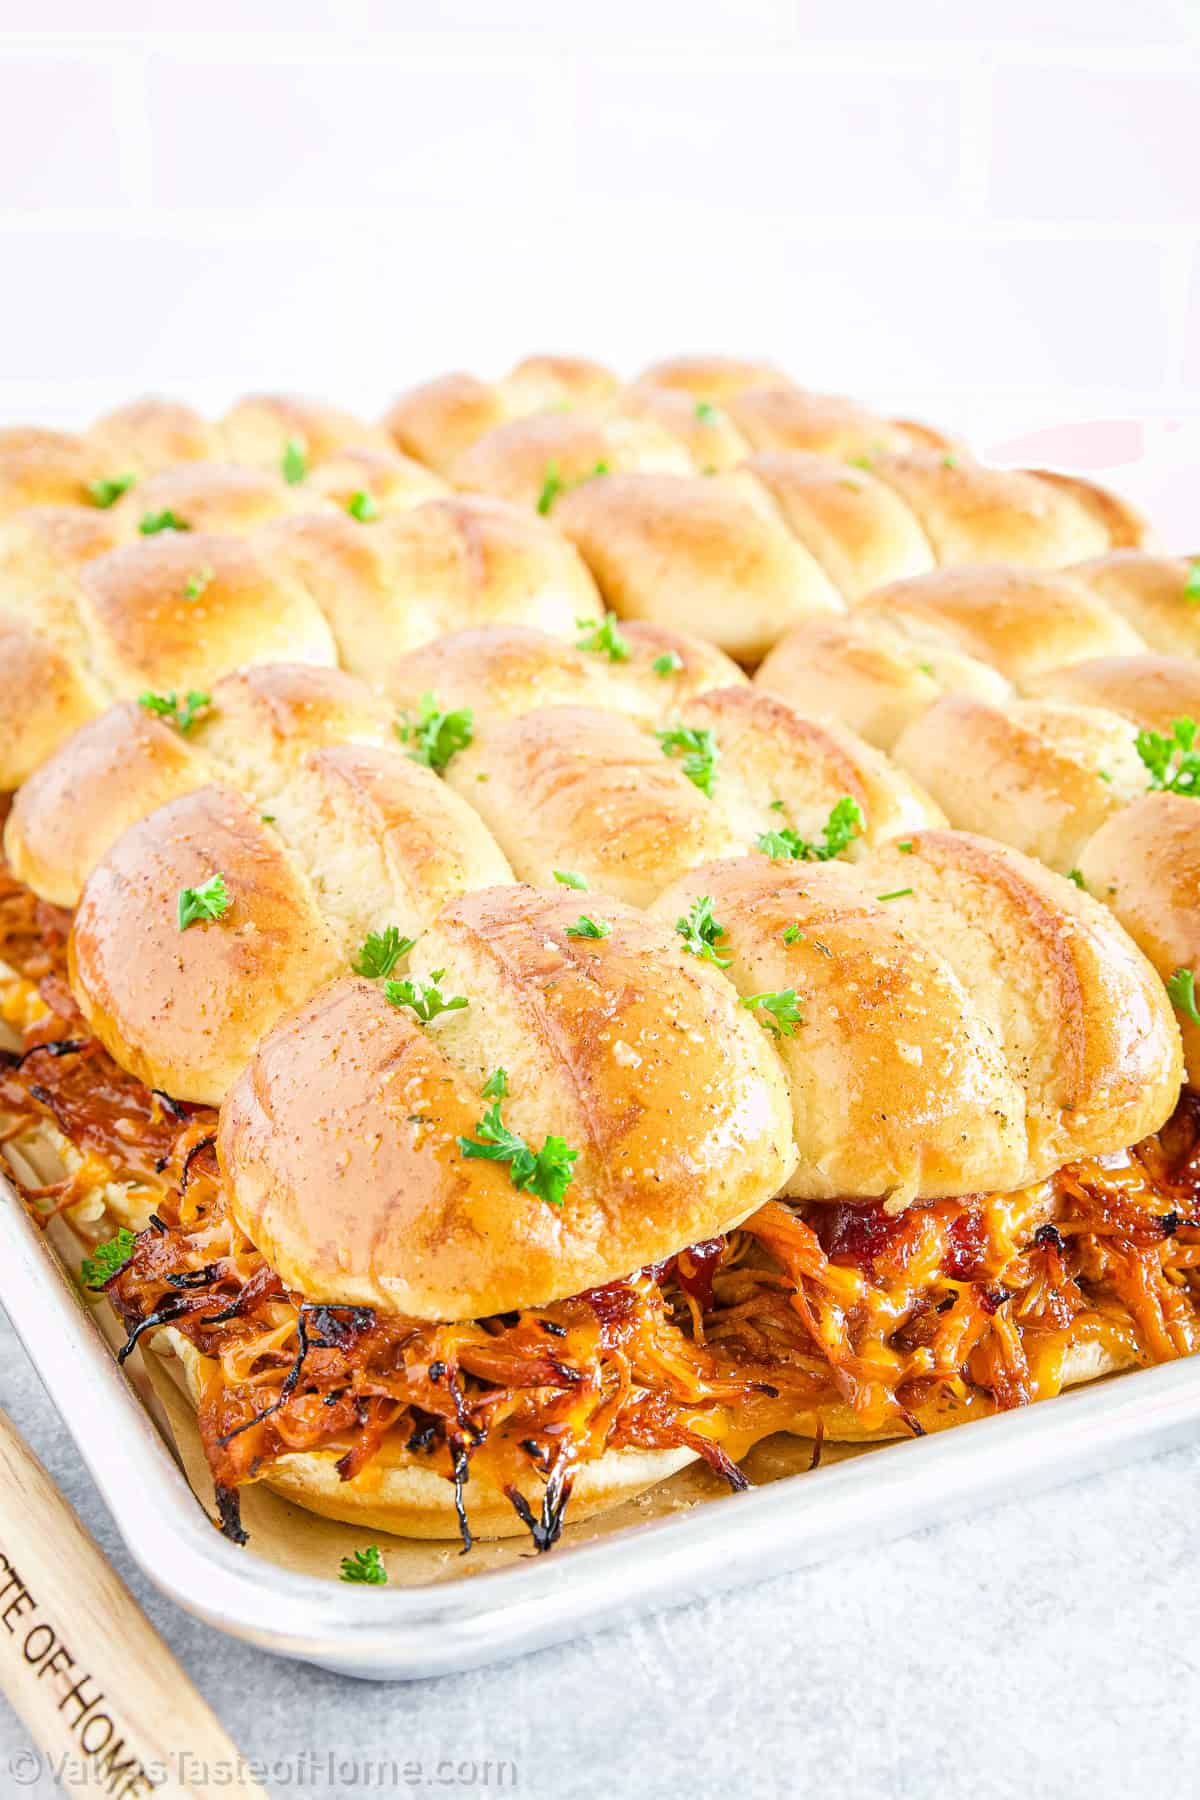
Slice or pull apart the sliders and serve warm. They’re perfect on their own or with sides like coleslaw, chips, or a fresh salad.
For a full list of ingredients and instructions, see the recipe card below.
Serving Suggestions
- Party Platter Style: Arrange the sliders on a large serving board with pickles, coleslaw, and BBQ dipping sauce for a casual, crowd-pleasing spread.
- With Classic Sides: Pair with potato salad, baked beans, mac and cheese, or corn on the cob for a full BBQ-inspired meal.
- Add Some Crunch: Serve alongside kettle chips, sweet potato fries, or a fresh cabbage slaw for texture contrast.
- Slider Bar Option: Set up a DIY slider bar with optional toppings like jalapeños, crispy red onions, sliced avocado, or different cheeses so guests can customize their own.
- Lighter Pairings: For a balanced plate, serve with a simple green salad, grilled vegetables, or cucumber-tomato salad.
Frequently Asked Questions
Yes! You can prepare the pulled chicken and assemble the sliders ahead of time. Just store the assembled sliders (without baking) in the refrigerator and bake them right before serving. They can also be frozen; just bake them from frozen or after thawing.
Absolutely! You can substitute the pulled chicken with pulled pork, beef, or even jackfruit for a vegetarian option. The BBQ sauce will complement all variations.
Yes, simply swap out the slider buns for gluten-free options available at most stores, such as gluten-free dinner rolls or slider buns.
Yes, a slow cooker is a great option! Simply add your chicken and BBQ sauce to the slow cooker and cook on low for 4-6 hours. Shred the chicken, and it’s ready for your sliders.
How to Store Leftovers
- Cool Down: Allow the sliders to cool to room temperature before storing to prevent condensation from forming inside the storage container.
- Refrigeration: Place any leftover sliders in an airtight container. They can be stored in the refrigerator for up to 3 days. Make sure the container is sealed well to keep them fresh.
- Freezing: If you want to keep them for a longer period, you can freeze the sliders. Wrap them tightly in plastic wrap or aluminum foil, and then place them in a freezer-safe bag or container. They can be frozen for up to 3 months.
How to Reheat Leftover Sliders
- For refrigerated sliders: To reheat, place the sliders in an oven at 350°F (175°C) for about 10-12 minutes until the buns are soft and the cheese is melted.
- For frozen sliders: Let them thaw in the fridge overnight, then reheat in the oven. Alternatively, you can reheat them from frozen, but it will take a bit longer (about 15-20 minutes).

BBQ Pulled Chicken Sliders (Everyone Will Love!)
Ingredients
- BBQ Pulled Chicken
- 16 slider buns
- 1 lb. cheddar cheese
- 2 tbsp melted butter
- 1 tsp garlic powder
Instructions
Prepare BBQ Pulled Chicken
- If you’re starting from scratch, cook and shred your chicken (see how to make a quick Instant Pot BBQ Pulled Chicken).
- Toss the shredded chicken in your favorite BBQ sauce until fully coated. Warm it through on the stove or in the microwave if needed.
Assemble BBQ Pulled Chicken Sliders
- Slice your slider buns in half horizontally (keep the bottoms and tops connected if using a sheet of rolls). Place the bottom halves on a baking sheet or in a baking dish. Spread the BBQ pulled chicken evenly across the buns, then sprinkle with shredded or sliced cheddar cheese.
- Place the top halves of the buns over the chicken and cheese to form the sliders.
- Melt butter and mix in garlic powder (and optional parsley or seasoning). Brush generously over the tops of the buns.
Bake BBQ Pulled Chicken Sliders
- Preheat your oven to 350°F. Bake the sliders uncovered for about 12–15 minutes, or until the cheese is melted and the tops are golden and slightly crispy.
Notes
Thank you for following me on Instagram, Facebook, and Pinterest!
The post may contain affiliate links. Read my disclosure.