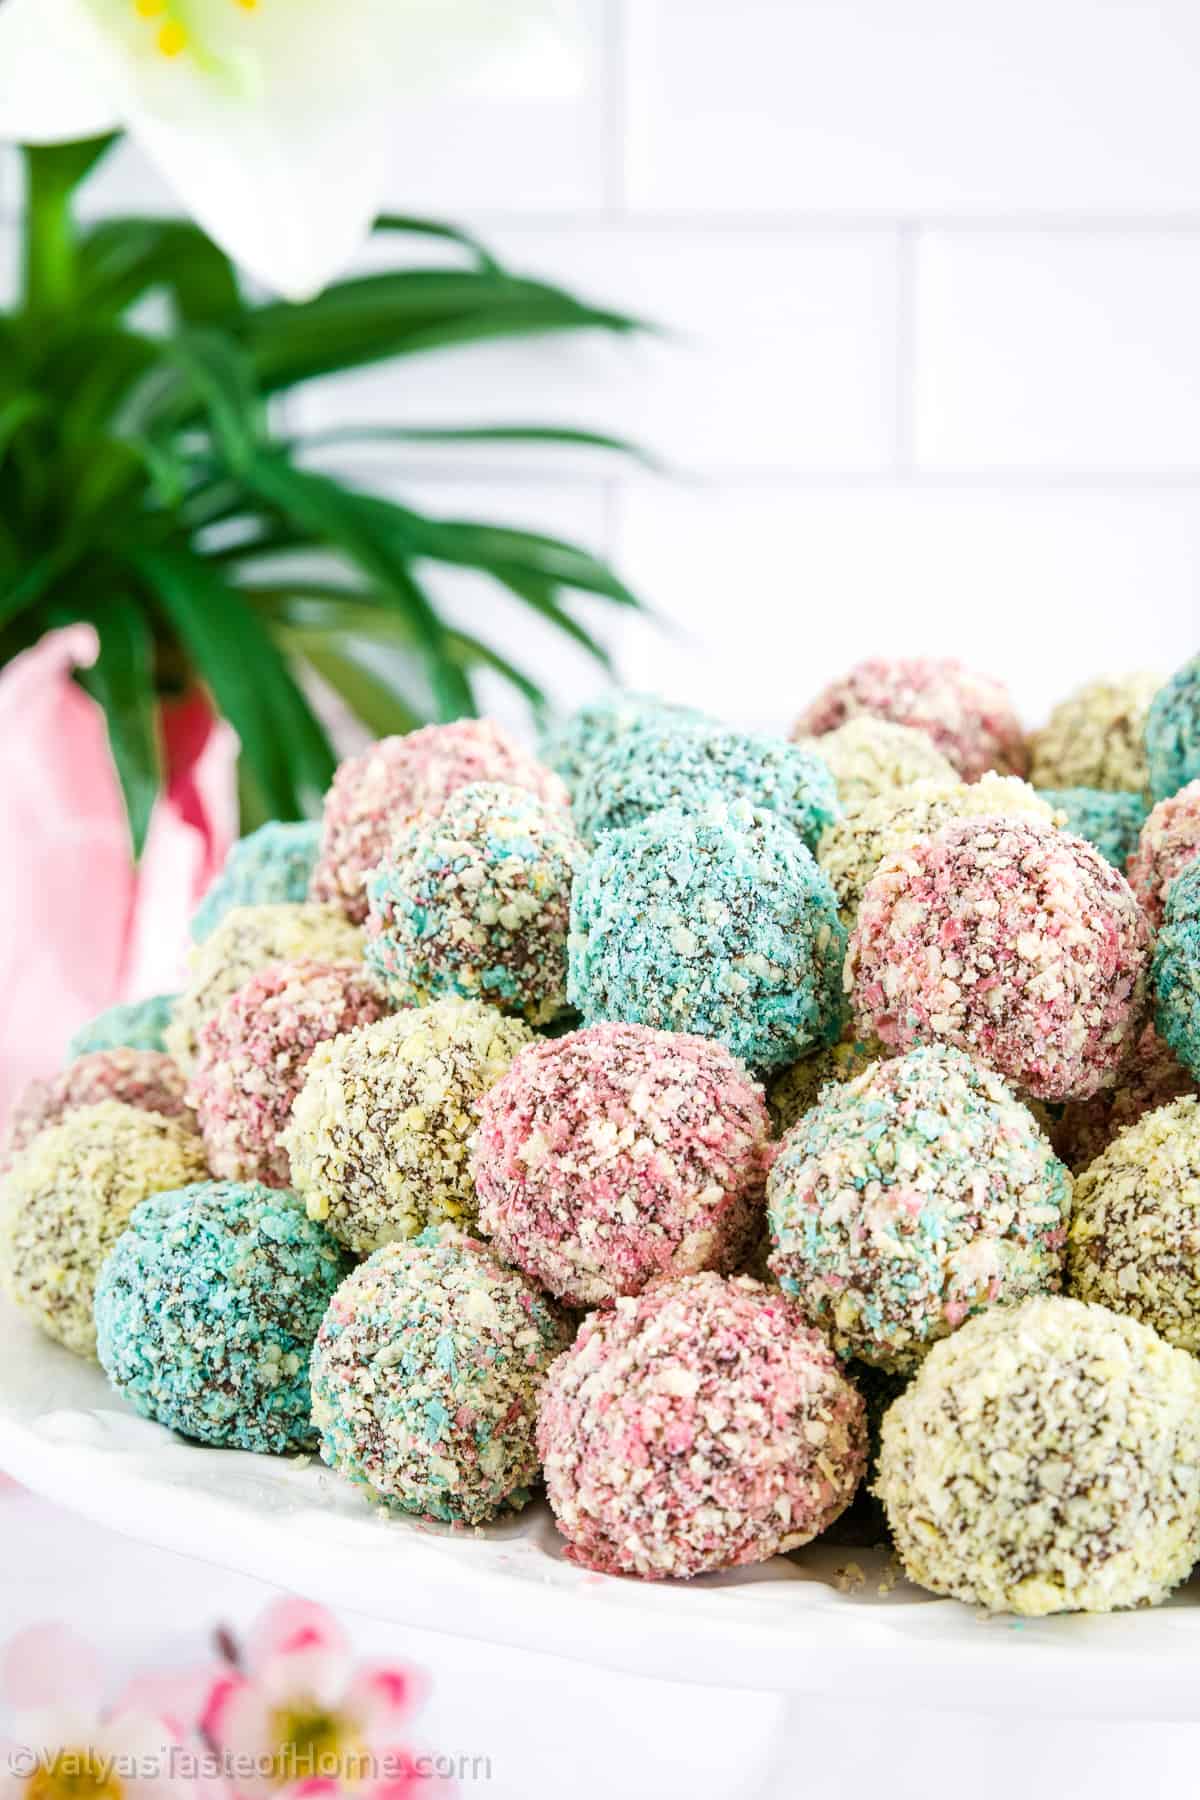
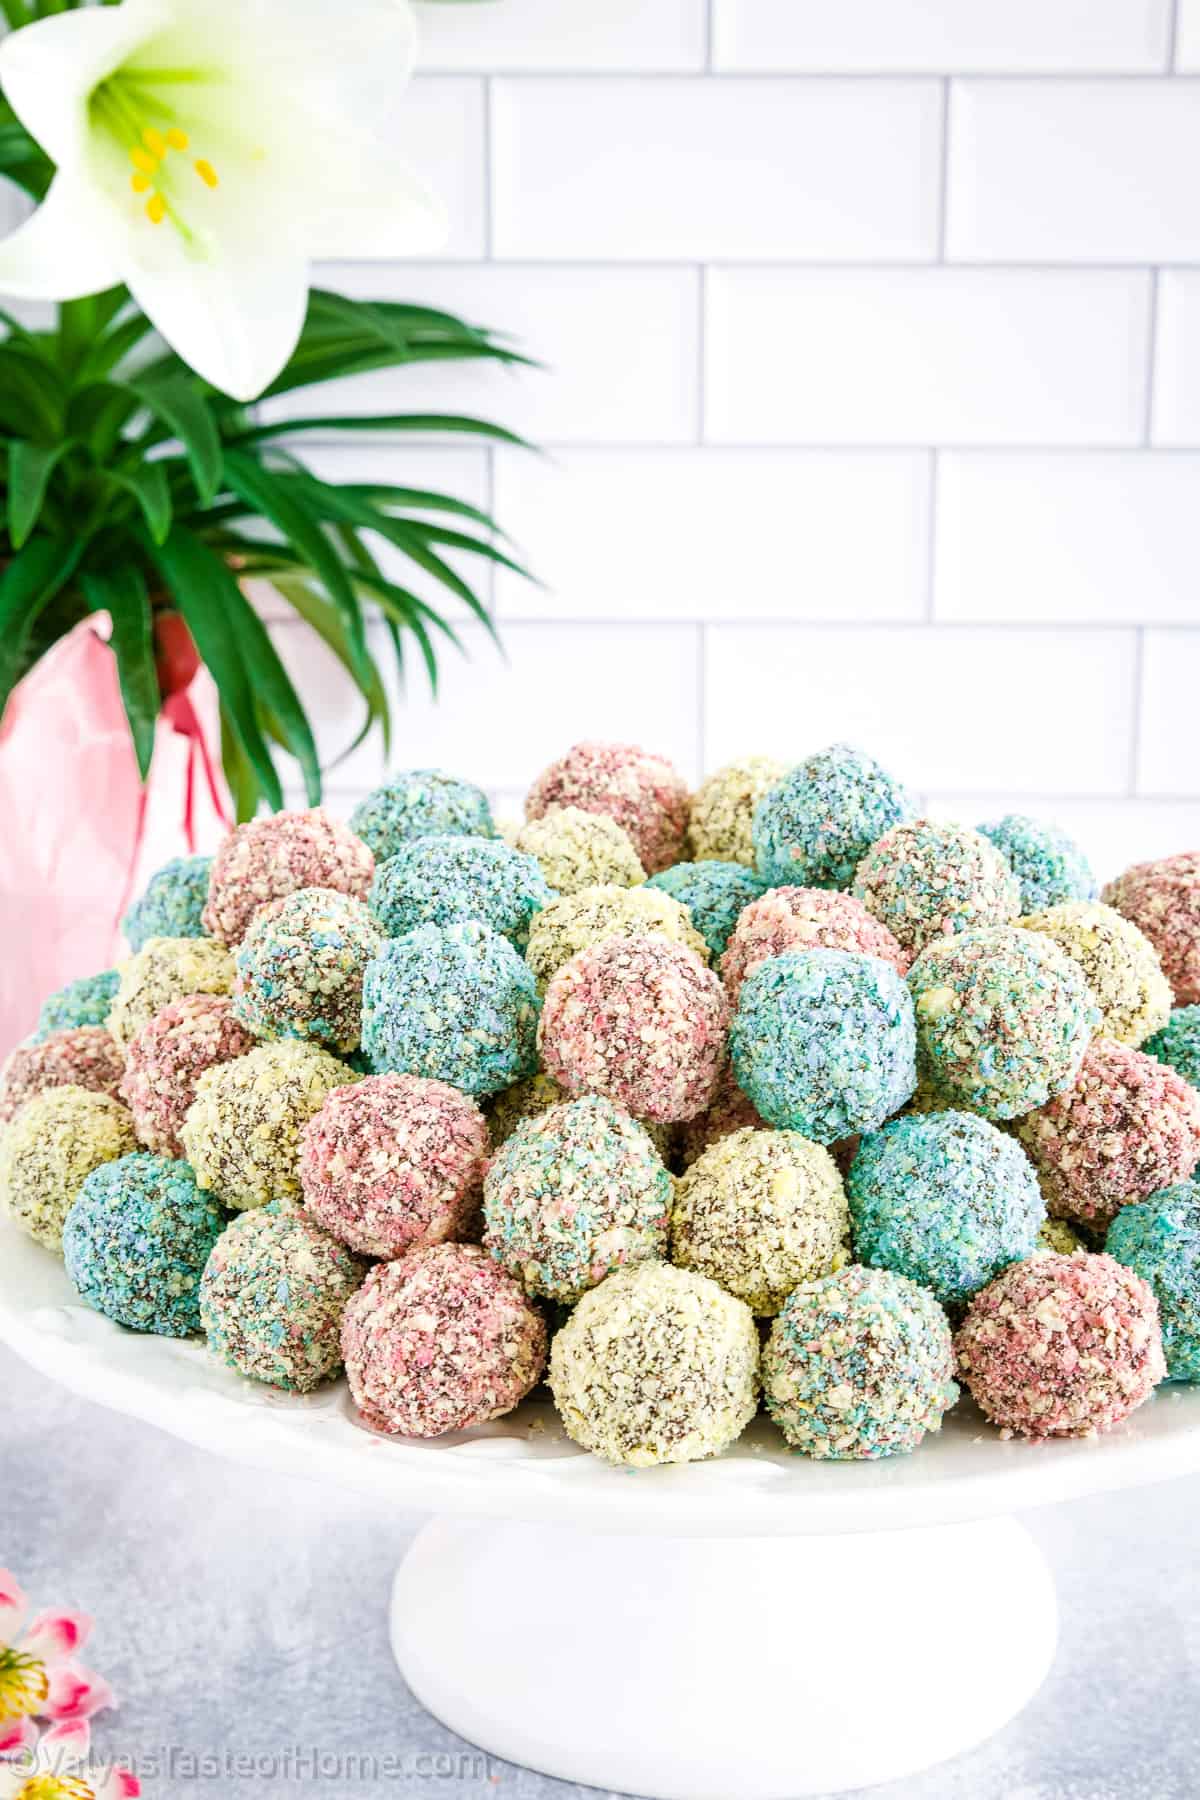
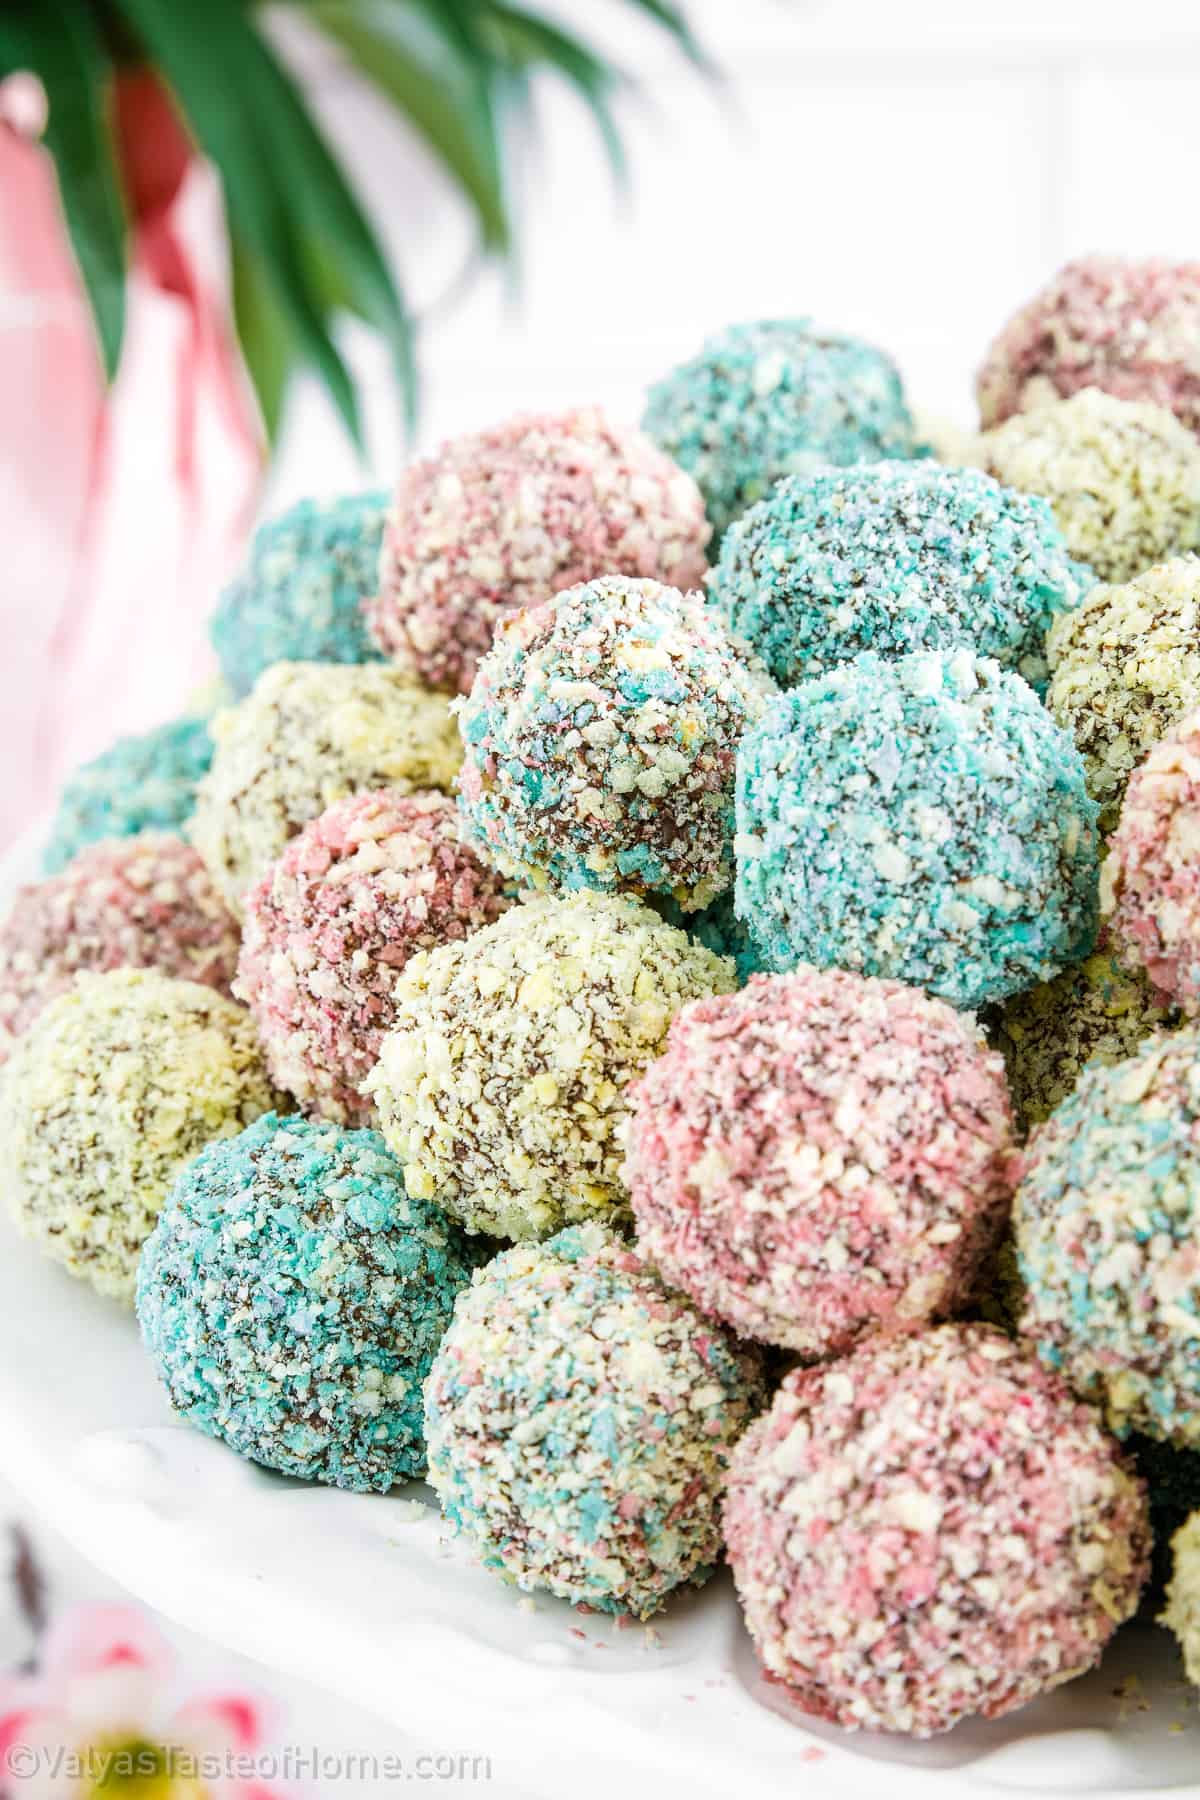
The Perfect Hedgehog Cookies Ezhiki (Great for Easter!)
Hedgehog cookies are a delightful treat that is sure to bring a smile to your face. These cookies are not only cute, adorable, and shaped like an egg but also delicious! Plus, they’re perfect for any occasion, from birthday parties to holiday gatherings and especially Easter!
These are a traditional European-style cookie that has been enjoyed for generations and a recipe that I’ve enjoyed a lot, especially while making them around Easter. With this recipe, you can easily make them in the comfort of your own home!
The recipe for hedgehog cookies requires a few interesting ingredients, such as European-style wafers and frozen cherries, but the result is well worth it. The wafers are used as a base for the cookie, while the cherries add a sweet and tangy flavor that complements the rich chocolate ganache in the cookies.
The dough for the cookies is made with cooked egg yolks, sour cream, margarine, and all-purpose flour. A touch of baking soda and vinegar helps to give it the perfect texture and rise.
In this recipe, I’ll guide you step-by-step through the process of making hedgehog cookies, so that even if you are a beginner baker, you can achieve great results. So, put on your apron and get ready to create a batch of these adorable and delicious snacks that are sure to become a new family favorite!
Want to learn how to make Hedgehog Cookies? Then keep on reading!
What are Hedgehog Cookies?
Hedgehog cookies are delicious, egg-like cookies coated with crushed wafers for a tasty treat that is fit for the holidays. These cookies are made with a base of European-style wafers, layered with a sweet and tangy filling made from frozen cherries, and topped with a rich chocolate ganache.
The wafers used in hedgehog cookies are round and plain, and they’ll give us a sturdy base for the cookie’s structure. The cherry filling adds a burst of flavor and color to the cookie, with a smooth and decadent finish of chocolate ganache. More layers of flavored wafers are used to create the spiky ‘hedgehog’ appearance.
Hedgehog cookies are a great way to decorate a holiday table spread with their adorable looks and delicious flavor. They’re especially great for Easter! You can also serve them at birthday parties and other celebrations.
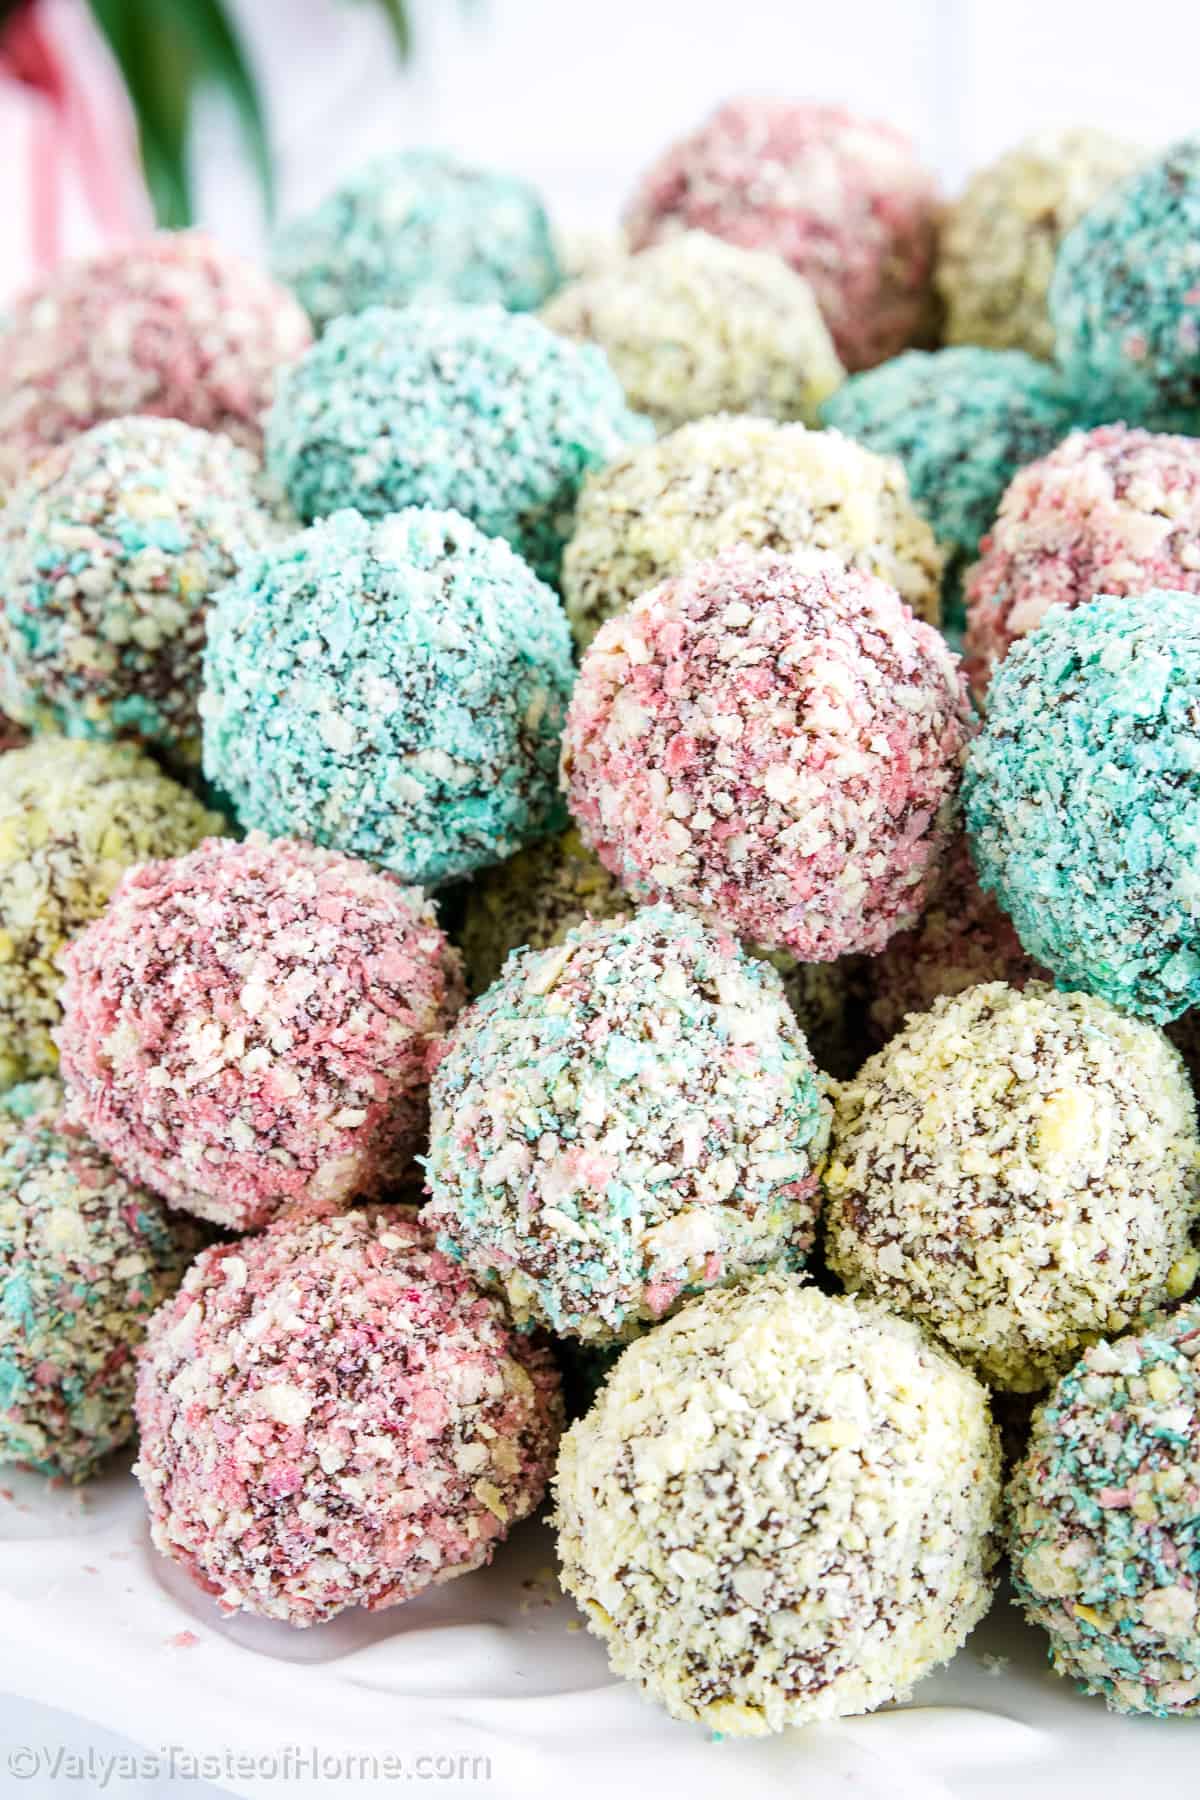
Their cute and whimsical appearance, along with their delicious combination of flavors and textures makes them a favorite with kids and adults!
What Makes This Hedgehog Cookies Recipe Special?
Cute: These hedgehog cookies have a fantastic presentation! They’re colorful and adorable, making a great addition to any holiday food spread.
Unique: This recipe doesn’t use traditional cookie dough that you’ll find in other cookies. The dough is made of cooked egg yolks along with other pantry staples for a delicious and unique treat!
Delicious: Hedgehog cookies have a very tasty combination of flavors. The sweet cherry filling and rich chocolate ganache pair perfectly with the crunchy wafers for a deliciously good flavor.
What You Need to Make Hedgehog Cookies at Home
All you need are some simple ingredients to make the most beautiful Hedgehog Cookies you’ve ever had! Here’s everything you’ll need:
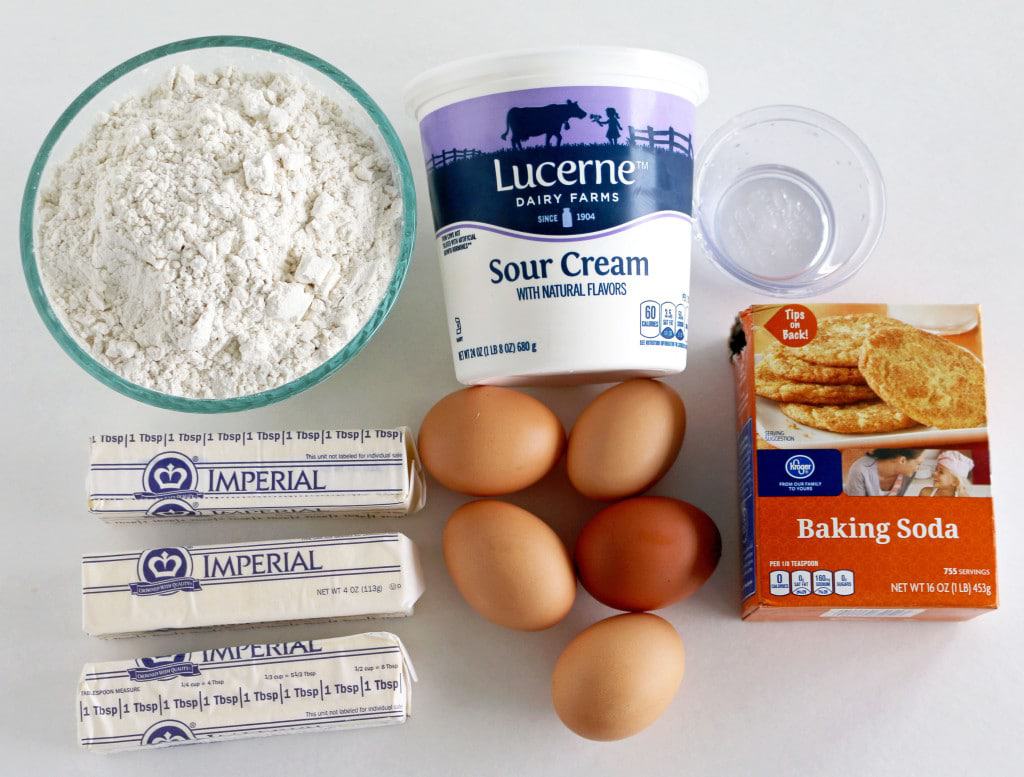
Dough Ingredients:
- Eggs: The first ingredient we’ll need for our hedgehog cookies is some eggs. We’ll hard-boil them and use the yolks as the base of our cookie balls.
- Sour cream: Next we’re going to use a little sour cream in our cookies. They’ll give us a nice rich tanginess while also providing moisture.
- Margarine: We need margarine for our hedgehog cookies too. The fat content in margarine will give our cookies a tender and crumbly texture without falling apart the way butter would if we used that instead.
- Baking soda: After that, we’ll use baking soda in the cookie dough. It will help our cookies rise and become light and fluffy and is better than using baking powder since we’ll activate the soda with vinegar.
- Vinegar: We’ll need a splash of vinegar for this recipe also. Vinegar will help our hedgehog cookies be more tender and crumbly and works great with the baking soda.
- Flour: All-purpose flour will be the base of our dough. It’s great for binding the rest of the ingredients together.
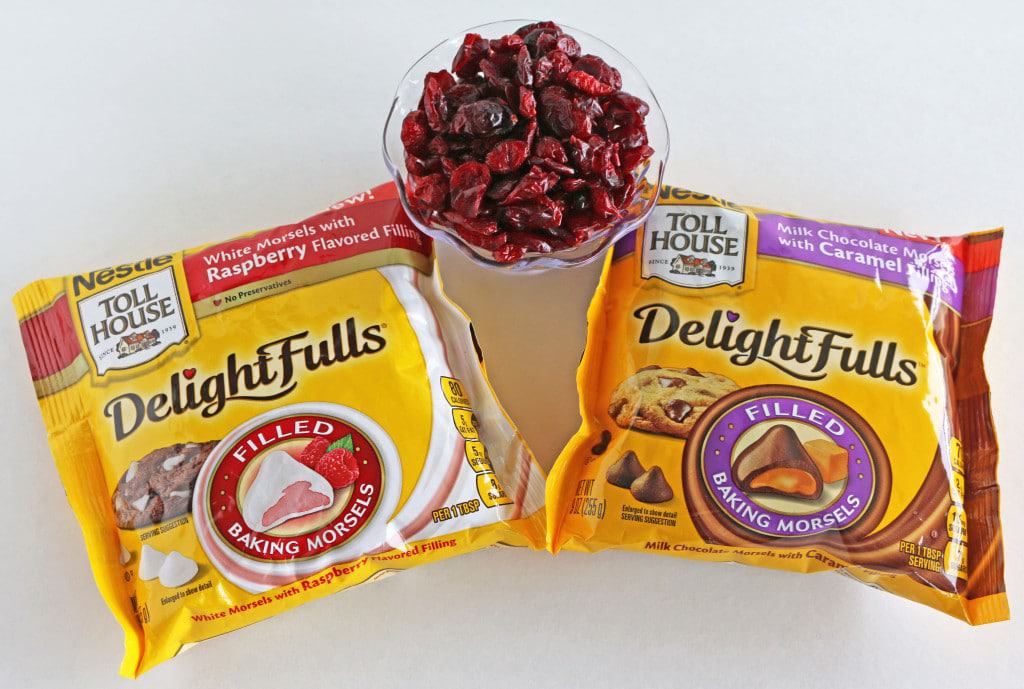
Filling Ingredients:
- Frozen cherries: I prefer to use frozen cherries in my hedgehog cookies. You can also use chocolate chips, raisins, cranberries, blueberries, or other frozen or dried fruits.
For the Chocolate Dipping:
- Chocolate ganache: For the chocolate dipping I love to use chocolate ganache. It has a rich, delicious flavor and helps the outer layer of wafers stick to the cookies. You can easily make it over a double boiler by following my recipe or even using your microwave.
Wafer Coating Ingredients:
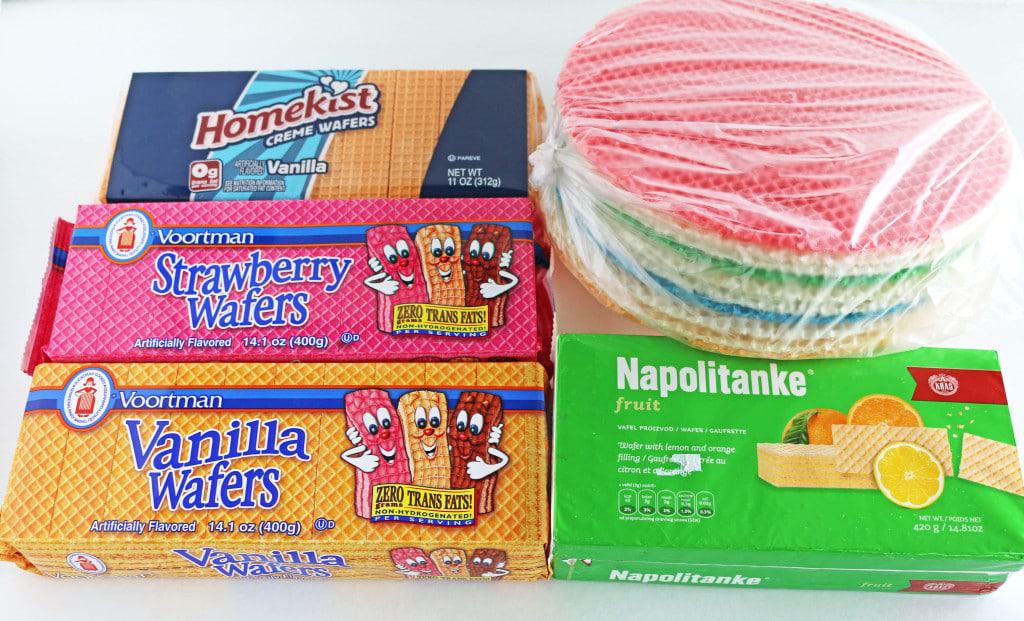
- Plain circular wafers: The first ingredient we need for the coating is plain circular wafers. You can find these at any European food store.
- Strawberry-flavored wafers: Next we need strawberry-flavored wafers. Strawberry is a great flavor to pair with the chocolate ganache!
- Vanilla-flavored wafers: We need vanilla-flavored wafers for our cookie coating also. They compliment the tartness of the cherries and taste great with the strawberry wafers.
- Lemon or orange-flavored wafers: Pick either lemon or orange-flavored wafers for the last ingredient. Lemon will add a little tartness while orange will make the coating taste slightly fruity.
How to Make Hedgehog Cookies (Step-by-Step)
Making these delicious and adorable Hedgehog cookies is easier than you think. Here’s how to make them step by step:
How to Prepare the Coating
Start by hard-boiling 5 large eggs. While they’re cooking, we’ll prepare the wafers for coating.
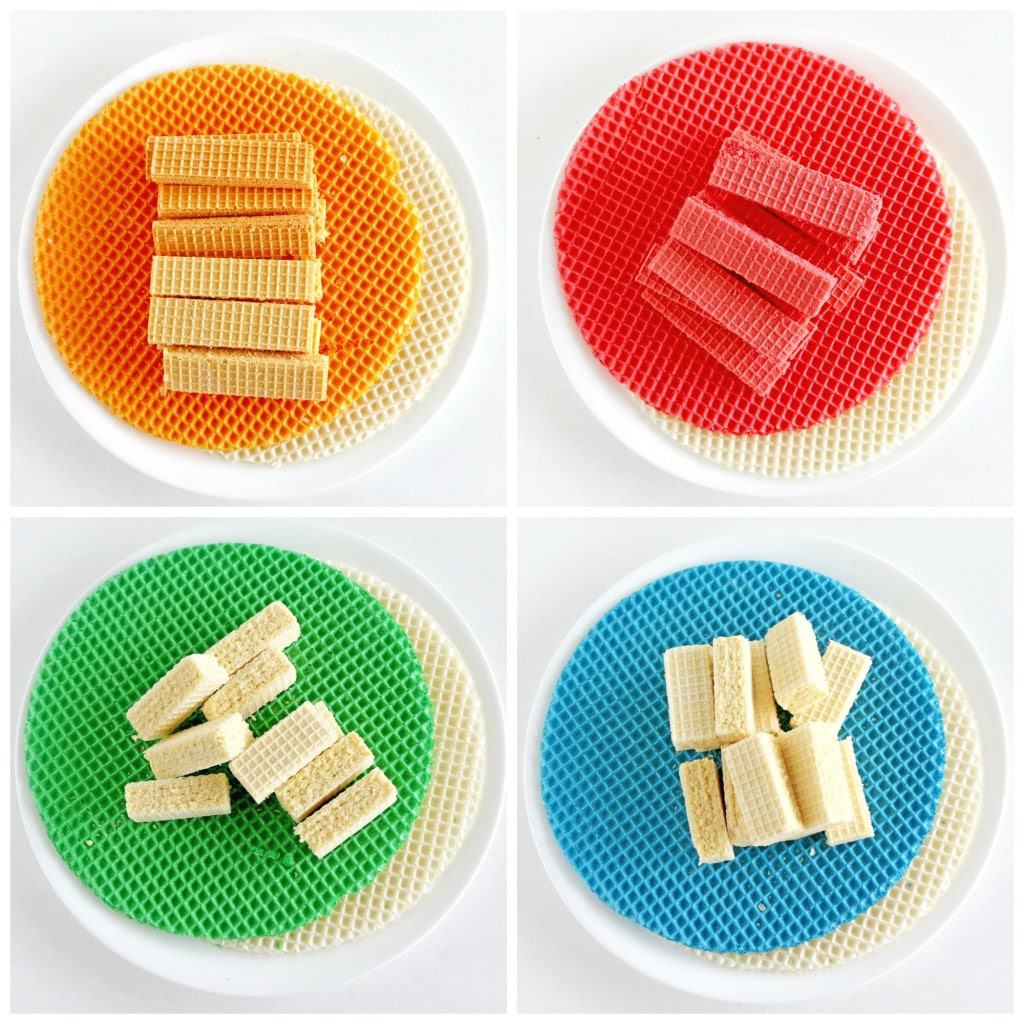
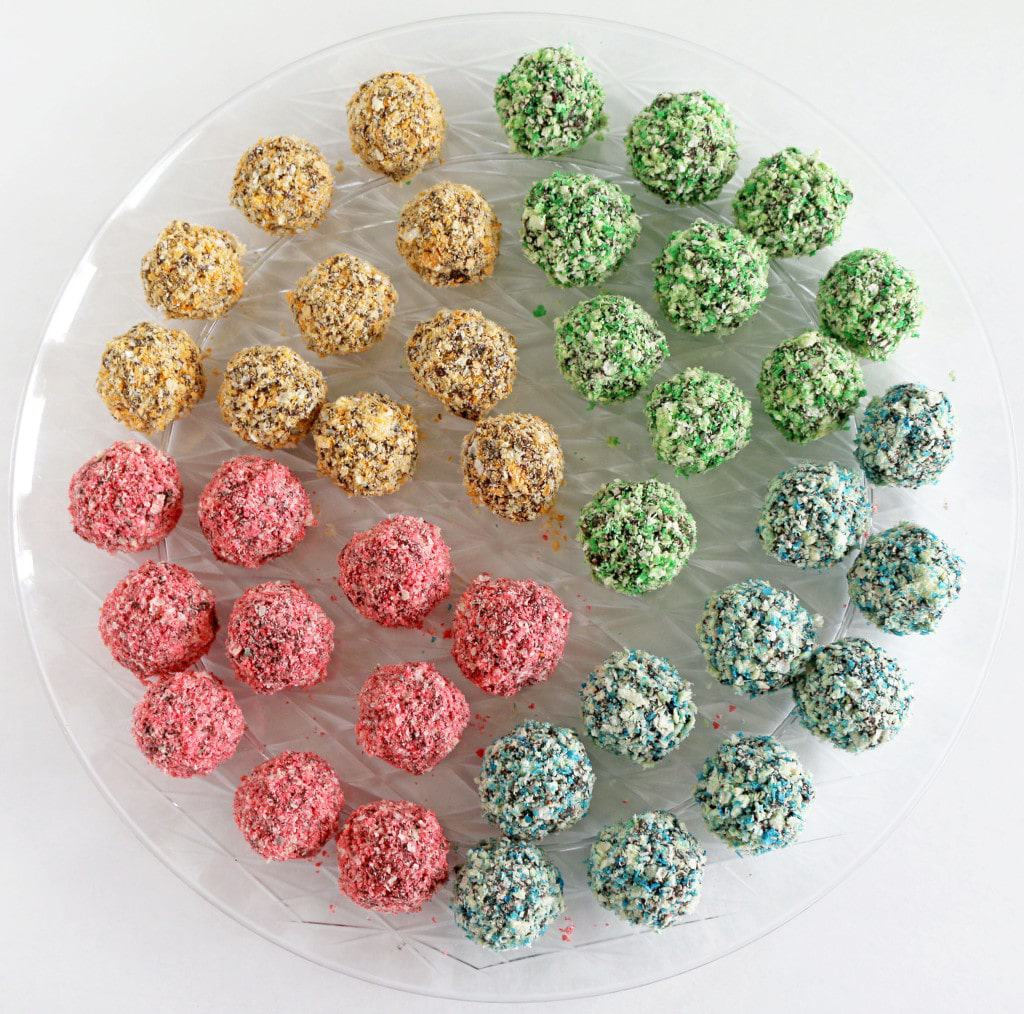
Put the following flavor and color combinations on separate large plates:
- 1 ½ white round wafers, 1 pink round wafer, and ⅓ pack strawberry-flavored wafers.
- 1 ½ white round wafers, 1 orange round wafer, and ⅓ pack vanilla-flavored wafers.
- 1 ½ white round wafers, 1 green round wafer, and ⅓ pack lemon or orange-flavored wafers.
- 1 ½ white round wafers, 1 blue round wafer, and ⅓ pack lemon or orange-flavored wafers.
Next, place the white and strawberry wafers in a gallon-size Ziploc bag. Using a dough roller, finely crush the wafers and shake the bags to mix them well. You can alternatively use a food processor as well to crush them.
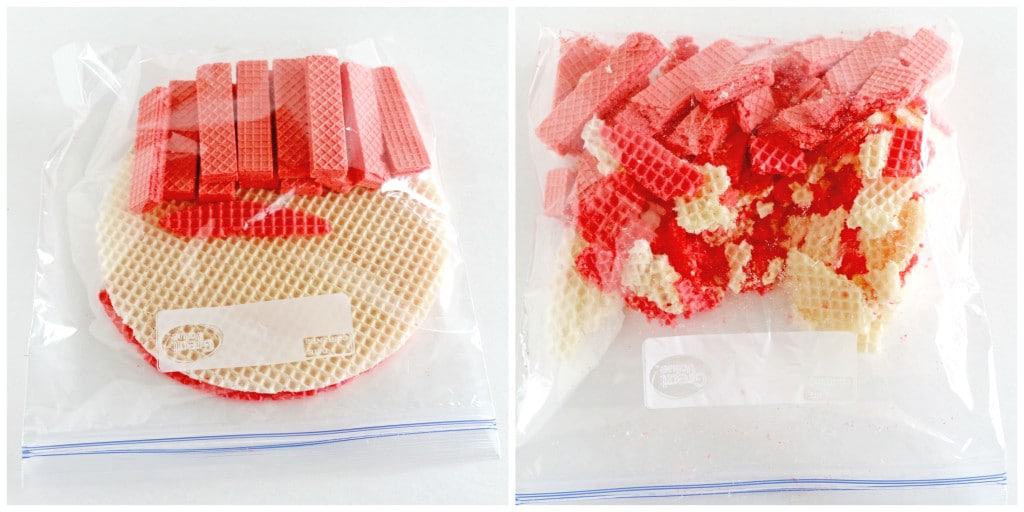
When they’re well mixed, transfer the crushed wafers back to the plate.
Repeat the same process with each plate of wafers, using a new Ziploc bag each time to avoid mixing colors.

How to Make Hedgehog Cookie Dough
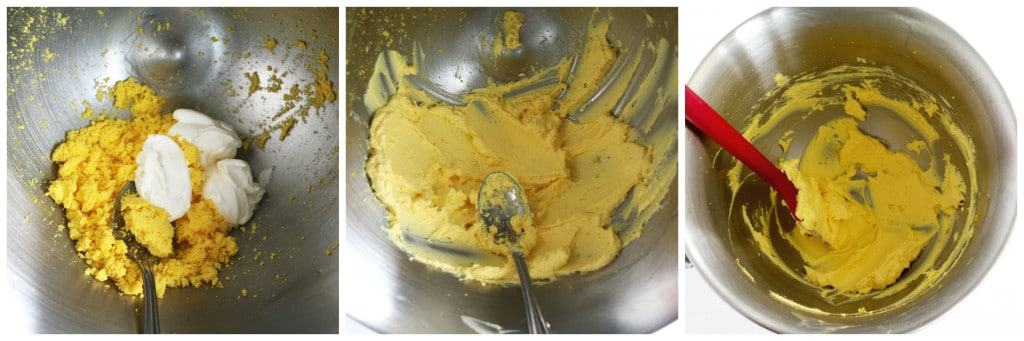
First, remove the yolks from the hard-boiled eggs. Put them in a large mixing bowl and beat them with a paddle attachment.
Use a spoon to mash the yolk crumbs as much as possible. You won’t be able to get a perfectly smooth texture, but keep mashing until there are only tiny crumbs left.
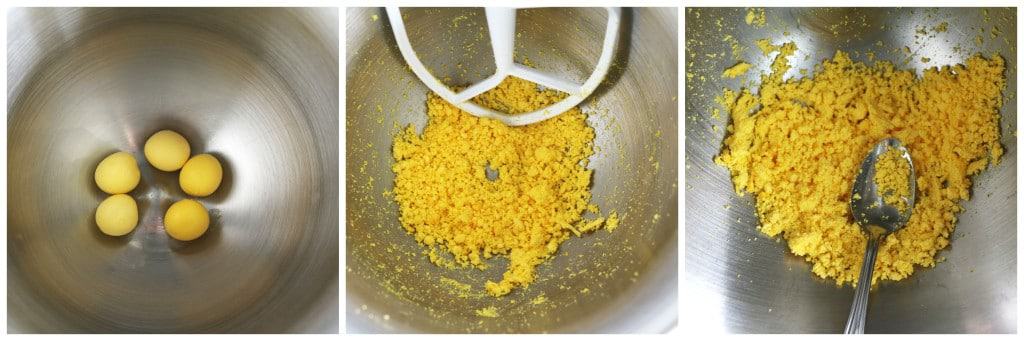
Add sour cream and keep mixing and mashing the yolks with sour cream until smooth. (This is where you’ll be able to break down most of the yolk crumbs best. I first use a spoon, then a hard rubber spatula.)
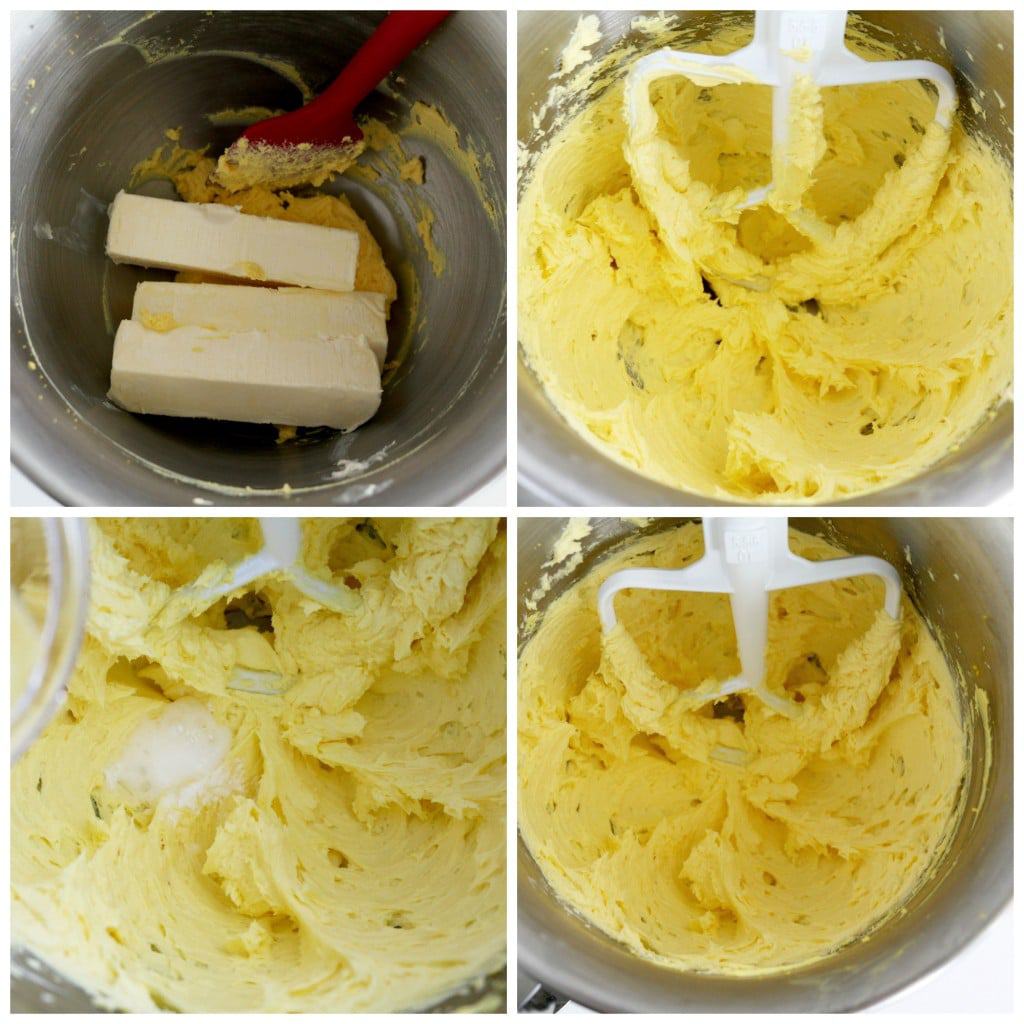
Next, put the bowl back under the stand mixer and attach the paddle. Add the softened butter and beat on high for 1 minute.
Scrape down the dough off the sides of the bowl with a spatula, and beat again for a minute.
Mix the baking soda and vinegar in a separate bowl, then add the mixture to the butter. Beat for 30 more seconds or until it’s well combined.
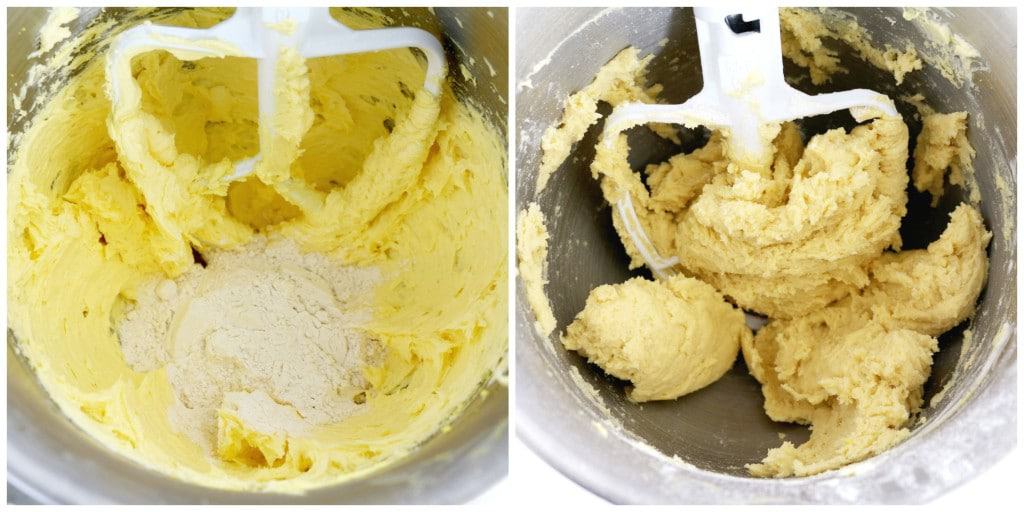
Continue beating while adding flour gradually, around ½ cup at a time, until the dough is formed.
It should be smooth and soft and not stick to the sides of the bowl.
How to Shape and Bake Hedgehog Cookie Dough
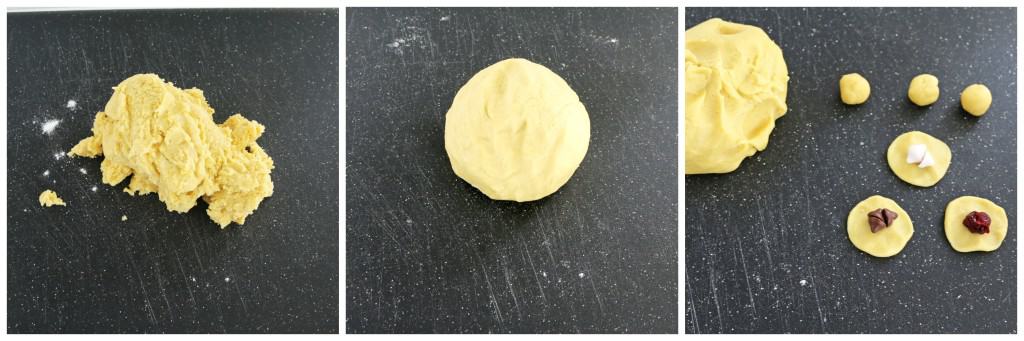
Preheat your oven to 350 F, then transfer the dough onto a working surface and knead it into a large ball.
Shape dough to form bite-size balls from the large one, about ½ inch in diameter, and flatten them down. You can also use a small cookie scoop to scoop cookie dough.
Place the filling in the center, seal them, then shape them back into balls.
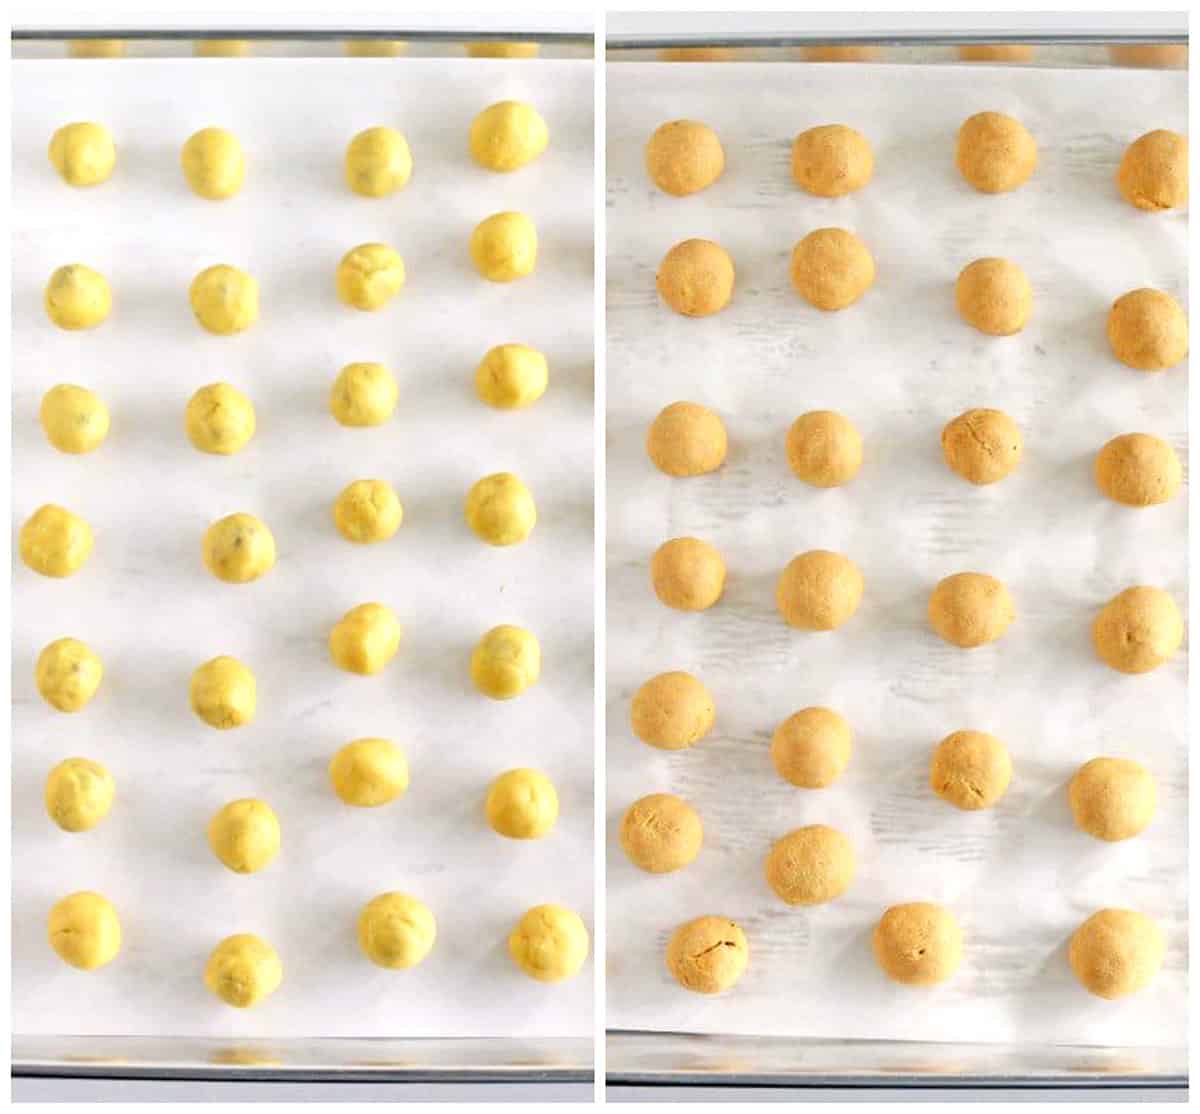
Place the balls onto a parchment-lined or greased baking sheet. Keep making and filling dough balls until all the dough is used.
Bake the balls in the preheated oven for 20 -25 minutes or until light golden brown. The frozen filling will leak a little, but that’s ok.
Remove them from the oven and let them cool completely before applying the coating.
How to Coat and Assemble Hedgehog Cookies
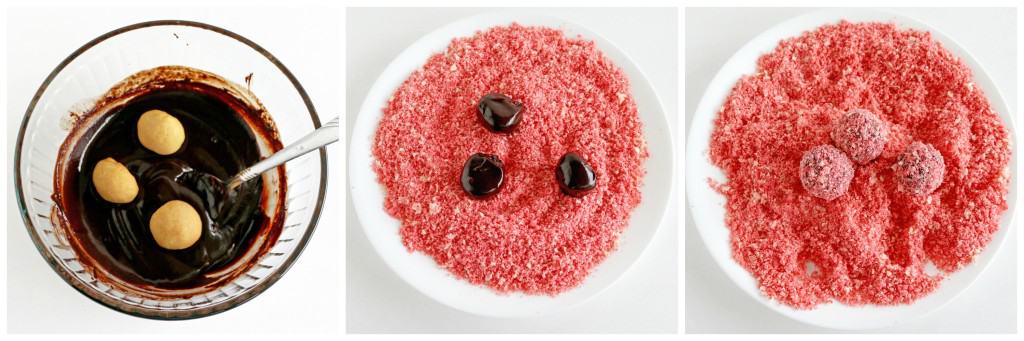
While the dough balls are baking, we can prepare the chocolate coating. I use chocolate ganache; I’ve found that a melted chocolate bar holds the dough together better than a glaze made with powdered cocoa.
Let the chocolate ganache cool until it’s warm but not hot, then dip one ball in at a time. Place the dipped balls on the plates with wafer crumbs.
Coat them carefully and thoroughly, making sure the chocolate doesn’t stay behind on the crumbs. Keep dipping and coating the balls until you’ve used them all.
Spread out all the coated and crumbed hedgehog cookies on a wire rack to let them dry and set completely. You can save excess coating and remaining melted chocolate ganache for cakes or other desserts.
These adorable and delicious hedgehog cookies are now ready to be served!
Tips for Making the Best Hedgehog Cookies Ever
Use fresh ingredients: This is especially important for wafers. If your wafers are stale it will ruin the taste of these cookies. Give one a bite to make sure they’re fresh!
Make consistent balls: When forming your dough balls, be sure to make them the same size and shape. This will give you uniform balls when they’re done baking.
Mix the dough properly: Make sure you mash the egg yolks as much as you can and mix the dough properly. It should be very smooth when it’s done.
Recipe Variation Ideas for Hedgehog Cookies
- Make them sweeter: For an added touch of sweetness, try adding 1/4 cup of honey or maple to the margarine mixture. You can also add some chopped nuts, or dried fruit to the filling.
- Spice them up: If you want to spice things up, add a pinch of ground cinnamon and nutmeg to the filling. Or, you can add some almond extract or orange zest to the dough.
- Change the filling: Replace the frozen cherries with your favorite filling. Other fruits work well or try adding some chopped nuts for a delightful crunch.
- Add nuts to coating: You can even add some ground pecans or any other ground nuts to the crushed wafer coating for a nutty flavor! Plus, you can also dust some confectioners’ sugar on top or some chocolate sprinkles before serving!
How to Store Leftover Hedgehog Cookies
Leftover hedgehog cookies can be stored in an airtight container for up to 5 days. To keep them from drying out, make sure that the container is lined with a paper towel or parchment paper, or alternatively you can cover it with plastic wrap.
Considering you can store them for this long, they’re great to make ahead for a holiday party where you have any other things you need to make that very day.
Plus, you can also freeze the cookies instead. Place the cookies in a single layer on a baking sheet and put them in the freezer for 1 hour, then transfer them to an airtight container or zip-lock bag. They will keep in the freezer for up to 3 months. Coat them in chocolate and wafers after thawing.
Similar Recipes You’ll Love
- Super Easy Easter Egg Oreo Truffles (Kid-Friendly Recipe)
- Kartoshka Chocolate Cake Truffles (Potato Pirozhnoye)
- Easiest Cream Puffs (Simple Recipe for Classic Flavors!)
- Cream Cheese Puff Pastries (Video)
- Easiest Cream Puffs (Simple Recipe for Classic Flavors!)
See all Easter recipes.

The Perfect Hedgehog Cookies Ezhiki (Great for Easter!)
Ingredients
For the Dough:
- 5 large – egg yolks
- ½ cup – sour cream
- 4 oz. – butter
- 1 tsp. – baking soda
- 2 tsp. – vinegar
- 2 cups – all-purpose flour
For the Filling:
- I like to use home frozen cherries. You may use anything you like; chocolate chips, raisins, cranberries, blueberries, frozen or dried fruit, etc.
For the Chocolate Dipping:
- I use the chocolate ganache recipe
For the Wafer Coating:
- 1 pack – colorful circular wafers (available at any European Stores)
- ½ pack – strawberry flavored wafers
- ½ pack – vanilla flavored wafers
- ½ pack – lemon or orange flavored wafers
- 4 – gallon size – Ziploc bags
Instructions
How to Prepare the Coating
- Start by hard-boiling 5 large eggs. While they’re cooking, we’ll prepare the wafers for coating.
Put the following flavor and color combinations on separate large plates:
- 1 ½ white round wafers, 1 pink round wafer, and ⅓ pack strawberry-flavored wafers.
- 1 ½ white round wafers, 1 orange round wafer, and ⅓ pack vanilla-flavored wafers.
- 1 ½ white round wafers, 1 green round wafer, and ⅓ pack lemon or orange-flavored wafers.
- 1 ½ white round wafers, 1 blue round wafer, and ⅓ pack lemon or orange-flavored wafers.
- Next, place the white and strawberry wafers in a gallon-size Ziploc bag. Using a dough roller, finely crush the wafers and shake the bags to mix them well. You can alternatively use a food processor as well to crush them.
- When they’re well mixed, transfer the crushed wafers back to the plate.
- Repeat the same process with each plate of wafers, using a new Ziploc bag each time to avoid mixing colors.
How to Make Hedgehog Cookie Dough
- First, remove the yolks from the hard-boiled eggs. Put them in a large mixing bowl and beat them with a paddle attachment.
- Use a spoon to mash the yolk crumbs as much as possible. You won’t be able to get a perfectly smooth texture, but keep mashing until there are only tiny crumbs left.
- Add sour cream and keep mixing and mashing the yolks with sour cream until smooth. (This is where you’ll be able to break down most of the yolk crumbs best. I first use a spoon, then a hard rubber spatula.)
- Next, put the bowl back under the stand mixer and attach the paddle. Add the softened butter and beat on high for 1 minute.
- Scrape down the dough off the sides of the bowl with a spatula, and beat again for a minute.
- Mix the baking soda and vinegar in a separate bowl, then add the mixture to the butter. Beat for 30 more seconds or until it’s well combined.
- Continue beating while adding flour gradually, around ½ cup at a time, until the dough is formed.
- It should be smooth and soft and not stick to the sides of the bowl.
How to Shape and Bake Hedgehog Cookie Dough
- Preheat your oven to 350 ℉, then transfer the dough onto a working surface and knead it into a large ball.
- Shape dough to form bite-size balls from the large one, about ½ inch in diameter, and flatten them down. You can also use a small cookie scoop to scoop cookie dough.
- Place the filling in the center, seal them, then shape them back into balls.
- Place the balls onto a parchment-lined or greased baking sheet. Keep making and filling dough balls until all the dough is used.
- Bake the balls in the preheated oven for 20 -25 minutes or until light golden brown. The frozen filling will leak a little, but that’s ok.
- Remove them from the oven and let them cool completely before applying the coating.
How to Coat and Assemble Hedgehog Cookies
- While the dough balls are baking, we can prepare the chocolate coating. I use chocolate ganache; I've found that a melted chocolate bar holds the dough together better than a glaze made with powdered cocoa.
- Let the chocolate ganache cool until it’s warm but not hot, then dip one ball in at a time. Place the dipped balls on the plates with wafer crumbs.
- Coat them carefully and thoroughly, making sure the chocolate doesn’t stay behind on the crumbs. Keep dipping and coating the balls until you’ve used them all.
- Spread out all the coated and crumbed hedgehog cookies on a wire rack to let them dry and set completely. You can save excess coating and remaining melted chocolate ganache for cakes or other desserts.
Thank you for following me on Instagram, Facebook, and Pinterest!
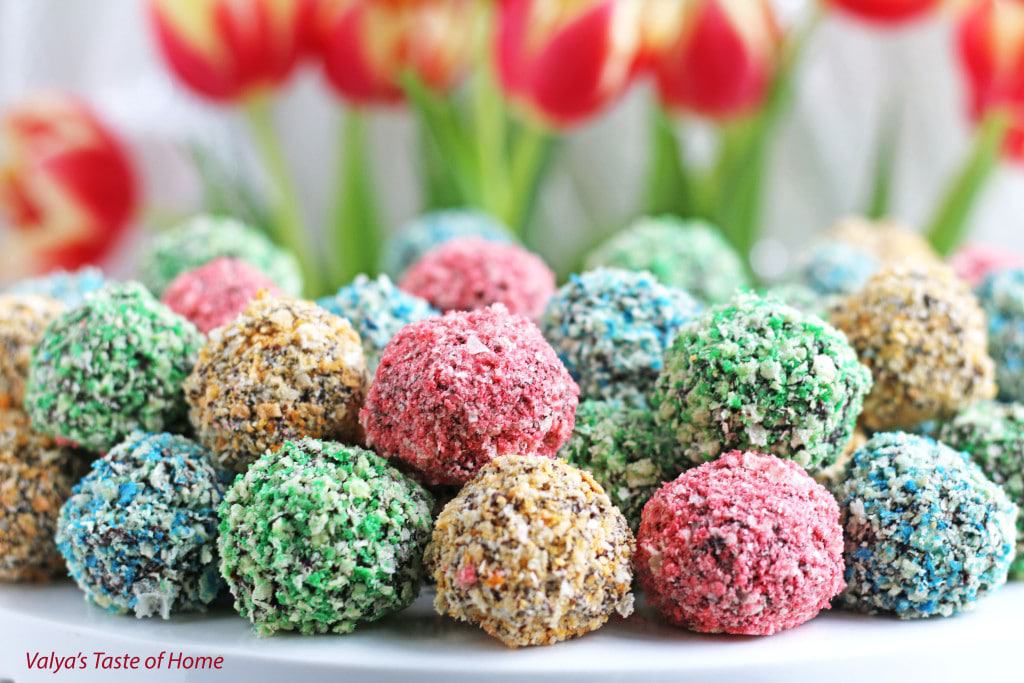
This recipe was originally posted on March 15, 2016 (original picture below), and updated for a better user experience. The post may contain affiliate links. Read my disclosure.


Could they be rolled in crushed peppermints? Do you think they’d be just as good this way? Thanks
Hi Carrie! As long as the chocolate ganache is not warm but rather on the cooler side so the candy do not melt I think it’s an amazing idea! I think that it will work using Christmas sprinkles as well. Enjoy!
I want to try this recipe but had a question if I can use butter instead of margarine?
You can give it a try using butter and see how it turns out for you. If remember correctly, I tried using butter before and the balls crumble after they are baked. This recipe was passed on to me 20 years ago using margarine (when we didn’t know that margarine isn’t as healthy as butter, lol).
What do you do with all the egg whites? And, can you substitute butter for the margarine?
I use egg whites for salads. Yes, that’s fine.
Hi Valya,
Can these be frozen? When is the best time to freeze them? Before coating them with wafer or after?
I never froze them before. I think the wafer will be very soft and may fall off after thawing. I would freeze it before coating with chocolate ganache and wafer.
I just made them for Easter!! Thank you so much for this idea and recipe! I use to eat them when I was young! Haven’t had them in years! They taste like childhood! Soooo yummy! Thank you! ❤️❤️❤️
You are very welcome!!! Thank you for sharing your experience with me! ?
I’m sorry but this are just too cute to eat!
I know. I feel like that sometimes too. They are definitely attractive. 🙂
Wooow! These look amazing! I will definitely try them out… Thank you for the recipe! 🙂
Thank you 🙂
How to store them if making in advance?
Thanx
I store them in a plastic container with a lid just a little open in the pantry or kitchen cabinet for up to 5-7 days.
WOW! These look AMAZING!!
Thank you very much 🙂
They look so pretty… ?
Thank you very much, they are just as good as they look 🙂