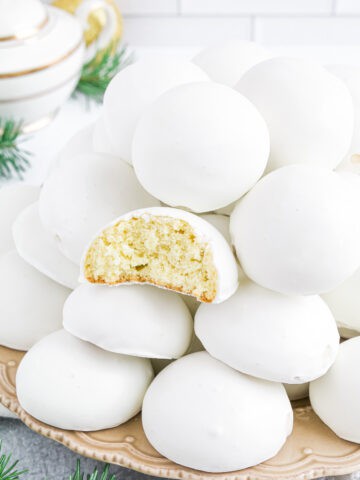
Snowflake cookies with royal icing are a delicious mix of sweet, buttery goodness, and a crisp texture, all topped with a layer of glossy royal icing. The homemade sugar cookie dough brings a depth of flavor that makes these cookies a crowd favorite.

What’s best about this recipe is its attention to detail. It begins with rolling out the dough, cutting out the snowflakes, and baking them to golden perfection. The end result is a batch of cookies that not only taste amazing but also fill your home with a sweet, comforting aroma.
The star of this recipe is the homemade sugar cookie dough that provides a rich buttery base that sets the stage for the royal icing. Plus, you can make festive shapes by using a snowflake cookie cutter. So why wait? Give this recipe a try and bring some edible snowflakes to your next holiday gathering.
Want to learn how to make these snowflake cookies with a royal icing recipe? Then keep on reading.
Table of Contents
- What is Snowflake Cookies With Royal Icing?
- What Makes These Snowflake Cookies With Royal Icing Recipe Special?
- What You Need to Make Snowflake Cookies With Royal Icing at Home
- How to Make Snowflake Cookies With Royal Icing
- Tips for Making the Best Snowflake Cookies With Royal Icing
- Serving Suggestions
- Recipe Variation Ideas
- Frequently Asked Questions
- How to Store Leftover Snowflake Cookies With Royal Icing
- Similar Recipes You'll Love
- Recipe Card
- Snowflake Cookies with Royal Icing (Easy Christmas Cookies)
- Comments
What is Snowflake Cookies With Royal Icing?
Snowflake cookies with royal icing are a delicious treat that brings the magic of winter right into your kitchen. This recipe involves making delicious sugar cookies cut into snowflake shapes using a snowflake cookie cutter, then decorating them with royal icing to mimic the intricate beauty of snowflakes.
These cookies are perfect for Christmas when you’re looking to get the winter feel at home. They not only look great but taste great too! The homemade sugar cookie dough is what makes all the difference and the best part is you can easily make and freeze the dough for whenever you need it.
Making snowflake cookies with royal icing at home is a fun activity that can involve the entire family. It is a great way to spend time together during the holiday season, and the result is a plateful of beautiful, delicious cookies that everyone will love.

What Makes These Snowflake Cookies With Royal Icing Recipe Special?
- Easy to make: These snowflake cookies use simple ingredients and straightforward instructions. With my homemade sugar cookie dough and an easy-to-follow royal icing recipe, you'll have these cookies ready in no time.
- Family-favorite: The delicious flavoring of almond extract in the royal icing and the sweet, buttery sugar cookie dough makes these cookies a hit with both kids and adults.
- Versatile: Although this cookie recipe is for snowflakes, you can use any cookie cutters you have on hand to create a variety of shapes. This makes it a versatile recipe that can be used for any occasion.
- Delicious: The combination of the sweet sugar cookie dough and the glossy royal icing is simply irresistible. These cookies are sure to satisfy any sweet tooth.
- Crowd pleaser: Whether you're baking for a Christmas party or just a cozy night in, these snowflake cookies are sure to please. With their beautiful decoration and delightful taste, they'll be the star of any cookie tray. They’re the perfect Christmas cookies!
What You Need to Make Snowflake Cookies With Royal Icing at Home
All you need are some simple pantry staple ingredients to make these snowflake cookies with a royal icing recipe at home. Let's look at them in more detail:
- Sugar Cookie Dough: This is the base of our snowflake cookies. We'll be using my homemade sugar cookie dough for this recipe. It is important to cover it with plastic wrap and chill it for one hour to guarantee the best cut-out results.
For the Royal Icing:
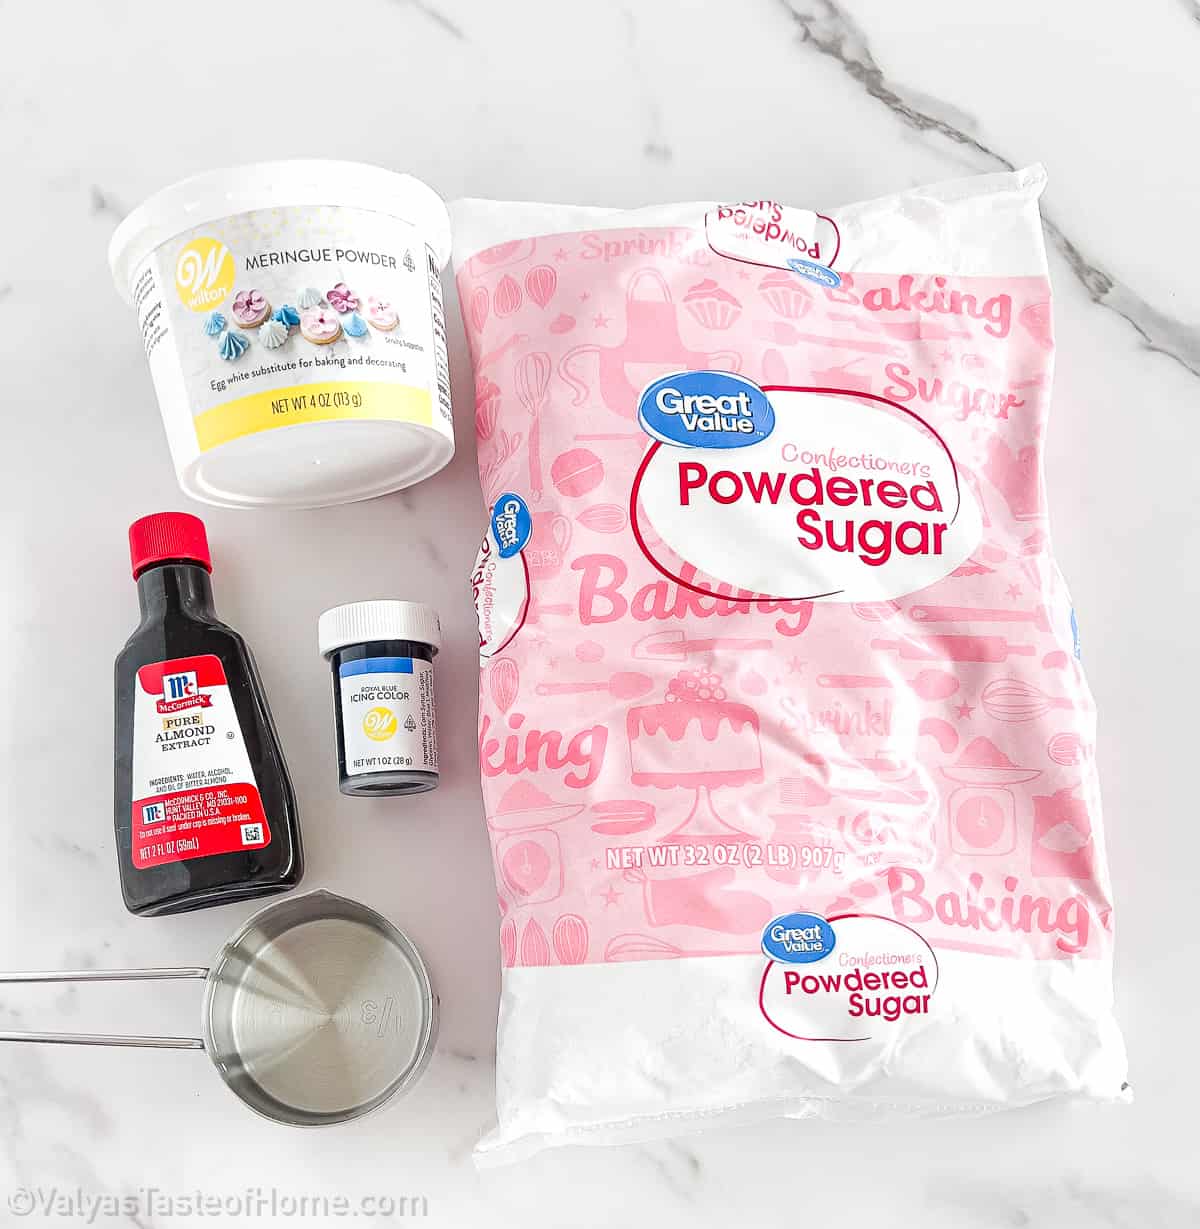
- Powdered Sugar: This ingredient is a key component of our royal icing. It provides the sweetness and also helps to create the perfect consistency for decorating.
- Meringue Powder: This is a secret weapon for making royal icing. It helps the icing harden, which is essential for intricate cookie decorating.
- Room Temperature Water: It is used to mix with the meringue powder and powdered sugar to form the royal icing. Make sure it is at room temperature to ensure a smooth, lump-free icing.
- Almond Extract: This gives a subtle, sweet flavor to the royal icing. It enhances the overall taste of the cookies without overpowering the other ingredients.
- Gel Food Coloring (optional): This is used to add color to your royal icing. You can choose any color you like, but remember, it is optional. Without it, your icing will be a classic white.
How to Make Snowflake Cookies With Royal Icing
Making these incredible snowflake cookies with royal icing is easier than you think. Here's how to make them at home step by step:
How to Shape and Bake the Cookies
The first step in our snowflake cookie recipe is to divide the sugar cookie dough into two equal parts. This makes it easier to handle and roll out.
Once divided, place each dough portion onto a lightly floured silicone baking mat or a clean, lightly floured surface. Using a rolling pin, also lightly dusted with flour to prevent sticking, roll out your dough to about a ¼-inch thickness.
If your dough seems too sticky, feel free to add a bit more flour, but be careful not to overdo it – you don't want your cookies to turn out dry.
Next, grab your snowflake cookie cutter and cut out your cookies from the rolled-out dough. If you don't have a snowflake cookie cutter, any other festive shape will do.
Don't waste the remaining dough – gather it up, re-roll, and continue cutting out cookies until all the dough is used. Repeat this process with the second piece of dough.
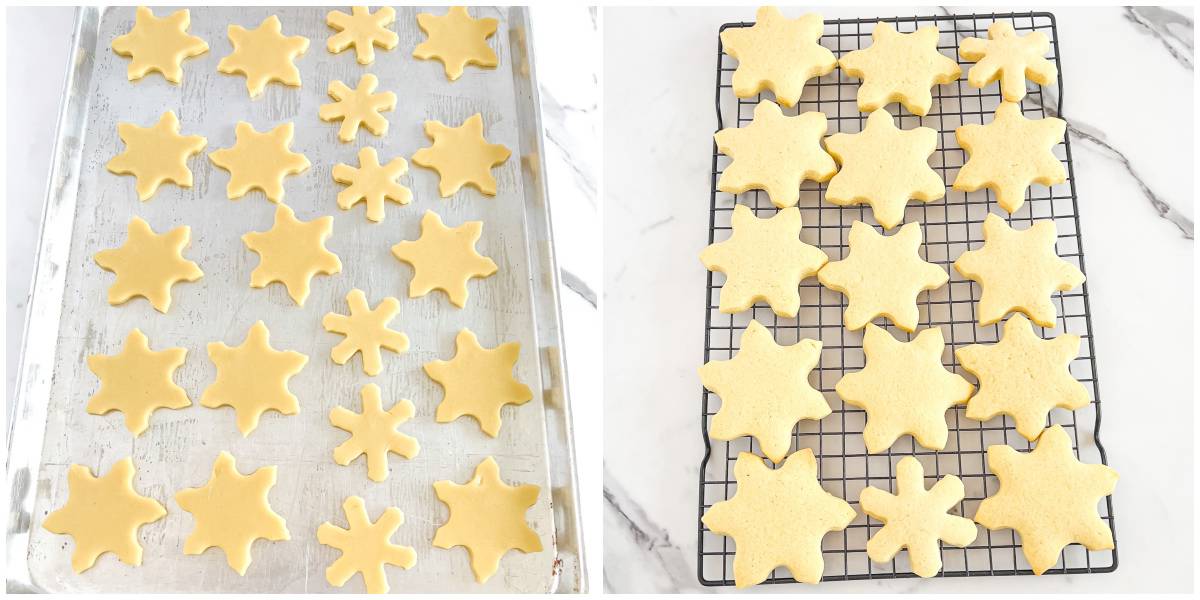
Now it is time to bake! Arrange your cut-out cookies on a prepared baking sheet, leaving about 2-3 inches of space between each cookie to allow for spreading. Pop them in the oven and bake for 8 minutes at 375 F or until you see a light golden brown color around the edges.
Once baked, allow the cookies to cool on the baking sheet for about 5 minutes. After this, transfer them to a wire rack to cool completely. It is crucial that your cookies are fully cooled before you start decorating, or the royal icing will melt.
How to Prepare the Royal Icing
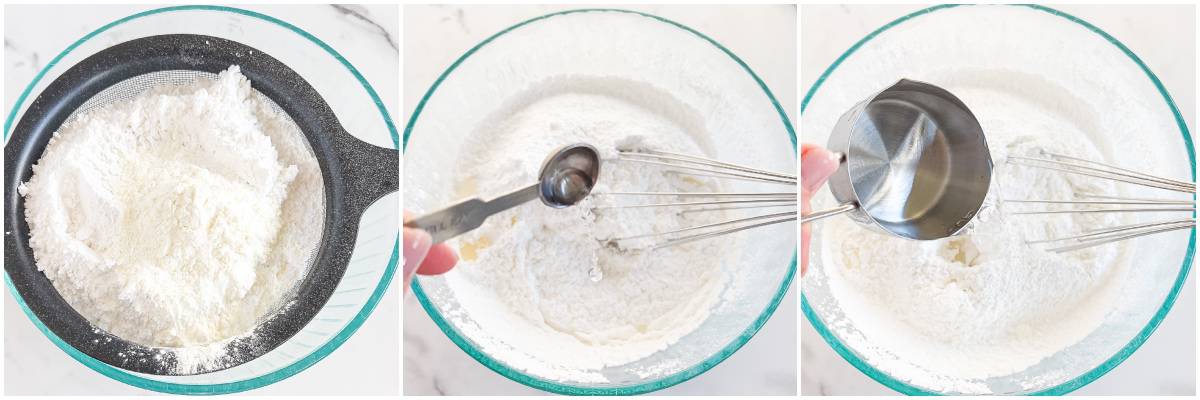
While your cookies are cooling, you can start making the royal icing. First, sift your powdered sugar (also called confectioners' sugar) and meringue powder into the bowl of a stand mixer. The sifting helps to eliminate any lumps, guaranteeing a smooth icing.
With the mixer running at low speed, slowly add warm water, almond extract, and food coloring gel if you choose to use it. Mix these ingredients until they're well combined, which should take about a minute.
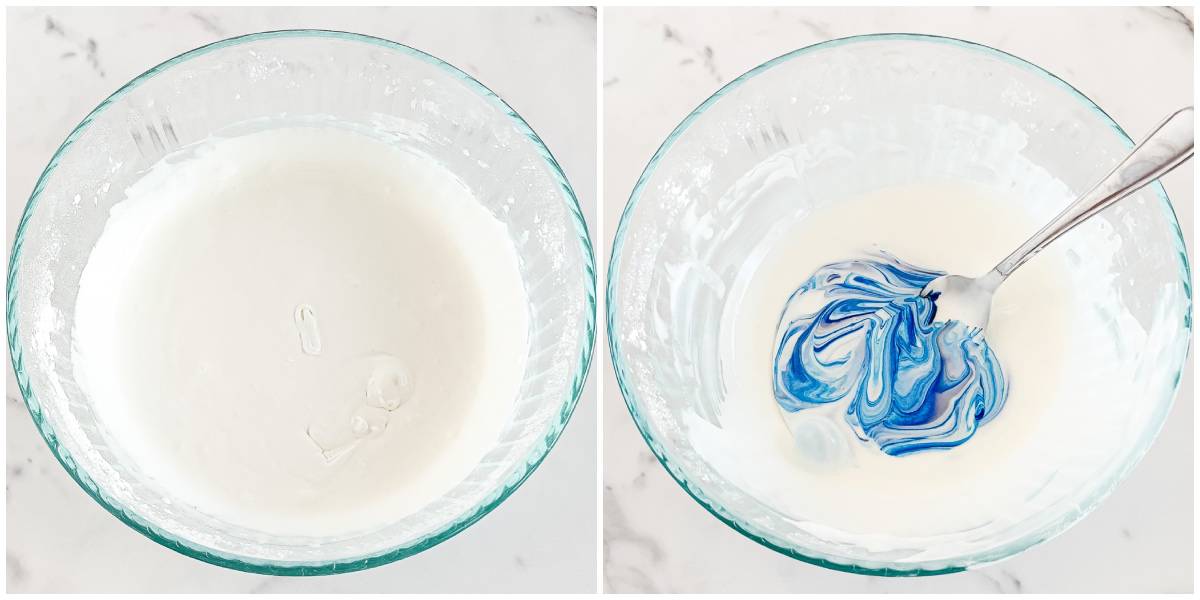
Then, increase the mixer speed to medium and beat until the icing becomes stiff. This process takes about 3-4 minutes. The longer you beat the royal icing, the thicker it will become – just make sure not to overbeat, or it might become too hard to pipe (you can add water to thin out the icing too).
Add and mix in the food coloring if desired.
You can store this icing at room temperature in an airtight container for up to 3 days.
How to Decorate the Cookies
Once your cookies are cooled and your royal icing is ready, it is time to decorate! Fill a piping bag or icing bottle with your icing and apply it onto the cookies in a thin layer.
The icing should dry completely in about 2 hours at room temperature. If your icing consistency is too thin and runny, it might take longer to dry.
For an extra festive touch, you can add edible beads or pearls onto the icing before it dries. Just be sure to work quickly – once the icing dries, anything you try to add will not stick.
And there you have it! Your beautiful, homemade snowflake cookies with royal icing are ready to be enjoyed.

Tips for Making the Best Snowflake Cookies With Royal Icing
- Chill the Dough: For the best results, cover the sugar cookie dough with plastic wrap and chill in the refrigerator for at least an hour. This will make the dough easier to handle and cut into shapes.
- Roll the Dough Evenly: Use a lightly floured rolling pin to roll out the dough to a consistent thickness of about ¼-inch. This will help guarantee that the cookies bake evenly and have a uniform appearance.
- Flour as Needed: If the dough becomes too sticky while rolling, don't hesitate to sprinkle a little more flour. This will make it easier to handle and prevent it from sticking to your work surface or rolling pin.
- Don't Overcrowd the Baking Sheet: When arranging the cookies on the baking sheet, keep them 2 - 3 inches apart. This will allow them to spread out as they bake and prevent them from sticking together.
- Allow Cookies to Cool Completely: After baking, let the cookies cool on the baking sheet for 5 minutes. Then, transfer them to a wire rack to cool completely before decorating. This will prevent the royal icing from melting when applied.
- Beat the Royal Icing: When making the royal icing, be sure to beat it until it becomes stiff. This will give it a thick consistency that's perfect for decorating. The longer you beat it, the thicker it becomes.
- Work with the Right Icing Consistency: If the icing is too thin and runny, it will take longer to dry. So, if you're in a hurry, you might want to thicken it up a bit. Just remember, the thicker the icing, the more difficult it can be to pipe.
Serving Suggestions
- For a festive breakfast, serve your snowflake cookies with a hot cup of cocoa. The sweetness of the cookie pairs perfectly with the rich chocolate flavor, starting your day on a cozy, merry note!
- Planning a Christmas dinner? Place a snowflake cookie at each place setting as a delightful edible decoration. Your guests will appreciate the sweet, thoughtful touch.
- If you're hosting a winter-themed party, serve these snowflake cookies alongside other wintery treats like peppermint bark or gingerbread cookies. The variety of flavors and shapes will make for a visually appealing and tasty dessert table.
- Snowflake cookies with royal icing also make a great gift. Package them in a festive tin or wrap them in cellophane with a pretty ribbon and they're ready to be gifted to teachers, neighbors, or anyone else on your holiday list.
- For an afternoon tea during the chilly season, serve these snowflake cookies with your favorite types of tea. Whether it is a robust English Breakfast or a delicate herbal blend, these cookies are a sweet addition.
- Snowflake cookies can also be a fun activity for a kids' holiday party. Bake the cookies ahead of time, then set up a decorating station with royal icing, sprinkles, and other fun toppings. The kids will love decorating their own cookies!
- Looking for a late-night holiday treat? Enjoy a snowflake cookie with a glass of eggnog. The rich, creamy flavor of the eggnog compliments the sweet, crisp cookie perfectly.
Recipe Variation Ideas
This delicious snowflake sugar cookies recipe is absolutely perfect as is, but if you're looking to change things up, here are a few variation ideas you can try:
- Gingerbread: For a festive spin on this classic snowflake cookie recipe, swap out the sugar cookie dough for gingerbread cookie dough. The rich, spiced flavor of gingerbread cookies adds a warm, comforting touch that's perfect for the holiday season.
- Vanilla Twist: If you're a fan of classic vanilla flavor, this variation is for you. Add one teaspoon of vanilla extract to the royal icing mixture. The vanilla flavor will give a delightful twist to the traditional royal icing and enhance the overall taste of your snowflake cookies.
- Add Some Nuts: For a crunchy twist, add finely chopped nuts into your cookie dough. Whether you prefer almonds, walnuts, or pecans, this addition will give your cookies an unexpected crunch and a touch of healthy fats. Just be sure to chop the nuts very finely so they don't interfere with your snowflake cookie cutter.
- Colorful Snowflakes: To make your snowflake cookies stand out, add a few drops of food coloring to your royal icing. Whether you choose a traditional holiday color like red or green, or something more whimsical like purple or blue, colored icing will make your cookies pop. Remember to add the food coloring slowly until you reach your desired hue.
- Sparkling Snowflakes: For a dazzling finish, sprinkle some edible glitter or sugar crystals on your cookies right after you've applied the icing. This will give your snowflake cookies a beautiful, sparkling effect that looks like fresh snow on a sunny day.
- Chocolate Dipped: If you're a chocolate lover, try dipping half of each baked and cooled snowflake cookie into melted chocolate. The combination of the sweet cookie and the rich chocolate is a match made in heaven. Just remember to let the chocolate set before serving.

Frequently Asked Questions
Absolutely! While homemade dough offers you control over the ingredients and flavor, store-bought sugar cookie dough is a great time-saving alternative. Just make sure to chill it before rolling and cutting to get the best cut-out results.
To prevent cookies from spreading, make sure your dough is chilled thoroughly before cutting out your shapes. Also, avoid placing your prepared baking sheets on a hot oven rack. Always use a cool baking sheet.
Meringue powder is used in royal icing as it helps the icing harden when it dries. It's made from dried egg whites, sugar, and edible gums, making it a crucial ingredient for decorating cookies.
Yes, you certainly can. The recipe uses almond extract, but you can use vanilla, lemon, or any other flavoring you prefer. Just make sure to keep the quantity the same to maintain the icing consistency.
Royal icing usually dries in about 2 hours at room temperature. However, if the icing consistency is too thin and runny, it might take longer.
Absolutely! While this recipe uses a snowflake cookie cutter, you can use any cookie cutter shape you like. Just remember to adjust the bake time if your shapes are significantly larger or smaller than a snowflake.
How to Store Leftover Snowflake Cookies With Royal Icing
Snowflake cookies with royal icing are quite easy to store. Place them in an airtight container with parchment paper between each layer to prevent the cookies from sticking to each other. Store the container in the fridge. This method will keep your cookies fresh for up to a week.
Unfortunately, these snowflake cookies do not freeze well. The royal icing tends to crack and become grainy once frozen and thawed, which can affect the texture and appearance of your cookies.
However, you can freeze the sugar cookie dough before baking. Wrap the dough tightly in plastic wrap and then place it in a zip-top bag. It can be stored in the freezer for up to three months.
When you're ready to bake, let it thaw in the fridge overnight, then proceed with the recipe instructions.

Similar Recipes You'll Love
- The Best Christmas Tree Sugar Cookies (Easy Festive Recipe)
- Easy Oreo Truffles (Festive Peppermint Oreo Cookie Balls!)
- Easy Cranberry Pistachio Biscotti (Festive Holiday Cookies!)
- Easy Cheesecake Cranberry Bars (Perfect for the Holidays!)
See all the cookie recipes.
Recipe Card
Snowflake Cookies with Royal Icing (Easy Christmas Cookies)
Ingredients
For the Sugar Cookie Dough
- I've used my favorite homemade sugar cookie dough recipe
For the Royal Icing
- 1 lb. - powdered sugar
- 3 tbsp. - meringue powder
- ⅓ cup – room temperature water
- ½ tsp. - almond extract
- Gel food coloring (optional)
Instructions
How to Shape and Bake the Cookies
- The first step in our snowflake cookie recipe is to divide the sugar cookie dough into two equal parts. This makes it easier to handle and roll out.
- Once divided, place each dough portion onto a lightly floured silicone baking mat or a clean, lightly floured surface. Using a rolling pin, also lightly dusted with flour to prevent sticking, roll out your dough to about a ¼-inch thickness.
- If your dough seems too sticky, feel free to add a bit more flour, but be careful not to overdo it – you don't want your cookies to turn out dry.
- Next, grab your snowflake cookie cutter and cut out your cookies from the rolled-out dough. If you don't have a snowflake cookie cutter, any other festive shape will do.
- Don't waste the remaining dough – gather it up, re-roll, and continue cutting out cookies until all the dough is used. Repeat this process with the second piece of dough.
- Now it is time to bake! Arrange your cut-out cookies on a prepared baking sheet, leaving about 2-3 inches of space between each cookie to allow for spreading. Pop them in the oven and bake for 8 minutes at 375 F or until you see a light golden brown color around the edges.
- Once baked, allow the cookies to cool on the baking sheet for about 5 minutes. After this, transfer them to a wire rack to cool completely. It is crucial that your cookies are fully cooled before you start decorating, or the royal icing will melt.
How to Prepare the Royal Icing
- While your cookies are cooling, you can start making the royal icing. First, sift your powdered sugar and meringue powder into the bowl of a stand mixer. The sifting helps to eliminate any lumps, guaranteeing a smooth icing.
- With the mixer running at low speed, slowly add warm water, almond extract, and food coloring gel if you choose to use it. Mix these ingredients until they're well combined, which should take about a minute.
- Then, increase the mixer speed to medium and beat until the icing becomes stiff. This process takes about 3-4 minutes. The longer you beat the royal icing, the thicker it will become – just make sure not to overbeat, or it might become too hard to pipe. You can store this icing at room temperature in an airtight container for up to 3 days.
How to Decorate the Cookies
- Once your cookies are cooled and your royal icing is ready, it is time to decorate! Fill a piping bag or icing bottle with your icing and apply it onto the cookies in a thin layer.
- The icing should dry completely in about 2 hours at room temperature. If your icing consistency is too thin and runny, it might take longer to dry.
- For an extra festive touch, you can add edible beads or pearls onto the icing before it dries. Just be sure to work quickly – once the icing dries, anything you try to add will not stick.
- And there you have it! Your beautiful, homemade snowflake cookies with royal icing are ready to be enjoyed.
Thank you for following me on Instagram, Facebook, and Pinterest!
The post may contain affiliate links. Read my disclosure.







Comments
No Comments