Canned Pickles Recipe (Easy Step-by-Step Guide)
Canned pickles are one of the easiest and most rewarding canning projects you can make at home. With just a few simple ingredients, you can transform fresh cucumbers into crunchy, tangy pickles that stay shelf-stable for months.

I learned how to can vegetables and fruits by watching my mom and grandma canning all sorts of fruits and vegetables as a kid in Ukraine. But this special recipe was handed down to me by my mom and I’ve been making this for years now.
While store-bought pickles are convenient, making your own homemade pickles is a fun and rewarding way to take your love for pickles to the next level. Not only is the taste of homemade pickles superior to store-bought ones, but you also have the flexibility to customize the recipe to suit your taste preferences.
The brine used in this recipe is made from simple ingredients such as water, vinegar, and salt. We’ll also add pickling spices that can be adjusted to your liking. Plus, making your own pickles is a great way to use up any excess cucumbers from your garden or local farmers market.
Once you’ve made your own homemade dill pickles, you’ll never want to go back to store-bought ones. These pickles are perfect for snacking on their own, or as a tangy and refreshing addition to sandwiches, salads, and burgers. They also make great gifts for friends and family who appreciate the taste of homemade food.
What are Dill Pickles?
Dill pickles are cucumbers that have been pickled in a brine solution using vinegar, water, salt, and various spices, including dill, garlic, and mustard seed. The term “dill pickle” refers to pickles that have been flavored with dill weed. This gives them a distinctively herbaceous and tangy flavor.
Dill pickles can be made using either fresh or pickling cucumbers, although pickling cucumbers are usually used as they have a thinner skin and firmer texture. The cucumbers are sliced or left whole before being placed in jars and covered with the brine solution.
Dill pickles are a popular snack food and can be enjoyed on their own or used in a variety of recipes, such as sandwiches, burgers, and salads. They are also great when served as a condiment alongside hot dogs and other barbequed meats.
Not only are they delicious, but dill pickles are also low in calories and a good source of vitamin K, which plays an important role in blood clotting and bone health.
Why You’ll Love This Recipe
This dill pickle recipe stands out from other recipes because of the unique combination of spices used in the brine. Adding fresh garlic, bay leaves, and peppercorns gives these pickles a more complex and flavorful taste than traditional dill pickles.
The pickles are also lightly spiced with red pepper flakes, which give them a mild heat that is sure to please even the pickiest palate. Plus, the use of white wine vinegar adds a subtle sweetness that complements the other flavors beautifully.
Unlike many other dill pickle recipes, this recipe requires no canning or special equipment such as a canning funnel or even a rack. All you need is some fresh cucumbers, basic pantry staples, and a few wide-mouth jars.
The pickles will be ready to enjoy in just three days. But they will become even tastier if left to sit for a week or two. My process for pickling them doesn’t over-process them which will keep these pickles crisp until you’re ready to have them
Homemade dill pickles are surprisingly easy to make, and the process requires only a few basic steps. With just a little bit of patience and a few basic ingredients, you can enjoy the delicious taste of homemade dill pickles all year round. Plus, they’re also healthier for you with less sodium
You can also check out my refrigerator pickles recipe for another great pickle recipe!
Key Ingredients
You only need a few pantry-staple ingredients to start making your own dill pickles at home. Here are all the ingredients you’ll need:
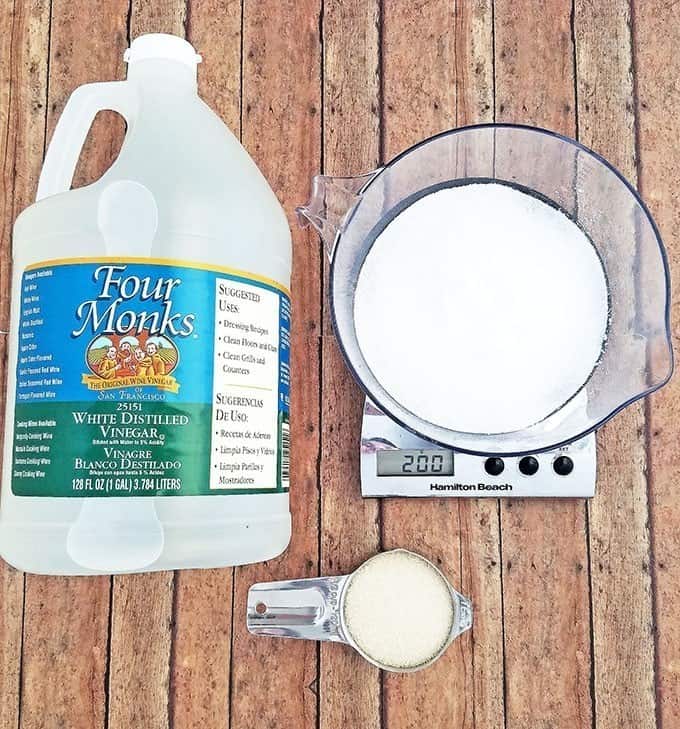
- Cold water: First we’ll need some purified or distilled water for our pickle brine. It’s best to use purified water. This is because tap water can contain chlorine, fluoride, and other chemicals that can affect the flavor and quality of the pickles.
- Sea salt (or Kosher salt): Next up, we’re going to use sea salt (or kosher salt). Salt enhances the flavor of the pickles by helping to balance out the tanginess of the vinegar and the herbaceousness of the dill weed.
- Organic sugar: We’ll also add some sugar to our dill pickle recipe to balance out the sourness of the vinegar and other acidic ingredients in the brine. Sugar helps create a more well-rounded flavor profile that is not overly tangy or sour.
- White distilled vinegar: White vinegar has a mild flavor and a high level of acidity, which helps to preserve the cucumbers and create a tangy flavor in our finished pickles.
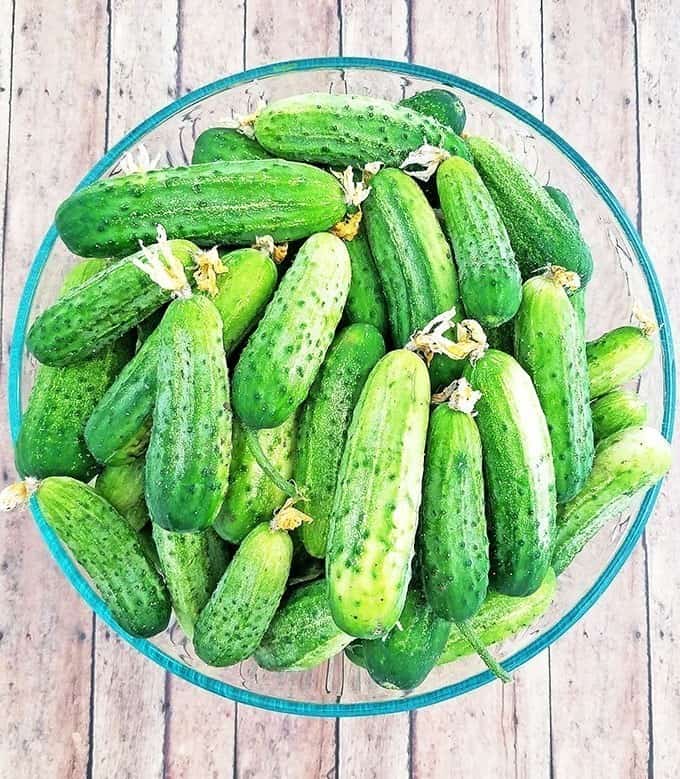
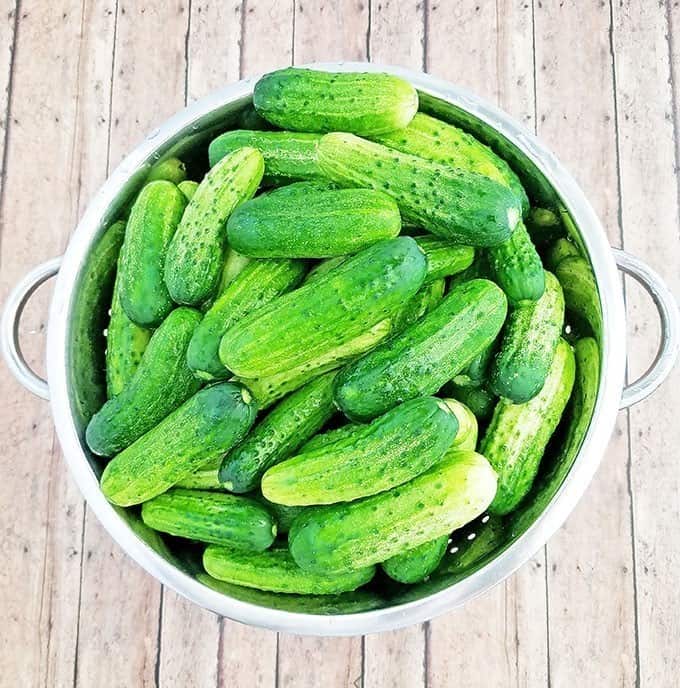
- Small pickling cucumbers: We’re going to use pickling garden cucumbers instead of regular cucumbers because they have a slightly different flavor profile. They are crisper, slightly tart, and slightly bitter, which will pair perfectly with the herbs we’ll be using.
Spices and Herbs for Dill Pickles
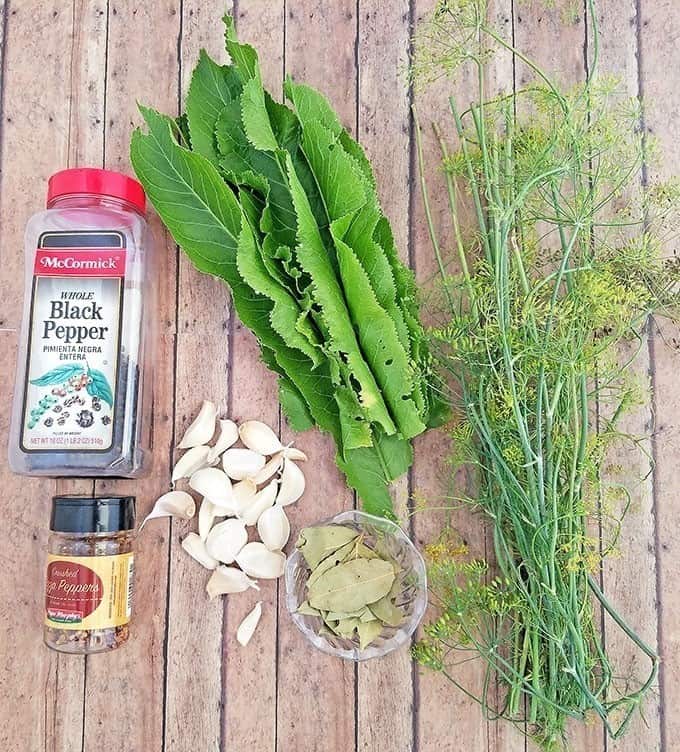
- Horseradish leaves: Horseradish leaves will add a unique and slightly spicy flavor to the pickles. They have a mild flavor and a slightly bitter, earthy taste.
- Fresh dill: They wouldn’t be dill pickles without the dill! This delicious herb has a slightly sweet, slightly tangy flavor with a hint of bitterness. It also has a fresh, grassy aroma that will infuse perfectly with our pickling cucumbers.
- Garlic: Next we’ll add some garlic for its pungent and savory flavor. Garlic has a strong and distinctive flavor that is slightly spicy, with a hint of sweetness and bitterness.
- Crushed red pepper flakes: We’re also going to add some crushed red pepper to our dill pickle recipe to give the pickles a spicy kick. They’ll add a pungent and slightly sweet heat to the pickles and pair great with the dill and garlic.
- Black peppercorn: Peppercorns have a complex and robust flavor that is both spicy and slightly sweet. They’re a really nice addition to the other herbs and spices in our dill pickle brine.
- Bay leaves: Lastly we’ll use some bay leaves to add a subtle, earthy flavor and aroma to our pickles.
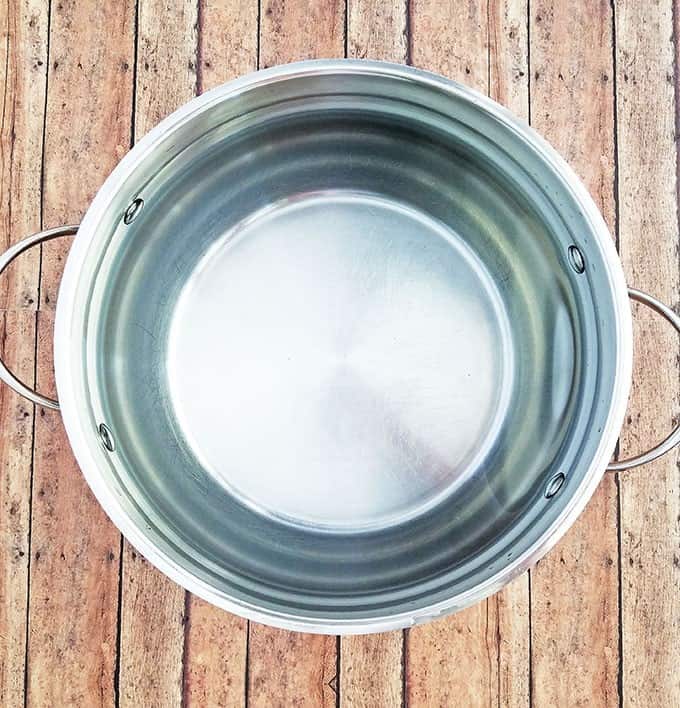
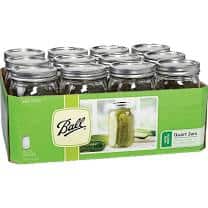
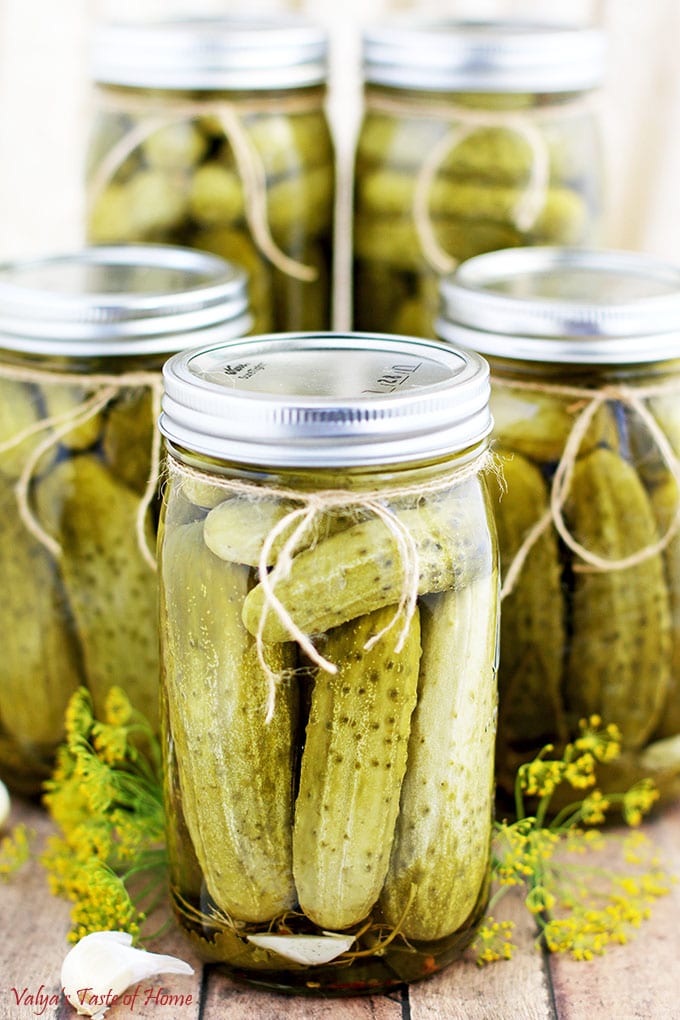
- 12 wide-mouth quart-size (2 pints or 1 liter) canning jars: We’ll need these wide-mouth canning jars for an airtight container to let our cucumbers pickle in.
How to Make Canned Pickles
Making this delicious Dill Pickles recipe is super easy and fun too! Here’s how to make it step by step:
How to Make Pickling Syrup
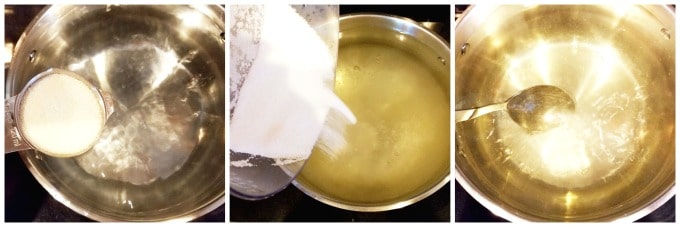
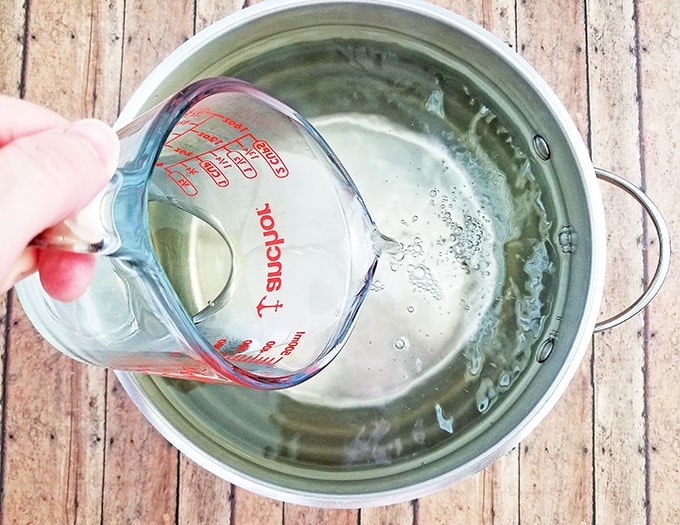
First, let’s make our pickling syrup. Combine the water, sugar, and salt in a large pot or saucepan, then bring it to a boil while stirring constantly until the sugar and salt completely dissolves.
As soon as it begins to boil, reduce the heat and continue to simmer for 5 minutes, then remove the pot from the stove and let the mixture cool.
How to Prepare Jars for Pickling
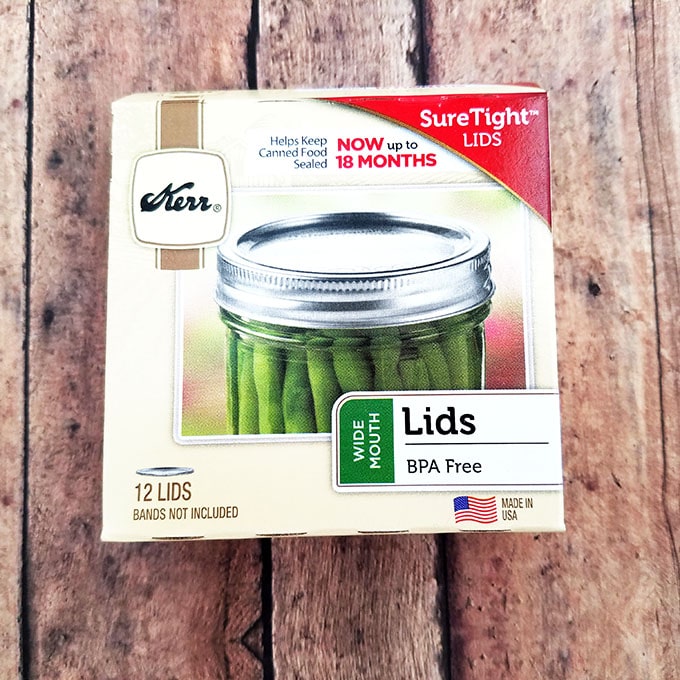
Next, let’s prepare our jars and lids. If you’re reusing old jars it would be a good idea to replace the lid as the wax seals can wear out over time. Also, ensure the ring must is rust-free, otherwise, it may not keep a tight seal.
Wash the jars and lids in hot water and allow them to dry completely.
How to Assemble Pickles
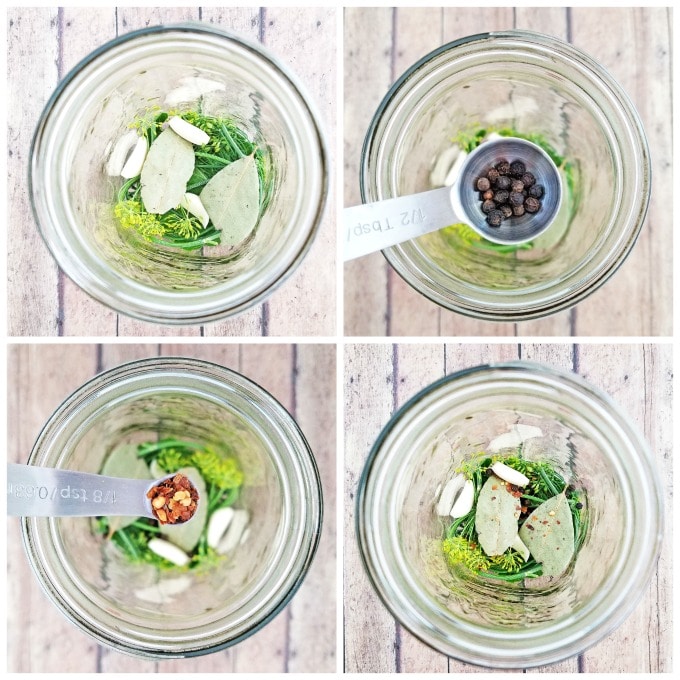
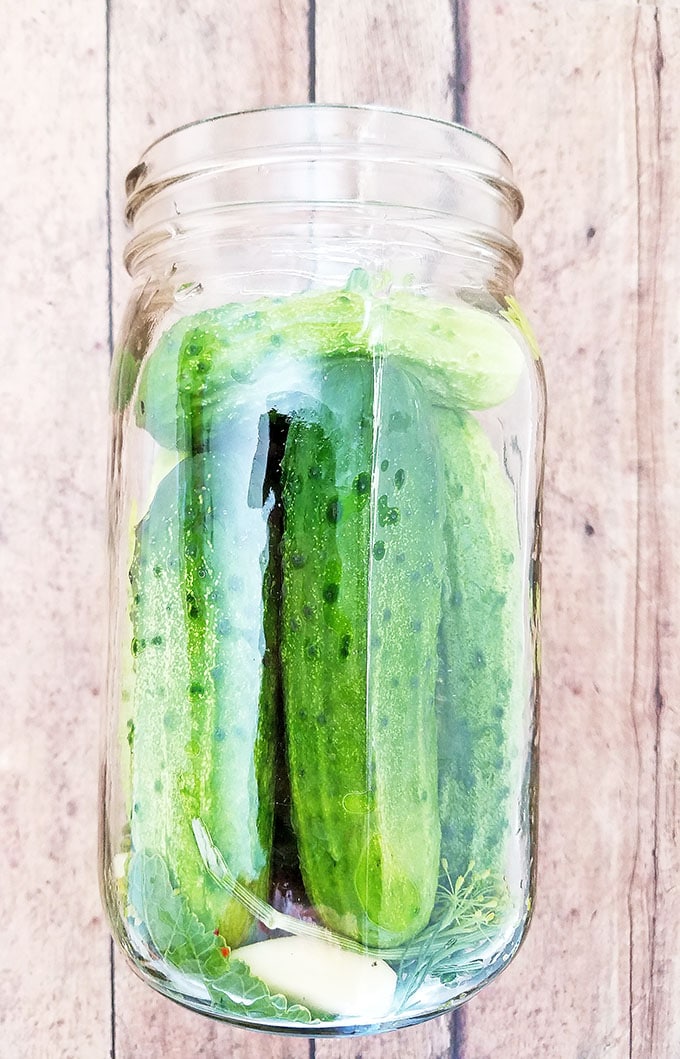
After your jars are dry, add a small piece of horseradish leaf, 1 small branch of fresh dill (including the blossom end), 2 bay leaves, 2-3 garlic cloves, 20 peppercorns, and 1/8th teaspoon of crushed red pepper flakes to each one.
Set your jars aside for a moment and thoroughly rinse the cucumbers, brushing them while rinsing to eliminate any dirt and grit if necessary.
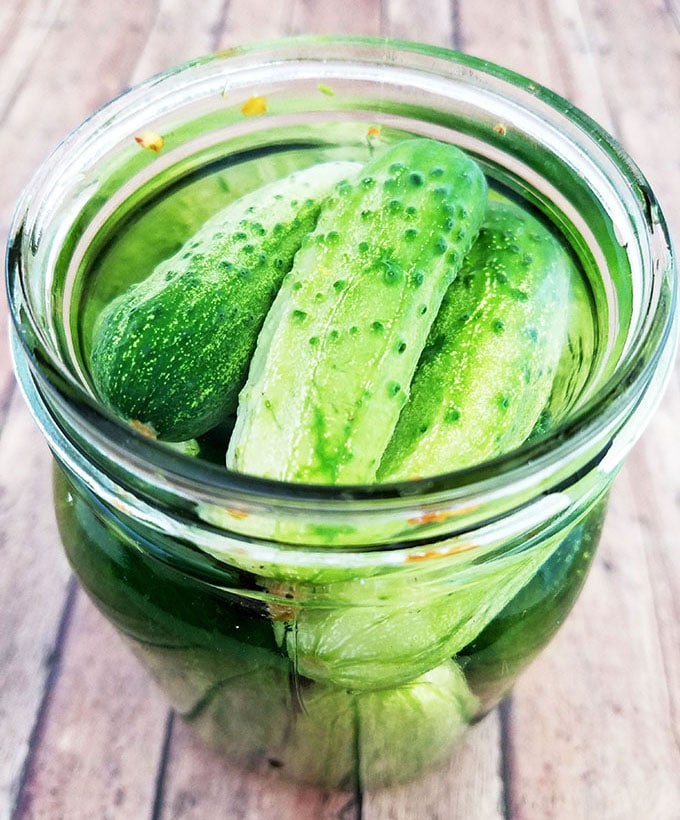
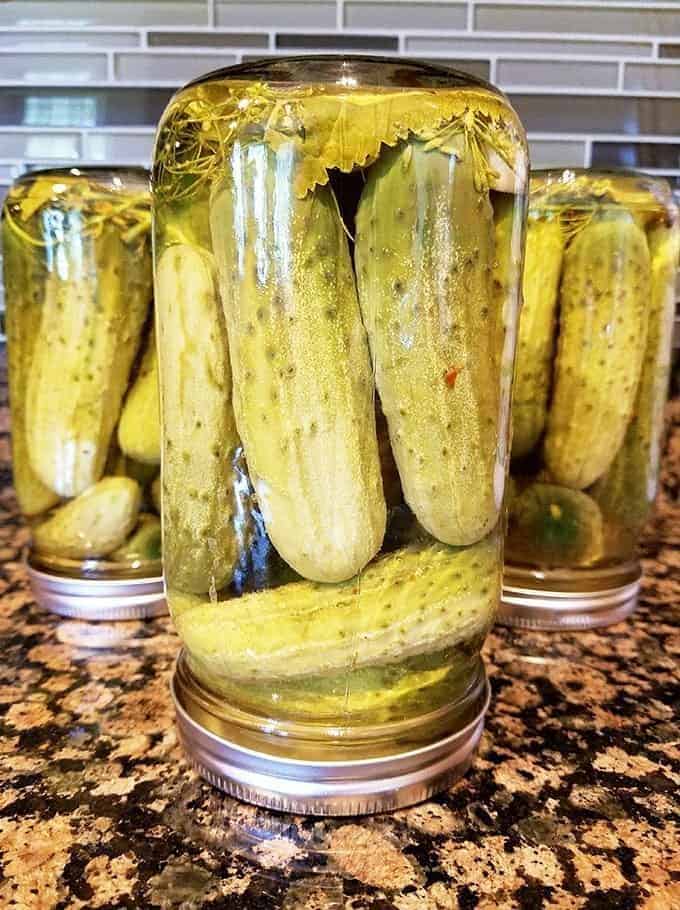
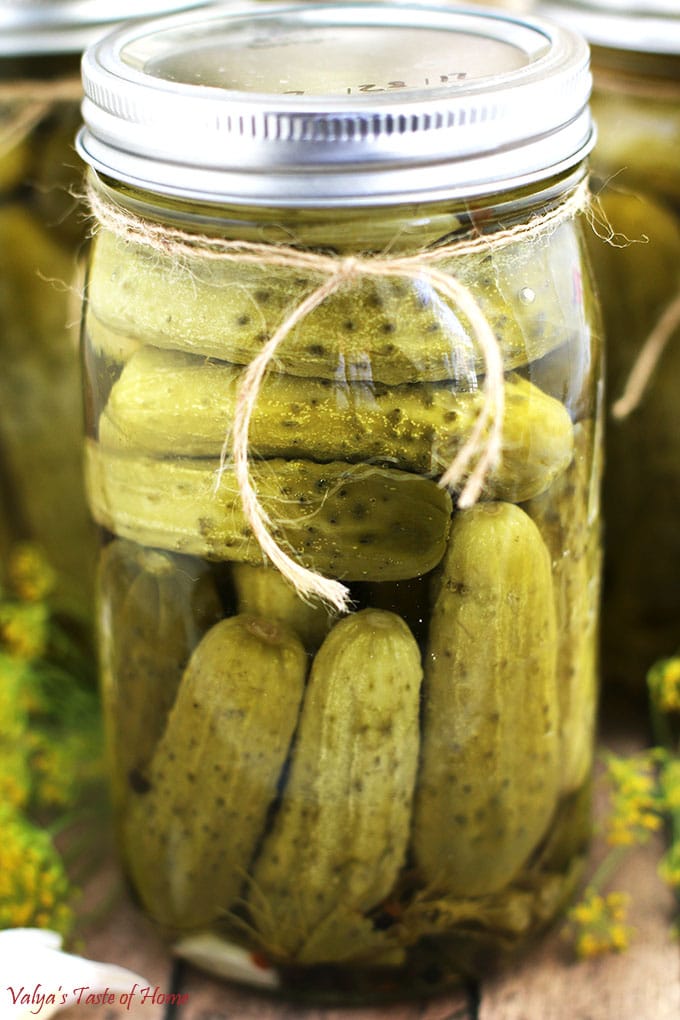
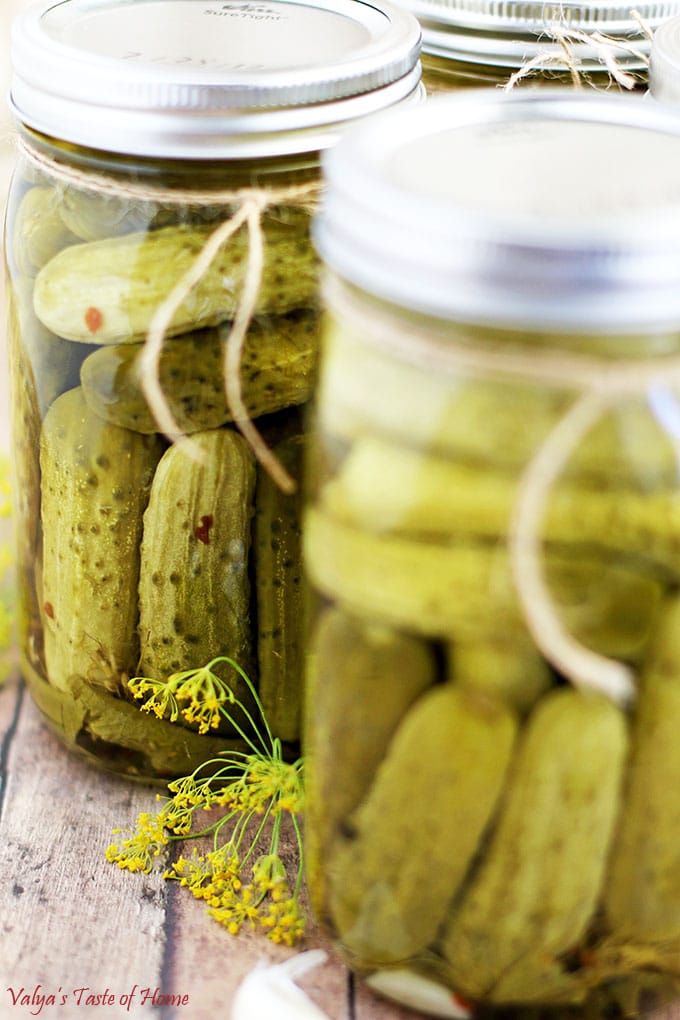
Next, pack the rinsed cucumbers into each jar as compactly as possible without denting or otherwise damaging them.
After that, we need to add the white vinegar to the pot of cooled syrup we prepared earlier. Stir it well to make sure everything is thoroughly mixed.
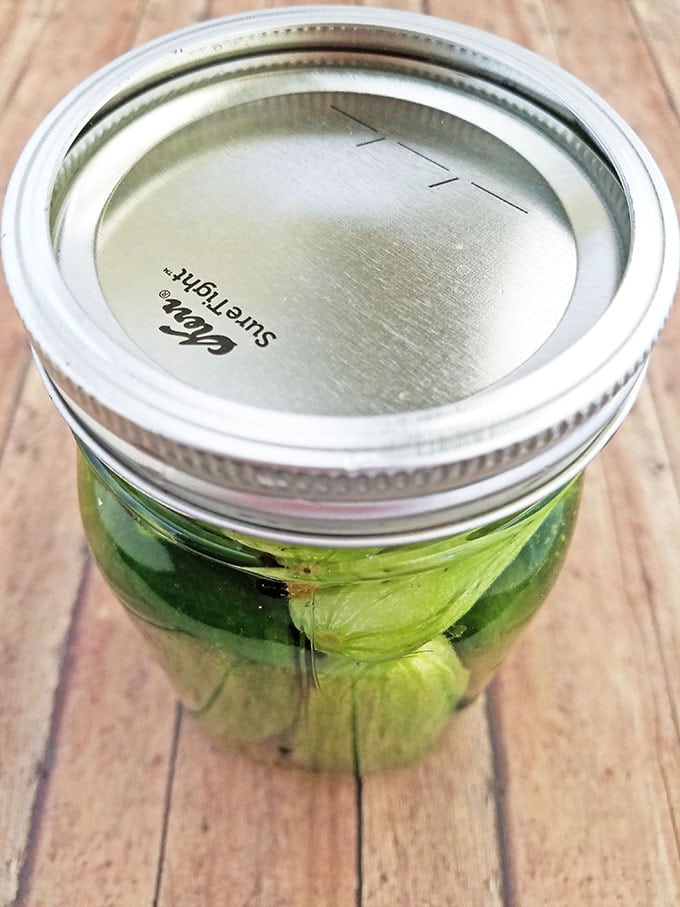
Fill each jar of pickles with the pickling syrup to the top of the jar.
And then cover each jar with a lid.
Canning Instructions for Pickles Recipe
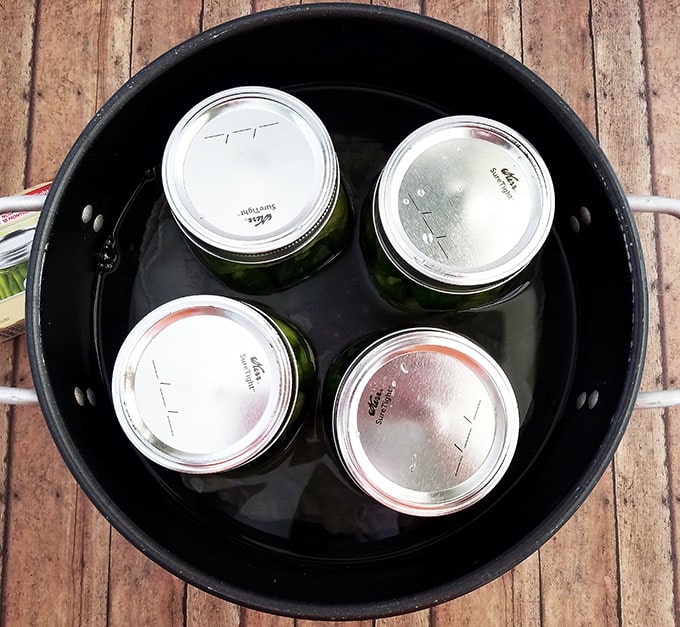
Next up, we’ll be doing a hot water bath canning for our dill pickle jars to make them shelf stable.
Place 4 jars into a Stovetop Canner pot or large stock pot, then fill it with enough water until the level reaches up to ¾ of the height of the jars.
Ensure the lid with rim of each jar is screwed on tightly, then turn the stove on high heat until the signs of boiling water are shown.
As soon as the water starts to boil, reduce the heat to medium and allow it to cook for 7 minutes (you should see the bubbles rising from the bottom to the top of each jar).
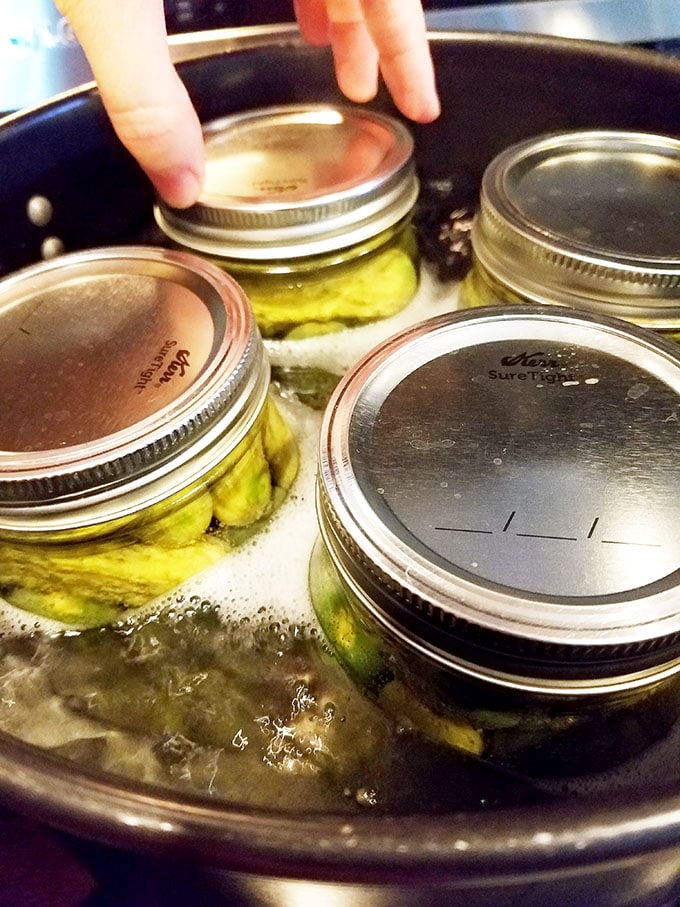
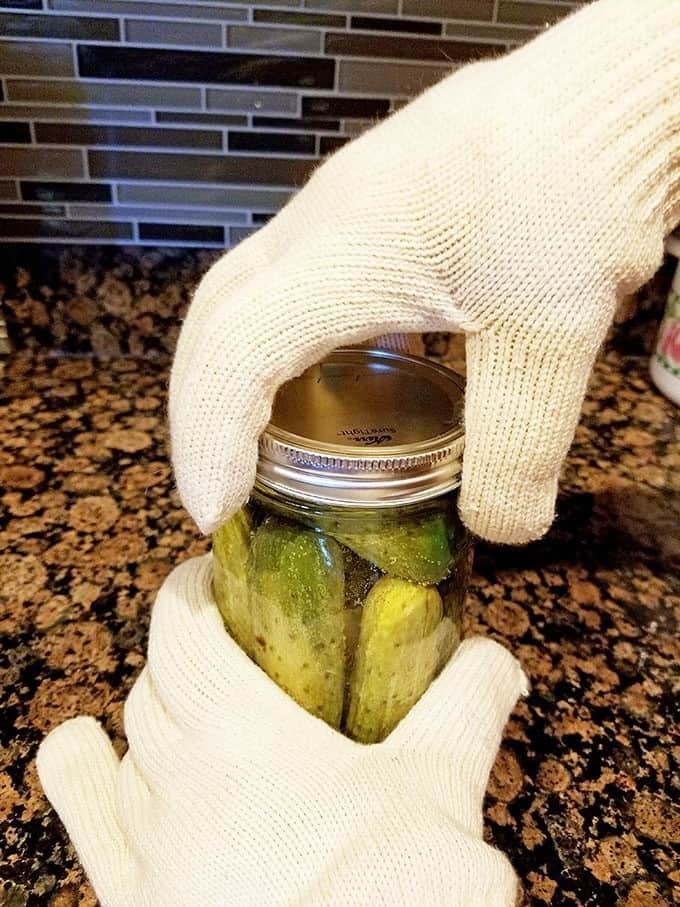
Put on canning gloves or use a jar lifter to remove the jar for the pot. Screw the lid pretty tight using your hands with a canning glove. Doing it this way will allow you to feel when the lid is screwed on correctly, and not sideways.
How to Allow Canned Pickles Jars to Cool Properly
Next, we’ll flip all our jars upside down on the counter top and let them cool completely in this position before moving them. I let them sit like this overnight, or for about 12 hours.
Drain and refill the water in your boiling pot, then repeat the canning process until all of the jars have been boiled and left to sit upside down.
Once all the jars are properly cooled, place them right side up in the fridge and allow them to sit for 3 days to 2 weeks. The longer you let them sit, the more flavor the pickles will absorb from the herbs.
Your delicious dill pickles are now ready to gift or enjoy!
For a full list of ingredients and instructions, see the recipe card below.
Canned Pickles Recipe Tips
- Use only fresh cucumbers: Cucumbers are much firmer and crispier when they’re freshly picked, so using fresher cucumbers will give you a better pickle texture.
- Choose your vinegar carefully: Depending on your preferences, you can use white vinegar, apple cider vinegar, or even a combination of both.
- Be generous with herbs and spices: For maximum flavor, be generous when adding your herbs and spices.
Recipe Variation Ideas for Canned Pickles
While traditional dill pickles are always a hit, there are many ways to switch up the recipe and add some variety to your pickle game. Here are a few ideas:
- Spicy Dill Pickles: Add a bit more crushed red pepper flakes to your pickling syrup for an extra kick.
- Garlic Dill Pickles: Increase the number of garlic cloves used in the recipe and add a pinch of garlic powder to the pickling syrup too.
- Dill and Onion Pickles: Add one thinly sliced yellow or white onion to your jars before adding the pickling syrup.
- Dill and Cucumber Chips/Spears: If you’re looking for a crunchier option, slice your cucumbers into thin chips or spears and add them to the jars.
How to Store Canned Pickles
- Check the seals – Make sure each jar has sealed properly before storing. If the lid pops up and down, refrigerate and eat soon.
- Label your jars – Write the date and type of pickles on the lid or label so you know how long they’ve been stored.
- Choose the right spot – Store sealed jars in a cool, dark place like a pantry, cupboard, or basement.
- Avoid heat and light – Keep jars away from direct sunlight, stoves, or other warm spots that can affect flavor and texture.
- Use within 12 – 18 months – For the best taste and crunch, enjoy your canned pickles within a year and a half.
- Refrigerate after opening – Once you break the seal, always keep the jar in the refrigerator and eat within a few weeks.
How to Store Leftover Pickles
Leftover opened dill pickles should be stored in an airtight container in the fridge. They can be stored this way for 3 to 4 weeks or more and will stay fresh and crispy. Many people store them for up to 3 to 4 months this way as well, and since they’ve been canned properly, they’ll still be good to use.
Unopened canned dill pickles can last up to 6 months or more when stored properly since they’re shelf stable because we’ve processed them in hot water. Make sure you follow the instructions to seal the jars and can them properly.
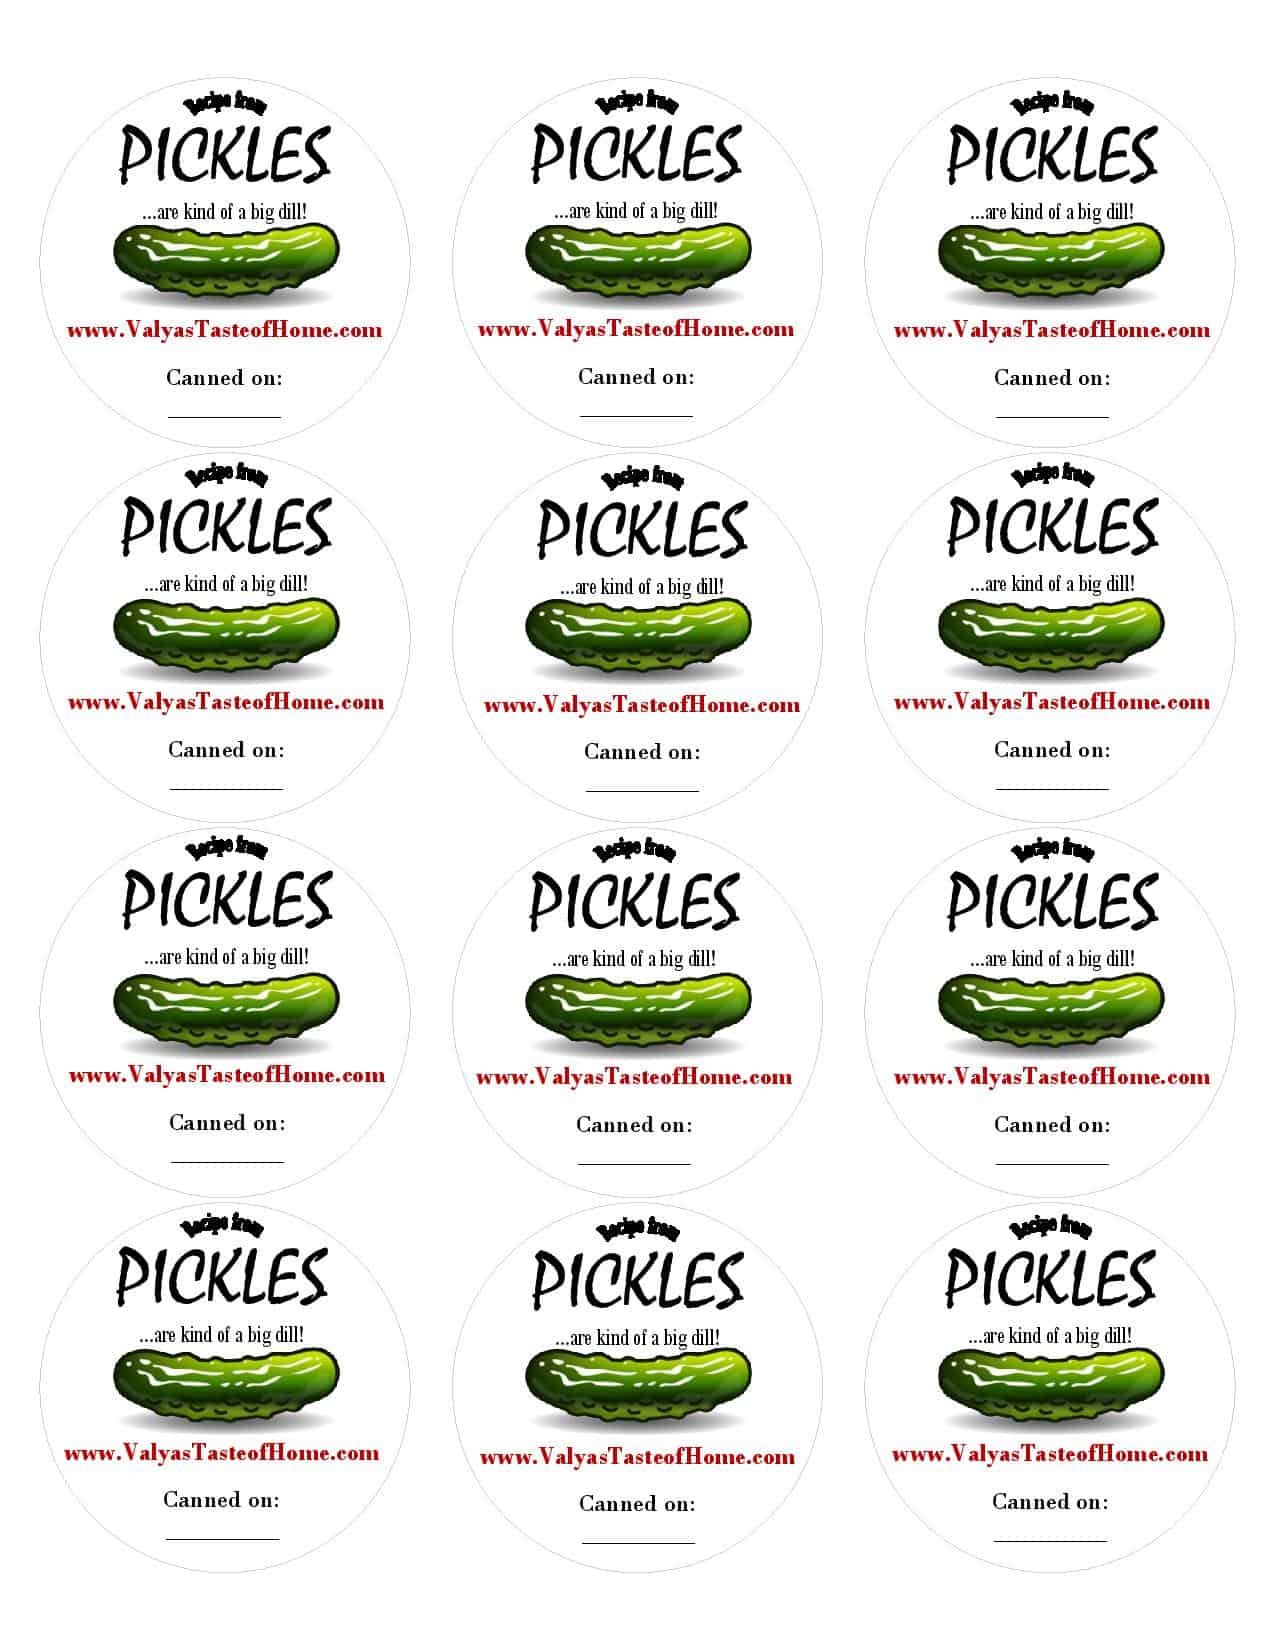
Click HERE to download and print Pickle Jar Labels for FREE on THIS printable label paper.
Frequently Asked Questions
t’s not recommended to reuse brine for canning since acidity levels may not be safe. You can, however, reuse brine for refrigerator pickles (short-term storage).
Signs of spoilage include a broken seal, bulging lid, cloudy liquid, mold, or an off smell. When in doubt, throw it out.
Pickles are usually processed in a water bath canner because vinegar provides the needed acidity. Pressure canning can sometimes make them mushy.
Serving Suggestions for Canned Pickles
Canned pickles aren’t just for snacking straight from the jar – they can be enjoyed in so many ways! Try adding crunchy dill pickle spears to sandwiches, burgers, or wraps for a crunchy, tangy bite. Chop them up and stir into potato salad, egg salad, or tuna salad for extra flavor. Pickles pair wonderfully with cheese boards, charcuterie platters, and deviled eggs. For a quick appetizer, wrap pickle spears with deli meat and cream cheese. You can even dice them into relish to top hot dogs, brats, or grilled sausages. No matter how you serve them, homemade canned pickles bring a fresh, zesty flavor to everyday meals.
Canned Pickles Recipe (Easy Step-by-Step Guide)
Ingredients
- 1.25 gallons cold water
- 7 oz. sea salt
- 6 tbsp. organic sugar
- 20 oz. distilled vinegar
- 20 lbs. small cucumbers
- Horseradish leaves (fresh dill, head of garlic, crushed red pepper, peppercorn, and bay leaves)
- 12 quart size canning jars
Instructions
How to Make Dill Pickling Syrup
- First, let’s make our pickling syrup. Combine the water, sugar, and salt in a large pot or saucepan, then bring it to a boil while stirring constantly until the sugar and salt completely dissolves.
- As soon as it begins to boil, reduce the heat and continue to simmer for 5 minutes, then remove the pot from the stove and let the mixture cool.
How to Prepare Jars for Pickling Dills
- Next, let’s prepare our jars and lids. If you’re reusing old jars it would be a good idea to replace the lid as the wax seals can wear out over time. Also, ensure the ring must is rust-free, otherwise, it may not keep a tight seal.
- Wash the jars and lids in hot water and allow them to dry completely.
How to Assemble Dill Pickle
- After your jars are dry, add a small piece of horseradish leaf, 1 small branch of fresh dill (including the blossom end), 2 bay leaves, 2-3 garlic cloves, 20 peppercorns, and ⅛th teaspoon of crushed red pepper flakes to each one.
- Set your jars aside for a moment and thoroughly rinse the cucumbers, brushing them while rinsing to eliminate any dirt and grit if necessary.
- Next, pack the rinsed cucumbers into each jar as compactly as possible without denting or otherwise damaging them.
- After that, we need to add the white vinegar to the pot of cooled syrup we prepared earlier. Stir it well to make sure everything is thoroughly mixed.
- Fill each jar of pickles with the pickling syrup.
- And then cover each jar with a lid.
Canning Instructions for Dill Pickle Recipe
- Next up, we’ll be doing a hot water bath for our dill pickle jars to make them shelf stable.
- Place 4 jars into a Stovetop Canner pot or other large boiling pot, then fill it with water until the water level reaches up to ¾ of the height of the jars.
- Ensure the lid of each jar is screwed on tightly, then turn the stove on high heat until the water starts boiling.
- As soon as the water starts to boil, reduce the heat to medium and allow it to cook for 7 minutes (you should see the bubbles rising from the bottom to the top of each jar).
- Put on canning gloves or use a canning utensil to remove the jar for the pot. Screw the lid pretty tight using your hands with a canning glove. Doing it this way will allow you to feel when the lid is screwed on correctly, and not sideways.
How to Allow Dill Pickle Jars to Cool Properly
- Next, we’ll flip all our jars upside down and let them cool completely in this position before moving them. I let them sit like this overnight, or for about 12 hours.
- Drain and refill the water in your boiling pot, then repeat the canning process until all of the jars have been boiled and left to sit upside down.
- Once all the jars are properly cooled, place them right side up in the fridge and allow them to sit for 3 days to 2 weeks. The longer you let them sit, the more flavor the pickles will absorb from the herbs.
- Your delicious dill pickles are now ready to gift or enjoy!
Notes
Thank you for following me on Instagram, and Pinterest!
This recipe was originally posted on August 7, 2017, and updated for a better user experience. The post may contain affiliate links. Read my disclosure.


Made these pickles last year absolutely love them! I am making them again as we speak. I’m just wondering why you need to cool the liquid then add the vinegar does this add extra crunch? Also why do you Flip the jars upside down. Thanks for sharing your recipes!!
Thank you for asking, those are great questions! The vinegar will evaporate if added to the hot syrup and will not be that effective and pickles will not be as crunchy. Flipping the jars upside down creates pressure inside the jar preventing the lids from popping off. It is also a great way to check if the rim on each jar is sealed well and not leaking.
These pickles are truly the best!!! Made a few jars(18) last year and everyone loved them! Thank you Valya! Gods blessing to you !
I’m so happy to hear that Luba! Thank you for your feedback and an amazing review!
I happened upon your canned pickle last year and was intrigued with how you process them. I am normally a pressure canner but have done pickles in a boiling water bath and completely submerged the jars in water. I followed your directions and was excited about how easy it was and ended up with 4 dozen pints until my cucumber crop was done. My question for you now is, have you ever canned zucchini? I have a recipe that after adding all the ingredients, the zucchini tastes like apple pie filling and want to can it but can’t decide whether to follow your water bath directions you used for the pickles or pressure can it. Thanks!
Yes, I have canned zucchini the same way as pickles even used the same exact instructions and they turn out amazing! I always use this way when canning anything. Check out my second website where I share canned plum juice recipe. Thank you for your comment!
Hi there, I have made 2 batches of these pickles, my son loves them. Some other people I gave jars to saif they find them too mild. I dont eat dill pickles myself so I cant test.them. Maybe I calculated my measurements incorrectly. It is 21 cups of water and 2.5 cups of vinegar corrects? I used the baby dill pickles, some of which are quite big, maybe too big? Or couldnit be possible the jars haven’t sit long enough?
Hi Marilyn! I don’t think they are mild, at least to my taste. They are similar in taste to store-bought pickles. You did measure it correctly. They have to sit for at least 2 weeks to absorb the flavors. I hope this helps.
Just wondering…you say in description 12 wide mouth quart jars. In the recipe you say 12 pint jars. Which do I need to use for this. I do have both just want it to be correct. Thank you.
Thank you for catching that. It’s 12 wide mouth quart (946 ml) jars. I’ll get that fixed ASAP.
I was curious as to what would happen if I cut the cucumbers into pickle spears? I wasn’t sure if you’ve tried that but if you have I’d appreciate knowing if anything changes. Thank you☺️
Yes, I have. They will taste just as good!
Can I cut the recepie in half? And how cool should the mixture get before I can add vinegar?
Yes, you can split the recipe in half. The mixture should be warm or room temperature before adding vinegar. I hope this helps.
My husband and I canned about 20 jars now and opened one to try; these pickles are perfect!
Thank you!
That’s awesome! These are the only pickles my family will eat, they don’t like sweet pickles. Thank you for an amazing review! 🙂
does anyone know the shelf life of these? I guess you can store in pantry?
I stored it for as long as 2 years and they were fine. I hope this helps. 🙂
Hello,
Do you have a recipe for a smaller quantity of pickles? I want to try the recipe since it’s my first time pickling. I have 1 pound of persian cucumbers. Wgat would the ingredient amounts be?
Thank you.
That’s a very small amount of pickles to can. You can use 2 lbs.of pickles and devide every ingredient by 10.
Im curious as to the double process? Why the hot water bath twice?
Hmm… not sure what you mean by hot water bath twice. Can you expand your coment.
No double process is needed.
Thanks for the response. The bubbles are gone. Now my pickles are floating to the top. I read they should settle if not just rotate the jar every few days. I also noticed the cucumbers are getting a little wrinkly. Nothing horrible just something I noticed.
Sorry, just super excited and hope these turn out great for my first time ?
If the cucumbers are pickled right after they were picked then there should be very little wrinkles. If they don’t turn out great for the first time then for the second time it will, practice makes perfect 😀
I just made this recipe I am super excited to try them in a couple weeks.
This is my first time canning and I noticed when I tilted my jars upright that there are tiny air bubbles. Is this normal or do I need to worry that the pickles could become contaminated? Hope not!
Hi Justin, thank you kindly for trying out my recipe.? Yes, it’s normal. The bubbles will settle and disappear once cooled. Hope you like the recipe.
These look delicious! Your pictures are fantastic and do a great job of outlining every step of the process. Can’t wait to try making this recipe at home!
Thank you kindly for sweet words. Let me know how you like the recipe if you ever get to make it. 🙂
Why are we not sterilize the jars and seals in boiling water first. Isn’t that important part of canning?
Hi Janice! Sterilizing the jars that are going to be boiled while canning isn’t necessary. It’s just an extra step that is not needed. If you’re canning jams, sauces etc…, jar sterilization is a must. I hope this clarifies a little bit more. Let me know if you have more questions, I’d be more than happy to help.
Memories! Yum!
They are truly delicious! Love them with lazy cabbage rolls 😉
Oh the only thing i changed in the recepy was the horseradish leaves for horseradish roots… i put a few pieces on the bottom of the jar and the pickeles came out verry cruncy too. I hope thats helpful… i couldnt find horseradish leaves.
That is so smart of you! ? Horseradish root will add a little (or a lot, depends how you used) spiciness to pickles. Thank you kindly for sharing your feedback!
This recepy defenetly is a keeper. I couldnt ressist not to open a jar and taste the pickles. They were amaizing… verrrrry tasty and crunchy.. just the way i love them.. they were aproved by the family too. I will be saving this recepy for a long time…. ok now do u have any recepies how to can tomatoes? Marinated tomatoes? If u do then can u share it? I have some tomatoes that i want to marinate…. i would really appreciate! Thank u and u r z verry good cook!
Aww… that’s so sweet of you! I’m glad to hear that you liked the recipe. Yes, I do have a good recipe for tomatoes canning as well, and it’s on my to post list. Thank you kindly for such an amazing review !!! 🙂
This recipe sound and looks delicious! I will be canning cucumbers tomorrow and will use this recipe. Thank you for sharing your recipes with us!
Thank you Tonya! Please share your experience with me. I appreciate you stopping by and commenting! 🙂
This looks like a great recipe! I’ve never made pickles before but wondering if you can eat them right away or have to. wait? If so, how long? Also, yes where do you get the horseradish leaves? My MIL used to grow her own. Thanks.
Hi Debbie! They taste best after they absorbs all the flavors, so I would wait at least 2 weeks to a month before opening a jar of canned pickles. Some natural or organic stores sell horseradish leaves and roots. You can also plant your own in the garden or flower beds. I hope this helps. Thank you for stopping by and commenting. 🙂
Great Post, looks so tasty! Love огурцы, I always eat them with Plov! 🙂
Thank you Peter! These pickles go perfect with plov. 🙂
Hi Valya,
where can I buy horseradish leaves? Will it be okay to omit horseradish leaves for canned pickles ?
Thank you!
Hi Lana! Yes, you can omit the horseradish leaf, as I already mentioned it in the post. I have canned cucumbers with out the leaf and it turned out perfect every time as well. The horseradish adds a little more crunchiness and spiciness. Let me know your experience and how you like the recipe.
This recipe works and it’s so delicious!!! I canned last week and yesterday opened one jar to try it. Pickles were so tasty,crunchy and with right amount of seasoning. Perfect recipe to keep for years to come. Thank you Valya!
Hi Lana! I’m so happy to hear that this recipe tuned out great for you. I really appreciate your feedback, and thank you for making my recipes and sharing them with your loved ones. 🙂
I have used oak leaves in place of horseradish leaves. They help with crunchiness as well.
That’s nice to know. Thank you for sharing your experience!
I’m going to be canning here soon. So 20 lb about how many cucumbers will that be, & about 6 cucumbers in a jar,or u had more? I’m now a stay home mom,so exited to can things. I’m not working anymore.
Hi Olga! It really depends on the size of the cucumbers. It may vary from 8 to 12 cucumbers per jar.
That’s awesome! I enjoy staying home as well. Have fun canning! 🙂
Just in time for me! I was just about to look for a recipe. I’ll give it a try. Thanks for the recipe!
I’m glad to hear that you found what you were looking for. If you like salty, crunchy pickles this recipe is for you 🙂