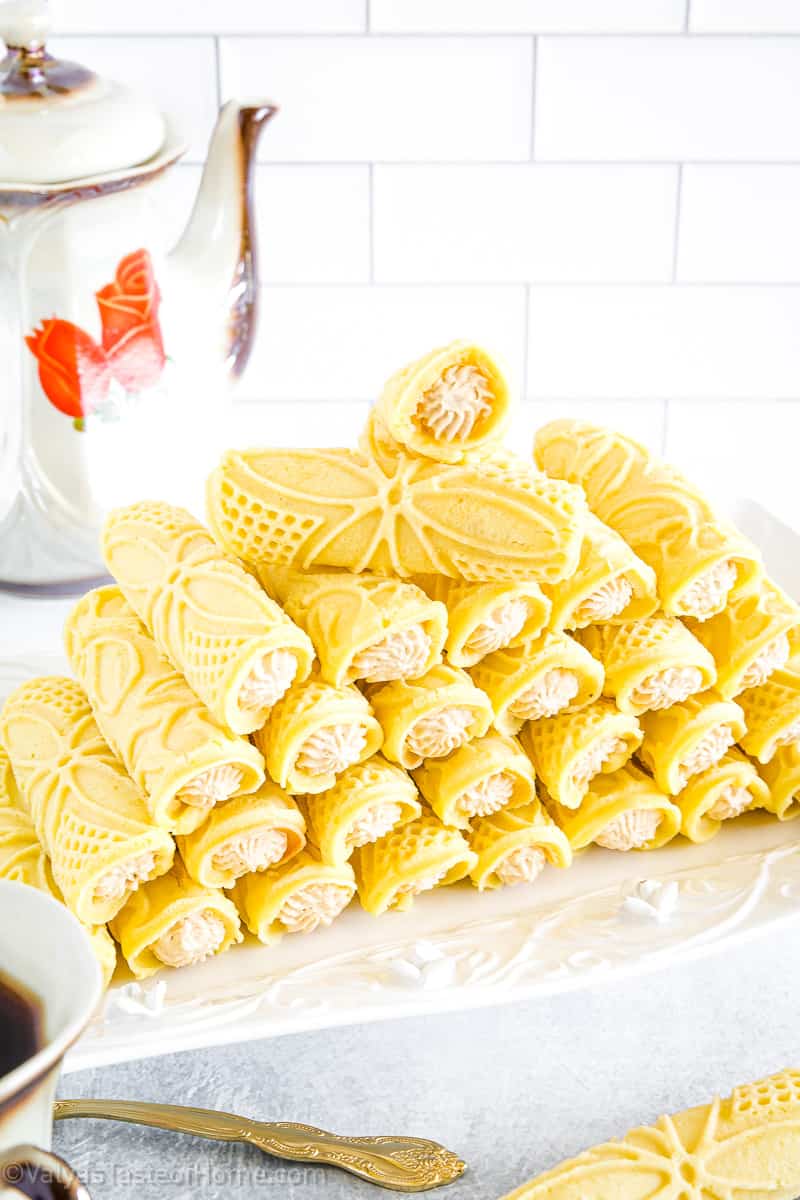
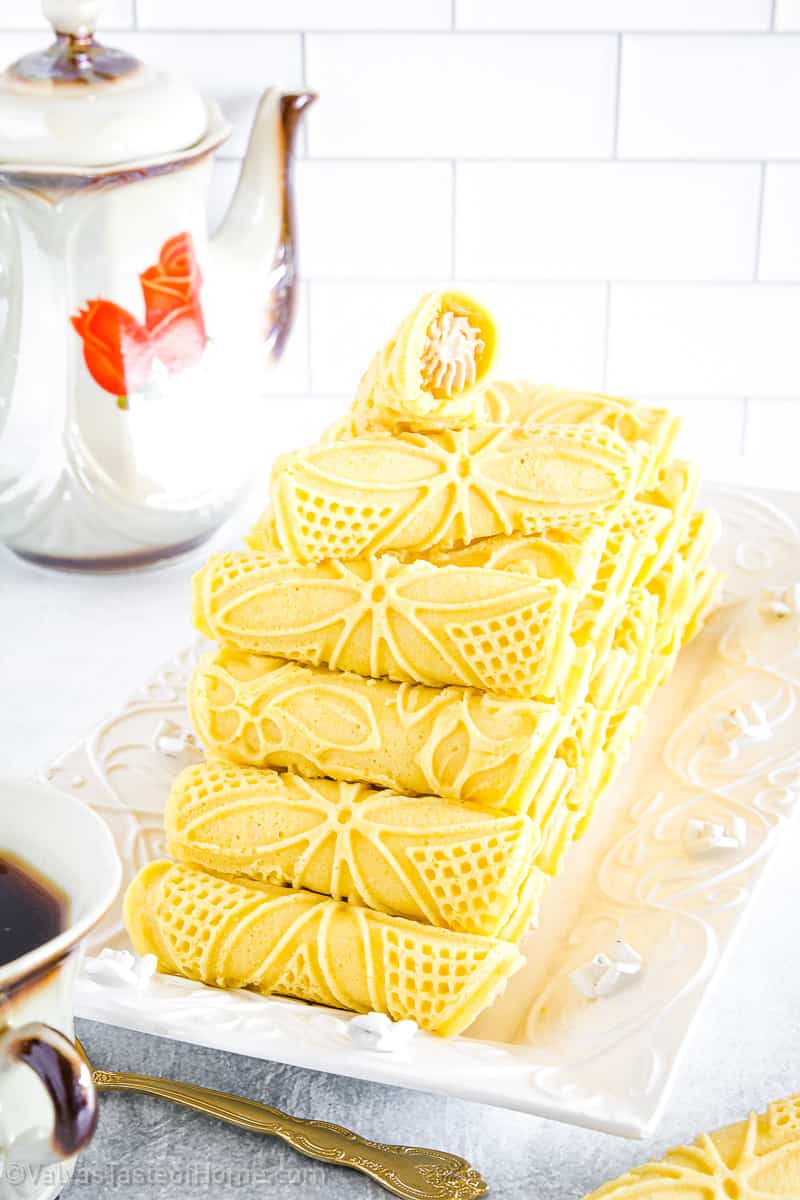
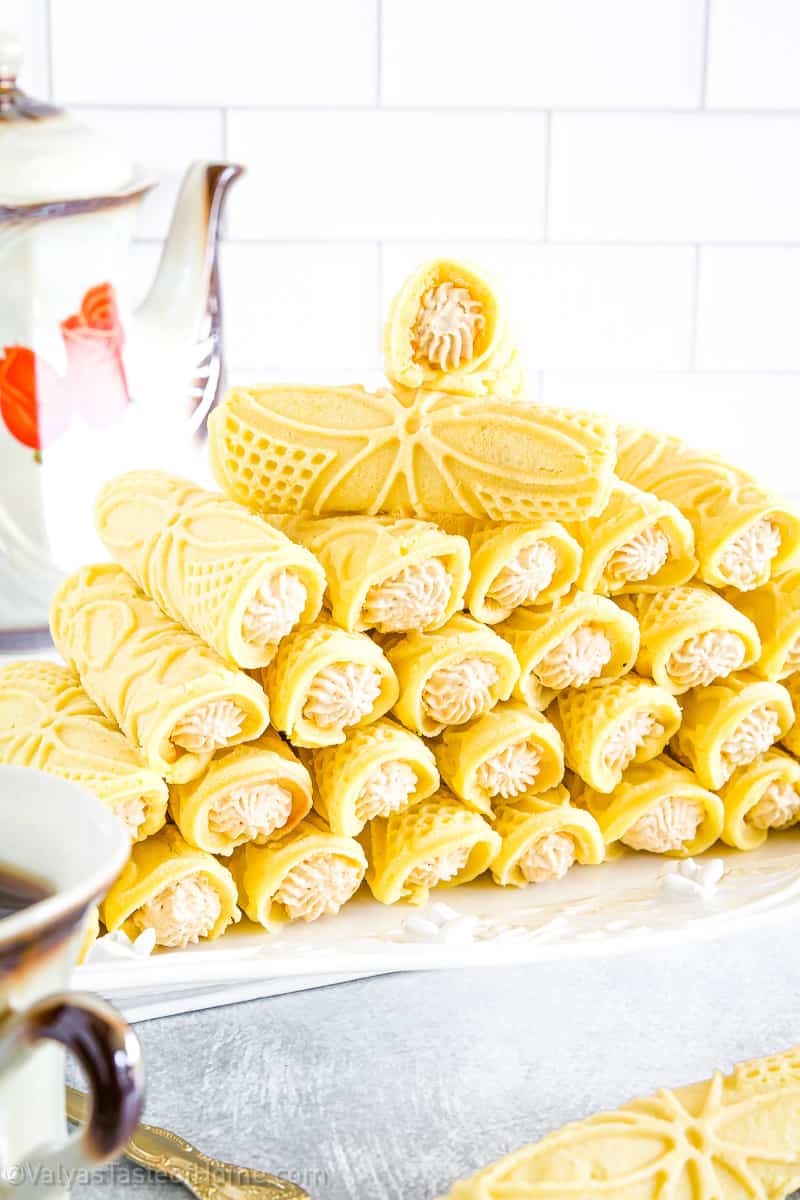
Stuffed Pizzelles (with Whipped Dulce de Leche Cream)
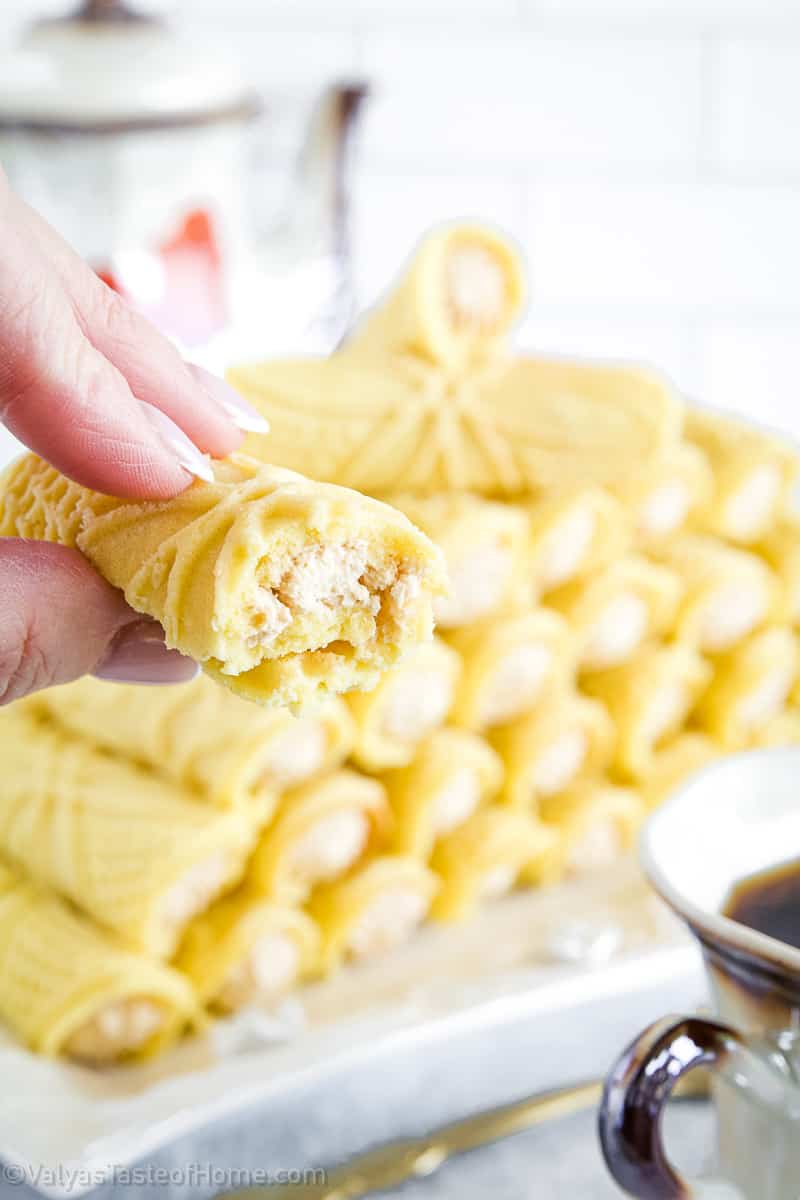
Stuffed Pizzelles are the new “it” dessert, giving classic Italian wafers a glow-up with a rich dulce de leche cream center. They’re simple, pretty, and endlessly photogenic – basically built for holiday hosting and feed-worthy baking. One bite and you get crisp, caramel, and creamy all at once, making them impossible to resist.
These Italian cookies are often flavored with anise (black licorice) or vanilla extract and have a crispy texture that melts in your mouth. While pizzelle makers can be found in almost every Italian household, making them from scratch can be intimidating.
But don’t worry, with a few simple ingredients and a bit of practice, anyone can master the art of making homemade pizzelle. You can also fold them or roll them into cones and fill them with cream-like cannoli shells. That’s exactly what we’ll be doing today in my recipe for the most delicious stuffed pizzelles ever!
In this recipe, I’ll guide you through each step to help you create perfect stuffed Pizzelles every time. Get ready to impress your friends and family with these delicious cookies that are sure to become a new favorite.
What are Stuffed Pizzelles?
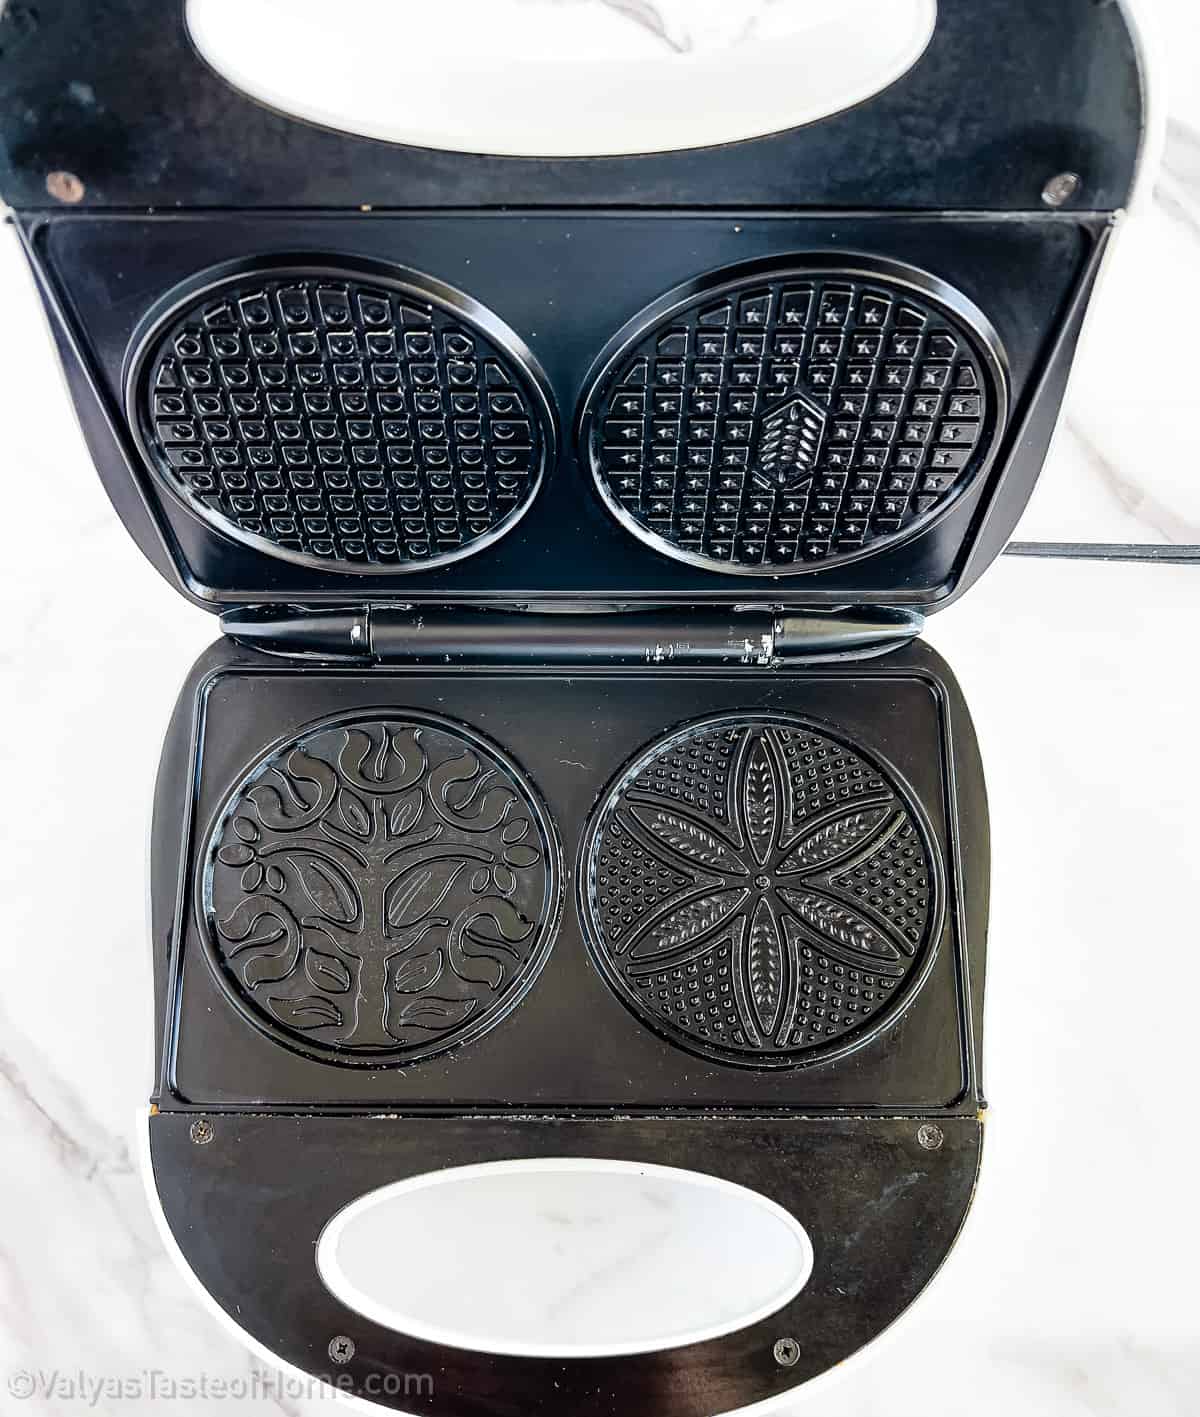
Stuffed Pizzelles are an Italian waffle cookie made using flour, eggs, sugar, butter, and flavorings such as vanilla, anise, or lemon zest. The batter is cooked using a pizzelle iron, which is similar to a waffle iron, but with intricate designs imprinted on the cookies.
One of the great things about these Italian cookies is their versatility. They can be enjoyed on their own as a snack, dusted with powdered sugar, or drizzled with chocolate for an extra indulgent treat. They can also be used as a base for desserts such as ice cream sandwiches or cannoli.
The word “pizzelle” comes from the Italian word “pizze,” which means “round and flat.” These cookies hail from the Abruzzi region of Italy and have been made for centuries, often on special occasions such as weddings and holidays.
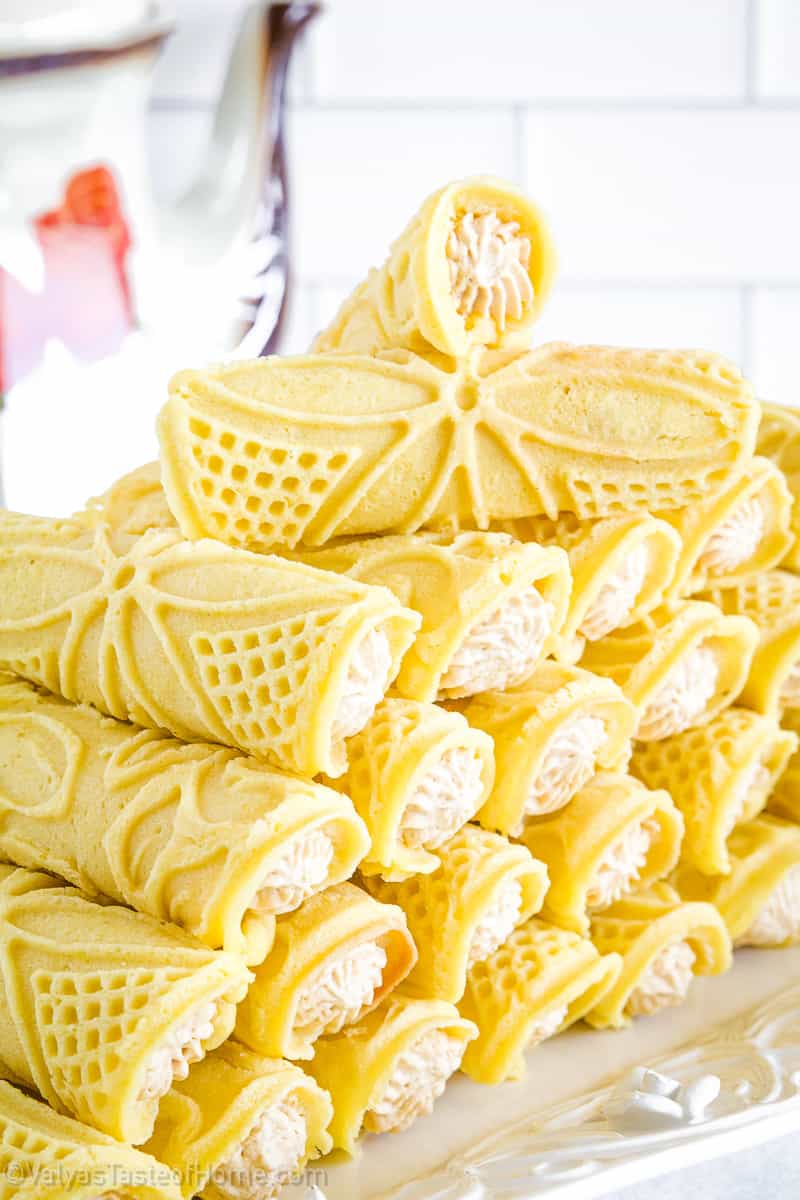
What makes these cookies so unique is their delicate and crisp texture, as well as their beautifully intricate designs. They are a beloved and traditional cookie in Italian cuisine, and their popularity has spread worldwide.
Why You’ll Love Stuffed Pizzelles
- Easy: This Stuffed Pizzelles recipe is very simple to make with only a few basic ingredients that you probably already have in your pantry. You don’t need any fancy equipment or skills to make these tasty treats, making them perfect for novice bakers.
- Versatile: These cookies can be made in a variety of flavors by simply adding different ingredients such as cocoa powder, vanilla extract, or almond extract. This recipe is incredibly versatile and allows you to customize your Stuffed Pizzelles to your liking.
- Delicious: The combination of crispy, buttery, and sweet flavors in this recipe creates a delectable treat that the whole family will love. The subtle anise flavor pairs perfectly with a cup of coffee or tea, making them a great snack for anytime.
- Crowd-pleaser: Stuffed Pizzelles are a classic Italian dessert that everyone loves, making them a perfect addition to any gathering or party. This recipe yields a large batch, so you’ll have plenty to share with friends and family.
- Traditional: This delicious stuffed Pizzelles recipe is an authentic Italian recipe that has been passed down for generations. By following this recipe, you’ll be able to create a delicious and traditional treat that will transport you to Italy with every bite.
Stuffed Pizzelles Key Ingredients
All you need are some simple, pantry staple ingredients to make these delicious Italian cookies at home. Let’s look at them in more detail:
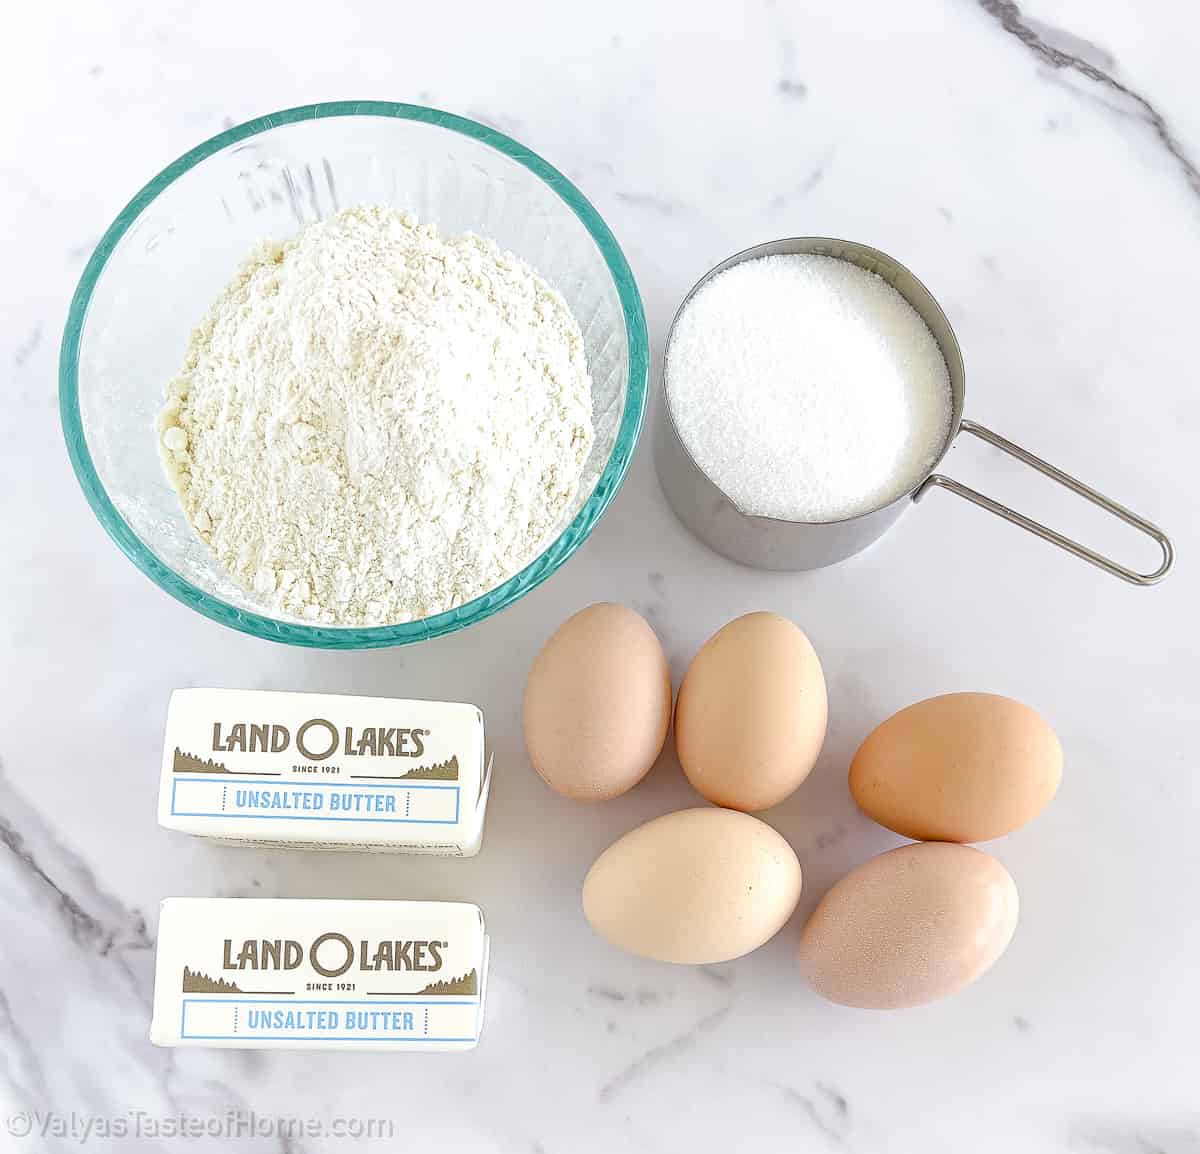
For the Batter:
- Large eggs: You’ll be cracking open some large eggs and whisking them into the batter, giving it a fluffy texture and helping it rise in the oven. We’ll also be using more eggs to make a delicious custard filling that will complement the cake’s sweetness.
- Sugar: We’ll be using regular granulated sugar in the batter and cream filling to add sweetness and help with browning in the oven. Organic cane sugar will also be added to the batter for a slightly different flavor profile.
- Unsalted butter: You’ll be melting some unsalted butter and adding it to the batter, creating a moist and tender crumb. Extra butter will be used to make the cream filling, adding richness and depth to the overall flavor.
- All-purpose flour: We’ll be sifting some all-purpose flour into the batter, giving the cake structure and stability. This same flour will also be used to create a buttery streusel topping for added texture and flavor.
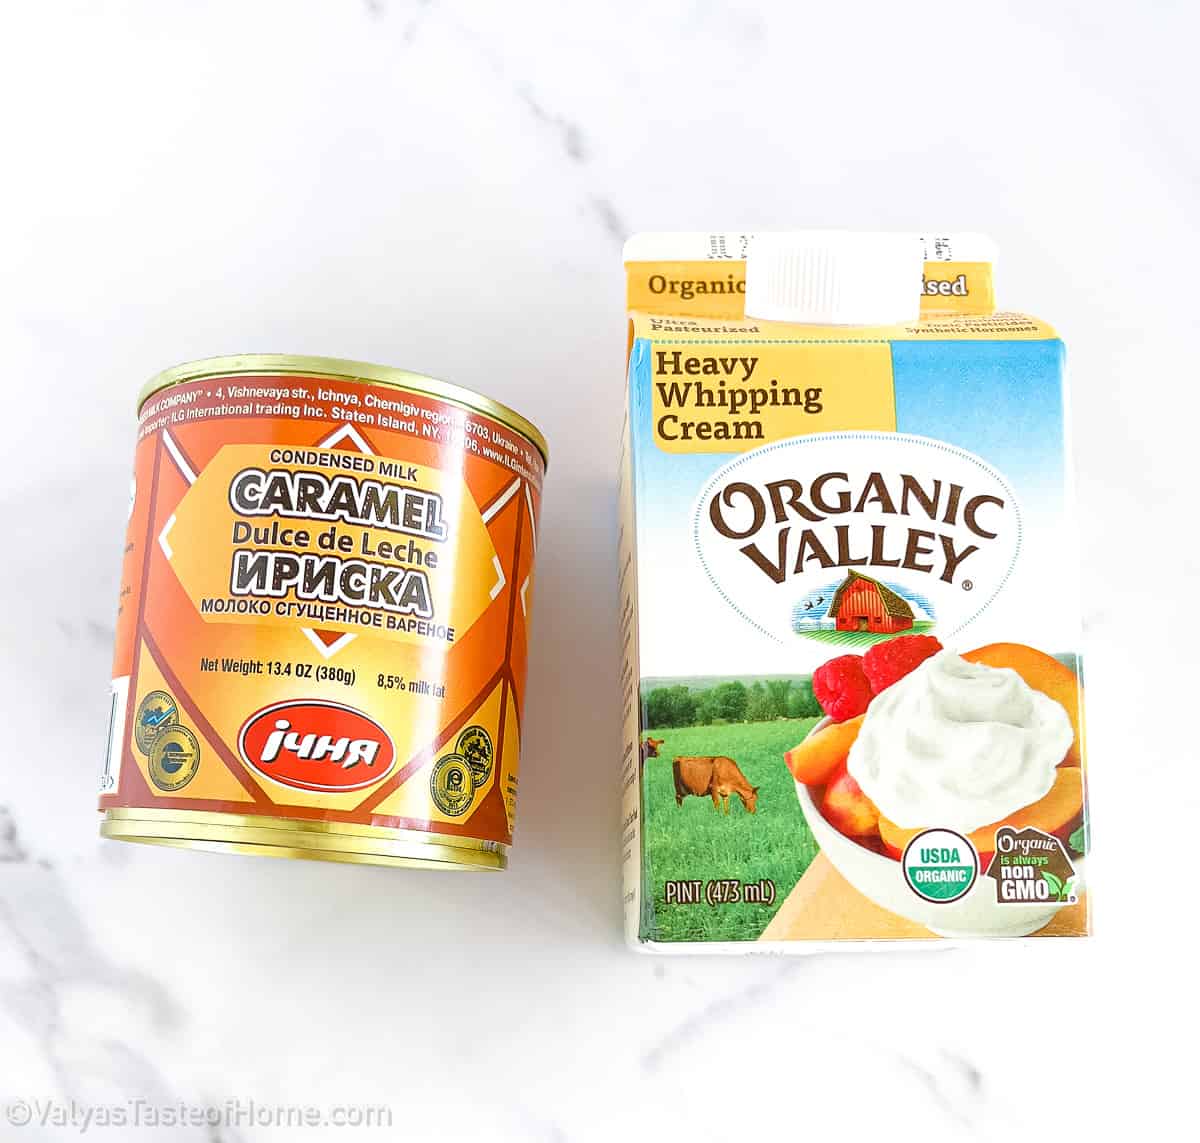
Cream Filling:
- Cold heavy cream: We’ll be whisking cold heavy cream into a fluffy whipped cream to use as a filling for the cake. The cream will add a light and airy quality that will balance out the sweetness of the cake.
- Dulce de Leche: We’ll be spreading a layer of rich and caramel-like dulce de leche on top of each cake layer for added flavor and richness. This sauce will also be folded into the whipped cream filling, adding depth and complexity to the overall flavor profile.
- Pizzelle maker: You’ll also need a Pizzelle maker. I bought mine from Bed Bath and Beyond. You can also purchase a different shape for your Pizzelle iron from Amazon.
For a full list of ingredients and quantities, please check the recipe card at the end of this post.
How to Make Stuffed Pizzelles
Making these delicious pizzelles is easier than you think. Here’s how to make them at home step by step:
How to Make Pizzelle Cookies
To make Pizzelles, start by placing butter and margarine in a small bowl and microwaving it for 30 seconds until melted. Let it cool before continuing.
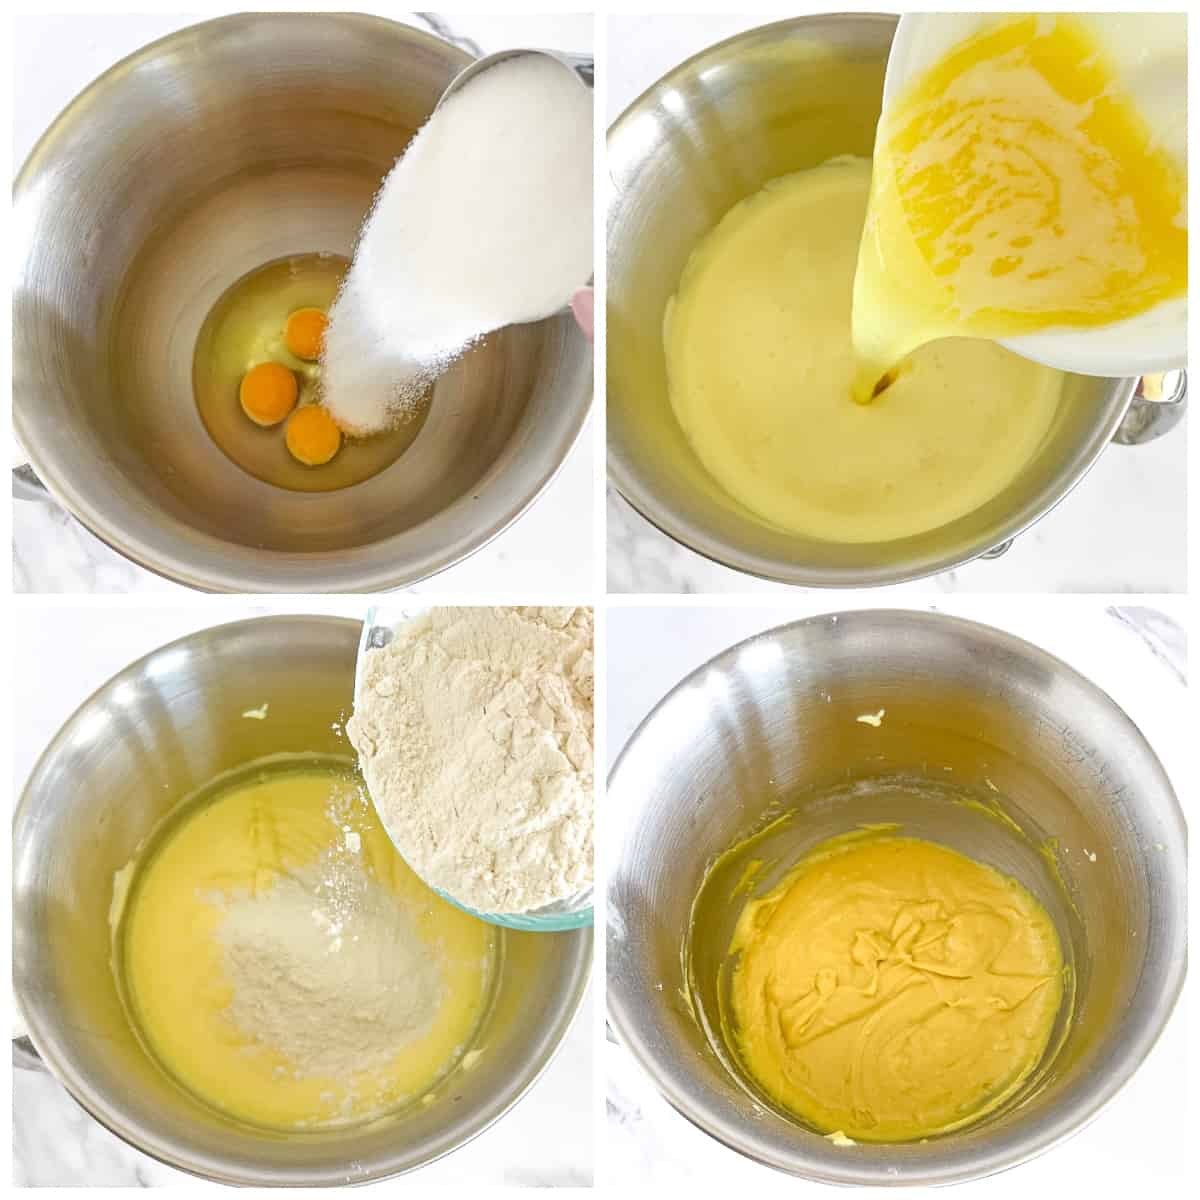
In a separate bowl add eggs and sugar and beat them on high for five minutes using an electric mixer.
Add melted and cooled butter, and whisk it for another minute.
Next, gradually add in flour while mixing on low until everything is fully combined.
Now, preheat your Pizzelle maker. Once it’s ready, use an ice cream scooper to pour some of the mixture onto each ring. Bake for only one minute.
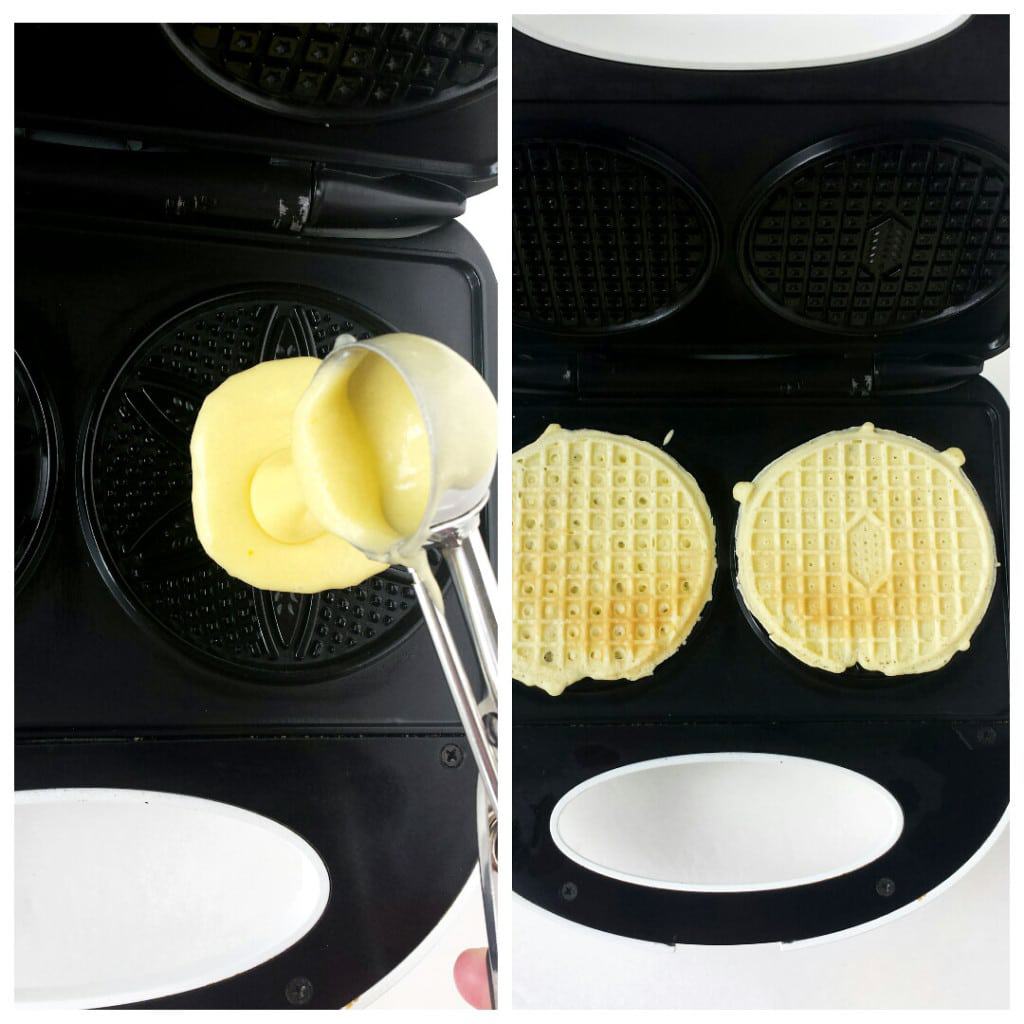
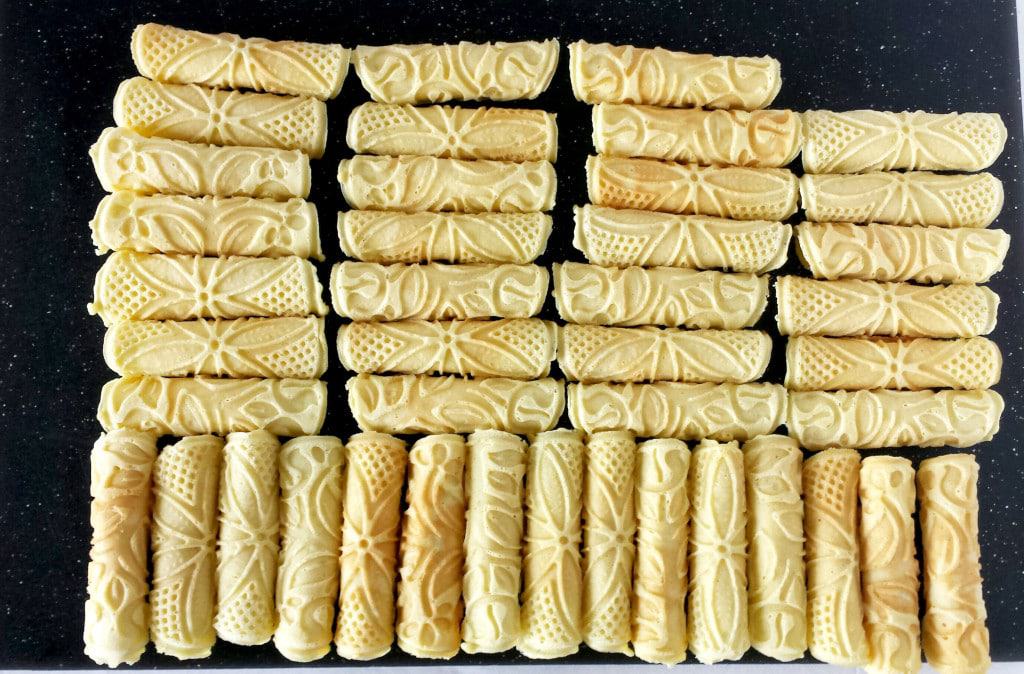
As soon as they’re done, quickly remove them from the Pizzelle maker and roll them up while they’re still hot. Note that once they cool, they will become hard and you won’t be able to roll them up.
Let the rolled pizzelles cool on a wire rack completely before filling them with cream.
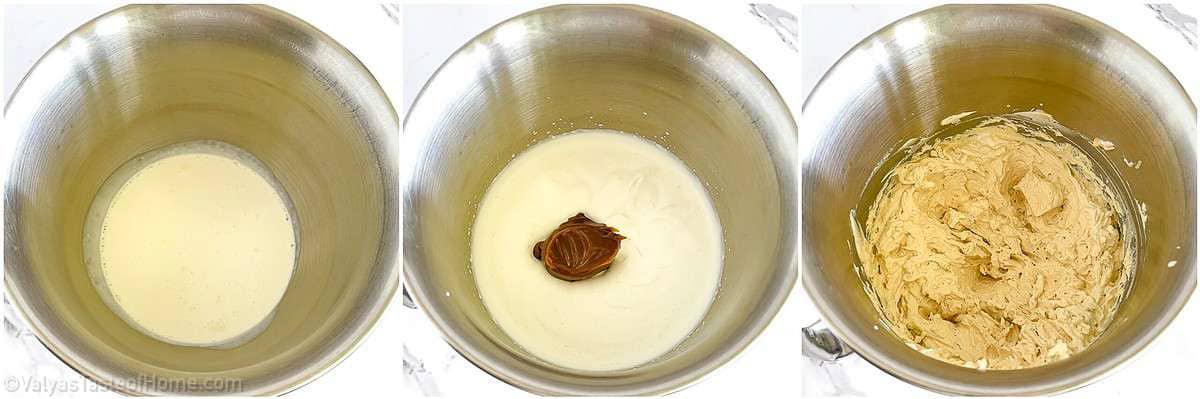
How to Make Dulce de Leche Cream Filling:
For the cream filling, simply beat heavy whipping cream until just starts to thicken, and then add Dulce de Leche and mix just until combined. Once it’s combined, scrape the sides of the bowl and mix again for another 30 seconds.
How to Assemble Pizzelle
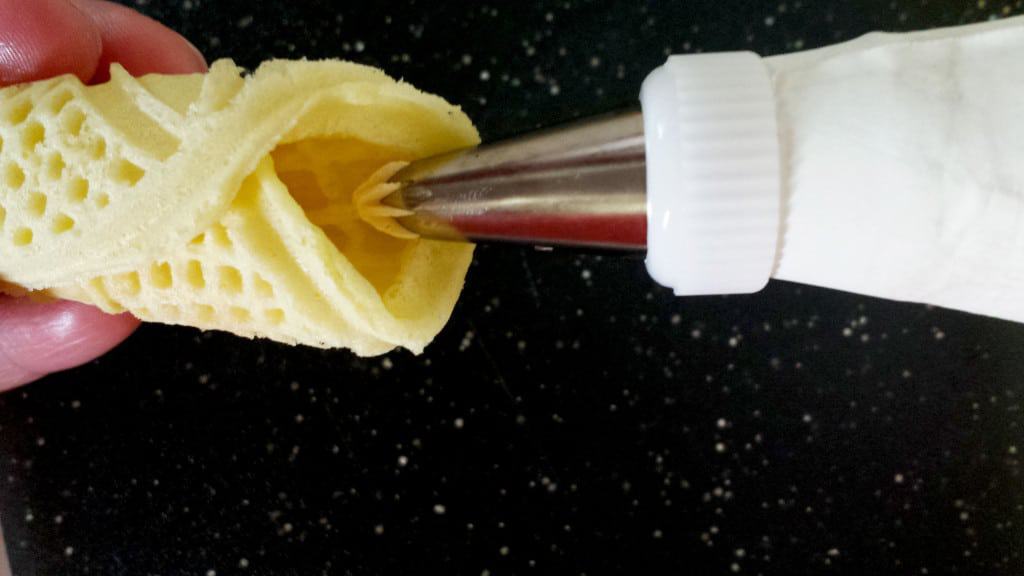
To assemble the Pizzelles, place the cream filling in a piping bag with Wilton 21 attachment. Pipe some cream onto each side of the rolled Pizzelle.
Repeat the process until all rolls are filled. Refrigerate for at least six hours before serving.
Your delicious Pizzelles are now ready! Enjoy them with coffee or tea for a sweet and indulgent snack.
Tips for Making the Best Stuffed Pizzelles
- Preheat your pizzelle iron: Preheat your iron for at least 10 minutes before making the first batch of pizzelles. This will help cook the pizzelles evenly and not stick to the iron. Also, use a little cooking spray so that it doesn’t stick.
- Use the right amount of batter: Use a tablespoon or cookie scooper. This will make sure you have the right amount of batter for each pizzelle. Too much batter will result in a doughy texture, and too little will produce thin and crispy pizzelles.
- Maintain the right temperature: Maintain the temperature of the pizzelle iron by adjusting the heat as necessary.
- Keep the pizzelle iron clean: Keep the pizzelle iron clean by wiping it with a damp cloth after each use. This will prevent the batter from sticking to the iron and ensure the pizzelles are shaped correctly.
- Experiment with flavors: Experiment with different flavorings such as vanilla, almond, lemon, or anise extract to add a unique twist to your pizzelles. You can also add cocoa powder, chopped nuts or chocolate chips to the batter for a more decadent treat.
- Add kosher salt: A secret trick I use is to add a pinch of kosher salt to the batter to help it bring out all the flavors perfectly so that your pizzelles taste extra good!
- Serve and store properly: Let the pizzelles cool down before serving and store them in an airtight container to keep them fresh. They can last for several weeks if kept in a cool and dry place, making them a great option for a quick and easy snack.
Recipe Variation Ideas for Stuffed Pizzelles
This delicious stuffed Pizzelles recipe is absolutely perfect as is. If you’re looking to change things up here are a few variation ideas you can try:
- Chocolate: To make a chocolate pizzelle variation, add 1/2 cup of unsweetened cocoa powder to the dry ingredients of the recipe. This will give the pizzelle a rich chocolate flavor that will satisfy any sweet tooth.
- Lemon zest: For a refreshing twist on the classic pizzelle, add 2 teaspoons of grated lemon zest to the batter. The lemon adds a bright citrus flavor that pairs well with a cup of tea or coffee.
- Almond: To make this nutty variation, add 1/2 cup of finely ground almonds to the batter. The almonds give the pizzelle a delicious crunch and flavor that pairs perfectly with a glass of milk.
- Hazelnut: For a nutty and sweet take on the classic recipe, add 1/2 cup of finely ground hazelnuts to the batter. This variation is perfect for those who enjoy a rich, nutty flavor with their desserts.
- Spice: To add some warmth and depth to the recipe, add 1 teaspoon of ground cinnamon and 1/2 teaspoon of ground nutmeg to the dry ingredients. This variation is perfect for the fall/winter season and pairs wonderfully with a cup of hot chocolate.
Serving Suggestions for Stuffed Pizzells
- Top stuffed pizzelles with whipped cream, ricotta cheese, and fresh berries for a simple yet elegant dessert that is perfect for any occasion.
- Spread a layer of Nutella on top of the stuffed pizzelles and stack them up to create a delicious and indulgent dessert that is perfect for sharing.
- Use pizzelles as a base for ice cream sandwiches by slicing them in half and stuffing them with your favorite flavor of ice cream.
- Dip stuffed pizzelles in melted chocolate and sprinkle them with chopped nuts or candy pieces to create fun and festive treats that are perfect for parties.
- Dust some powdered sugar on top of your pizzelles for a stunning and elegant look to these traditiona Italian waffle cookies.
- Serve stuffed pizzelles with a hot cup of coffee or tea for a traditional Italian dessert that is sure to please any crowd.
Frequently Asked Questions
Store pizzelles in an airtight container at room temperature for up to a week. You may also freeze pizzelles for a longer shelf life.
Yes, you will need a pizzele iron in order to make this recipe. A pizzelle iron is a special type of waffle-like iron that imprints the iconic snowflake pattern onto the cookie.
To ensure that your pizzelles are crisp and not soft, make sure to cook them for the recommended time in your pizzelle iron until they are golden brown.
Absolutely! You can make this pizzelle recipe gluten-free by using a gluten-free all-purpose flour or a flour blend that is specifically formulated for gluten-free baking.
How to Store Stuffed Pizzelles
To store leftover pizzelle, first, ensure that they have cooled completely to room temperature. Place them in an airtight container or resealable bag and store them in the refrigerator for up to five days.
If the pizzelle have been frozen, they will lose their crisp texture and become chewy when thawed. That’s why I don’t recommend freezing it in a freezer.
More Recipes You’ll Enjoy
- Amazing Mom’s Cream Horns (The Best Recipe on the Web!)
- Cream Cheese Puff Pastries (Video Recipe)
- Cream Cheese Puff Pastries (Video Recipe)
See all dessert recipes.

Stuffed Pizzelles (with Whipped Dulce de Leche Cream)
Ingredients
For the Pizzelle Cookies
- 5 large eggs
- 1 cup sugar
- 6 oz. unsalted butter
- 1 ¼ cup all-purpose flour
For the Pizzelle Cream Filling
- 2 cups heavy whipping cream
- ½ can Dulce de Leche
- Pizzelle maker
Instructions
How to Make Stuffed Pizzelles Cookies
- To make Pizzelles, start by placing butter and margarine in a small bowl and microwaving it for 30 seconds until melted. Let it cool before continuing.
- In a separate bowl, add eggs and sugar and beat them on high for five minutes using an electric mixer.
- Add melted and cooled butter and whisk it for another minute.
- Next, gradually add in flour while mixing on low until everything is fully combined.
- Now, preheat your Pizzelle maker. Once it's ready, use an ice cream scooper to pour some of the mixture onto each ring. Bake for only one minute.
- As soon as they're done, quickly remove them from the Pizzelle maker and roll them up while they're still hot. Note that once they cool, they will become hard and you won't be able to roll them up.
- Let the rolled pizzelles cool on a wire rack completely before filling them with cream.
How to Make Dulche de Leche Cream Filling
- For the cream filling, simply beat heavy whipping cream until just starts to thicken, and then add Dulce de Leche and mix just until combined. Once it's combined, scrape the sides of the bowl and mix again for another 30 seconds.
How to Assemble Pizzelles
- To assemble the Pizzelles, place the cream filling in a piping bag with Wilton 21 attachment. Pipe some cream onto each side of the rolled Pizzelle.
- Repeat the process until all rolls are filled. Refrigerate for at least six hours before serving.
Notes
Thank you for following me on Instagram, Facebook, and Pinterest!
This recipe was originally posted on February 13, 2015 (original picture below), and updated for a better user experience. The post may contain affiliate links. Read my disclosure.


If I want to make vanilla pizzelles, how much vanilla extract should I use in the batter? Thanks
Hi Rosa. 1-2 tsps of vanilla extract. Thank you for asking!
Looks like you updated your filling recipe and I didn’t write it down. What was it before?thank you !
Hello Lena! I do not use Cool Whip any longer and replaced the recipe with using heavy whipping cream instead. I did add the old frosting recipe in the recipe card notes. Check it out.
Hello Valya. I want to make these for a wedding, and freeze them beforehand. Do I fill them and then freeze them with the cream? Also how long ahead can I make and freeze them. Will few weeks ahead be ok? Thank you
It’s ok to freeze these. Make sure to slow thaw them in the fridge for at least 8 hours.
I noticed in the ingredients it only mentions butter, but the instructions say add butter and margarine. So how much margarine do I add? Thanks
You can use either or, but not both at the same time and the amount is the same for each. Using butter Pizzeles turn out crunchier, and much softer using margarine. I hope this helps.
Hello Valya, thank you for the recipe! I just want to clarify about the cream filling… In your ingredient list you have heavy whipping listed but in your instructions you mention cool whip…so which one do you use?
You can use either. This recipe was updated by using heavy whipping cream in the cream instead of cool whip (my preference).
How long can I store the rolled pizzelles before filling them
I usually filled them and refrigerate or freeze them. I’ve never stored them unfilled.
What recipe would you use to fill with a chocolate filling? Would
Chocolate pudding work?
Chocolate pudding is too liquidy. I would use this cake rolls cream recipe and add cocoa powder or melted and cooled chocolate.
Question? Can these filled pizzelles be frozen after making. I am baking cookies for our daughter’s wedding that is in less than 2 weeks. I need to get some baking done early. We’re from Pittsburgh and it’s tradition to have a cookie table filled with treats in addition to the wedding cake
Yes, they freeze perfectly. Thaw them in the fridge overnight, they will taste just as fresh.
Thank you for this recipe! Where do you buy this Mexican condensed milk? I think I bought a raw la lechera at winco.. I will try to cook it.
Would it be ok to use only butter?
Thanks!
Safeway or most Walmart has it. Sure only butter is ok. I stopped using margarine completely a while ago.
I made this recipe many times but not with your filling. I made your recipe last night. Followed recipe but stuffing mixture seemed a lil runny. Any suggestions on how to make a stiffer type of filling so it doesnt seem like a runny mess?
Did you use cool whip or heavy cream for the cream? If you used frozen cool whip that will make the cream runny. It’s kind of hard to determine what went wrong with out more detailed explanation
Hi. I have looked everywhere for the dulce de leche and no one has it. Can you use the nestle sweetened condensed milk as a subsitute with the cool whip??? Thanks!
Yes, absolutely! Cook nestle or any brand of condensed milk fo 3 hour on low/med and it will be the same dulce de leche.
Thanks for the quick response!
You are welcome! ?
hi valya, i read a comment where you said you freeze them. do you freeze them filled already or just the empty pizzelis themselves and fill later? thanks. by the way this is a good recipe. they turn out great
Hi Tatyana! I fill them and then freeze, because I like them soft after thawing. If you like them to be crunchy freeze them unfilled and then fill them after thawing. I hope this helps. Thank you kindly for a sweet feedback! 🙂
Hello there. These look soo good. I want to make them. But i have a question which size of pizzelle maker do you use? The 3″ or 5″? Or advise which one is better to purchase..thanks
I have a double 3″ in diameter pizzelle maker. Also, I have a link to Amazon, where you can purchase one if you need to. Thanks for asking Raya 🙂
Hi Valya, these look tasty! question, why do you use butter and margarine together? can I use butter only or it will change the texture of the pizzelle? thank you so much!
Adding margarine gives them a softer texture. Never used butter alone, so please let me know how it turns out for you. I hope this helps. Tx 🙂
Yummy! Make some on spring break, it’s my diet break. Lol. Will have to try making this for sure!
Thanks! 🙂
Oh I love these! I never get the nerve to make them though lol.
I know. They are so good. Thanks Olga 🙂
These are beautiful, Valya! They look like the belong in a bakery. And I’m loving that cream filling, sounds amazing!
They are very tempting, it’s hard not to eat more than one. Thanks Gayle! 🙂
These look amazing! Whenever i make mine they get soggy, i gotta fill them with cream right before serving to guests. Can you advise me on what to do so that they dont get soggy so quickly? i do place in fridge right after filling them, even if its for a few minutes before serving
Is your recipe same as mine? After I refrigerate mine (even for days) they are soft not soggy. If I want them crunchy, I feel them before serving. They are not soggy at all. Explain how you make your recipe so I can figure out what you are doing wrong.
I discovered your website not too long ago. I really like your recipes and photos. Also how step by step you show everything. Great job.
Welcome Vera!!!! I am so happy to hear that you like my website and recipes. Hope to hear more from you! Thank you and come back soon! 🙂
Thank you for sharing your version of pizzelles. I have a recipe I have used a few times before but mine always crack and I can’t figure out why=( I’ll try your recipe and hope for better results=)
You are very welcome Marina! I would love to hear what results you have after making this recipe. Can’t wait to hear back from you ; )
I tried this recipe a couple of times and good news: they definitely didn’t crack:) The only thing, which isn’t necessarily a bad thing, is that they turned out very thin for me, more fragile than yours look on the picture. I had to be extra careful while filling them with cream, otherwise the edges would break.
In your most recent post you wrote that you freeze your Cream Horns. Have you tried freezing these pizzelles? I am thinking ahead, you see, already preparing for the Holidays:)
Thank you and to your girls for all of your hard work!
I think the problem was that the batter was too runny and your trubochki turn out too thin. The size of the eggs can make the recipe be different from original, so add a little more flour to make trubochki thicker. Yes, I have froze these many time and they are just as fresh and good after thawing. Merry Christmas Marina! 🙂
Thank you for the quick reply! I’m putting these on my menu then. Merry Christmas!
Valya privet! These look beautiful and I’d like to make the recipe. As I was checking the ingredients I got confused about the butter and margarine. It says 4 oz but looks like it’s a half of that. Would u clarify just to make sure.please.thank you in advance
I’m sorry! I’m so used to making two servings of it and made a mistake. Thank you so much for catching before any one made this recipe. It’s already fixed. You need 2 oz unsalted butter(half a stick) and 4 oz imperial margarine (one whole stick) melted and cooled or warm.