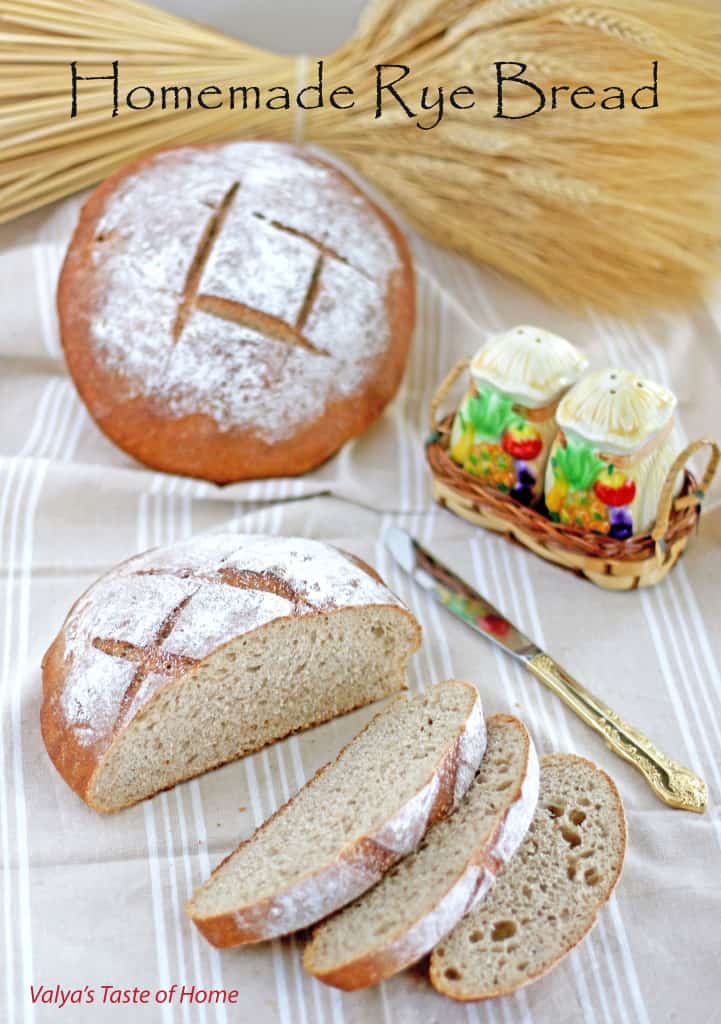
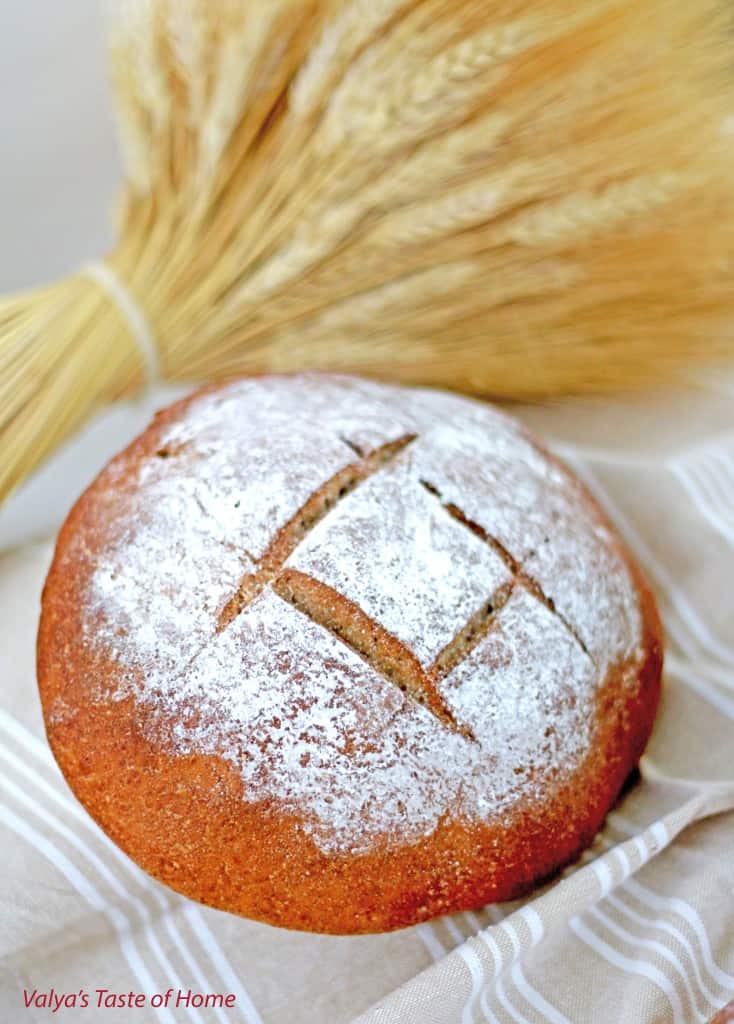
Homemade Rye Bread
“A table without bread is not a table, but bread is a table on its own.” SGP
What does bread mean to you? In all of our kitchens we have a designated place just for bread. Everybody knows it is the most basic food staple in every household, across every nation. What is not common is that most countries don’t have this internationally known, God-given right to have, blessing in their home and are suffering brutal poverty and famines we cannot even imagine here today.
The USA is also called “the bread basket of the world,” and we thank the good Lord for it. However, how is this blessing treated? Where is the bread in your home and what happens to it? Is it carefully sealed and frozen for preservation? Is it used in moderation, as much as will be eaten? Is it sitting in your bread box until it molds? Are left overs thrown into a garbage bin? Does it fall on the floor, get swept by a dusty broom and thrown out as trash?
To have this blessing on the table….
…it required back-breaking labor by the hands of our grandparents. From the initial planting of wheat, to harvesting by hand using sickles, to grinding the grain to flour, to finally baking the bread. It takes about 110 days for wheat to grow from seed to ripened harvest. And that is only half the work. It takes us several minutes to drive to a store to buy our favorite bread and other bread-based goods. Too often, and because it comes so easily, it is taken for granted that we have this instant and unlimited access to this treasure. Too often it is undervalued.
Having an abundance of bread in daily life leads many to lose its significance. It is underestimated and uncherished. It seems perfectly normal to discard unused or leftover bread by chucking it into the garbage. However, to famished people all over the world, there is nothing normal about that. That piece of bread lightheartedly thrown into the trash could have prevented the death of another human being somewhere in the world, from starvation…and both events are in clear view, side by side, of the Same and Only God.
While it may not be possible to send that particular leftover piece of bread to a third world country, treating this blessing with care and respect in the smallest way, however micro a level, is a move towards lessening world suffering for the sake of righteousness. If a starving child doesn’t eat it, at least it will not be wasted, knowing there is such a child out there. And to show honor and thankfulness to the Lord, instead of mockery in wasting, for this blessing He gives to us so graciously.
With this life-sustaining blessing, we learn a gospel lesson today. First and foremost, from the Bible, we hear that fundamental teaching from the Lord’s Prayer. “Give us this day our daily bread.” God desires all people around the globe to have enough daily bread to nourish their lives. The word, “give,” reminds us that all bread comes from God and that bread is a gift of sunshine, rain, good soil, weather, and the atmosphere above the earth which allows the miracle of bread to happen. No person could ever make a loaf of bread if God had not been generous with these gifts of nature. The word, “us,” refers to the human community around the globe.
Jesus did not say, “Give me this day my daily bread.” It is not a selfish prayer just for me and my family but is a generous prayer, including the whole human family. The “us” does not narrowly refer to the church or include only Christians around the globe. The “us” includes all humanity. The word, “daily,” is also important. The Apostle Paul, in II Corinthians 8, talks about the manna or bread that God gave to the Israelites during their wanderings in the wilderness for forty years.
As recorded in the book of Exodus, each night, miraculously, God provided manna on the ground for people to eat and keep themselves alive, and Paul says that these people “gathered not too much nor too little.” You and I need the right portion of bread. If you gather and eat too much, you risk waste (and gain weight..). If you gather too little and eat not enough, you can starve your body.
Many people around the globe are malnourished. God wants us to have a daily and appropriate portion of bread for the best health of all human beings. “Bread” is a symbol of food and our daily needs. Jesus’ Lord’s Prayer is instructive for our lives and our moral values about world hunger: Give us this day our daily bread.
We all love bread. Especially homemade and fresh out of the oven. Warm and soft. Can you smell it? Can you taste it? How about when you’re hungry? It is soooo good and invigorating.
Most food gets tiring after a while, but not bread. And so it is when we consume the bread of life, Jesus and God’s infinite love for us. Jesus said in John 6:35: “I am the bread of life. Whoever comes to me will never be hungry, and whoever believes in me will never be thirsty.” When we eat and absorb Jesus’ words, spirit, and love into our lives, Jesus lives in us and we never die. The basic food staple of the world is bread and Jesus is the basic spiritual staple of the world.
There is a shortage of physical bread in this world of ours, but there is even a greater shortage of the bread of love. Jesus is the true bread from heaven that will never get mold or old. Jesus Christ and his love energizes our lives forever with the right kind of energy of love and compassion that we need. Let’s give great thanks, this Thanksgiving and always, to the Lord, our loving God, for our daily bread!
Ok, now to the recipe…
You can rush lot of things in life , but you cannot rush bread. A really good, quality – tasting bread cannot be made in a hurry. Though the dough does take time to develop and rise, there is more wait time than work time in this bread recipe. Which gives time to actually prepare the main event of the meal.
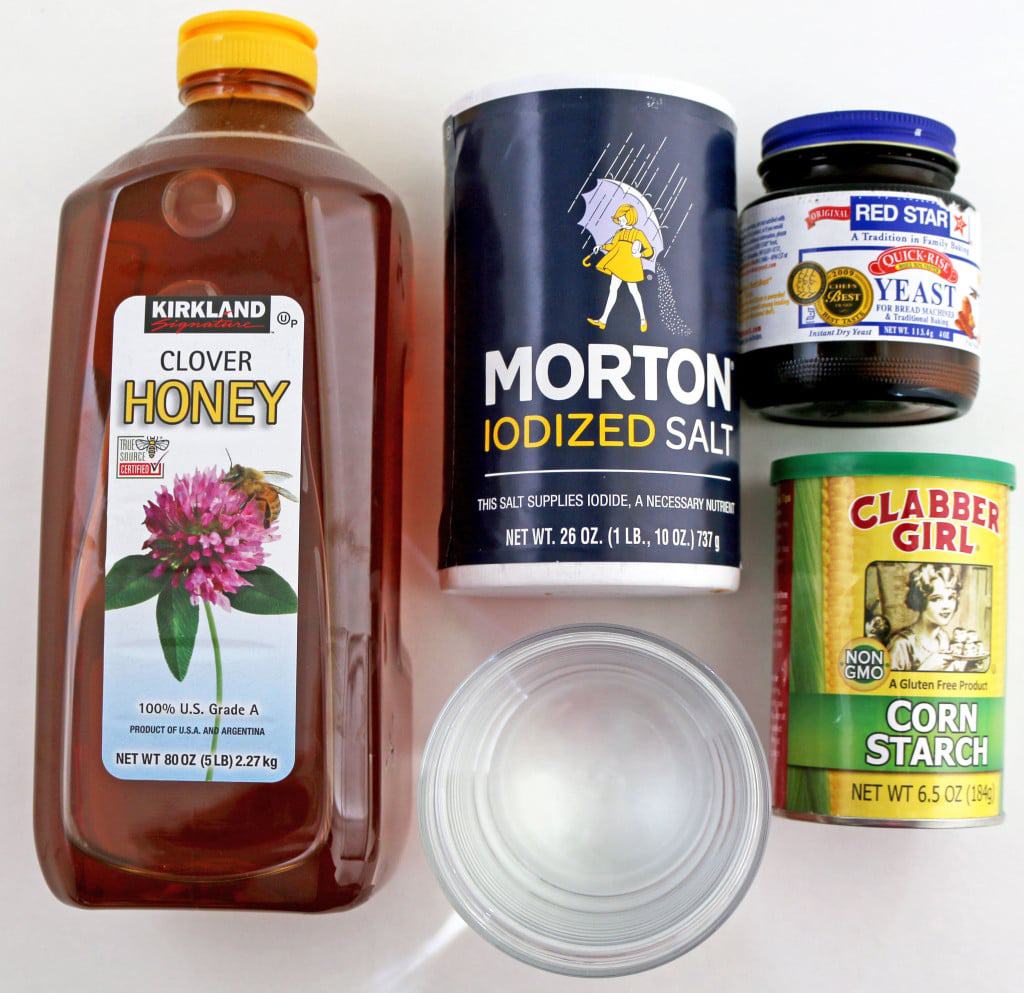
Ingredients you will need:
Day 1
2 cups – all-purpose flour
2 cups – whole wheat flour
1 tsp. – dry active yeast
3 cups – water room temperature
Day 2
2 cups – warm water
2 tbsp. – salt
4 tbsp. – honey
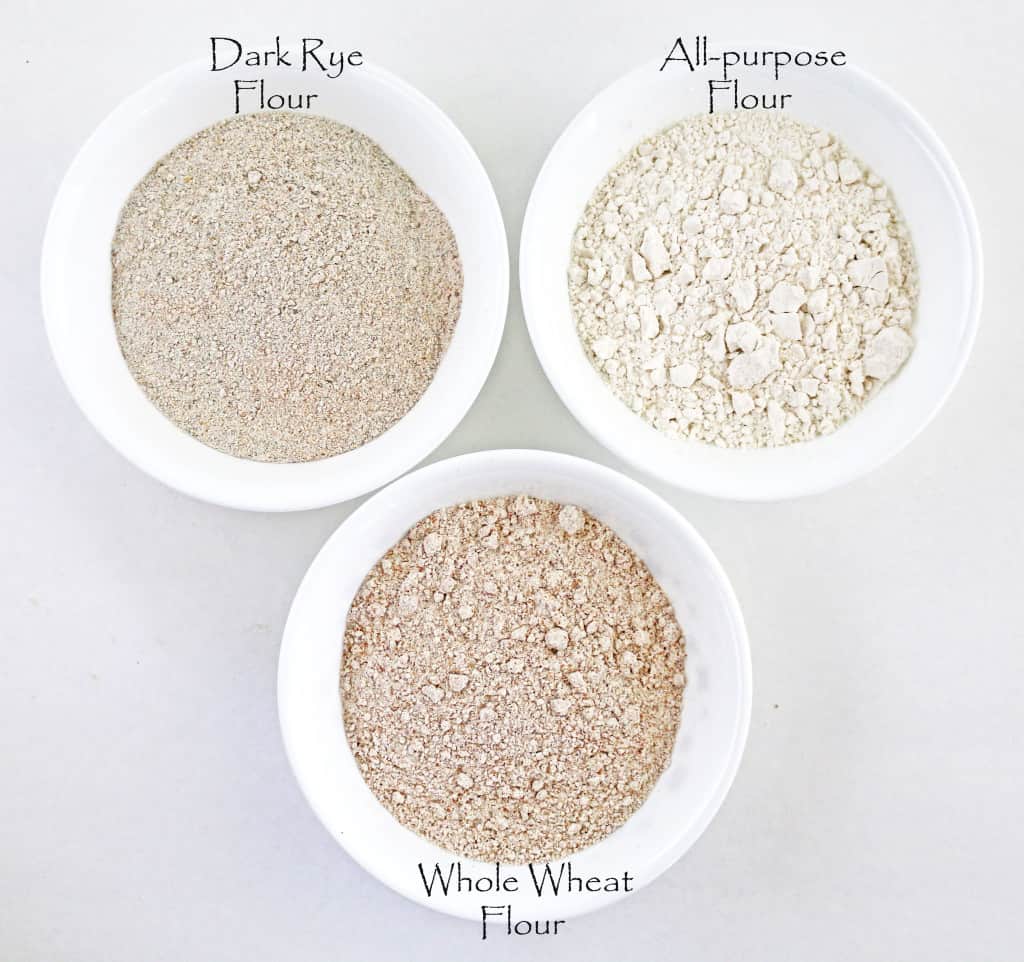
2 cups – organic dark rye flour
6 cups – all-purpose flour
Corn starch for dusting the top of the bread
Olive oil.
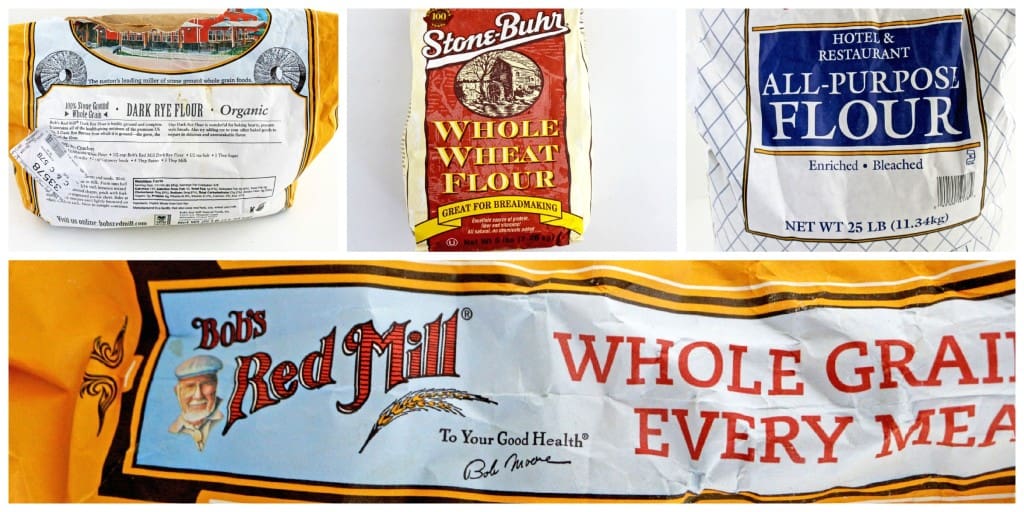
This how three different kind of flour look like if you compare them to each other.
Instructions:
Day 1
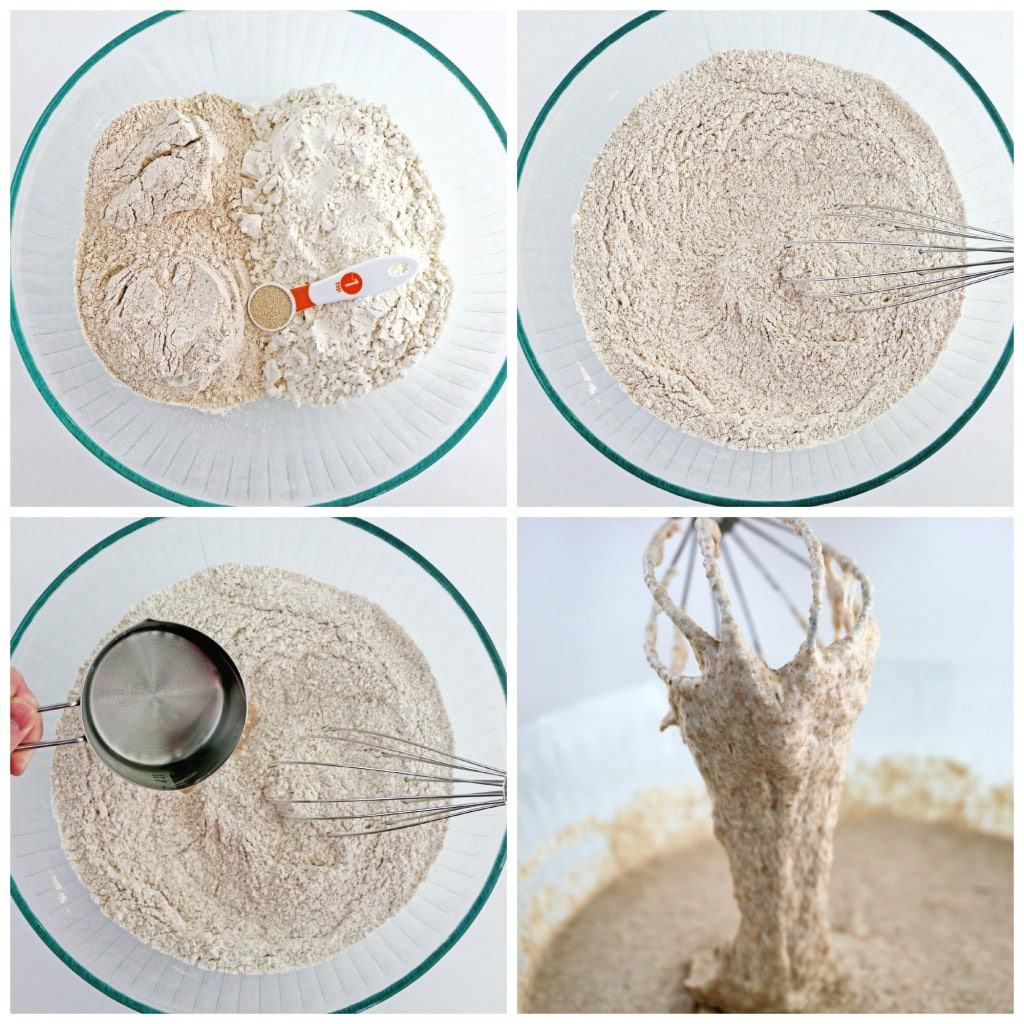
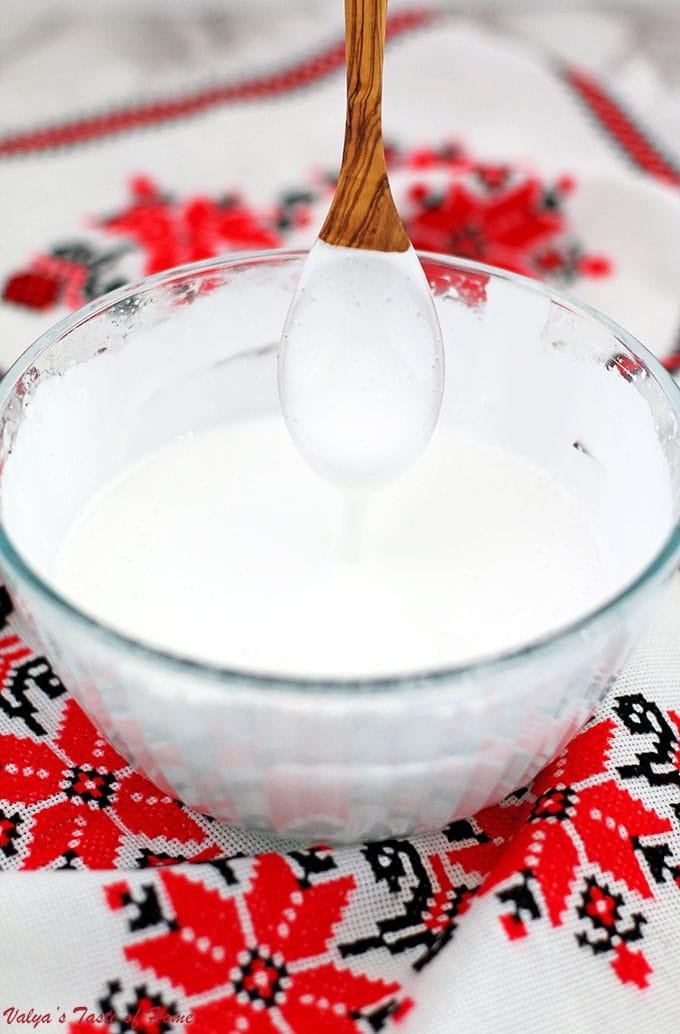
I start making this bread in the evening before I go to bed. Place 2 cups of all-purpose flour, 2 cups of whole wheat flour and 1 tsp. of yeast into a large bowl. Stir it with a hand whisker to combine the flour and yeast together. Add 3 cups of room temperature water. Stir it with whisker until all well combined. Dough should have a stretchy rubbery look/feeling when is dripping down the whisker. Cover the bowl with lid and let it sit on the counter top overnight.
Day 2
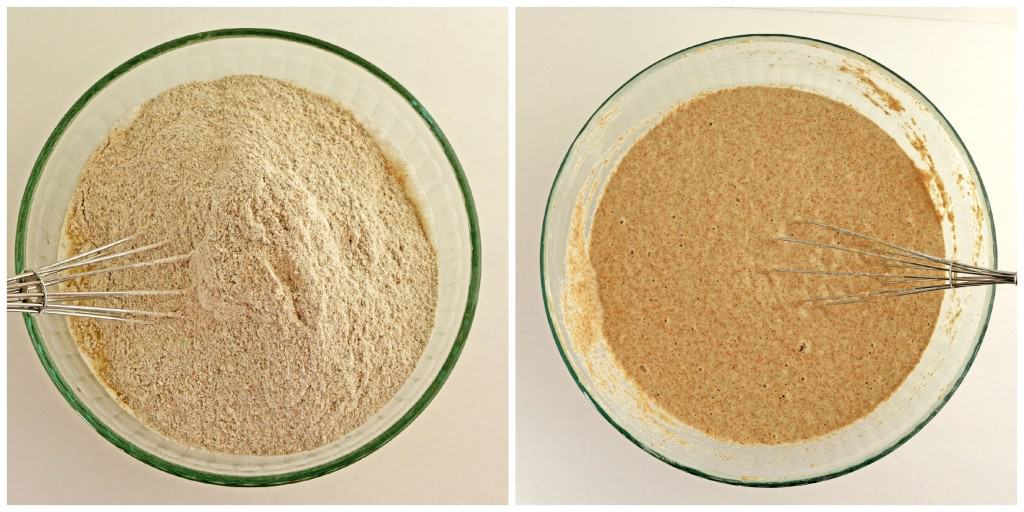
1. Pour 2 cups of very warm water to a small bowl. Add salt and honey. Stir with whisker until all dissolves about 2 minutes.

2. Then add 2 cups of organic dark rye flour. Stir with whisker until well combined with no lumps about 2 more minutes.
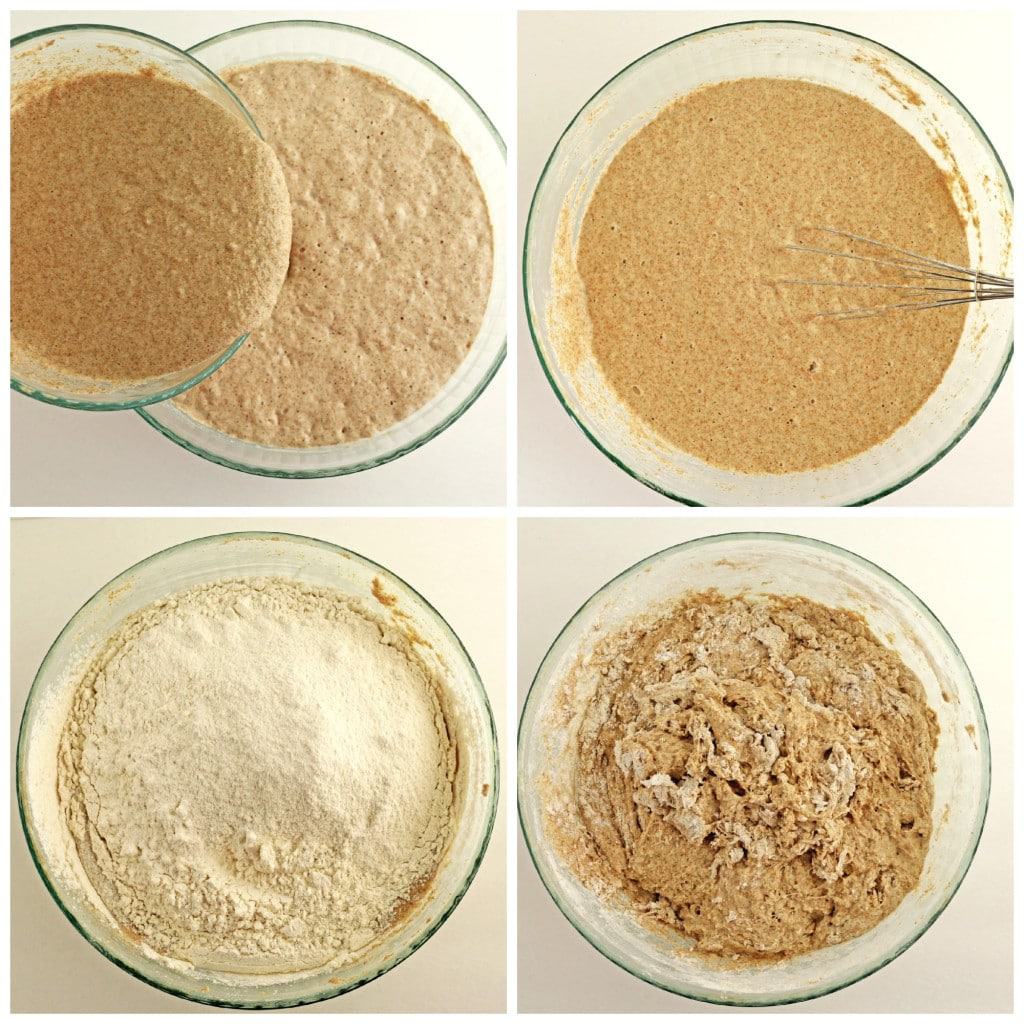
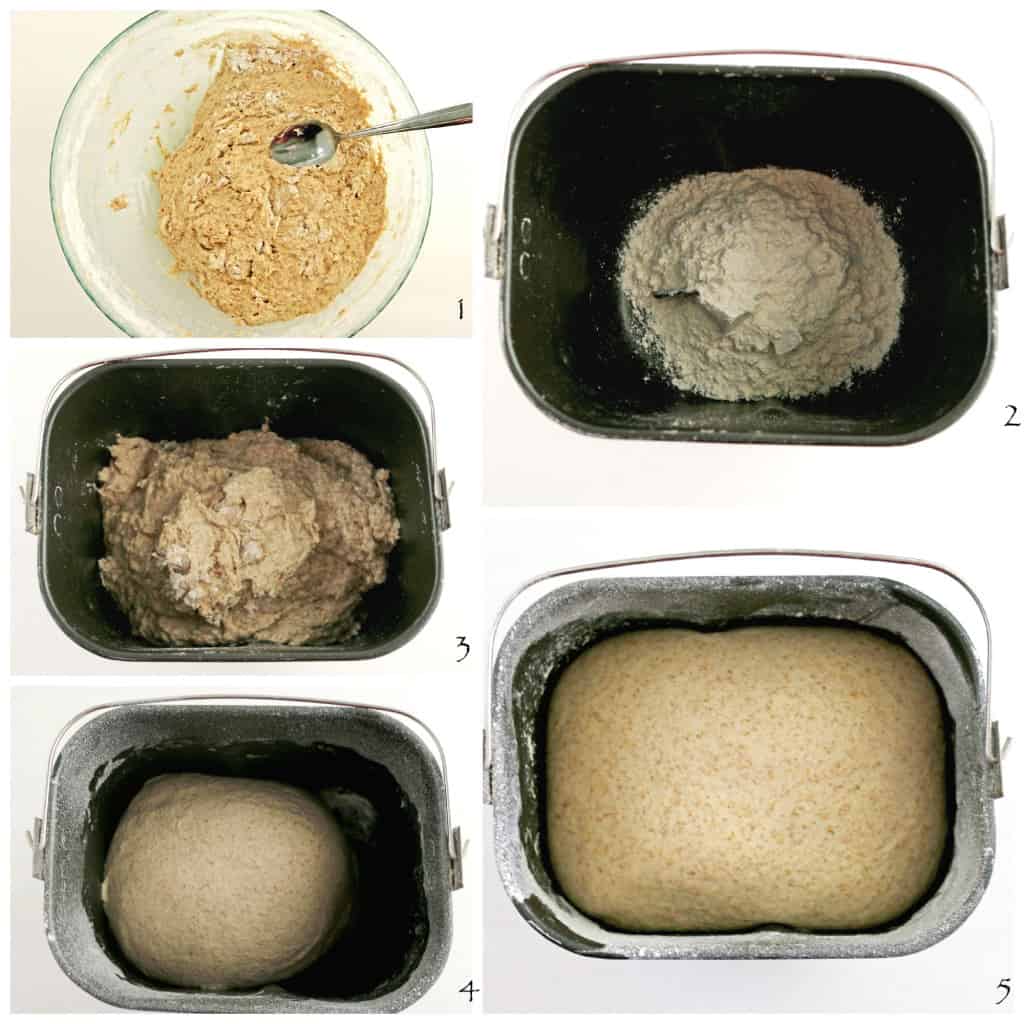
3. Pour the rye flour mixture into the wheat mixture (that is was proofing all night). Stir it well with whisker. Sift 4 cups of all-purpose flour into the rye/wheat flour mixture. Stir in the all-purpose flour (it doesn’t have to be well combined, because the bread machine will do the rest of the job for you).
4. Add 1 cup of all-purpose flour into a bread machine pan and then add half of the bread dough into the bread machine pan. Set the bread machine onto a dough cycle. Let the machine mix the dough for 30 (or until it’s done mixing, depends on the bread machine you have) into the dough cycle.
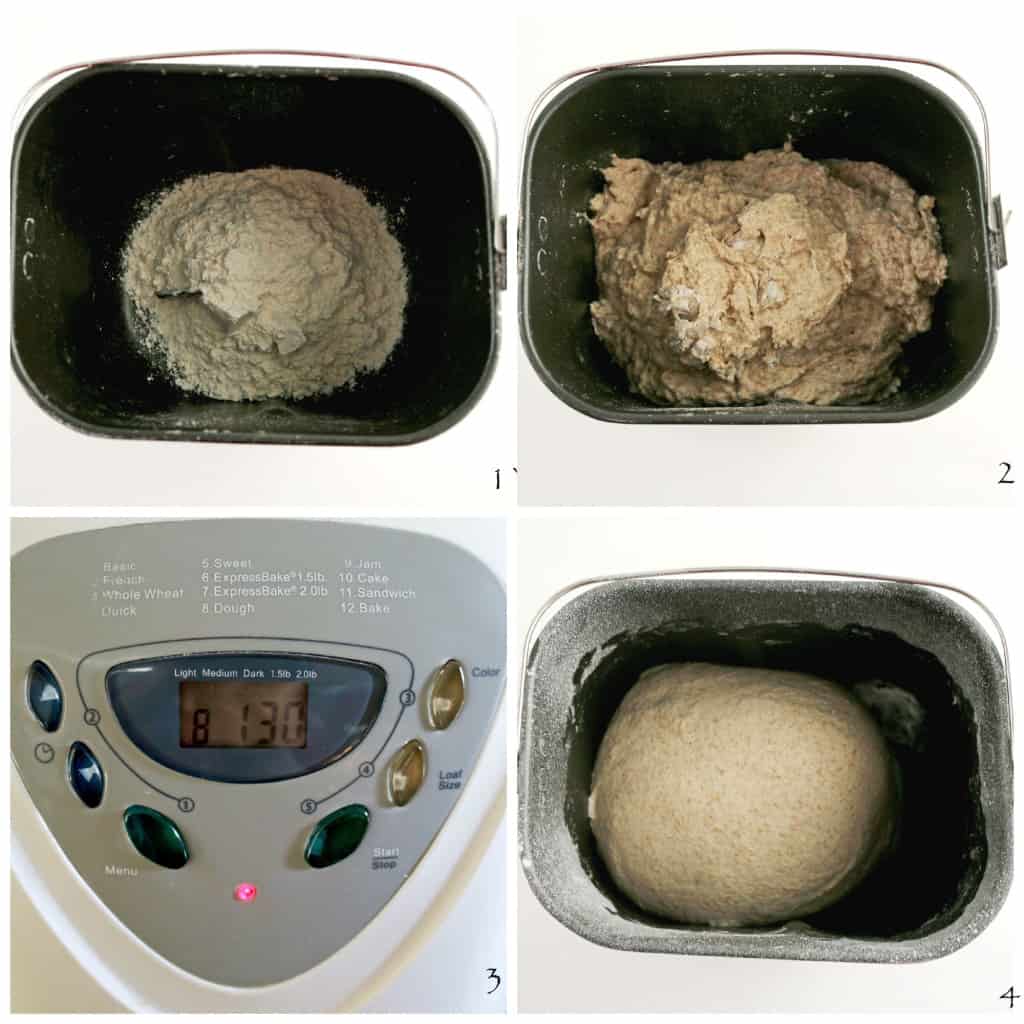
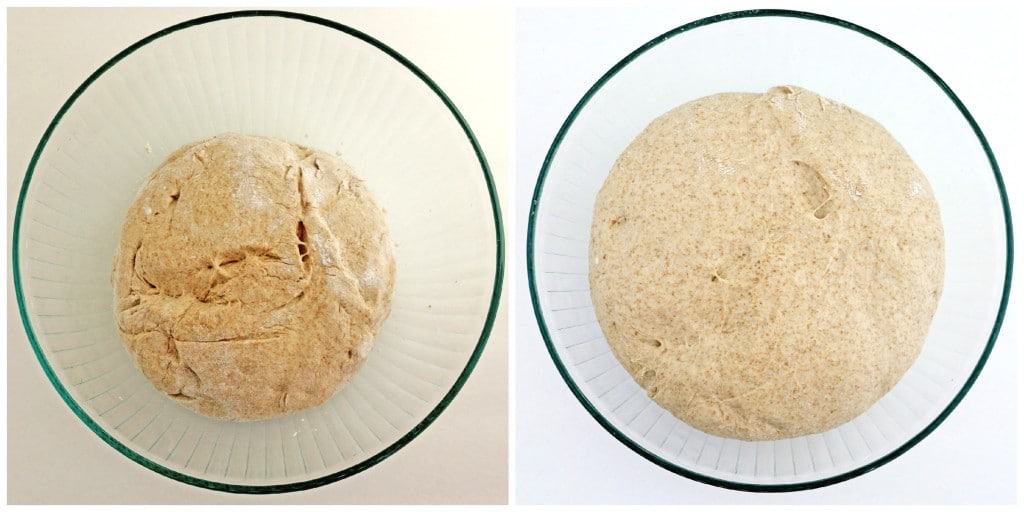
5. Remove the dough from the bread machine into large bowl dusted with flour or greased with olive oil (no matter) and let the dough proof in the warm place for about an hour or until triples in size (I usually preheat oven to 105, turn the oven off, place the towel onto an rack in the oven and then place bowl with dough covered with plastic food wrap or bowl lid (do not cover with towel it will dry the top of the dough) in it.
6. Repeat the same step with the second half of the dough, except let the bread machine dough cycle finish it’s mixing and proofing cycle (don’t remove the dough from the machine into a bowl for proofing like you did with the first half of the dough, the bread machine dough cycle will do the job for you).
7. The dough in the oven will proof faster, because it was prepared first, so start working with the first haft of the dough. Remove the dough from the bowl into a greased with olive oil work surface. Split the dough in half (if you are going to make long baguettes – batons or into three if you are making round bread).
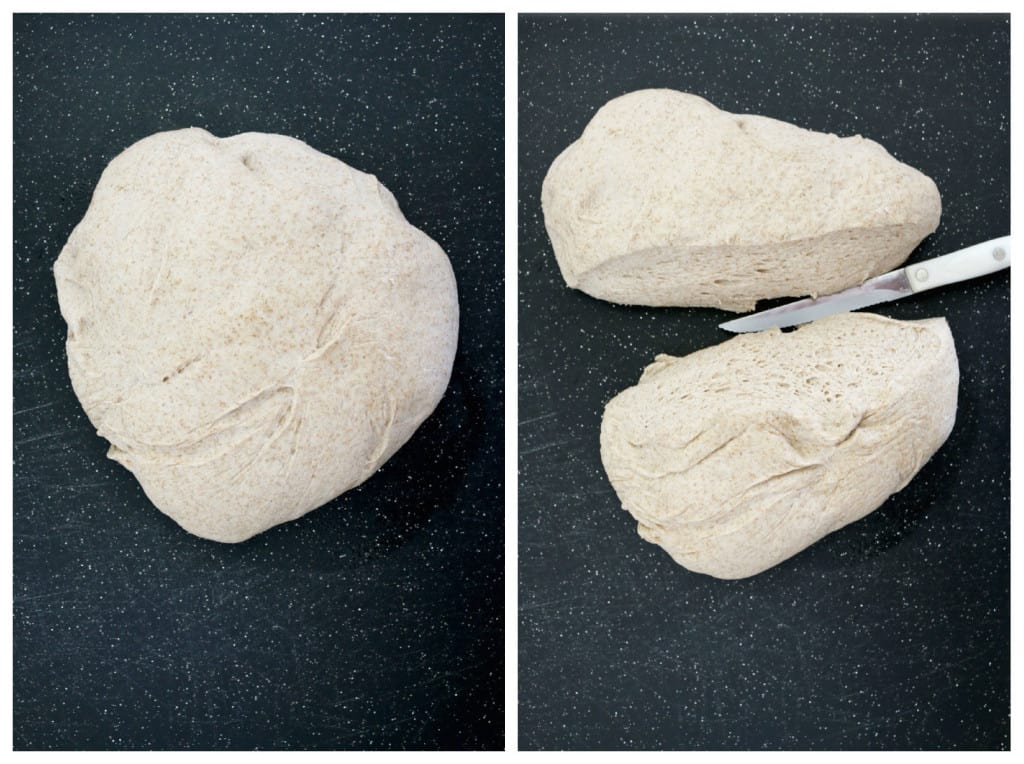
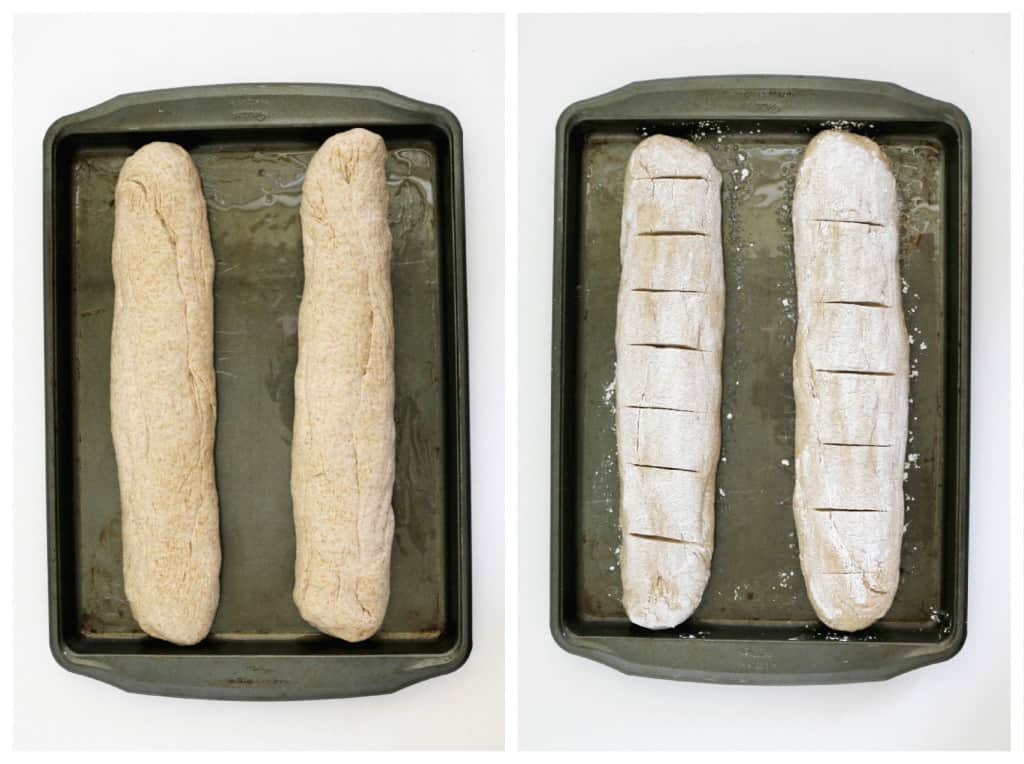
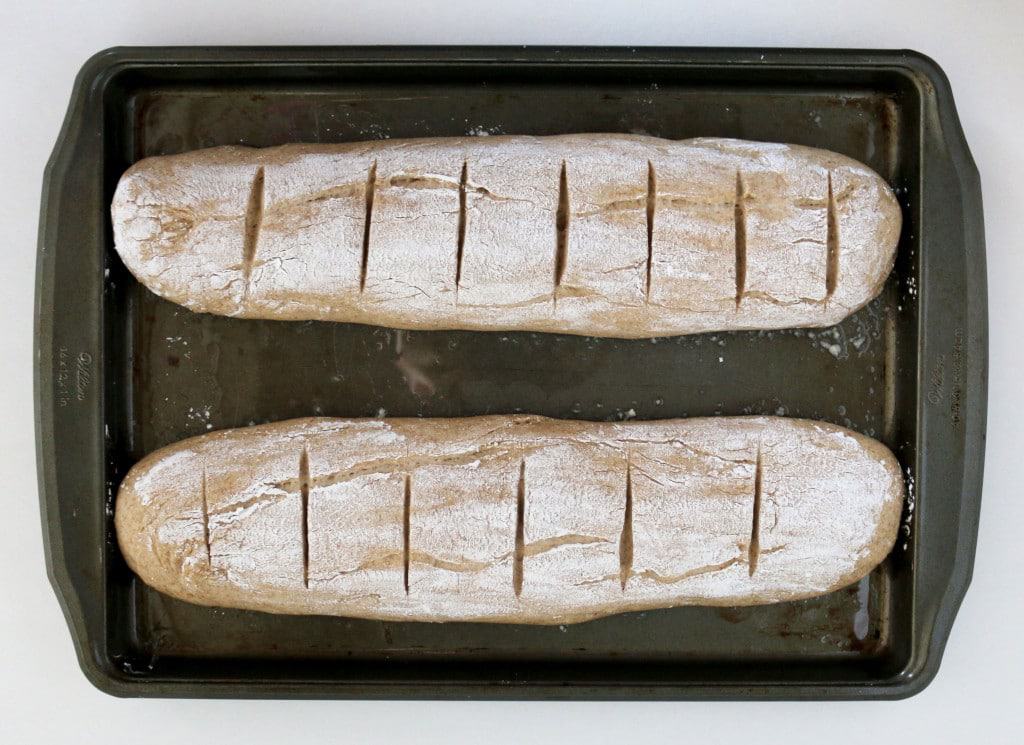
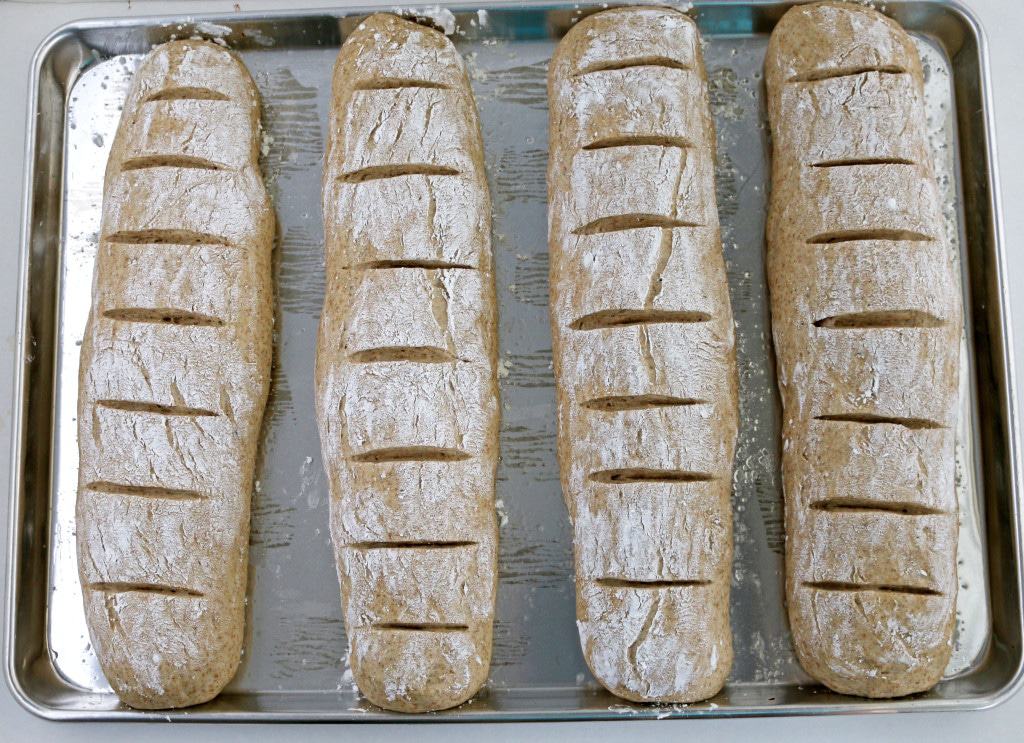
8. Roll each half of the dough into long batons and place them onto a baking pan well-greased with olive oil. Spread some corn starch on tops of each baton and then cut lines on top of each one. Set the pan onto the top of the stove and let it proof again.
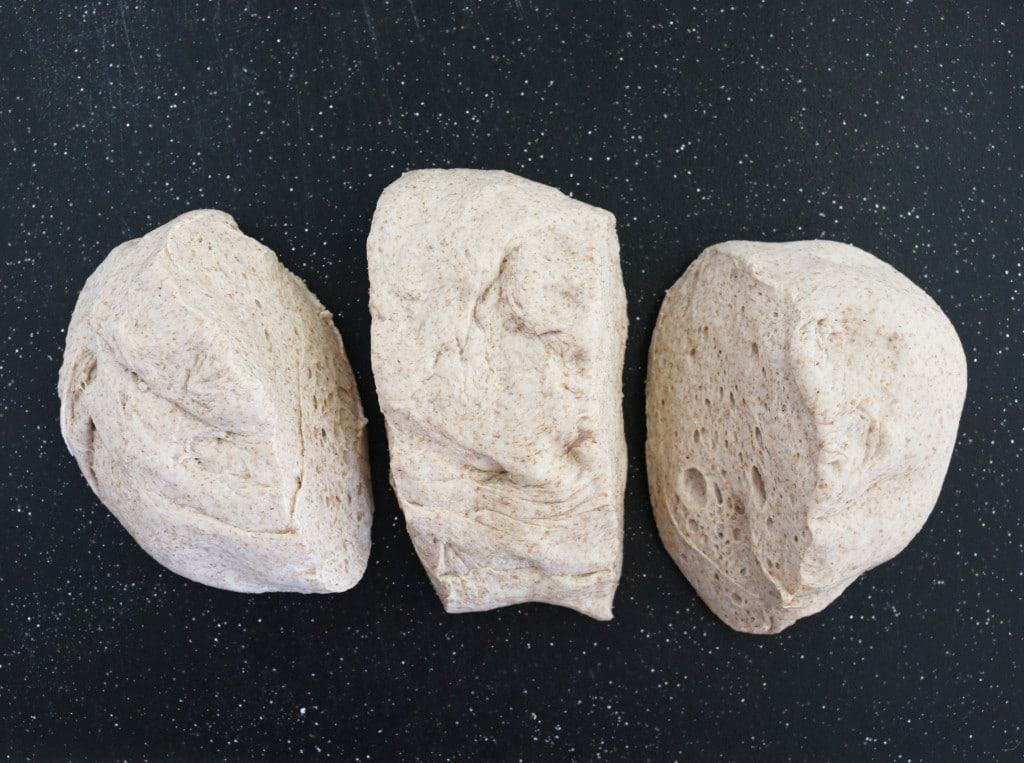
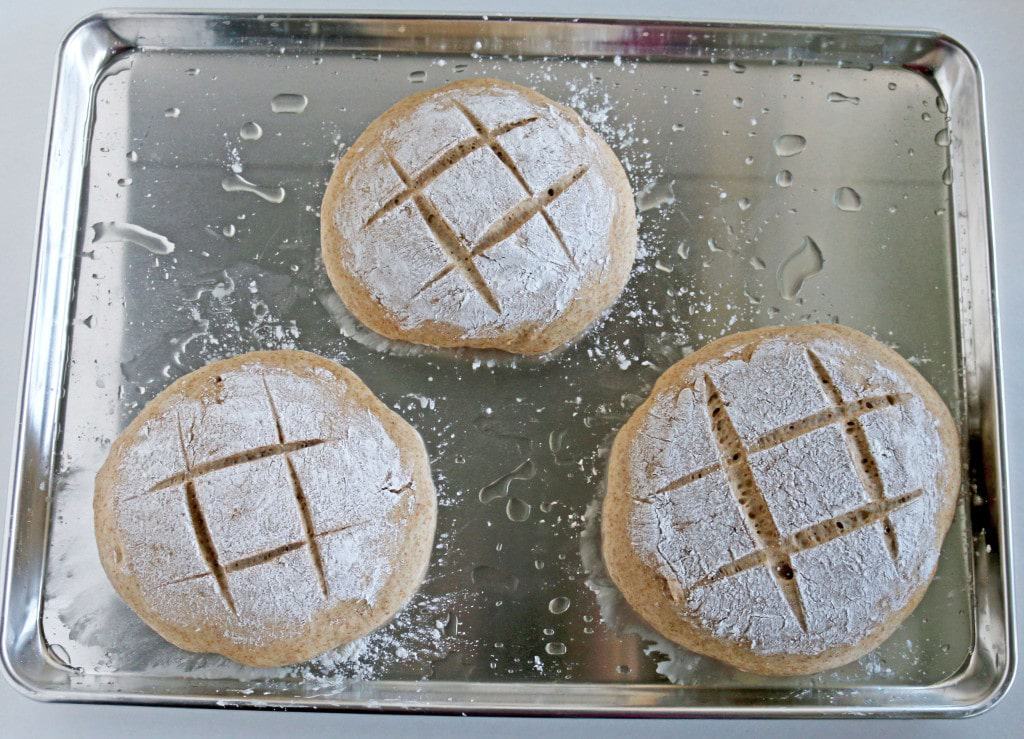
9. Repeat the same steps with a second half if you are making long baguettes – batons (which what I always do). If you wish to make round bread, you need to remove the bread onto a greased with olive oil working surface. Split the dough in three pieces.
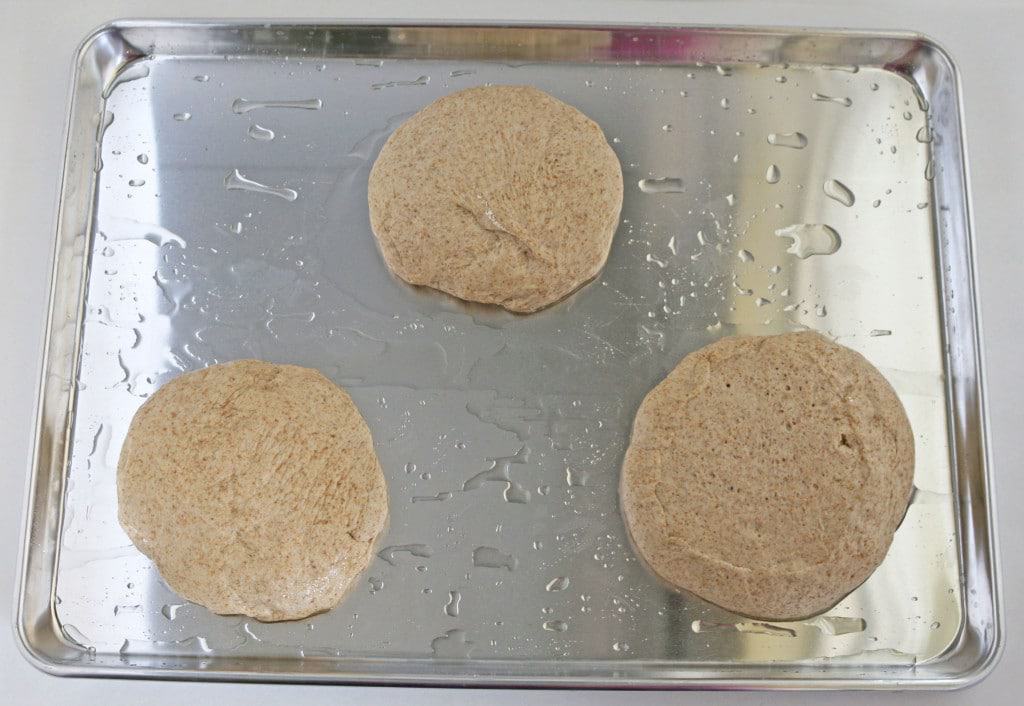
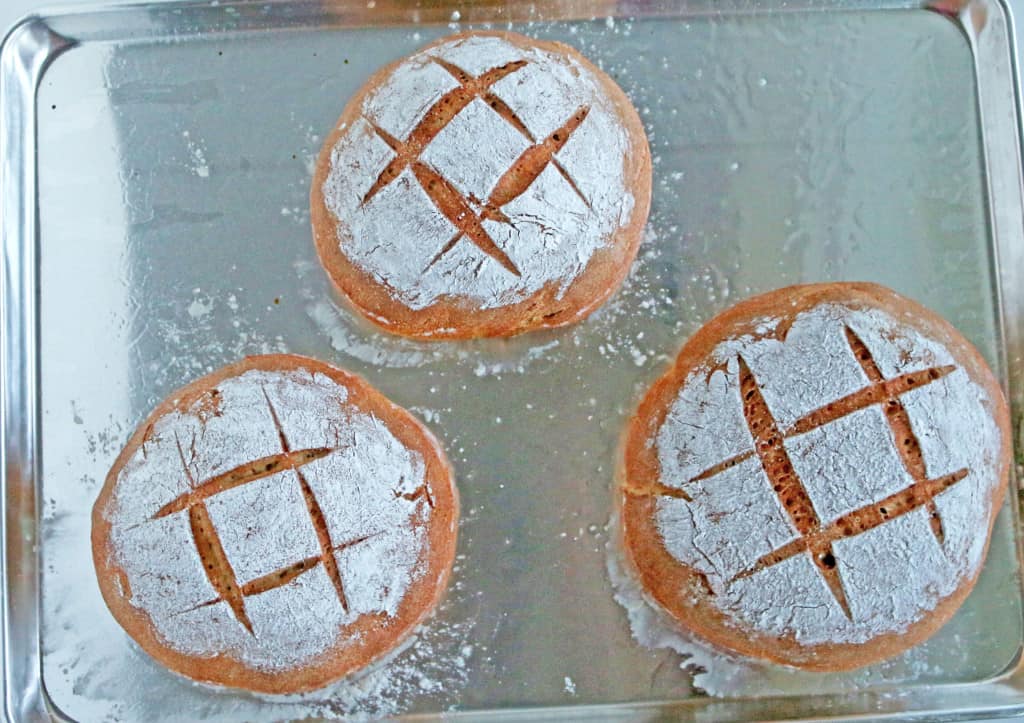
10. Knead and shape each piece into round bread. Place each round bread onto a well-greased baking pan.
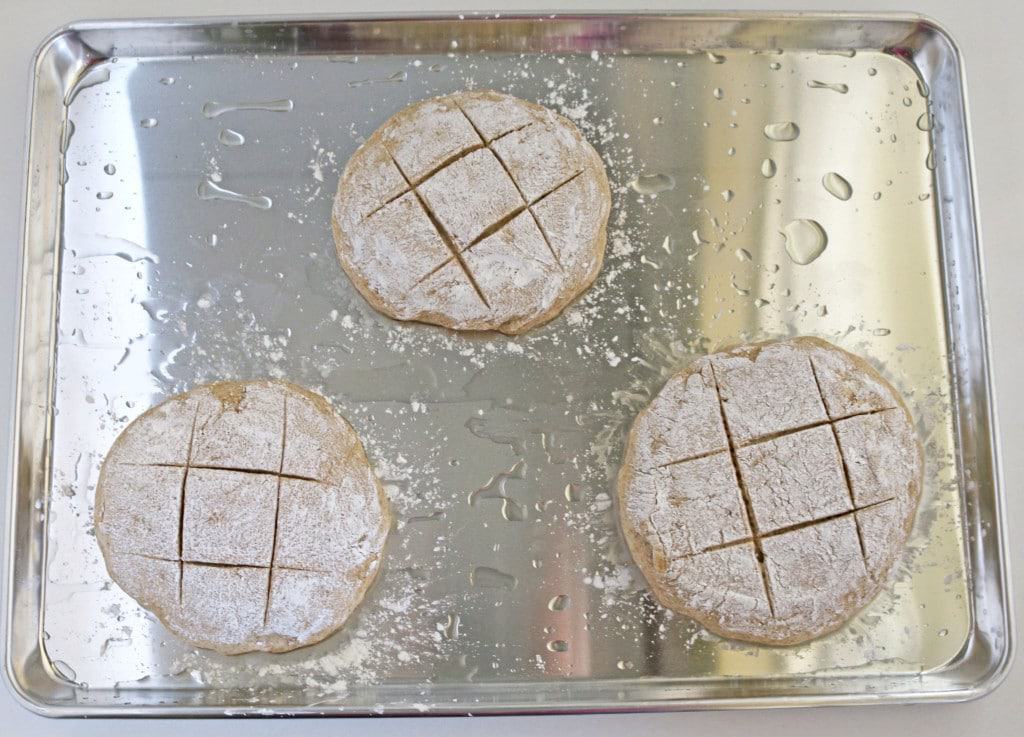
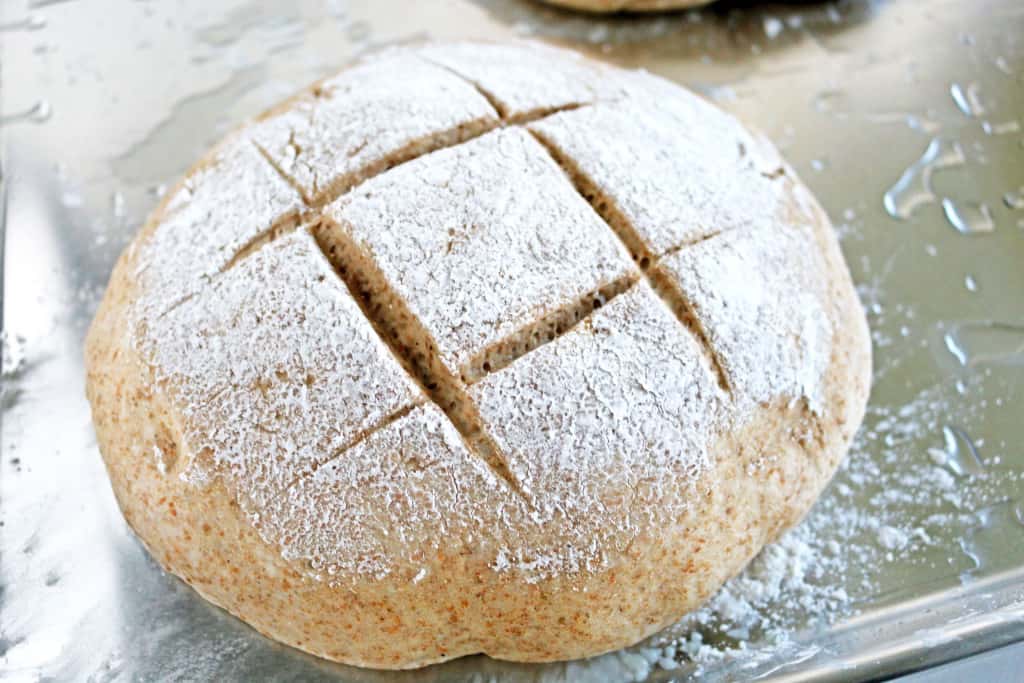
11. Spread some corn starch, cut little lines on top of the bread anyhow you like it. Place it onto a counter top to proof again.
Baking Instructions:
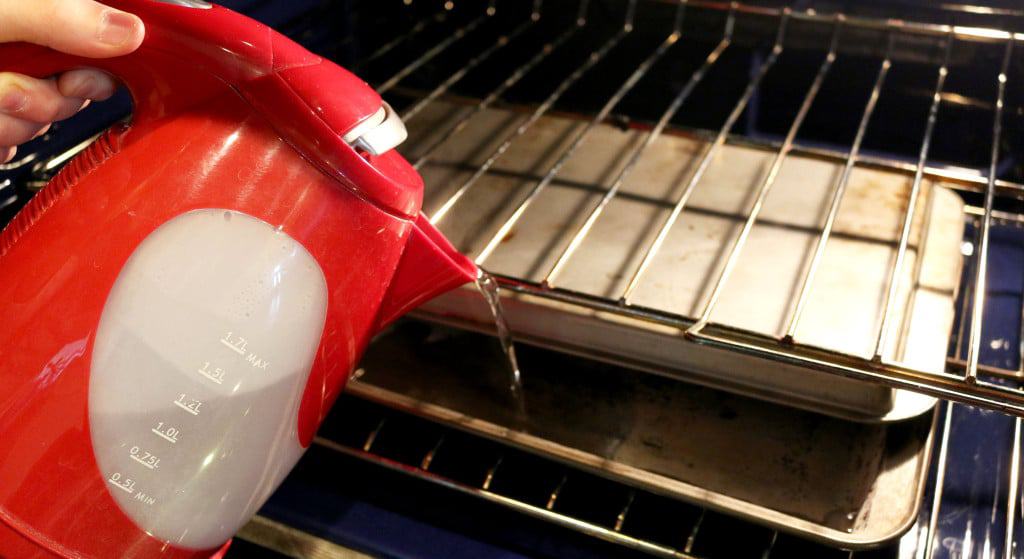
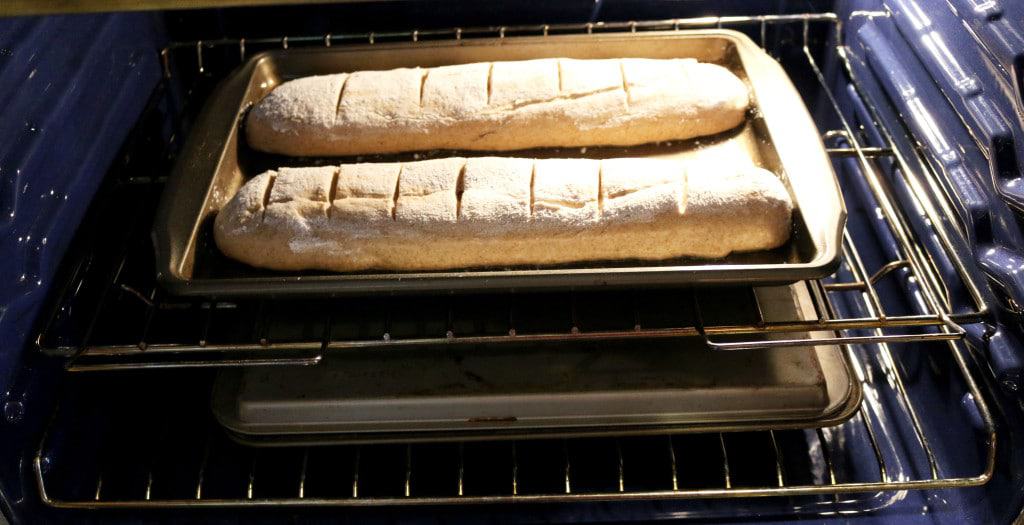
1. Place couple of pans onto the lowest oven rack. Pour boiled water into a pan until it’s almost full. Close the bottom pan with a top pan. Close the oven door and set the oven temperature to 450 F.
2. By the time the oven temperature riches 450 F (it takes about 20-30 min) the first pan with bread will be ready to bake.
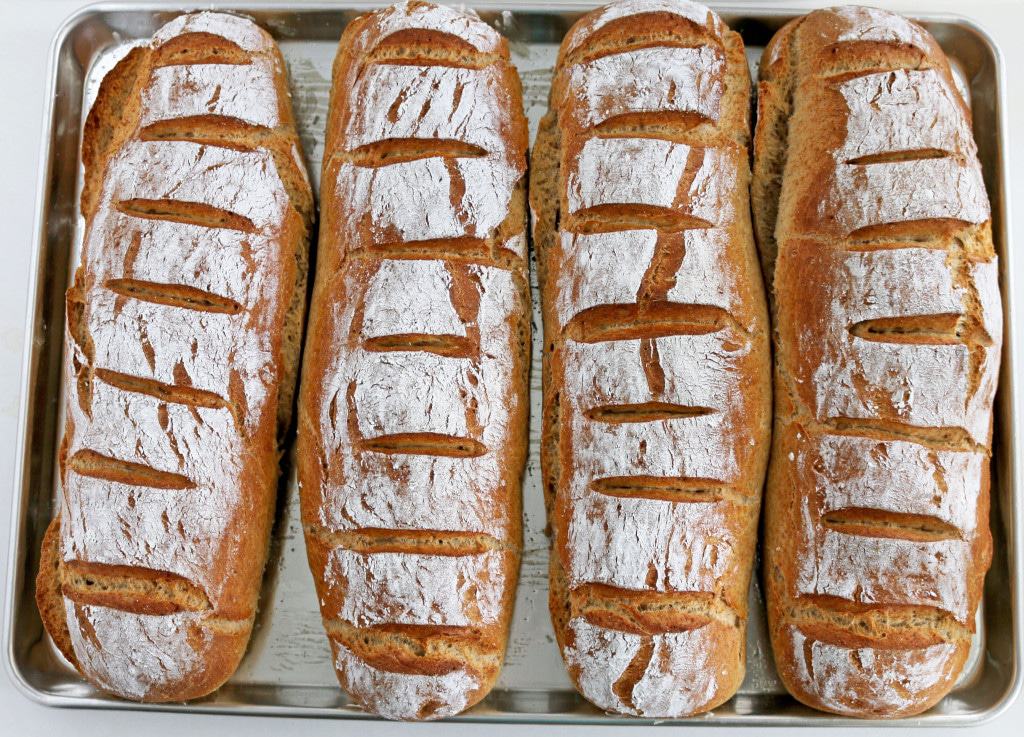
3. Place first bread pan into an oven onto a second rack (be very careful when you open the oven door to place or remove the cooked bread from the oven. First open a little crack to let the steam out or else you will burn you face if you open the oven door wide open right away). Bake the bread for 25 minutes or until dark golden brown.
4. I use big 16 X 21 baking pan. Make all the bread baton shape and bake it all at one. This saves me a lot of time than baking bread in round and baton shapes. Round shaped bread takes more space and needs to be baked in two separate pans.
5. After removing a pan with baton bread place the pan into the oven with round bread right away. Bake about 25 min or until dark golden brown. Remove the bread from the oven carefully; let the bread cool for 10 min on the baking pan. Remove the bread onto cooling rack and cover the bread with clean towel. The bread is ready to be served as soon as it cools (I love the bread warm). When the bread is completely cooled, place the bread into the plastic bag (or cut batons in half and place it into a Ziploc bags) and freeze the bread for up to 4 weeks.
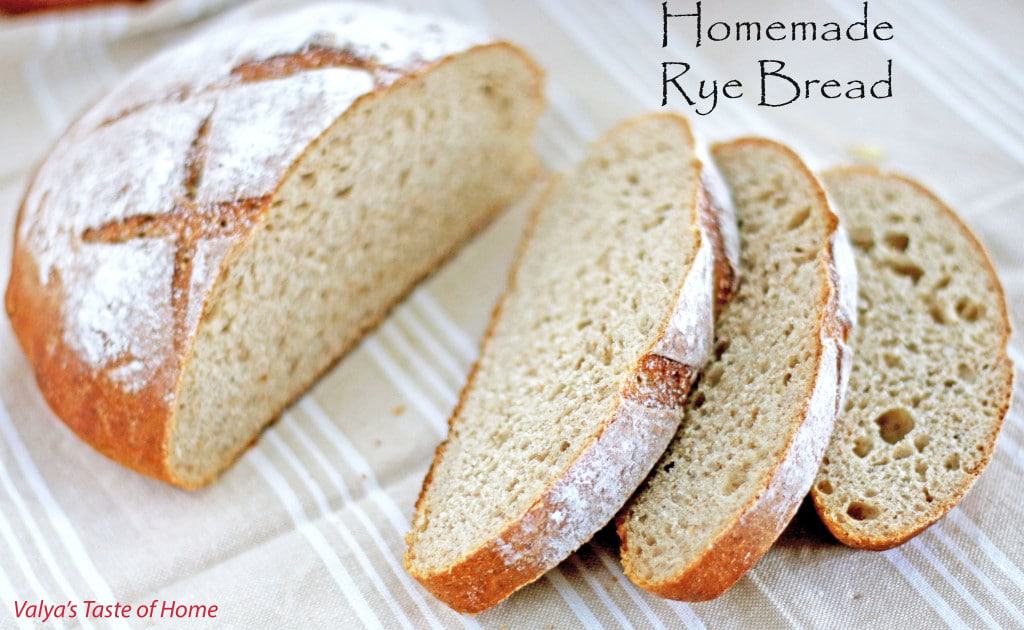
Slice and Enjoy (very little ingredients but such a delicious bread)!

Homemade Rye Bread
Ingredients
- Day 1
- 2 cups – all-purpose flour
- 2 cups – whole wheat flour
- 1 tsp. – dry active yeast
- 3 cups – water room temperature
- Day 2
- 2 cups – warm water
- 2 tbsp. – salt
- 4 tbsp. – honey
- 2 cups – organic dark rye flour
- 6 cups – all-purpose flour
- Corn starch for dusting the top of the bread
- Olive oil
Instructions
- Day 1
- I start making this bread in the evening before I go to bed. Place 2 cups of all-purpose flour, 2 cups of whole wheat flour and 1 tsp. of yeast into a large bowl. Stir it with a hand whisker to combine the flour and yeast together. Add 3 cups of room temperature water. Stir it with whisker until all well combined. Dough should have a stretchy rubbery look/feeling when is dripping down the whisker. Cover the bowl with lid and let it sit on the counter top overnight.
- Day 2
- Pour 2 cups of very warm water to a small bowl. Add salt and honey. Stir with whisker until all dissolves about 2 minutes.
- Then add 2 cups of organic dark rye flour. Stir with whisker until well combined with no lumps about 2 more minutes.
- Pour the rye flour mixture into the wheat mixture (that is was proofing all night). Stir it well with whisker. Sift 4 cups of all-purpose flour into the rye/wheat flour mixture. Stir in the all-purpose flour (it doesn’t have to be well combined, because the bread machine will do the rest of the job for you).
- Add 1 cup of all-purpose flour into a bread machine pan and then add half of the bread dough into the bread machine pan. Set the bread machine onto a dough cycle. Let the machine mix the dough for 30 (or until it’s done mixing, depends on the bread machine you have) into the dough cycle.
- Remove the dough from the bread machine into large bowl dusted with flour or greased with olive oil (no matter) and let the dough proof in the warm place for about an hour or until triples in size (I usually preheat oven to 105, turn the oven off, place the towel onto an rack in the oven and then place bowl with dough covered with plastic food wrap or bowl lid (do not cover with towel it will dry the top of the dough) in it.
- Repeat the same step with the second half of the dough, except let the bread machine dough cycle finish it’s mixing and proofing cycle (don’t remove the dough from the machine into a bowl for proofing like you did with the first half of the dough, the bread machine dough cycle will do the job for you).
- The dough in the oven will proof faster, because it was prepared first, so start working with the first haft of the dough. Remove the dough from the bowl into a greased with olive oil work surface. Split the dough in half (if you are going to make long baguettes – batons or into three if you are making round bread).
- Roll each half of the dough into long batons and place them onto a baking pan well-greased with olive oil. Spread some corn starch on tops of each baton and then cut lines on top of each one. Set the pan onto the top of the stove and let it proof again.
- Repeat the same steps with a second half if you are making long baguettes – batons (which what I always do). If you wish to make round bread, you need to remove the bread onto a greased with olive oil working surface. Split the dough in three pieces.
- Shape each piece into round shapes (do not knead the dough). Place each round bread onto a well-greased baking pan.
- Spread some corn starch, cut little lines on top of the bread anyhow you like it. Place it onto a counter top to proof again.
- Baking Instructions:
- Place couple of pans onto the lowest oven rack. Pour boiled water into a pan until it’s almost full. Close the bottom pan with a top pan. Close the oven door and set the oven temperature to 450 F.
- By the time the oven temperature riches 450 F (it takes about 20-30 min) the first pan with bread will be ready to bake. Place first bread pan into an oven onto a second rack (be very careful when you open the oven door to place or remove the cooked bread from the oven. First open a little crack to let the steam out or else you will burn you face if you open the oven door wide open right away). Bake the bread for 25 minutes or until dark golden brown.
- I use big 16 X 21 baking pan. Make all the bread baton shape and bake it all at one. This saves me a lot of time than baking bread in round and baton shapes. Round shaped bread takes more space and needs to be baked in two separate pans.
- After removing a pan with baton bread place the pan into the oven with round bread right away. Bake about 25 min or until dark golden brown. Remove the bread from the oven carefully; let the bread cool for 10 min on the baking pan. Remove the bread onto cooling rack and cover the bread with clean towel. The bread is ready to be served as soon as it cools (I love the bread warm). When the bread is completely cooled, place the bread into the plastic bag (or cut batons in half and place it into a Ziploc bags) and freeze the bread for up to 4 weeks.
- Slice and Enjoy!
If you make Homemade Rye Bread Recipe please share a picture with me on Snapchat, Facebook, Instagram or Pinterest. Tag with #valyastasteofhome. I’d love to see your creations! ?
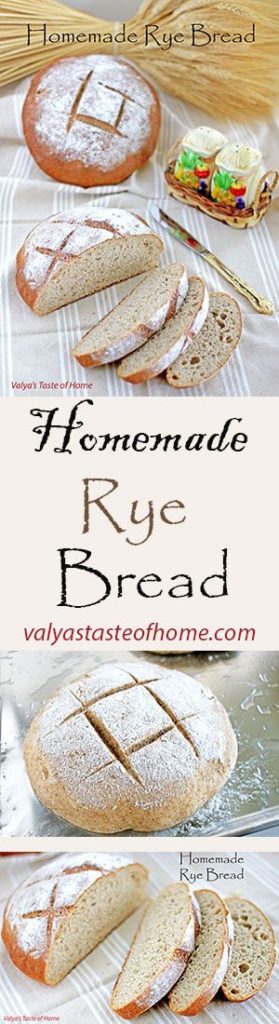
PIN ME!


I just took the loaves from the oven but haven’t tasted them as yet. I have to say this recipe came together so easily and the batons are beautiful. The only change I made was to do a slow rise in a cool basement room; oh, and I kneaded by hand. But such a well structured recipe!!!
Hi Nancy! I am so happy to hear that, thank you for an amazing review! 🙂
Hi Valechka,
Thank you for taking the time to share and post great recipes. To find a recipe like this are a real treasure and a jewel to have in life!
I have made this bread only once a very long time ago and it was amazingly good! My family loved it just like your lasagna! Then, I was moving and lost this recipe. Thank you Valya for bringing it back into my life!
For those people who find it that the crust is too hard. Easy fix. After the bread is done baking, remove from the oven and cover with a slightly moist towel. Then, Voila and you have a slightly crunchy crust and soft delicious middle.
Also, people who are looking for a healthy and delicious snack! Chop (don’t use pressed) garlic, spread it on the top of a piece of bread, sprinkle a little salt and pour some good Ukranian (cold pressed) sunflower oil! It is so good and delicious with just by itself, or soup, or you can toast the bread in toaster and then add garlic, salt and oil. It’s heavenly delicious! I dare you to just try once! 🙂
Thank you Tanya for such an amazing review! The crust is hard at first, but then it softens as the bread cools. I’ve been making this bread weekly and it never gets old. It freezes well too. Thanks again for taking the time to write your experience!
Valya hi, can I just place the dough into 4 regular bread pans??
Thank you
I’ve never baked this bread in pans, but it should be ok. Let me know how it turns out for you.
Valya, Thank you so much for this amazing bread recipe. I love rye bread and I haven’t been able to find an easy, healthy and delicious recipe. Well, now I have one. Thank you the bread is so tasty, it’s a very nice portion so that I can freeze some and then I only have to make bread once a week or every other week. I love it. I’m glad I read the comments about having trouble removing the bread from the pan, so I left my on the pan for about 10 min and true enough the bread came off nicely with a little spatula help. Once again amazing recipe and very tasty results!!! God bless you and your family!
Im glad you found what you were looking for on my blog! This kind of cheering comments really encouraging me to keep posting the recipes we love. I make this bread once a week and freeze it as well, and then when you come to a freezer its like you found a treasure that will ease your dinner preparations. Thank you so much for such an amazing review! Gods blessings to you too! 🙂
Hi Valya! I tried making Moms bread in the bread machine and it failed two times. I really want to give this recipe a try, I’ve used your recipes and they all come amazing. I read all the reviews from folks, thank you everyone for contributing and sharing the feedback.
I am glad that the dough can be frozen, all the little tips help so much.
Thank you for sharing your skills, step by step instructions.
I was wondering if it would be too much honey and you clarified that for another person already.
Thank you and God bless you!!!
Hi Lena!
Not really sure what you mean by “Moms bread” when you’re commenting on the Homemade Rye Bread post. This bread takes multiple steps to make. After mixing in the bread machine in 2 different batches it needs to be risen in a bowl on the counter, and baked in the oven over the water. I do not freeze the dough but baked bread and it lasts in the freezer for a while. Let me know if you have more questions. You can always reach out to me via email or Instagram message. Thank you for the kind words!
Hi, I️ dared to try this bread today. The taste is great. This is what I️ had trouble with: I️ found it difficult to divide the dough when I had to split it for the bread machine. So maybe next time I’ll just do it in two separate bowls as the ingredients are easy to split. I️ also had to add a bit more flour because it was very sticky. But this is prob normal for bread recipes. Next thing is that I️ wish I️ placed parchment paper on the baking sheet as the bread stuck to the pan even though I️ greased it. Also, what is the purpose of the water in the oven? Crusty loaves? What happens if you bake without the steam? Overall, very delicious bread. Definitely will make again. I️ thought I️ was going to have some to freeze but doesn’t look like it. Lol. Thank you!
Hi Alena! Thank you for trying out my bread recipe! I’m so used to making this recipe that I usually eyeball it when it gets to dividing the dough for the bread machine to mix. You can place entire bowl onto kitchen scale and then divided it that way. All bread recipes are usually very sticky, you can use a little oil or flour while shaping the bread. Parchment paper will burn at this high baking temperature (450 F). I usually, let the bread cool on the baking sheet for about 15 minutes or so after removing from the oven, for the bottom of bread to become a little moist and then using a silicon spatula to separate the bread from the pan. It works, trust me, just need some practice. The water inside the oven is important. While the bread is baking the water boils and produces steam which makes the bread moist inside after baking. I tried baking without water and the bread was dry inside. I hope this helps and once again thank you so very much for making my recipe and supporting my blog! 🙂
I’ll have to try this one. Sounds pretty straight forward. Hard to get a good rise out of rye bread recipes.
Let me know how it went for you!
Do you think Red Star Active Dry Yeast regular type yeast would work?
Its the same brand but not the Quick rise like you have on the picture.
Please let me know
Thank you
Hi Lena! I have used many different types of active dry yeast and they all worked well. Thank you for asking!
Hi Valya! I can not find DARK rye flour. Do you think I can use just rye flour?
I think dark rye and regular rye flour is very similar. I dont think you should have problems.
Valya thank you so much for such a great recipe. My husband and parents were raving about it. My mom even asked for the recipe so I know she really loved it ☺
The recipe was also large for my family so I froze the second half in a gallon zip lock. Several days later I just put it in the fridge overnight. In the morning I let it rise and baked per instructions and it turned out just like the first. Very little work with delicious results!
I’m so excited to hear that Lilia. This is our number one bread in our house. I’m making it today as well. What a great idea freezing the dough. I never actually tried freezing this bread dough, so it’s very nice to know that for me and my readers as well. Thank you very much for your review 🙂
Can I omit the honey? does it add flavor?
You cannot omit honey. This recipe require honey not sugar.
Valya, Thank you for sharing this recipe for the rye bread. I’ve tried several recipes with a fail. They usually come out so hard in the outer shell, that I can’t cut into it. I am going to try your recipe. Thank you for sharing.
You are very welcome Tanya. Let me know how this recipe will turn out for you.
Hi Valya! so if i make the round bread i get 6 of them?
Yes. Or you can make 4 large round breads.
Can I make it with out the dough machine?
Sure, if you have strong hands to knead the dough 😉
Valya I’m so excited about this recipe 🙂 thanks for posting!
Also for some reason I can’t print your recipes….
I was able to print. Try logging out and log back in. I’m not sure why you can’t print it.
You are very welcome 🙂 Let me know how it will turn out for you. Share a picture with me. I would love to see it.
In the “day 1” do you leave the dough on the counter top or in the fridge?
On the counter top.