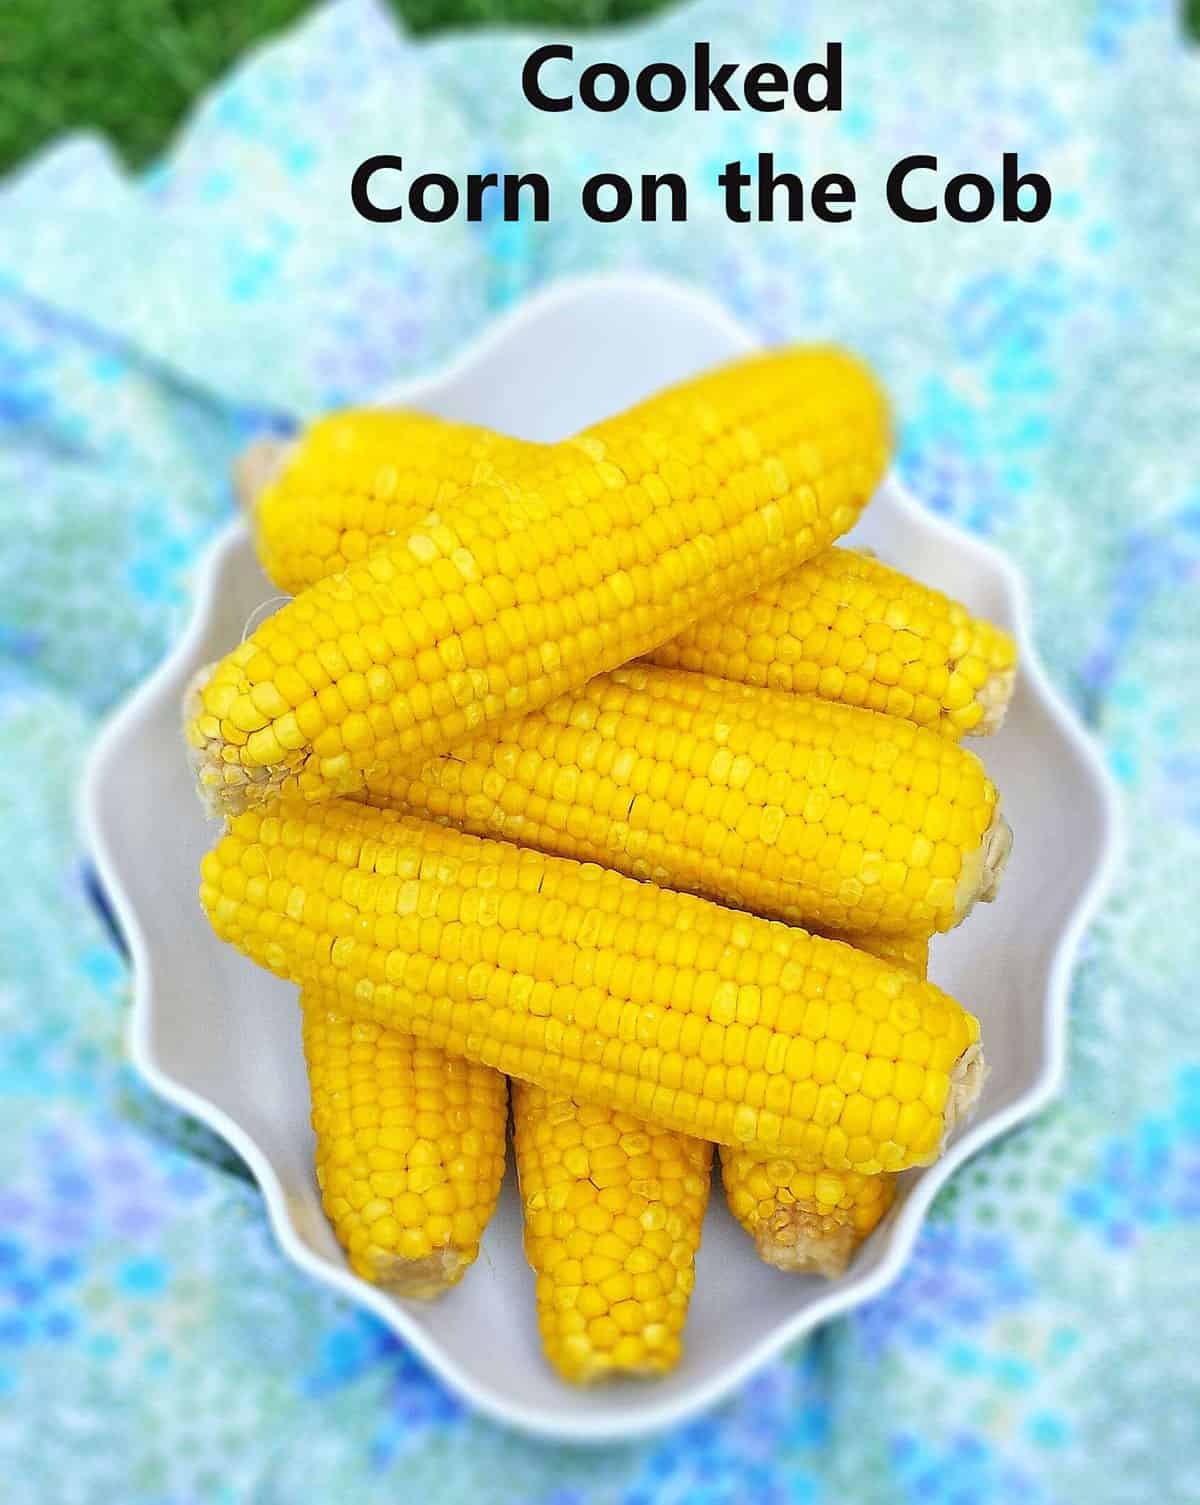
The Best Corn on the Cob (Easiest Way to Cook It Perfectly)
Corn on the cob is a staple dish that is enjoyed all over the world, especially during the summer months. This simple yet flavorful dish is loved for its sweet and crunchy flavor, which is enhanced when cooked perfectly. And my recipe will teach you how to cook corn on the cob just right every single time!
The secret to the perfect corn on the cob lies in selecting fresh and plump corn that is in season. Once you have the right corn, the cooking technique is crucial, whether it is boiling, grilling, or roasting. My post will teach you everything you need to make it absolutely perfect!
Plus, you can also season the corn with the right spices and herbs that complement its natural sweetness. With this recipe, you can learn how to make the perfect corn on the cob that is both delicious and satisfying.
Want to learn how to make this corn on the cob recipe? Then keep on reading.
What is Corn on the Cob?
Corn on the cob is a dish made by boiling or grilling fresh corn ears and serving them with butter, salt, and other seasonings. The dish is popular for its sweet and juicy taste, crunchy texture, and nutritional benefits.
It is a good source of dietary fiber, vitamins, and minerals, making it a healthy addition to any meal. Plus, corn on the cob is easy and quick to prepare, making it a perfect dish for summer barbecues, picnics, and outdoor gatherings.
What Makes This Corn on the Cob Recipe Special?
Easy: This recipe is incredibly easy to follow and requires minimal prep time. Simply boil the corn and slather on some flavorful butter mixture or add salt on top for a delicious side dish.
Versatile: This recipe can be adapted to fit various dietary restrictions or preferences. You can even make a butter mixture with your favorite herbs and spices, and the corn can be grilled or roasted for a different texture.
Delicious: The combination of perfectly cooked corn with salt creates a mouthwatering flavor that perfectly complements the sweetness of the corn. It is a winsome combination that will have everyone coming back for seconds.
Crowd-pleaser: Corn on the cob is a classic summer side dish that is loved by all, and this recipe takes it to the next level. It is a surefire hit at any summer BBQ or potluck, and is guaranteed to impress your guests.
Seasonal: This recipe is best made during the summer months when fresh corn is in season. It is a great way to use up the abundance of corn during peak harvest season and enjoy it at its best.
What You Need to Make Corn on the Cob at Home
All you need are some simple pantry staple ingredients to make this corn on the cob recipe at home. Let’s look at them in more detail:
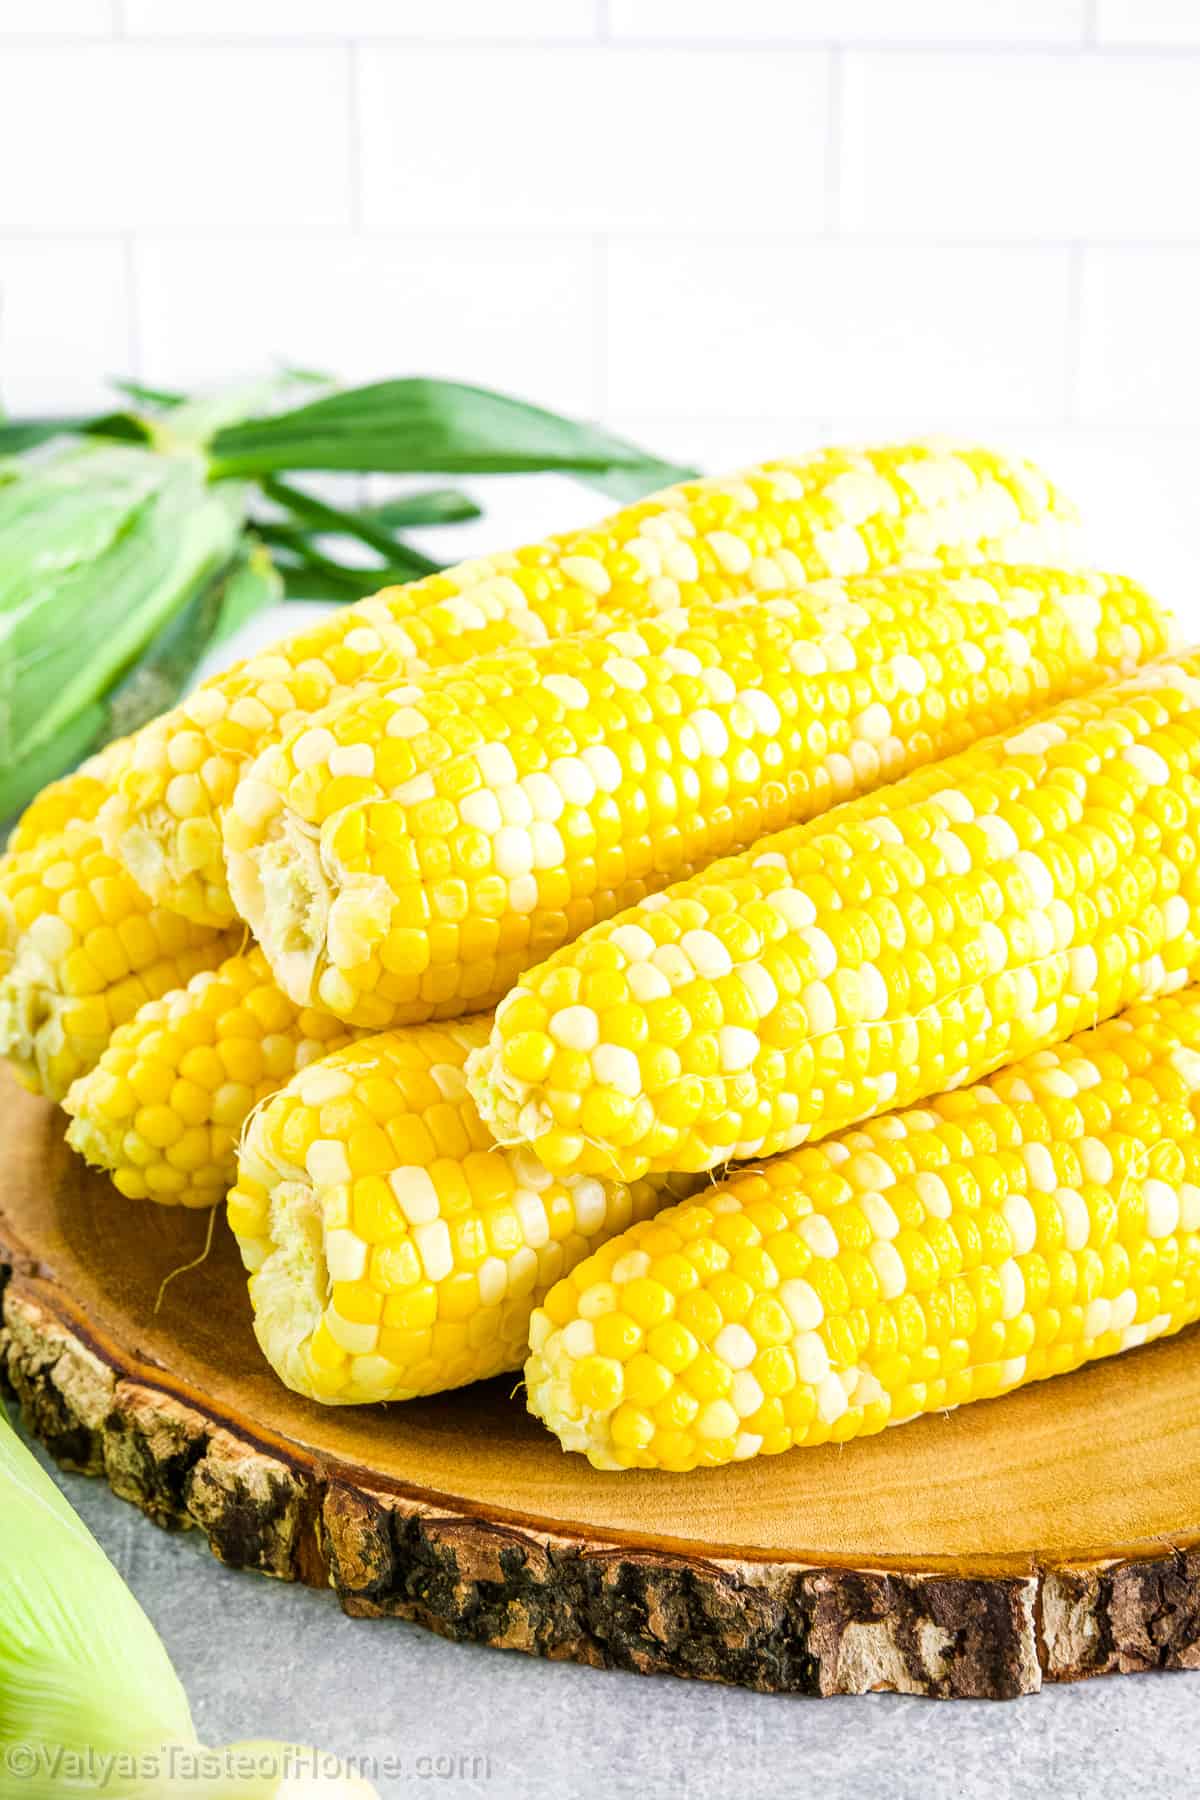
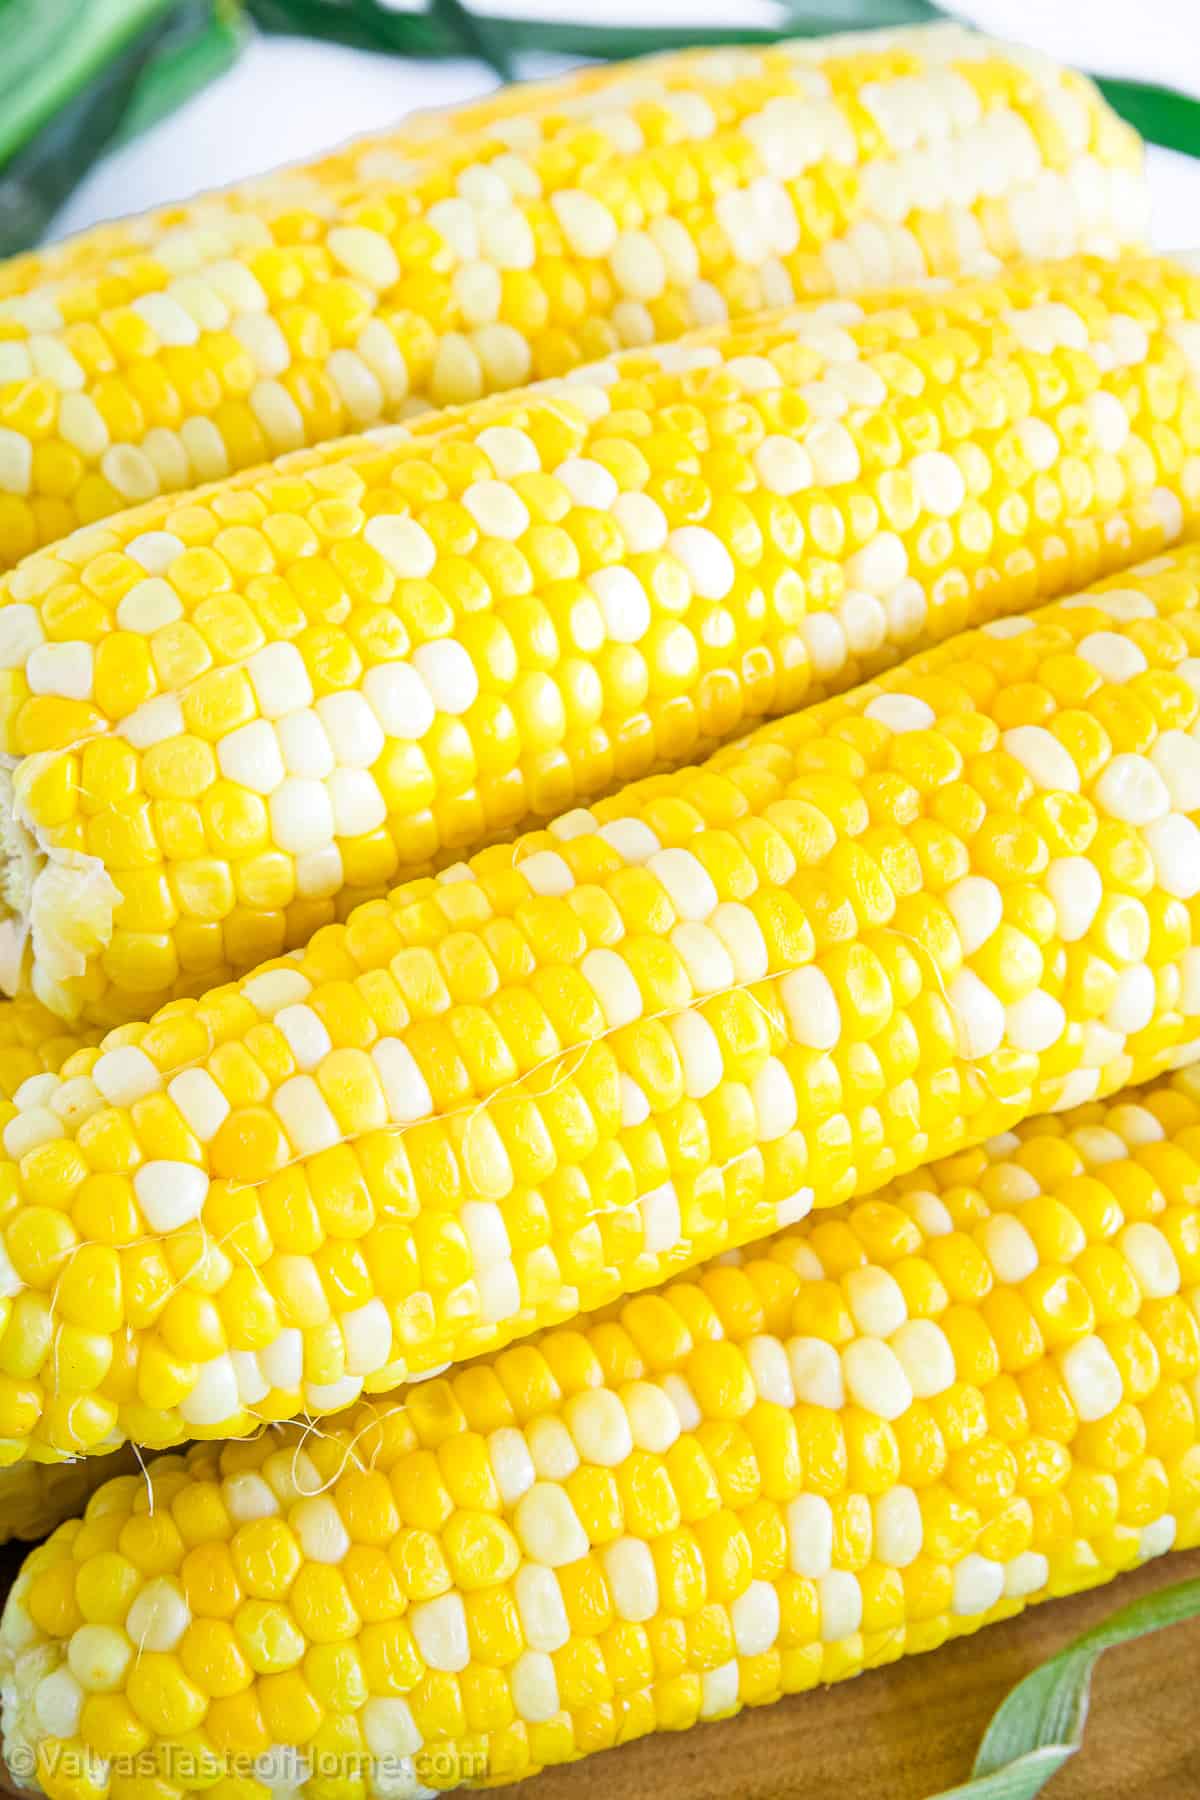
- Corn on the cob: We will be boiling the corn on the cob in a pot of water for about 10 minutes, which will help to soften the kernels and bring out their natural sweetness. While it is cooking, notice the water turning a bright yellow color as the corn releases its flavor.
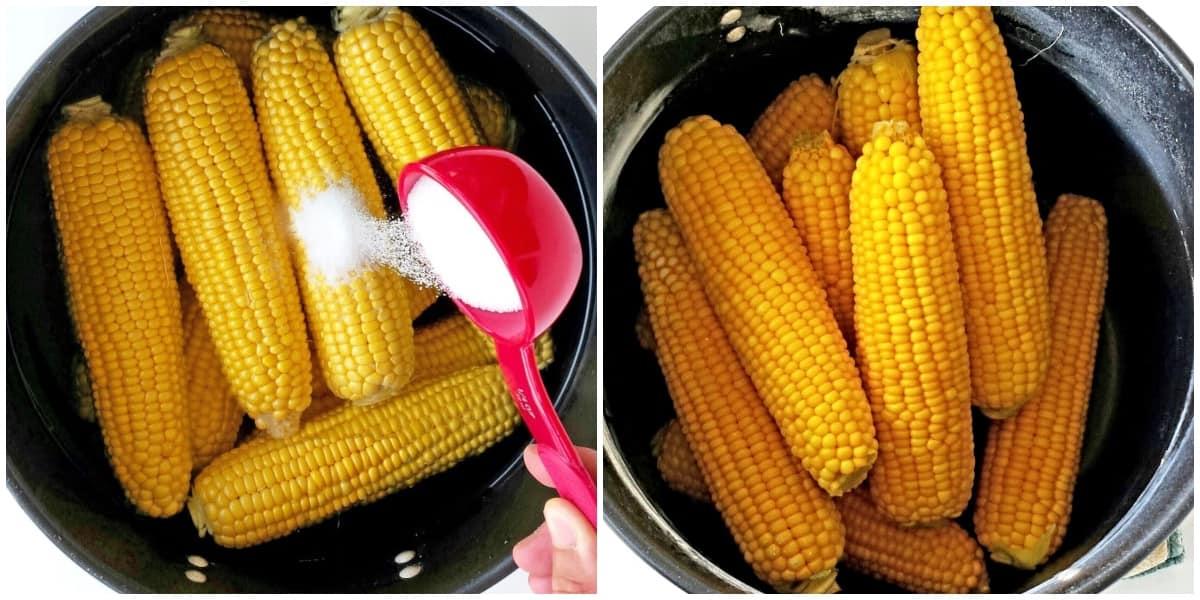
- Salt: Adding a pinch of salt to the boiling water will enhance the flavor of the corn and help to season it evenly. As the corn cooks, the salt will dissolve into the water, infusing it with a savory taste.
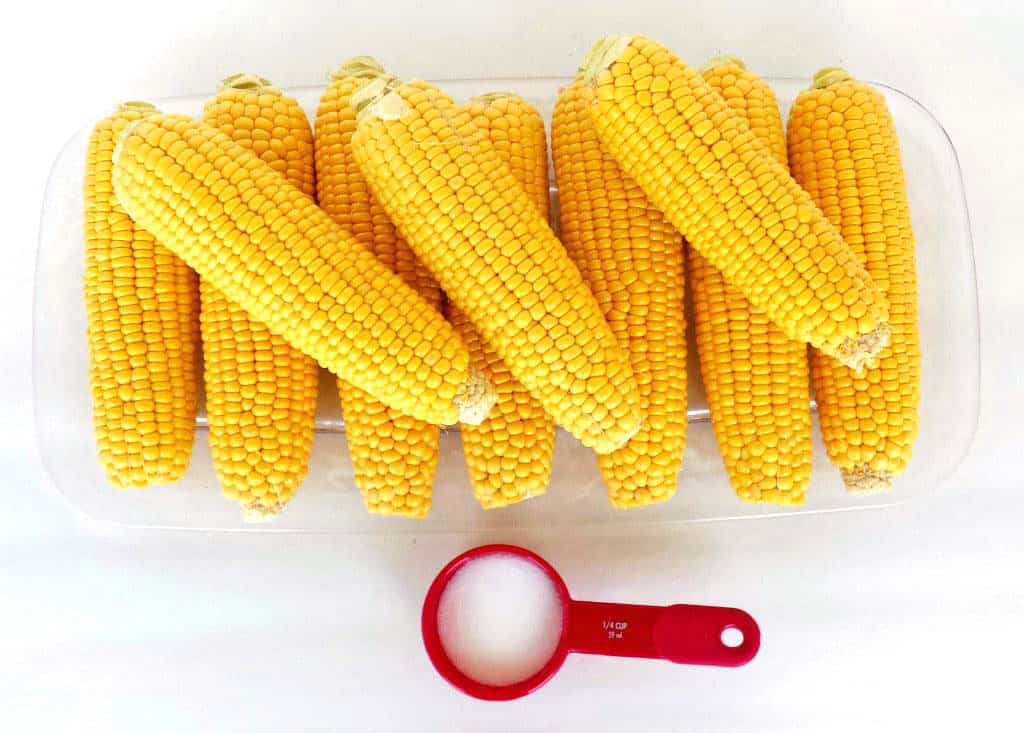
- Water: We will need enough water to cover the corn completely and allow it to cook evenly.
How to Make Corn on the Cob (Step-by-Step)
Making this incredible corn on the cob is easier than you think. Here’s how to make them at home step by step:
To cook corn on the cob, start by peeling off the outer layer of leaves and removing any remaining silk. Then, wash each cob thoroughly to remove any dirt or debris.
Next, place your corn on the cob into a large pot and fill it with water so that it covers about 3/4 of the corn. Add salt to the water to enhance the flavor of the corn.
Place the pot on your stove and turn the heat to high. Wait for the water to come to a boil, then reduce the heat to medium to keep the water at a steady simmer.
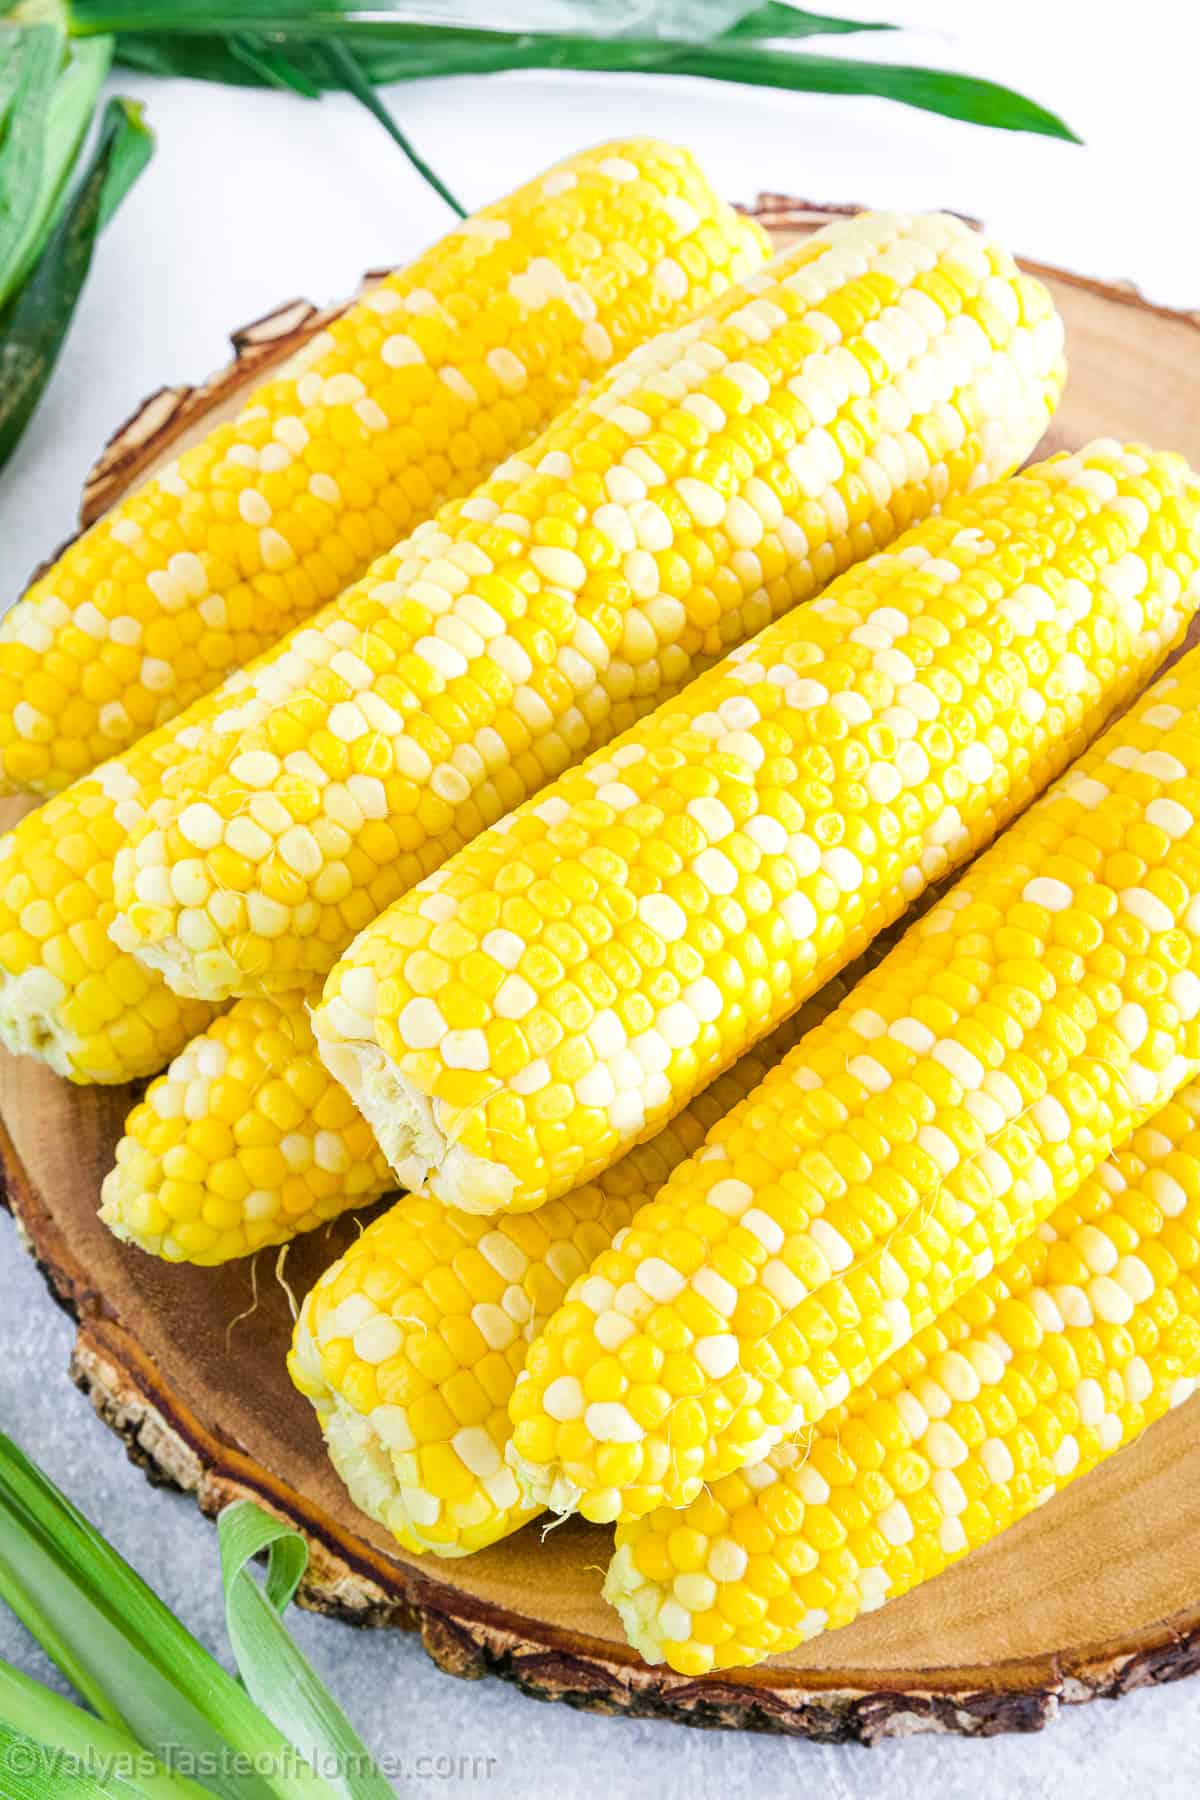
Let the corn cook in the simmering water for about 25 – 30 minutes. Keep in mind that the longer you boil the corn, the drier it will be. You can adjust the cooking time to your preference depending on how you like your corn.
Once the corn is cooked to your liking, use a pair of tongs or a slotted spoon to remove it from the pot. Drain the water and set the corn aside to cool for about 15 minutes before serving.
If you are looking to serve the corn to kids, then allow it to cool for a bit longer, around 30 minutes, to make sure that it is not too hot to eat.
Finally, once you are ready to enjoy your corn on the cob, you can serve it plain or add some butter or extra salt if you like.
Your delicious Corn on the Cob is ready to be served!
Tips for Making the Best Corn on the Cob Ever
Choosing Fresh Corn: When selecting corn, look for ears with bright green husks, tightly closed tops, and plump kernels. Gently press the kernels to ensure they are firm and not mushy.
Peeling the Husk: To peel the husk, gently pull it down towards the stalk, removing all the silk along with it. If the husk is tough, you can use a sharp knife to help peel it off.
Boiling the Corn: To boil corn, fill a large pot with water, add salt, and bring to a boil and follow my recipe instructions. Do not overcook the corn as it can become mushy.
Grilling the Corn: To grill the corn, place the husked ears directly on the grill over medium-high heat. Turn the corn occasionally until the kernels are slightly charred, about 8-10 minutes.
Seasoning the Corn: Once cooked, brush the corn with melted butter and sprinkle it with salt and pepper. Our family doesn’t prefer that but you definitely can. You can also try other seasonings like chili powder, garlic powder, or grated parmesan cheese for added flavor.
Serving Suggestions for Corn on the Cob
- Add some butter and salt to the corn on the cob for a classic and simple side dish that pairs well with any main course.
- For a Mexican twist, spread some mayonnaise on the corn and sprinkle it with chili powder and cotija cheese. You’ll get the flavors of mexican street corn salad (elote) at home with this. Sprinkle some chopped chives or cilantro on top before serving.
- Turn the corn into a complete meal by topping it with grilled shrimp, avocado, and a squeeze of lime juice.
- Create a summer salad by cutting the kernels off the cob and mixing them with diced tomatoes, cucumbers, and red onions in a vinaigrette dressing.
- For a fun and festive appetizer, cut the corn into smaller pieces and skewer them with cherry tomatoes and fresh basil leaves. Serve with a balsamic glaze for dipping.
Recipe Variation Ideas for Corn on the Cob
This delicious corn on the cob recipe is absolutely perfect as it is, but if you’re looking to change things up, here are a few variation ideas you can try:
- Spicy Garlic: For a kick of flavor, mix together melted butter, minced garlic, chili powder, and cayenne pepper. Brush the mixture onto the corn before grilling for a spicy twist on traditional corn on the cob.
- Sweet and Savory: For a unique flavor combination, mix together honey, balsamic vinegar, and melted butter. Brush the mixture onto the corn before grilling for a sweet and savory taste.
- Cheesy Jalapeno: To add some cheese and heat to your corn on the cob, mix together melted butter, shredded cheddar cheese, and diced jalapeno. Brush the mixture onto the corn before grilling for a cheesy and spicy twist.
- Herb Infused: For a fresh and herby taste, mix together melted butter, chopped fresh herbs (such as thyme, rosemary, and parsley), and a squeeze of lemon juice. Brush the mixture onto the corn before grilling for a flavorful and aromatic side dish.
- Garlic Parmesan: For a classic flavor combination, mix together melted butter, minced garlic, and grated parmesan cheese. Brush the mixture onto the corn before grilling for a delicious and cheesy side dish.
Frequently Asked Questions
How do I choose the best corn on the cob?
Look for ears of corn that have bright green husks that are tightly wrapped around the ear. The kernels should look plump and milky, and the silk should be light in color and slightly moist.
How do I cook corn on the cob on the grill?
Grilling corn is easy and will give your corn a smoky flavor. Preheat the grill to medium-high heat. Peel back the husks and remove the silk from the corn. Brush the corn with butter or oil and season with salt and pepper. Place the corn on the grill and cook for 10-15 minutes, turning occasionally, until the kernels are tender and slightly charred.
Can I cook corn on the cob in the microwave?
Yes, you can cook corn on the cob in the microwave. Place the ear of corn in a microwave-safe dish and add a tablespoon of water. Cover the dish with plastic wrap and microwave on high for 3-5 minutes, or until the corn is tender.
How can I tell when the corn on the cob is done cooking?
The kernels should be tender when you insert a fork or knife into them. You can also check by peeling back a small section of the husk and checking the color of the kernels. They should be bright yellow and plump, not dull or wrinkled.
How to Store Leftover Corn on the Cob
To store leftovers of this corn on the cob recipe, first allow the corn to cool to room temperature. Then, wrap each cob individually in a plastic wrap or into aluminum foil and place them in an airtight container or resealable plastic bag. Store the container or bag in the refrigerator for up to three days.
To reheat the corn, remove the plastic wrap or aluminum foil and place the cob on a microwave-safe dish. Microwave on high for 30-60 seconds or until heated through.
As an alternative, you can reheat the corn on the cob by wrapping it into aluminum foil and placing it on a preheated grill for about 5-10 minutes, turning occasionally.
Unfortunately, corn on the cob doesn’t freeze well due to its high water content. It is important to note that freezing it can cause the corn to become mushy and lose its flavor and texture. Therefore, it is best to enjoy leftover corn on the cob within a few days of cooking.

Similar Recipes You’ll Love
- Simple Roasted Mixed Vegetables Recipe (Super Easy to Make!)
- Easiest Roasted Beef Recipe (Effortless Meal with Veggies!)

The Best Corn on the Cob (Easiest Way to Cook It Perfectly)
Ingredients
- 8 – corn on the cob
- 2 tbsp. – salt
- Water
Instructions
How to Make Corn on the Cob
- To cook corn on the cob, start by peeling off the outer layer of leaves and removing any remaining silk. Then, wash each cob thoroughly to remove any dirt or debris.
- Next, place your corn on the cob into a large pot and fill it with water so that it covers about 3/4 of the corn. Add a pinch of salt to the water to enhance the flavor of the corn.
- Place the pot on your stove and turn the heat to high. Wait for the water to come to a boil, then reduce the heat to medium to keep the water at a steady simmer.
- Let the corn cook in the simmering water for about 25 minutes. Keep in mind that the longer you boil the corn, the drier it will be. You can adjust the cooking time to your preference depending on how you like your corn.
- Once the corn is cooked to your liking, use a pair of tongs or a slotted spoon to remove it from the pot. Drain the water and set the corn aside to cool for about 15 minutes before serving.
- If you are looking to serve the corn to kids, then allow it to cool for a bit longer, around 30 minutes, to make sure that it is not too hot to eat.
- Finally, once you are ready to enjoy your corn on the cob, you can serve it plain or add some butter or extra salt if you like.
- Your delicious Corn on the Cob is ready to be served!
Thank you for following me on Instagram, Facebook, and Pinterest!
This recipe was originally posted on July 9, 2015 (original picture below), and updated for a better user experience. The post may contain affiliate links. Read my disclosure.