Cake “Day and Night”
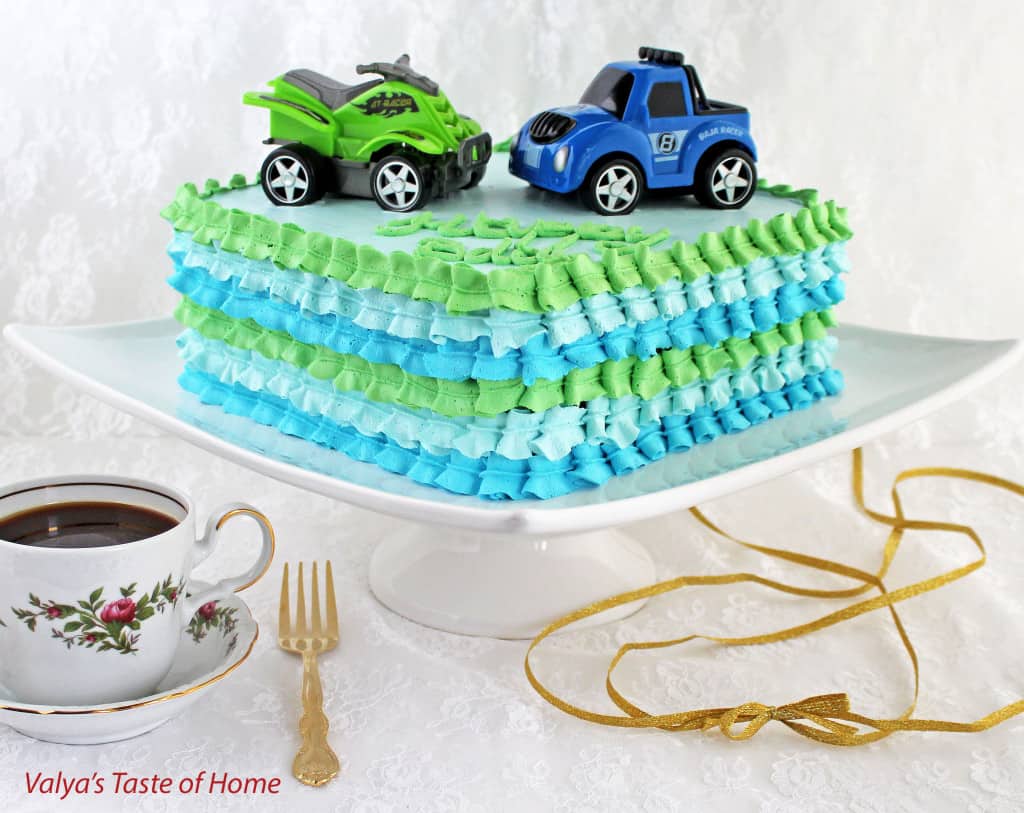
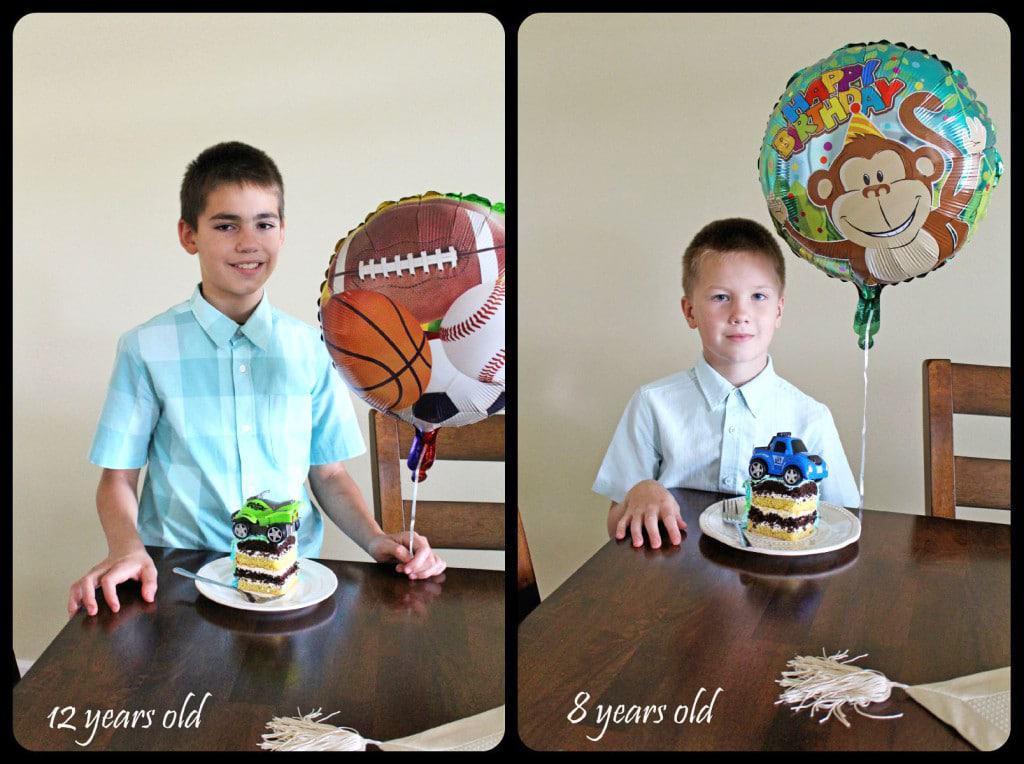
I chose this cake for my boys’ birthdays this year. Vadim turned 12 and Ruvim turned 8. They are 4 years and 5 days apart. This cake is usually decorated simpler; chocolate ganache over cream, with sprinkled nuts over the top (which I find more fitting to the cake’s name). But this time, I decided to decorate it a bit more to match their birthday party theme. Why choose the Day and Night Cake as their birthday cake?…
If you have noticed, Vadim has darker skin, dark hair, and brown eyes. Ruvim is the opposite; blondie, with light skin and sky blue eyes. So you can see how this cake matches them. They get called “salt” and “pepper” sometimes, to which I say should remind them that we are called to be the salt of the earth in Matthew 5:13. And pepper is good for the human body so they should be healthy and strong do good deeds to people, especially in the name of Christ (or Christ body). The boys are best buddies, you will always find them together, just like salt and pepper on the table. As salt and pepper go together, their little personalities complement each other. Best friends for life.
This recipe has been around in our family for a long time. I make two different creams for this cake. The inside cream makes the cake soft and moist but it’s a bit too sticky to decorate the outside with. The cream on the outside of the cake is a little firmer, yet smooth and soft enough that pipes out really well which I like for outer cake decorations. I hope you like it!
Ingredients:
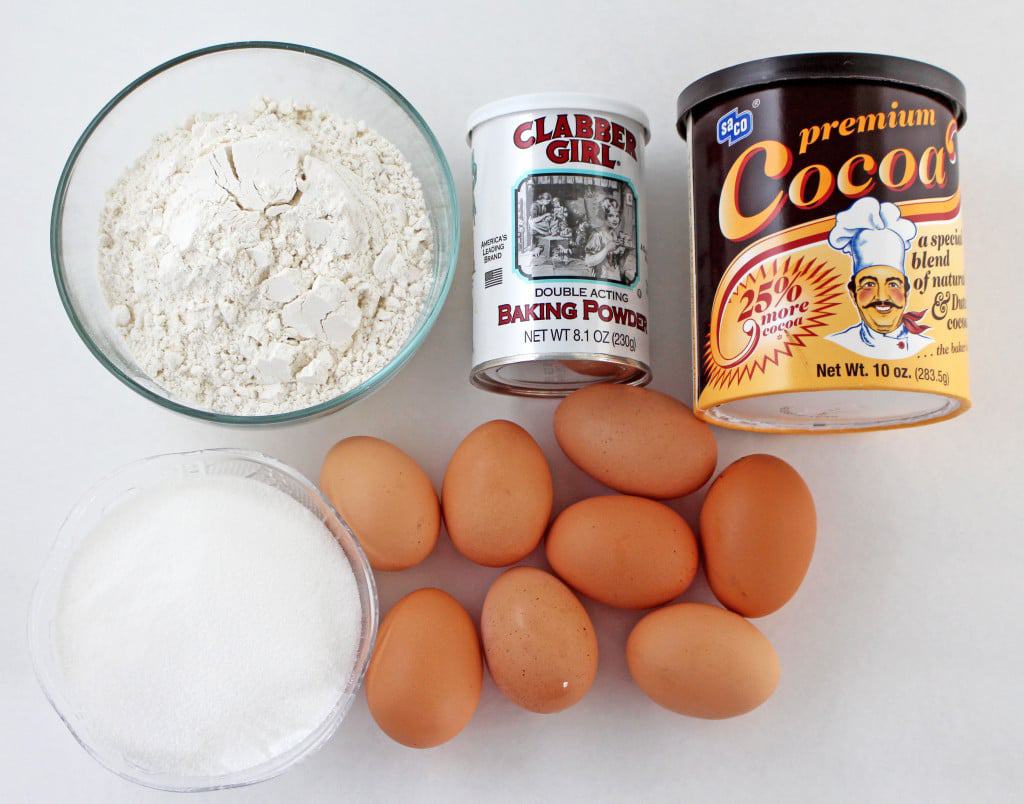
White Cake:
4 large – eggs
½ cup – granulated sugar
½ tsp. – baking powder
1 cup – all-purpose flour
Chocolate Cake:
4 large – eggs
½ cup – granulated sugar
½ tsp. – baking powder
½ cup – cocoa powder
½ cup – all-purpose flour
Inner Cream Ingredients:
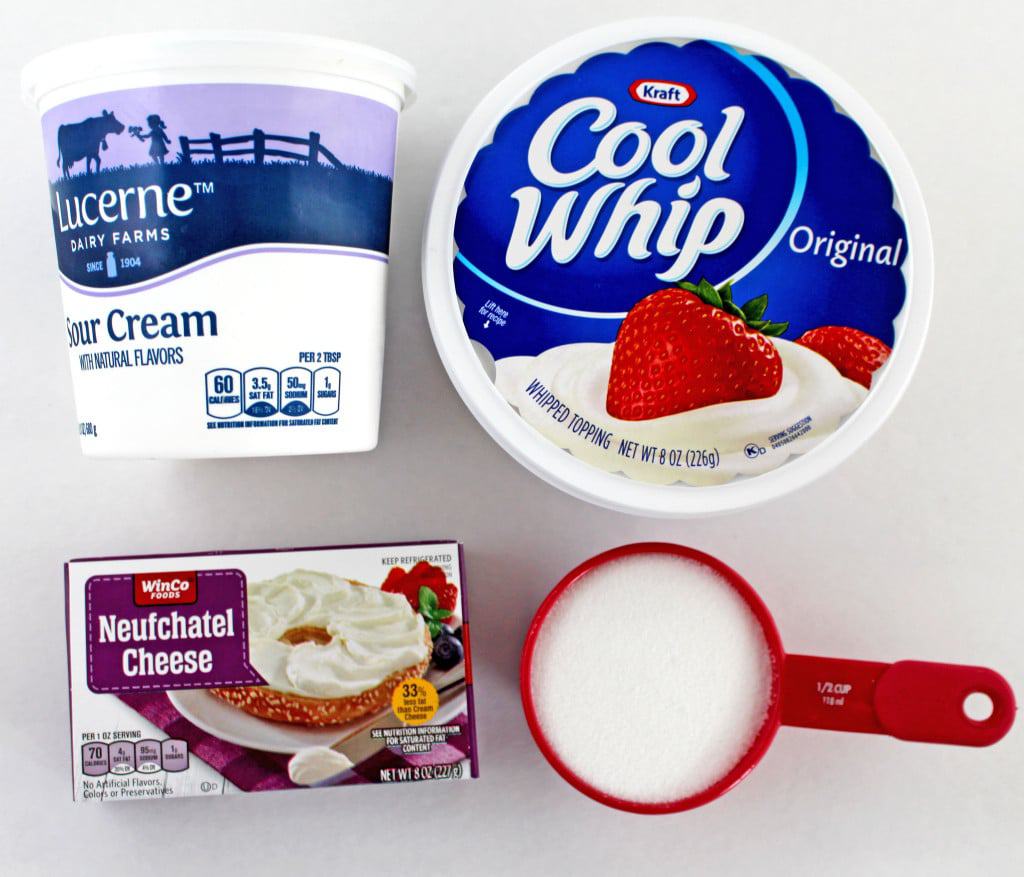
8 oz. – cream cheese (softened)
½ cup – sour cream
½ cup – sugar
8 oz. – Cool Whip (thawed)
Outer Cream Ingredients:
Same as for the outside “Honey Chocolate Strawberry Cake,”
with the addition of Green, Sky Blue, and Royal Blue Wilton food coloring paste.
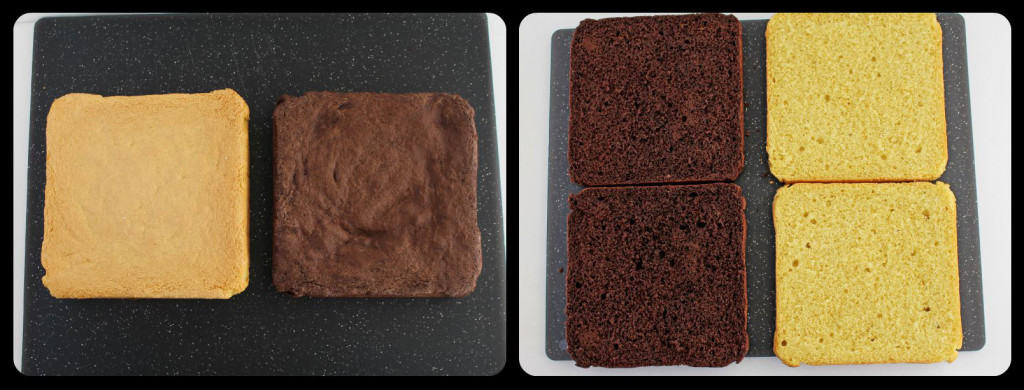
Instructions for White Cake:
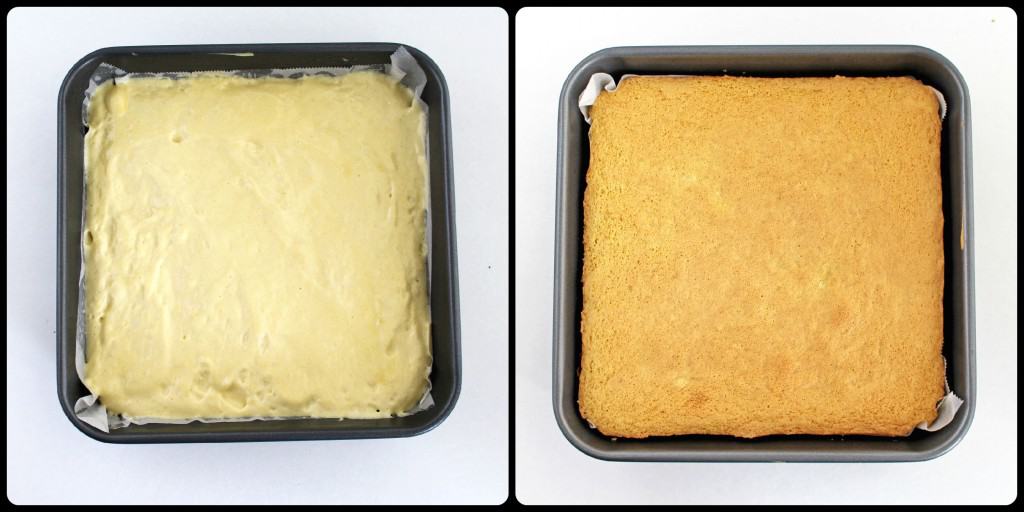
1. Preheat the oven to 350 F. Beat eggs and sugar together on high in the mixer bowl, for 10 minutes. (I use Professional 6000 HD Kitchen Aid Mixer. If you are working with a hand mixer, it will take much longer to beat the eggs and sugar into the necessary thick and stiff consistency.) Sift in the flour, mixed with baking powder, and then fold it over the very gently with a whisk or spatula not to deflate too many air bubbles.
2. Pour batter into a greased 8” square pan lined with parchment paper. Bake at 350 F for 25 minutes. Let it cool in the pan for 5 minutes before taking it out of the pan.
Instructions for Chocolate Cake:
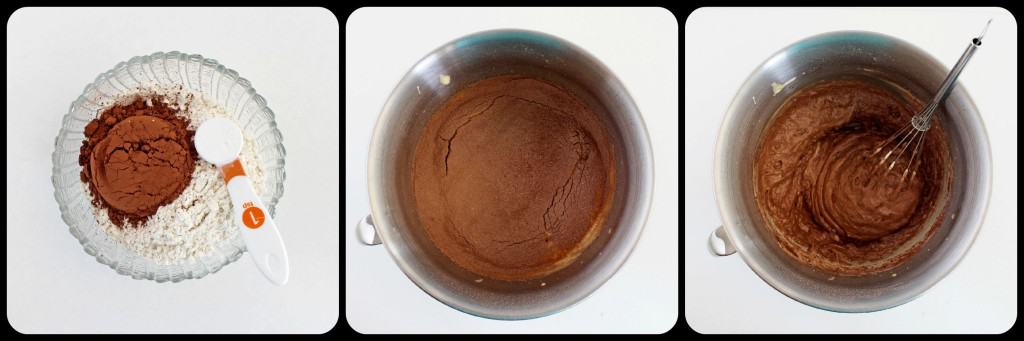
1. Beat eggs and sugar on high in the mixer bowl for 10 minutes. Combine flour, baking powder, and cocoa in a bowl. Sift in half of the dry ingredients and gently fold into the egg mixture. Be careful not to deflate many air bubbles. Then sift in the other half of dry ingredients and repeat the same gentle mix.
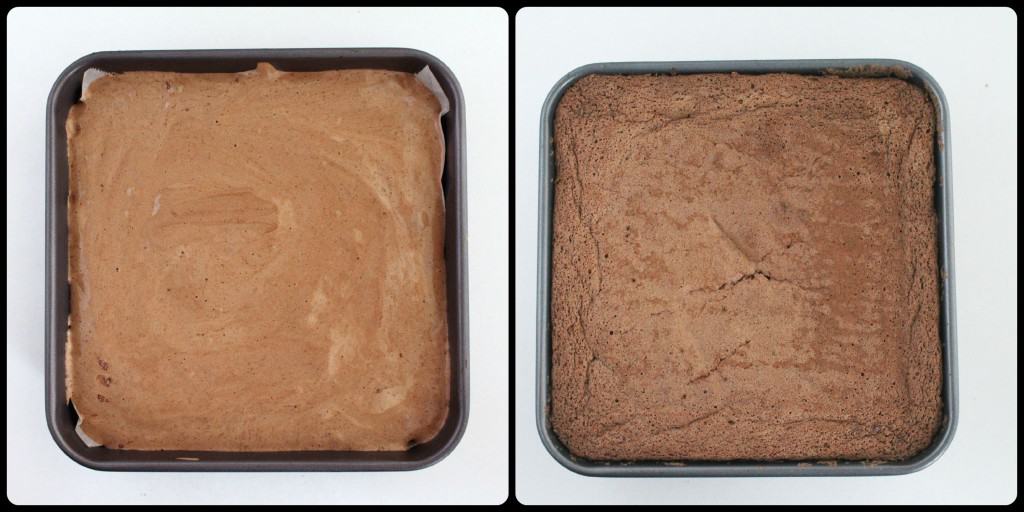
2. Pour batter into a greased 8” square pan lined with parchment paper. Bake at 350 F for 30 minutes. Let it cool in the pan for 5 minutes before removing it from the pan.
Inner Cream Instructions:
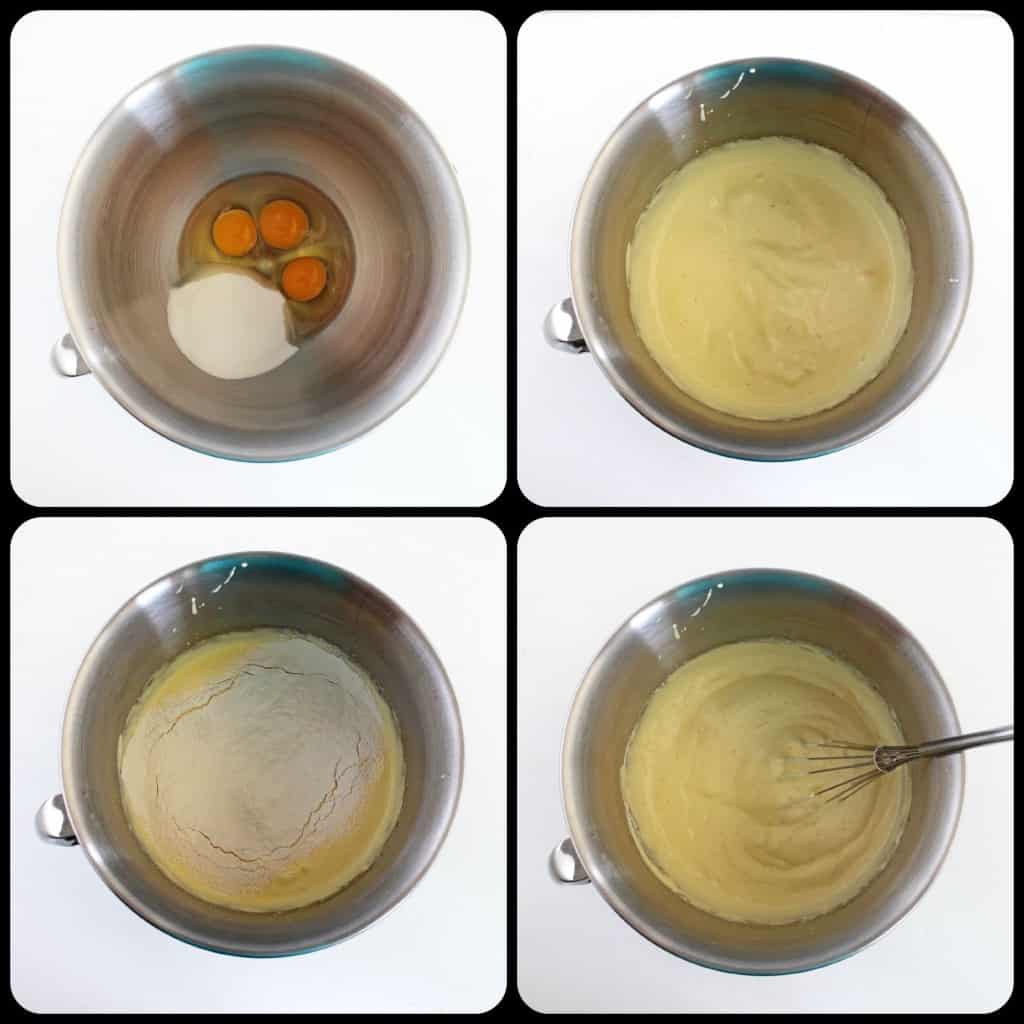
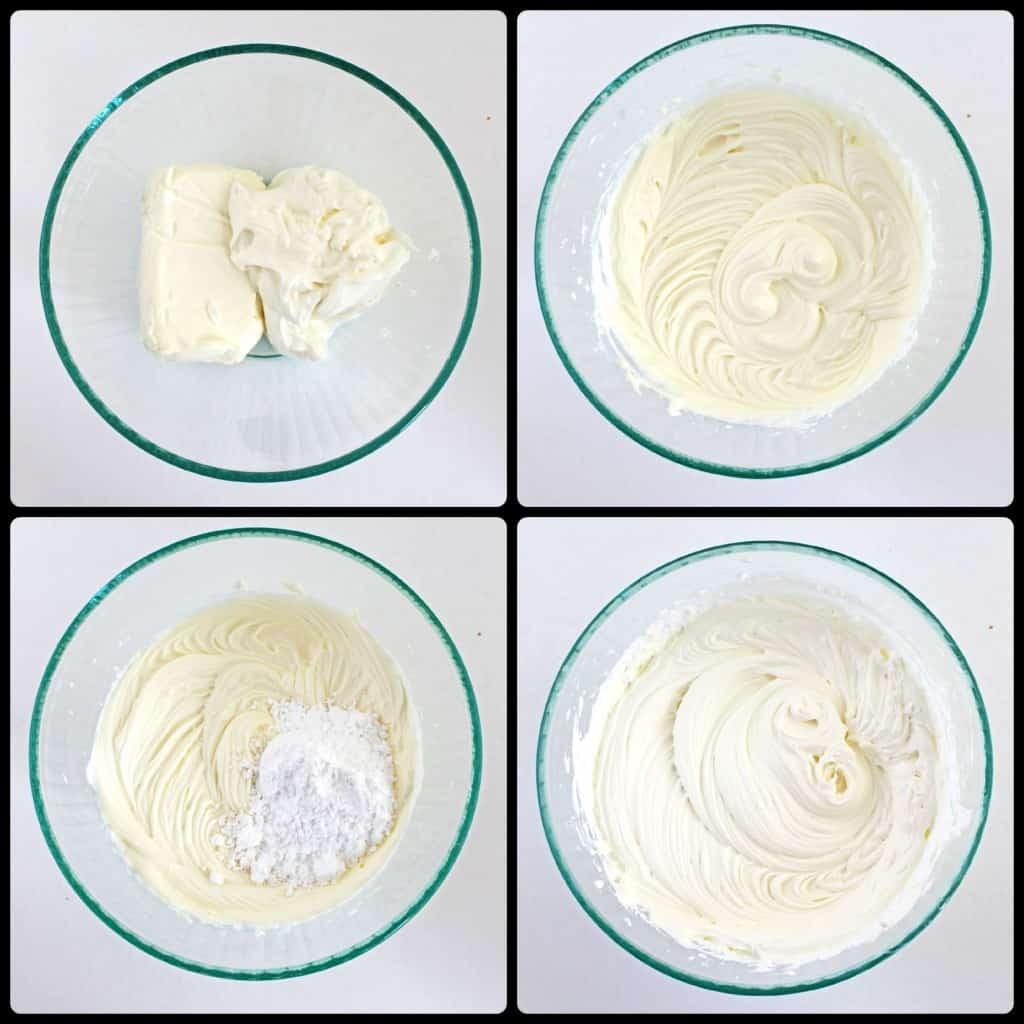
Beat sour cream and softened cream cheese for a minute. Add sugar; beat for another minute or until all sugar is dissolved. Add cool whip and beat for 2 minutes. Scrape down the sides of the bowl and beat for 3 minutes. Set aside until ready for use.
Assembling the Cake:
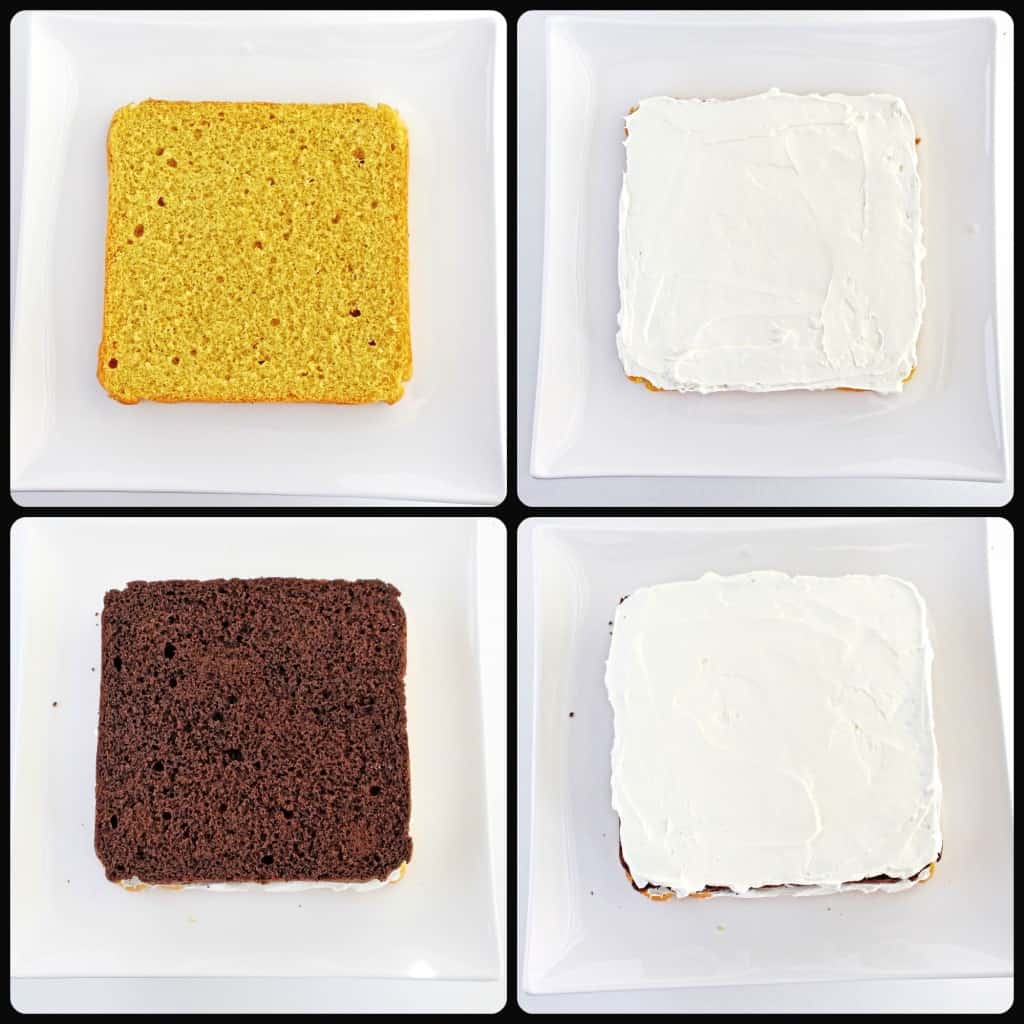
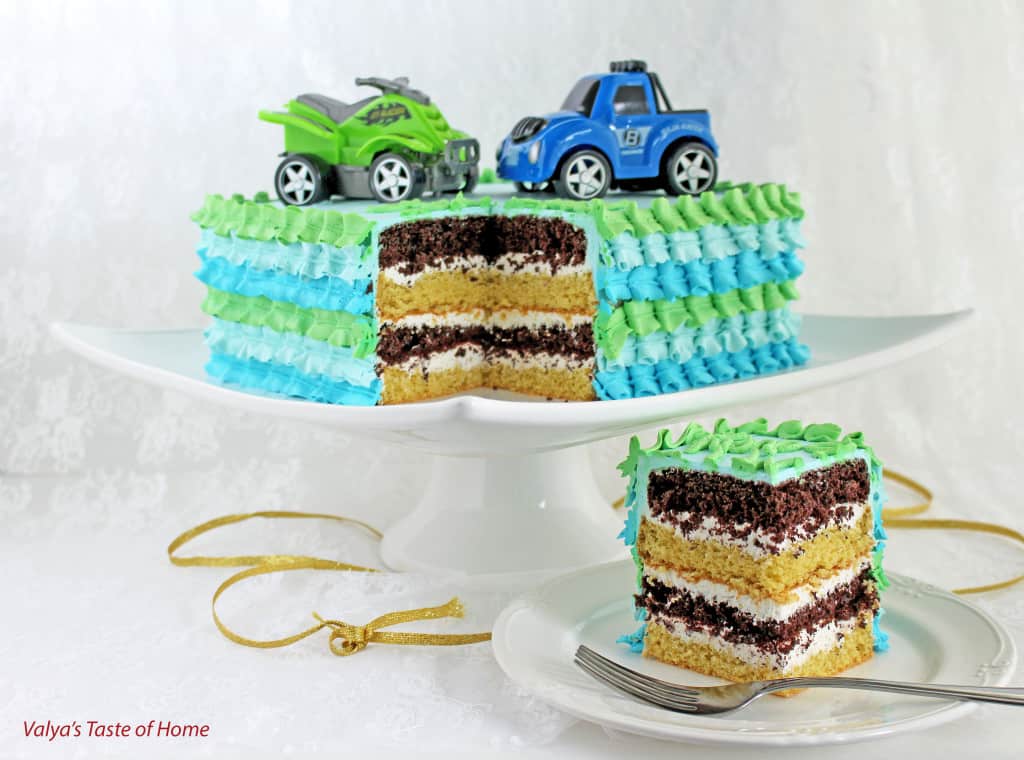
1. Cut each cake sponge in half. (I precut the edges with a knife and then insert a thread and with a side to side motion, cut through the whole sponge and finish when the thread is freed on the opposite side. See images and instructions on how to perfectly cut a cake sponge horizontally in Curly Boy Cake.)
2. Place a white sponge layer on a cake holder. Spread ¼ of the cream over sponge evenly. Then place a chocolate layer on top of the cream and then spread another ¼ of the cream. Repeat these steps until the rest of the sponges are assembled.
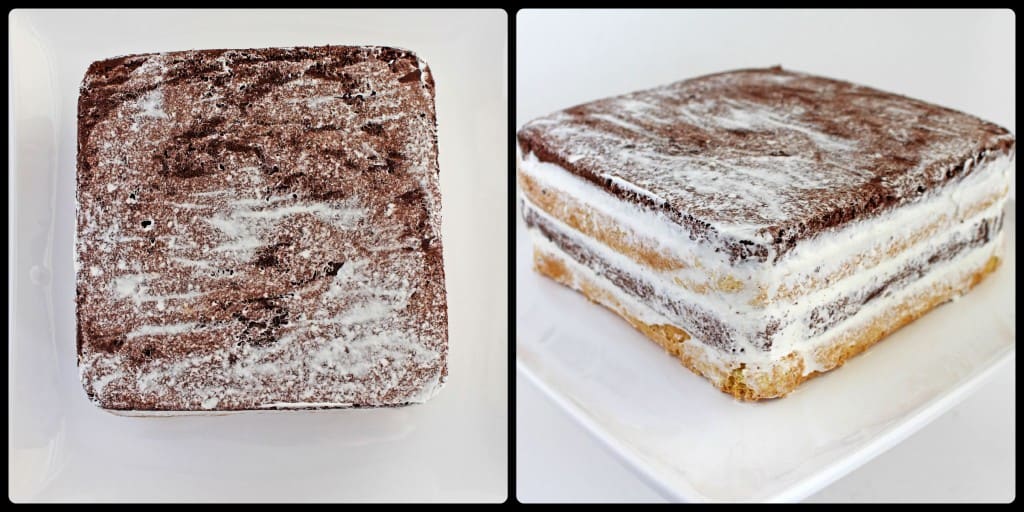
3. With the remaining ¼ of the cream crumb coat the top of the cake. Place it in the fridge to set a little before decorating, about 1 hour.
Outer Cream Instructions:
I use the same Cream as for the Honey Chocolate and Strawberry Cake. Split the cream between 3 small bowls and add Wilton gel food coloring. Beat each cream well, scraping down the sides of the bowl periodically.

Decorating the Cake:
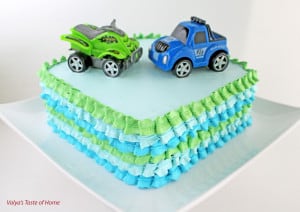
1. Remove the cake from the fridge and spread half of the sky blue cream on top and half way on the sides of the cake evenly.

2. Transfer the rest of the cream 3 separate piping bags and use Wilton 70 tip to pipe out continuous ribbon-shaped folded strips all around the cake.

3. I placed 2 different cars on top of the cake and then wrote “Happy B-day!” to finish off the cake, but you may choose any decorations and colors you wish. We sliced big pieces of the cake for the B-day boys underneath the car they chose. They really ENJOYED their cake, and I think you will as well!
Cake "Day and Night"
Ingredients
- White Cake:
- 4 large – eggs
- ½ cup – granulated sugar
- ½ tsp. – baking powder
- 1 cup – all-purpose flour
- Chocolate Cake:
- 4 large – eggs
- ½ cup – granulated sugar
- ½ tsp. – baking powder
- ½ cup – cocoa powder
- ½ cup – all-purpose flour
- Inner Cream Ingredients:
- 8 oz. – cream cheese softened
- ½ cup – sour cream
- ½ cup – sugar
- 8 oz. – Cool Whip thawed
- Outer Cream Ingredients:
- Same as for the outside “Honey Chocolate Strawberry Cake ”
- with the addition of Green Sky Blue, and Royal Blue Wilton food coloring paste
Instructions
- Instructions for White Cake:
- Preheat the oven to 350 F. Beat eggs and sugar together on high in the mixer bowl, for 10 minutes. (I use Professional 6000 HD Kitchen Aid Mixer. If you are working with a hand mixer, it will take much longer to beat the eggs and sugar into the necessary thick and stiff consistency.) Sift in the flour, mixed with baking powder, and then fold it over the very gently with a whisk or spatula not to deflate too many air bubbles.
- Pour batter into a greased 8” square pan lined with parchment paper. Bake at 350 F for 25 minutes. Let it cool in the pan for 5 minutes before taking it out of the pan.
- Instructions for Chocolate Cake:
- Beat eggs and sugar on high in the mixer bowl for 10 minutes. Combine flour, baking powder, and cocoa in a bowl. Sift in half of the dry ingredients and gently fold into the egg mixture. Be careful not to deflate many air bubbles. Then sift in the other half of dry ingredients and repeat the same gentle mix.
- Pour batter into a greased 8” square pan lined with parchment paper. Bake at 350 F for 30 minutes. Let it cool in the pan for 5 minutes before removing it from the pan
- Inner Cream Instructions:
- Beat sour cream and softened cream cheese for a minute. Add sugar; beat for another minute or until all sugar is dissolved. Add cool whip and beat for 2 minutes. Scrape down the sides of the bowl and beat for 3 minutes. Set aside until ready for use.
- Assembling the Cake:
- Cut each cake sponge in half. (I precut the edges with a knife and then insert a thread and with a side to side motion, cut through the whole sponge and finish when the thread is freed on the opposite side. See images and instructions on how to perfectly cut a cake sponge horizontally in Curly Boy Cake.)
- Place a white sponge layer on a cake holder. Spread ¼ of the cream over sponge evenly. Then place a chocolate layer on top of the cream and then spread another ¼ of the cream. Repeat these steps until the rest of the sponges are assembled.
- With the remaining ¼ of the cream crumb coat the top of the cake. Place it in the fridge to set a little before decorating, about 1 hour.
- Outer Cream Instructions: I use the same Cream as for the Honey Chocolate and Strawberry Cake. Split the cream between 3 small bowls and add Wilton gel food coloring. Beat each cream well, scraping down the sides of the bowl periodically.
- Decorating the Cake:
- Remove the cake from the fridge and spread half of the sky blue cream on top and half way on the sides of the cake evenly.
- Transfer the rest of the cream 3 separate piping bags and use Wilton 70 tip to pipe out continuous ribbon-shaped folded strips all around the cake.
- I placed 2 different cars on top of the cake and then wrote “Happy Bday!” to finish off the cake, but you may choose any decorations and colors you wish. We sliced big pieces of the cake for the bday boys underneath the car they chose. They really ENJOYED their cake, and I think you will as well!
.
If you make this Cake “Day and Night” recipe please share a picture with me on Snapchat, Facebook, Instagram or Pinterest. Tag with #valyastasteofhome. I’d love to see your creations! 🙂
NOTE: I received some negative feedback from people that their cake sponges have turned out tough and not as tall and fluffy as mine. After some follow-up questions, I found a common cause of the problem and would like to share it with the rest of you to help you avoid it.
When beating eggs and sugar I use Professional 6000 HD KitchenAid Mixer. This workhorse of a mixer makes all the difference in a simple recipe as this one! While the recipe is simple, the success secret lays in the final consistency of the egg and sugar – a perfect meringue blend – which is not easily achieved with lighter duty mixers.
Beating times vary with different mixers. The mighty KitchenAid Mixer’s beating time ratio is about 10 minutes to 50 of a typical hand mixer. A 10-minute beating of a hand mixer will not give you a meringue that’s thick and stiff enough to form peaks when lifted with the whisker, as the heavy duty mixer.
If your meringue is runny with very little air bubbles when adding dry ingredients, it will make your sponges hard and they will not rise as tall. I will post an individual HOW TO post to make the PERFECT Biskvit Cake Sponges every time.
In the meantime, to give you a little word of advice: invest in a good KitchenAid mixer. It will practically revolutionalize all your baking and make it so much easier and fun.
PIN IT!


Would 8” round pan work? New at baking and don’t want to mess up.
Yes, the cake sponges will just be a little thicker.
I love this post! This is cake very beautiful. Salt and pepper is fitting for them. 🙂
Thank you Nina! 🙂
Hi valia,
I used to have trouble with my sponge cake being uneven and sticking to the pan noattet how I greased it. Then j got top quality new baking sheets and they come out perfect every time.
Yeah, you are right. Old or cheaper pans can cause uneven baking. I’m glad you found the problem why your sponge cake didn’t work out in the past. 🙂