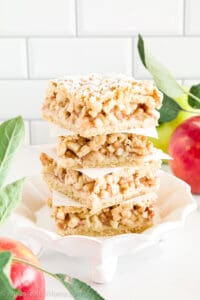
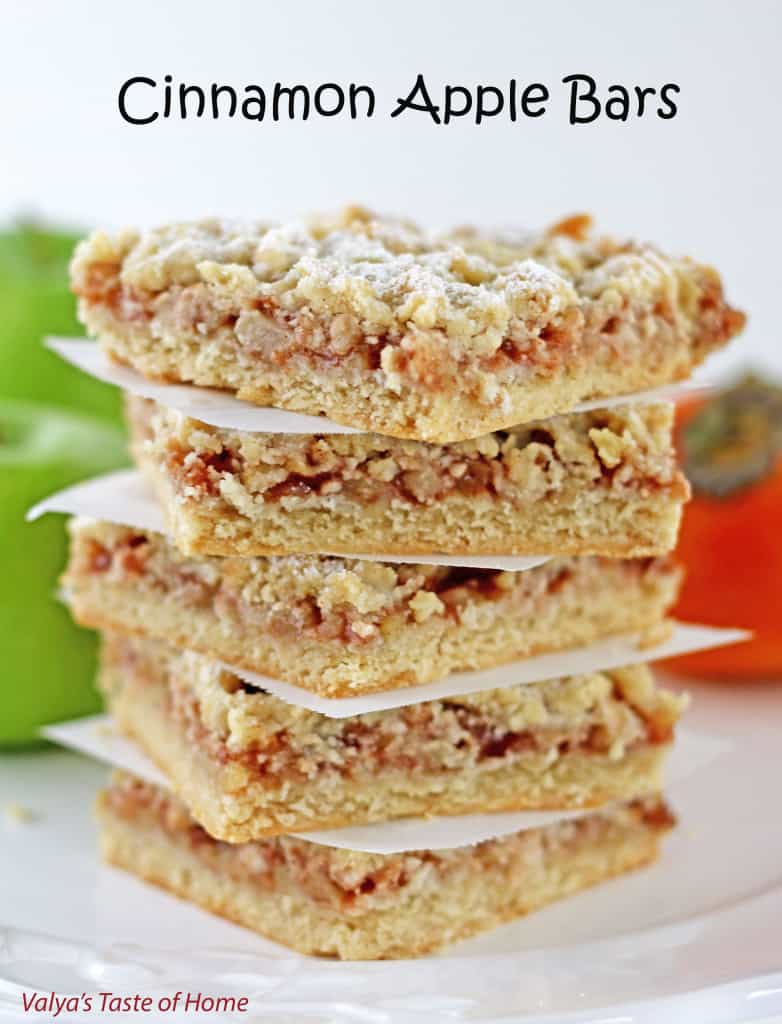
Easiest Apple Bars Recipe (Beginner-Friendly Fall Recipe)
Apple Bars are the perfect treat for fall and the holidays, and this Apple Bars Recipe is the easiest and tastiest one you’ll ever try!
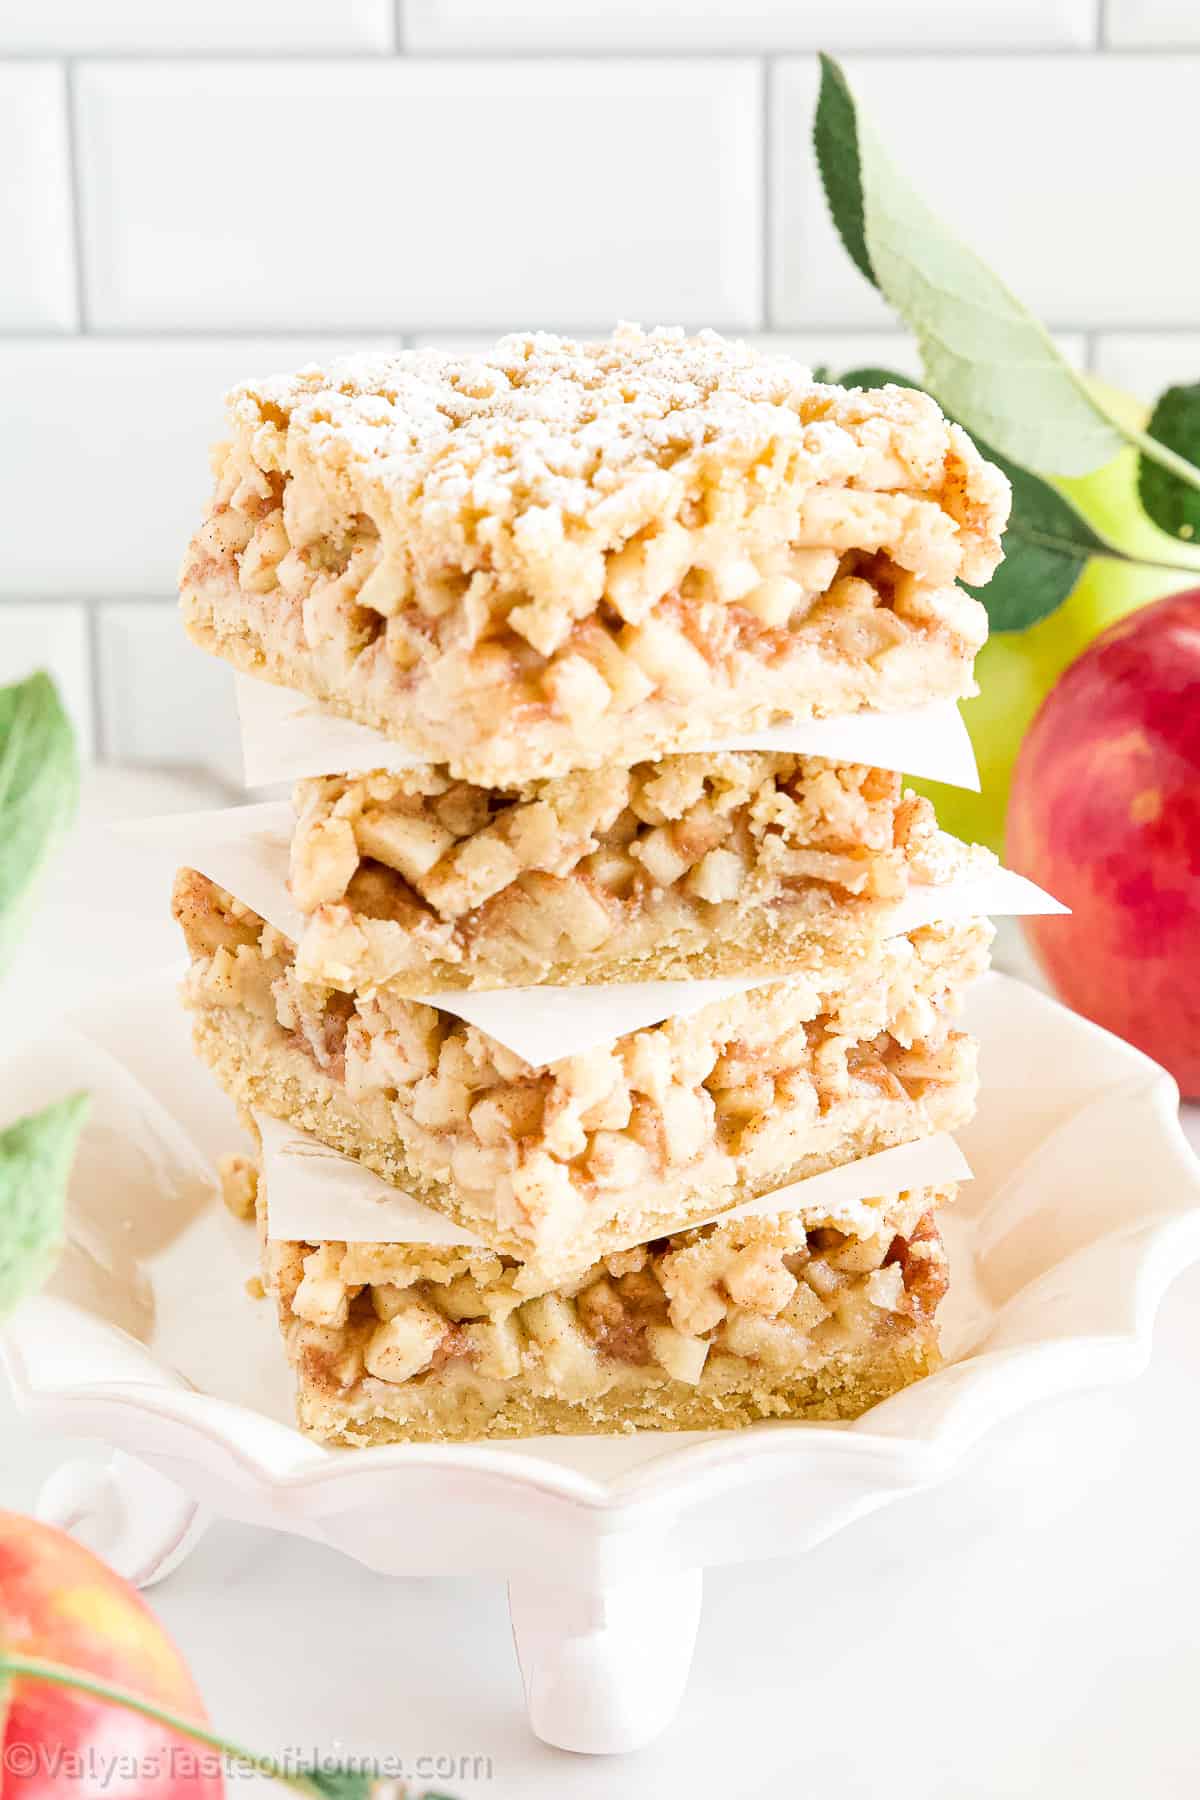
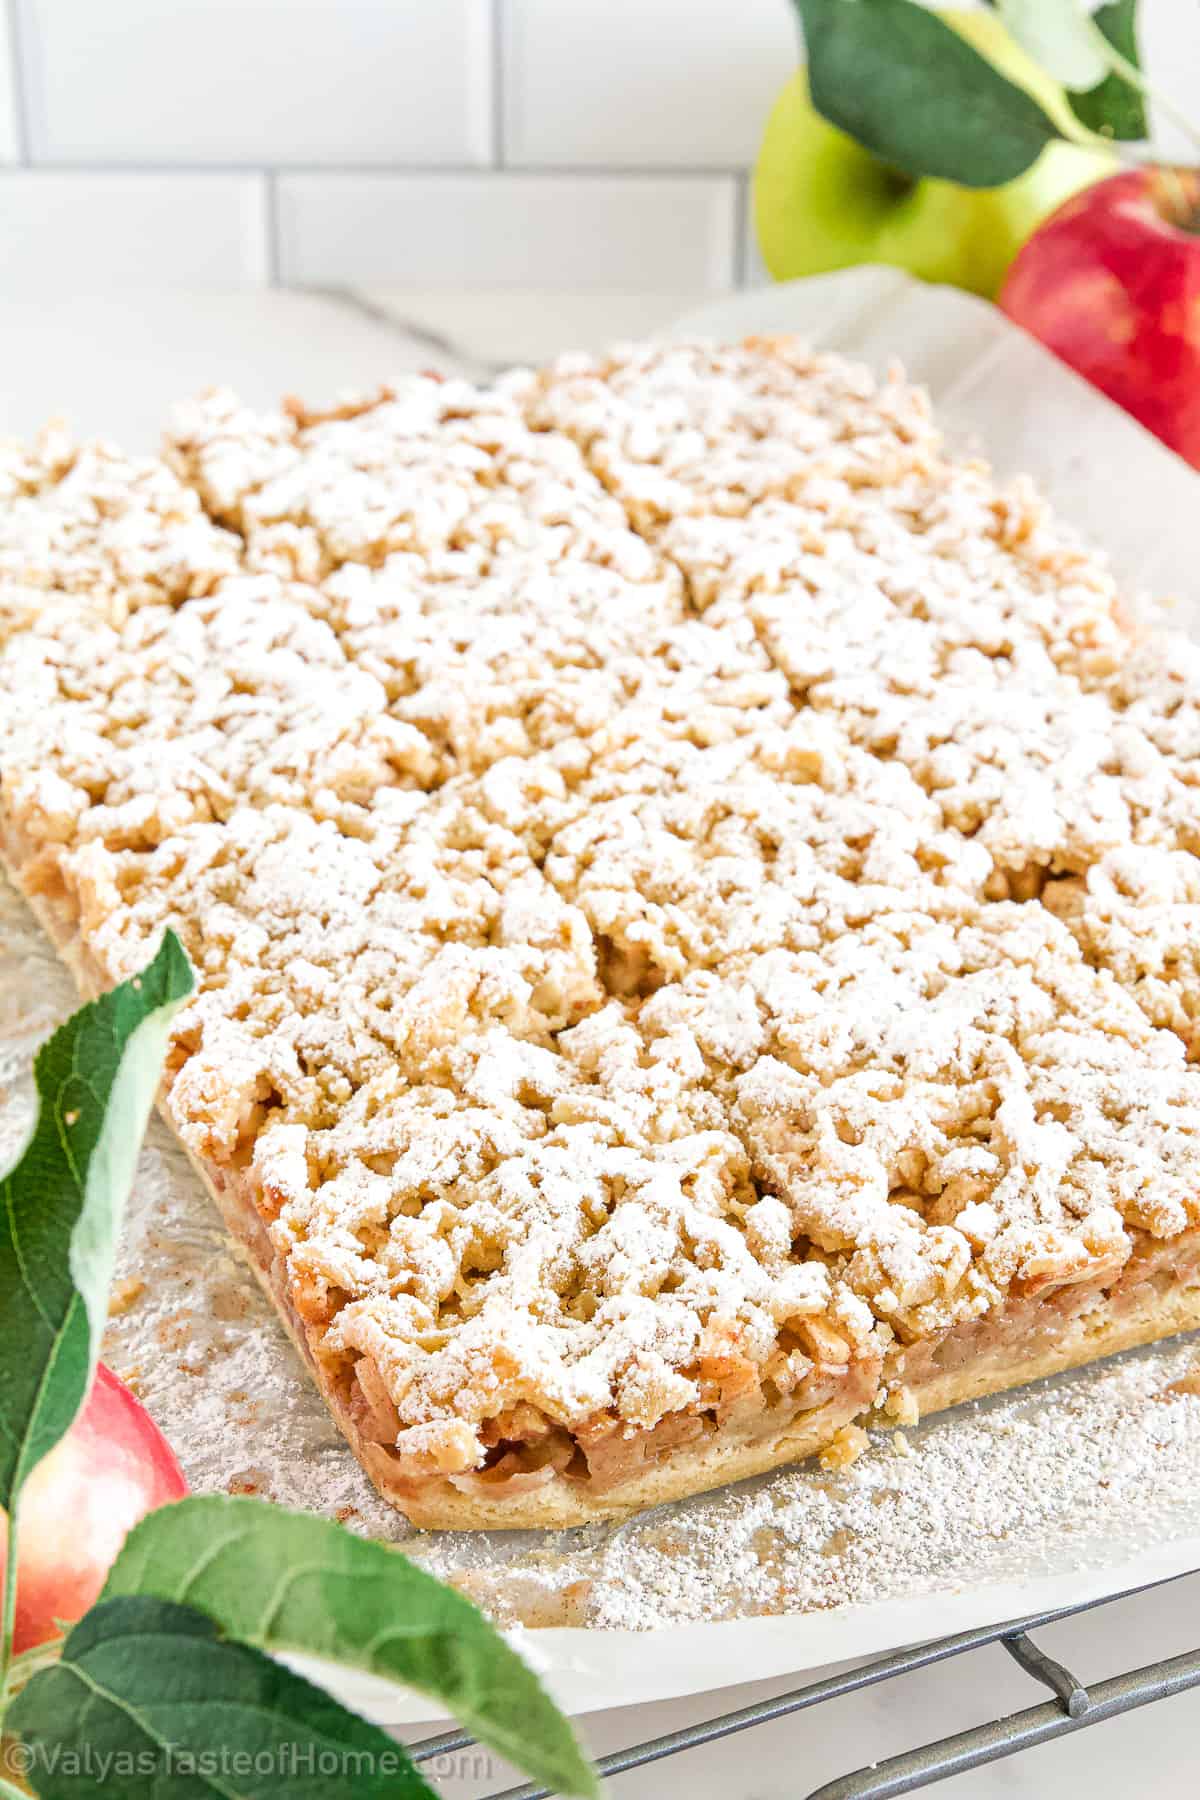
With a crumble bottom and top and shredded cinnamon apple mixture sandwiched in the middle. Think of them as an apple pie in a dessert square!
Kids seem to love them, and they’re super handy to have around, especially since they can be frozen for up to 3 months! This is the perfect recipe to try if you’re a beginner and want to make a delicious fall dessert.
Want to learn how to make this Apple Bars Recipe? Then keep on reading!
What are Apple Bars?
Apple bars are delicious baked bars that are like an apple crisp in a bar! With a delicious crust and a crumbly inside, these apple bars are to die for!
They’re the perfect dessert to serve as single-servings during the holidays and are particularly good if you’re a fan of apples like I am!
What’s best is that these apple bars are super easy to make! You don’t need a pastry cutter, pastry blender, or any other fancy baking equipment to make these delicious treats!
These apple crisp bars are a delicious, healthy snack that is easy to make. They can be made with any kind of apple you like and they’re great for breakfast or as an afternoon treat.
They’re also perfect for kids because they don’t have too many unnecessary ingredients and they’re super simple to make. If you have anyone in the family that’s allergic to eggs, then you’ll be happy to know that this recipe is also egg free!
What Makes This Apple Bars Recipe Special?
Winter is around the corner, but I’m still in the mood for fall baking. Still justifiable until Thanksgiving, right? These cinnamon Apple Bars are so easy to make yet they are so delicious. Also, so soft that every bite just melts in your mouth.
These bars are rich with flavors of cinnamon and apple and will make a beautiful dessert on your Thanksgiving table.
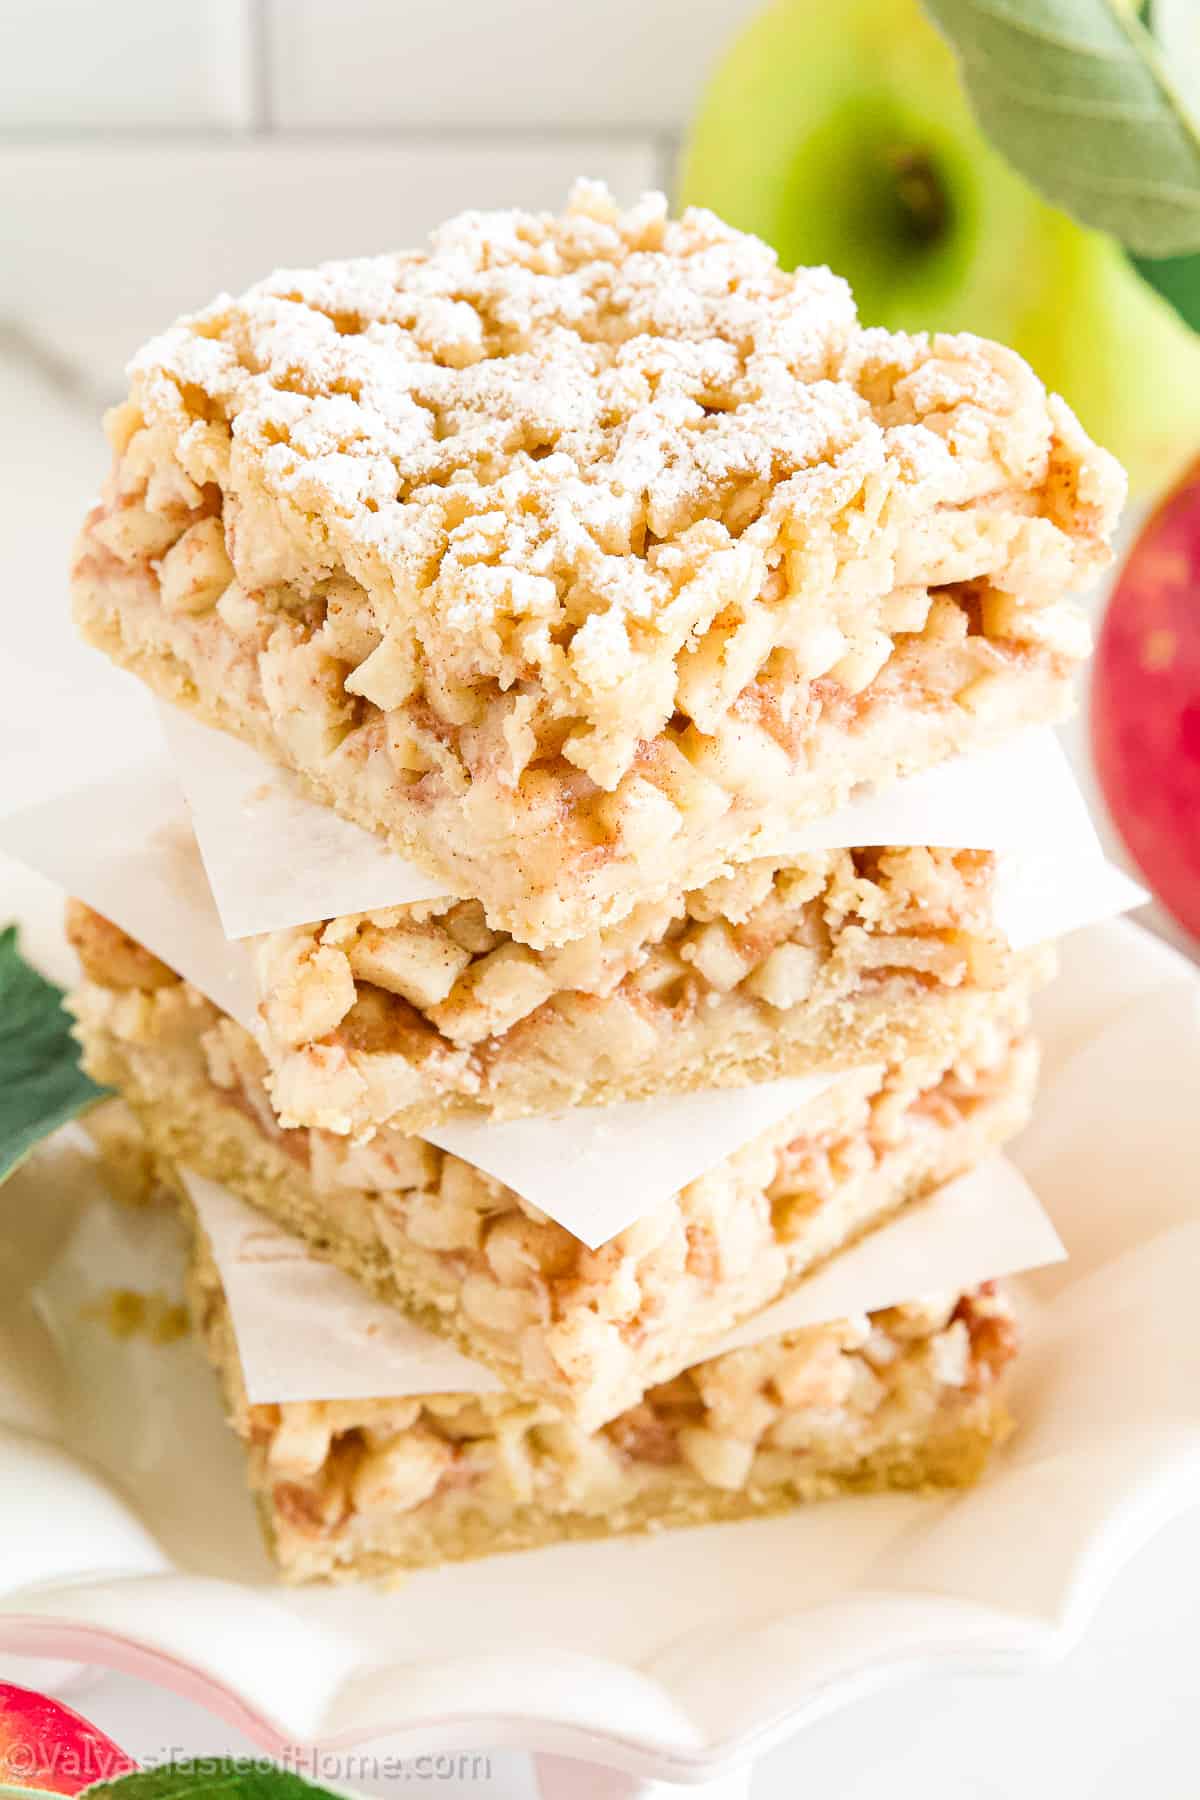
If you prefer to serve them alone then powder them with confectioners’ sugar. But if you wish to serve these bars the way we like it, with French Vanilla ice cream, then omit the confectioners’ sugar.
This recipe is super special because it’s easy to make, even for absolute beginners! So if this is your first time baking, don’t worry you’ll be able to make this treat easily for the upcoming holidays!
What to Need to Make Apple Bars at Home
All you’ll need is some pantry-staple ingredients and some apples to make try this delicious apple bars recipe! Here’s everything you’ll need to make them at home:
Batter Ingredients:
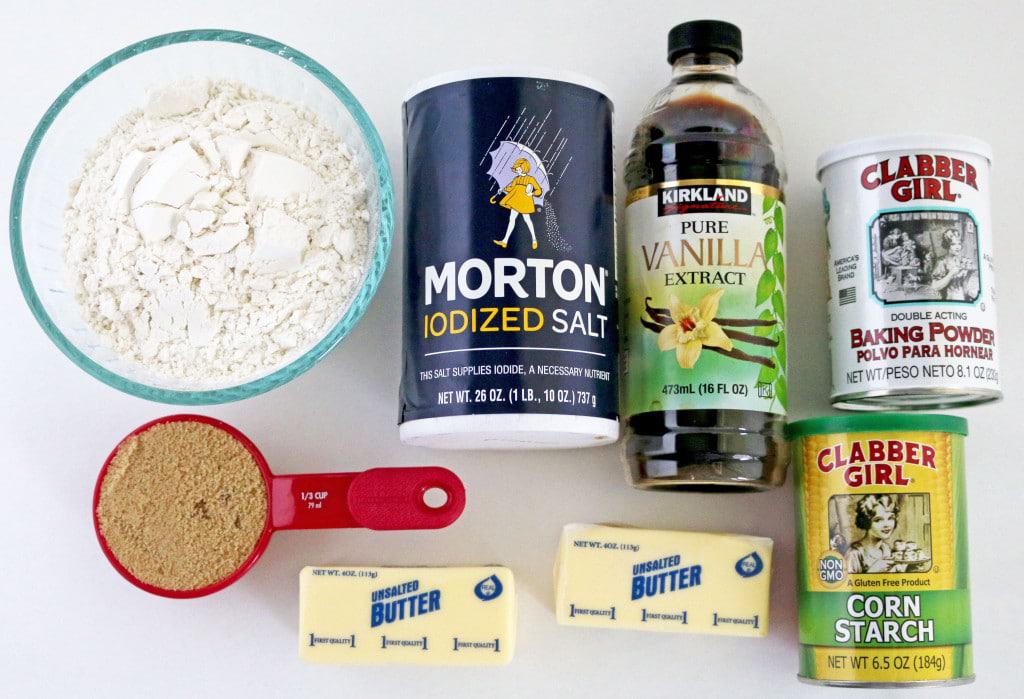
All-purpose flour: We’ll need some all-purpose flour to give the bars some structure. It’s a readily-available ingredient that I’m sure is in your pantry already!
Butter: Next, we need some unsalted butter that has been softened at room temperature instead of cold butter. You’ll need two sticks of this.
Brown sugar: We’ll also need some brown sugar to sweeten our apple bars to the right level! I love using brown sugar instead of white sugar since it has a deeper, richer flavor that enhances the cinnamon in the recipe.
Vanilla extract: You’ll also need some vanilla extract to bring out the flavor while it bakes. We’ll be using one teaspoon in our recipe.
Cornstarch: For the perfect crisp crust, we’ll be adding a little bit of cornstarch to our bar batter. We’ll be using one tablespoon of it.
Baking powder: You’ll also need some baking powder to leaven the apple bars while they bake to just the right level.
Salt: We’ll add a little bit of salt to our batter since it’ll balance out all the flavors. Trust me, it makes a huge difference!
Filling Ingredients:
Apples: Of course, we’ll need some apples in our apple bars! I’ve used Granny Smith apples, but you can use whichever ones you love best!
Sugar: To sweeten our filling, we’ll use some regular white, granulated sugar in our apple mixture.
All-purpose flour: To thicken the filling, we’ll add some all-purpose flour here as well.
Cinnamon: Cinnamon goes so incredibly well with apples and gives your apple bars a touch of fall and the holidays! We’ll be using some ground cinnamon in our apple pie bars to perfectly flavor it. If you like, you can also add a pinch of ground nutmeg but this is optional.
Salt: We’ll also need a little bit of salt in our filling to balance out the flavors perfectly.
Lemon juice: You’ll also need some lemon juice so that the apples don’t start browning and store well.

How to Make Apple Bars (Step-by-Step)
Making these Apple Bars is a piece of cake! Here’s what you need to do to make them step by step:
How to Make Apple Bar Batter
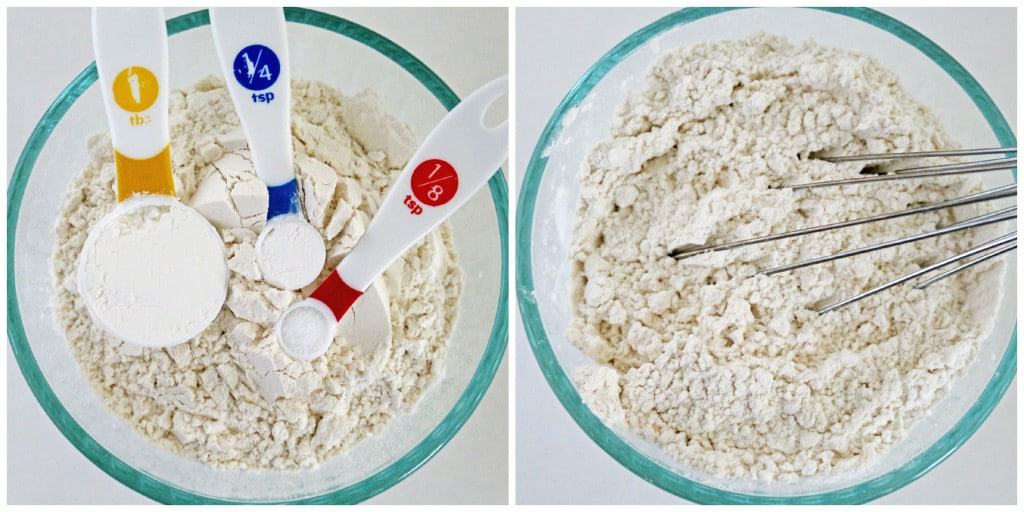
Start by placing the flour, baking powder, cornstarch, and salt into a small bowl.
Stir it with a whisk until it is all incorporated. Set aside for now.
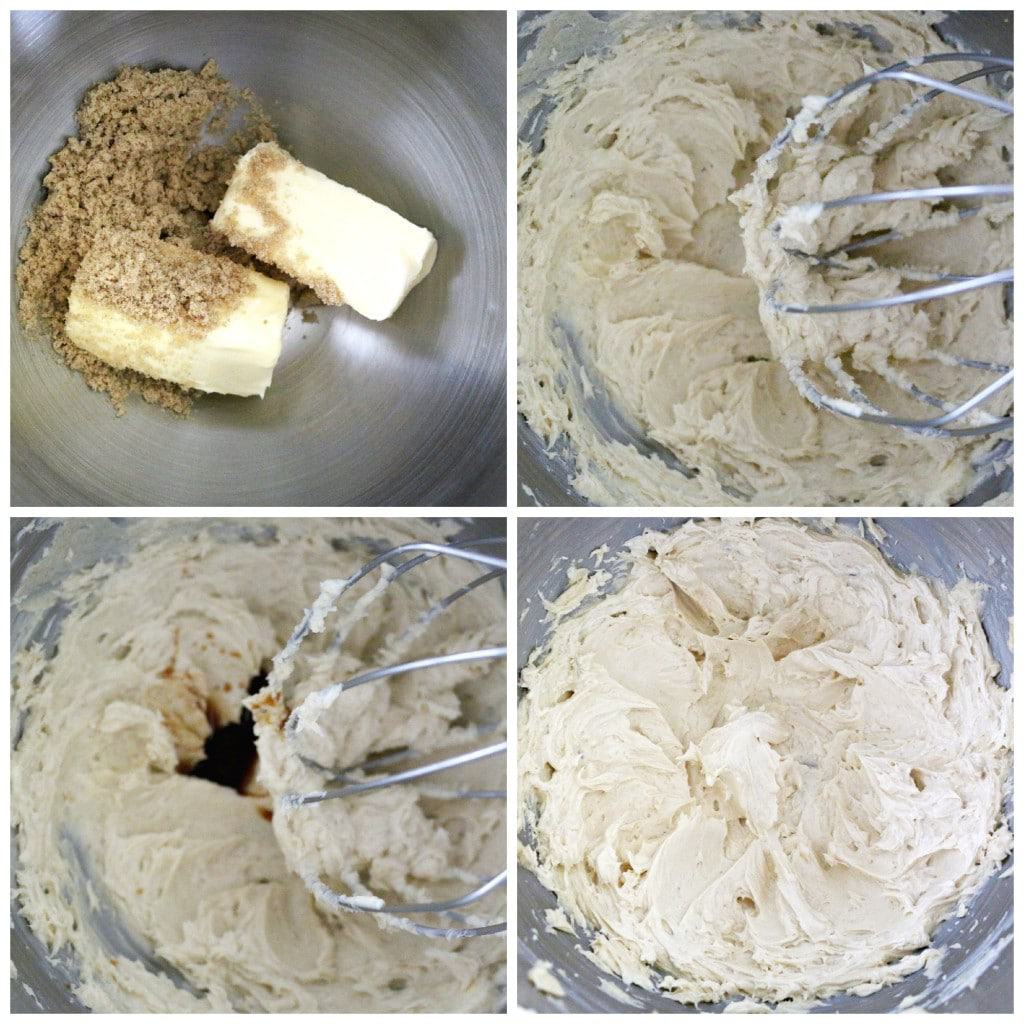
Next, in a medium bowl beat softened butter and brown sugar on high for 5 minutes, scraping the mixer bowl in between a couple of times.
Add vanilla and mix for another minute or until it’s all mixed well.
Next, add the flour mixture and stir it in on low for 3 minutes or until it’s all combined and the dough has formed.
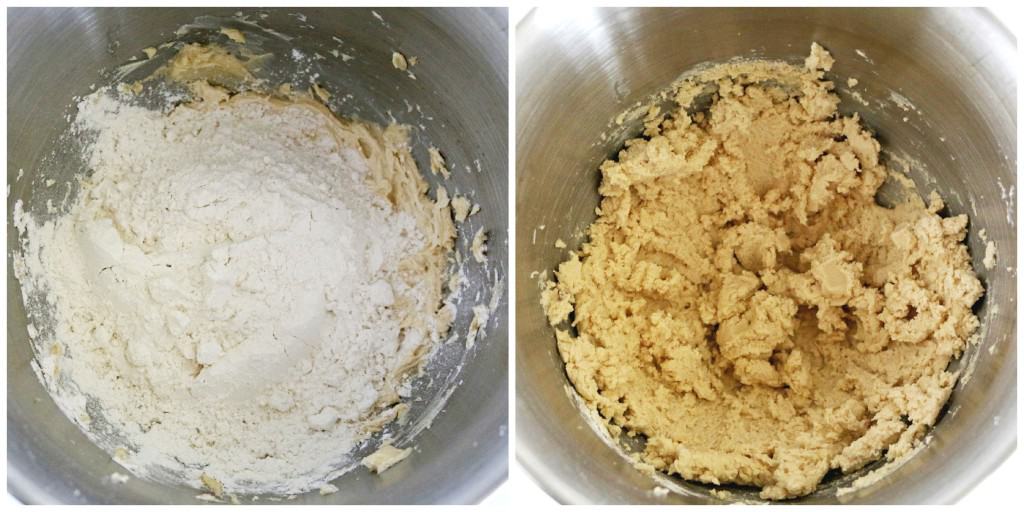
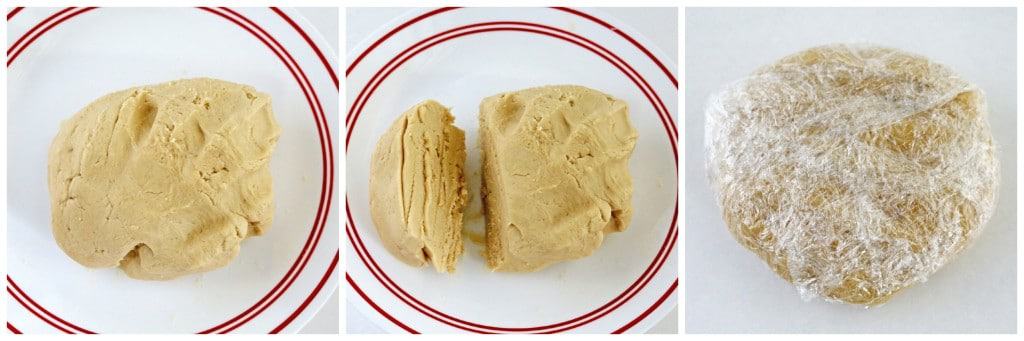
Remove the dough from a mixer bowl into a plate, and form a dough ball.
Cut ¼ off from the dough ball. Wrap it into a food plastic wrap and place the small dough piece into the freezer.
How to Make Apple Bars Filling
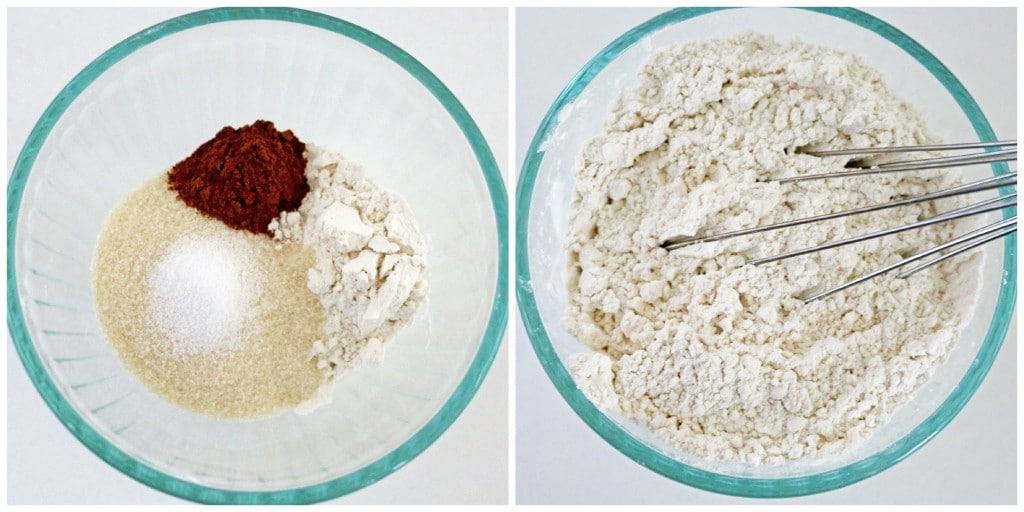
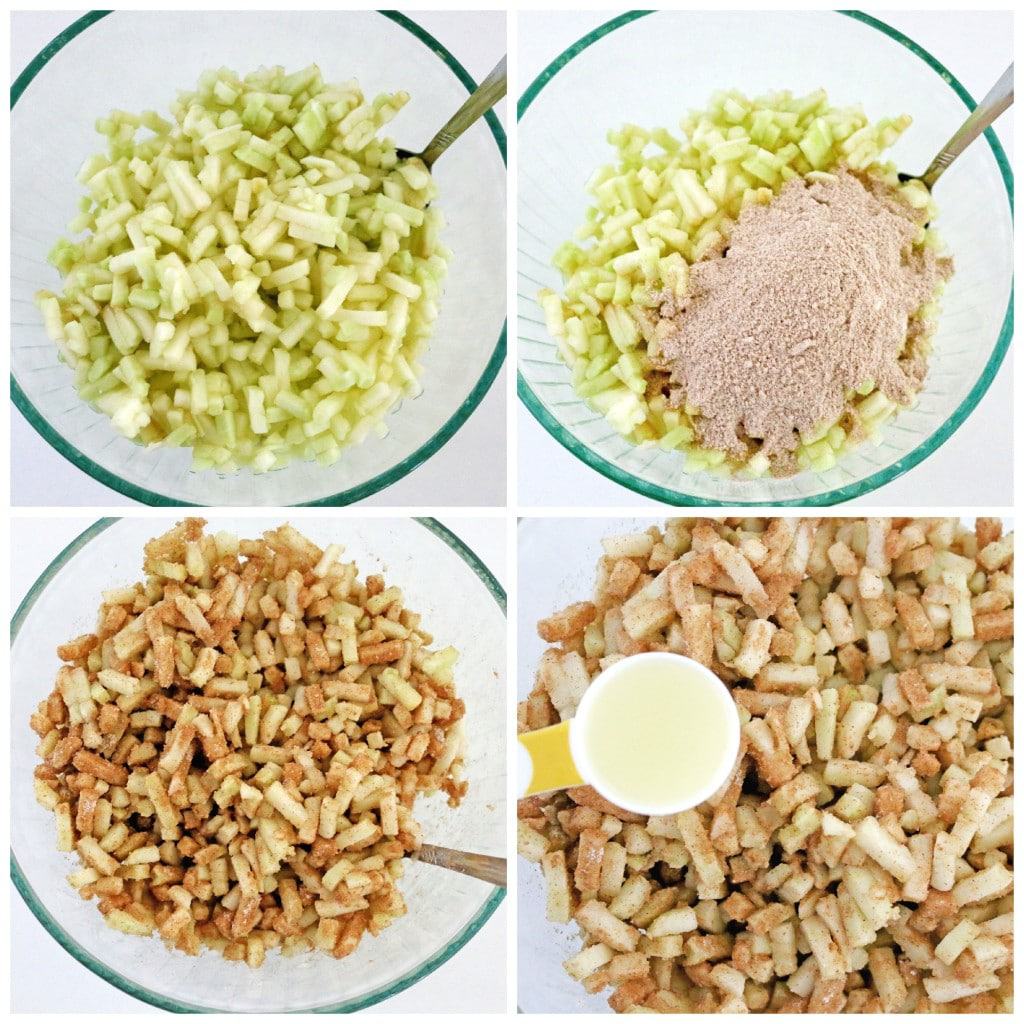
Time to make our apple filling! Into a small bowl add flour, cinnamon, flour, and salt, and stir it all together with a hand whisker. Set aside for now.
Next, wash and peel apples.
Chop apples into small pieces into a large bowl. I used an onion chopper to make things super fast and easy!
Add the flour mixture to the apples, and mix it well. Add lemon juice and stir it once more until it’s all mixed well together.
How to Assemble and Bake Apple Bars
Let’s put it all together and bake our apple bars!
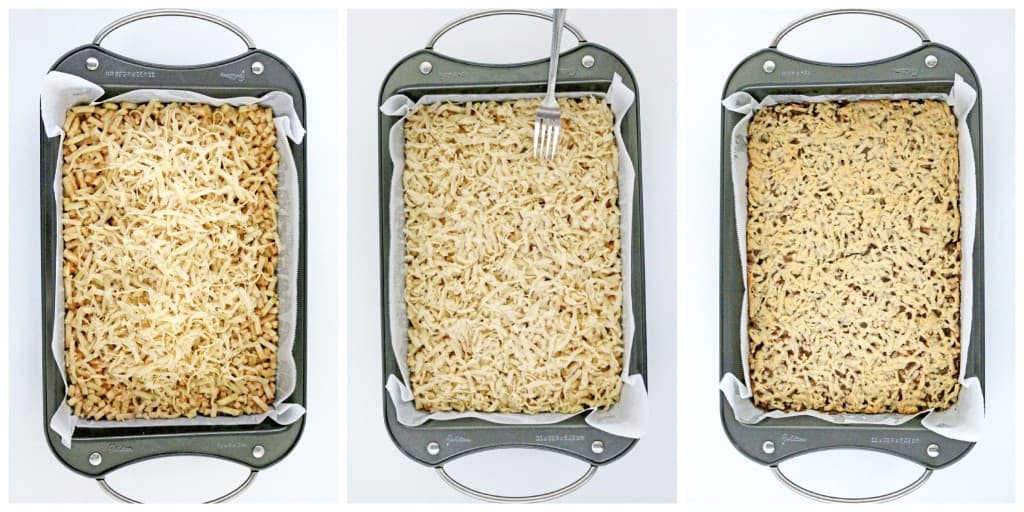
To do this, start by pinching off small pieces from the rest of the dough and dropping them onto the prepared pan. To prepare a baking pan, grease it with butter and line it with parchment paper.
Push the dough into the baking pan with your hand to form an even layer of dough. Add apple mixture and spread it out evenly.

Shred the frozen piece of dough on top of the apples. Spread it out evenly with a fork.
Bake in a preheated oven for 45 minutes at 350 F. Remove from the oven and let it cool in the pan.
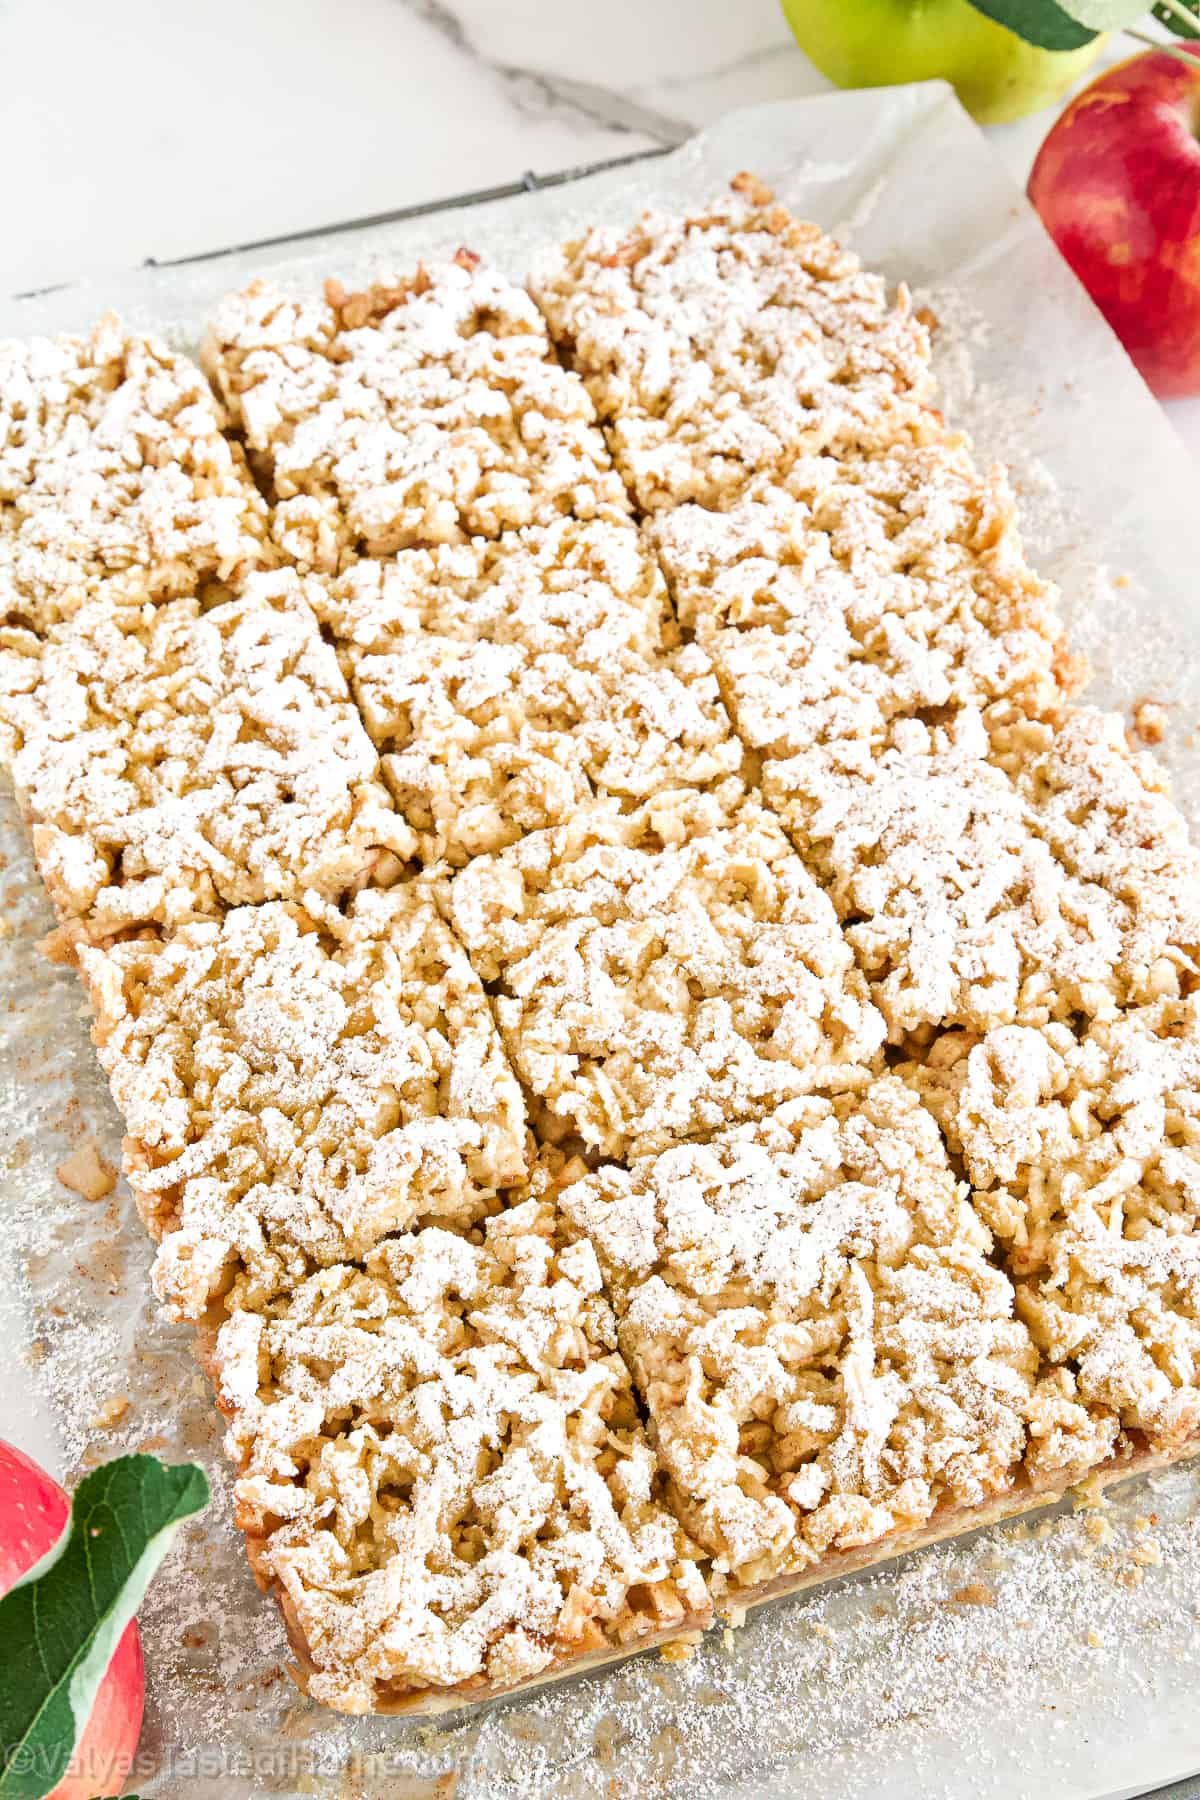
Remove from the pan and slice it into 12 even bars.
You can dust it with some confectioner’s sugar, drizzle some caramel sauce, or serve it with a scoop of ice cream.
How to Store Leftover Apple Bars
If you have any leftover apple bars, you can store them in an airtight container in the fridge for up to 3 days.
If you want, you can also freeze these delicious apple bars! They can be stored in a freezer-safe container for up to 3 months. Just thaw them overnight in the fridge because warming them up and serving them with some ice cream.
If you like apple desserts, I’m sure you’ll also love my Homemade Apple Crisp. Do try it out as well and let me know in the comments what you thought of it!
Easiest Apple Bars Recipe (Beginner-Friendly Fall Recipe)
Ingredients
Apple Bars Batter Crust Ingredients
- 2 sticks – unsalted butter softened
- 1/3 cup – brown sugar
- 1 tsp. – pure vanilla extract
- 2 cups – all-purpose flour
- 1 tbsp. – cornstarch
- ¼ tsp. – baking powder
- 1/8 tsp. – salt
Cinnamon Apple BarsFilling Ingredients
- 6 small – granny smith apples
- 1/3 cup – organic sugar
- ¼ cup – all-purpose flour
- 1 tbsp. – cinnamon
- ½ tsp. – salt
- 1 tbsp. – lemon juice
Instructions
How to Make Apple Bar Batter
- Start by placing the flour, baking powder, cornstarch, and salt into a small bowl.
- Stir it with a whisk until it is all incorporated. Set aside for now.
- Next, in a medium bowl beat softened butter and brown sugar on high for 5 minutes, scraping the mixer bowl in between a couple of times.
- Add vanilla and mix for another minute or until it’s all mixed well.
- Next, add the flour mixture and stir it in on low for 3 minutes or until it’s all combined and the dough has formed.
- Remove the dough from a mixer bowl into a plate, and form a dough ball.
- Cut ¼ off from the dough ball. Wrap it into a food plastic wrap and place the small dough piece into the freezer.
How to Make Apple Bars Filling
- Time to make our apple filling! Into a small bowl add flour, cinnamon, flour, and salt, and stir it all together with a hand whisker. Set aside for now.
- Next, wash and peel apples.
- Chop apples into small pieces into a large bowl. I used an onion chopper to make things super fast and easy!
- Add the flour mixture to the apples, and mix it well. Add lemon juice and stir it once more until it’s all mixed well together.
How to Assemble and Bake Apple Bars
- Let’s put it all together and bake our apple bars!
- To do this, start by pinching off small pieces from the rest of the dough and dropping them onto the prepared pan. To prepare a baking pan, grease it with butter and line it with parchment paper.
- Push the dough into the baking pan with your hand to form an even layer of dough. Add apple mixture and spread it out evenly.
- Shred the frozen piece of dough on top of the apples. Spread it out evenly with a fork.
- Bake in a preheated oven for 45 minutes at 350 F. Remove from the oven and let it cool in the pan.
- Remove from the pan and slice it into 12 even bars.
- You can dust it with some confectioner’s sugar, drizzle some caramel sauce, or serve it with a scoop of ice cream.
Thank you for following me on Instagram, Facebook, and Pinterest!
This recipe was originally posted on November 6, 2015 (original picture below), and updated for a better user experience. The post may contain affiliate links. Read my disclosure.
Do you think i can use plum jam instead of apple filling? Thanks
Hi Jessica! I’ve never used jam on any bars, but you could give it ago and see how it turns out. I’d love to see your creation. Thanks for your comment!
What size of baking sheet did you use?
Hi Inna! There is a link in the post to the exact baking sheet I’ve used in case you want to get one. The size is 13 x 9. Thank you, enjoy your baking 😉
I made this today and it turned out very delicious, kids and hubby were very pleased! Saving this recipe for all time favorite now 🙂 thank you for sharing it with us! Im always checking back for more great recipes!
Hi Nataliya. I’m so happy to hear that your family liked these delicious treats. They are very much loved in our family as well. Thank you very much for visiting my blog and trying out my recipes. 🙂
wow, these look good! I’ll have to try them soon!:)
They can be pretty addicting. Thanks Annie 😉