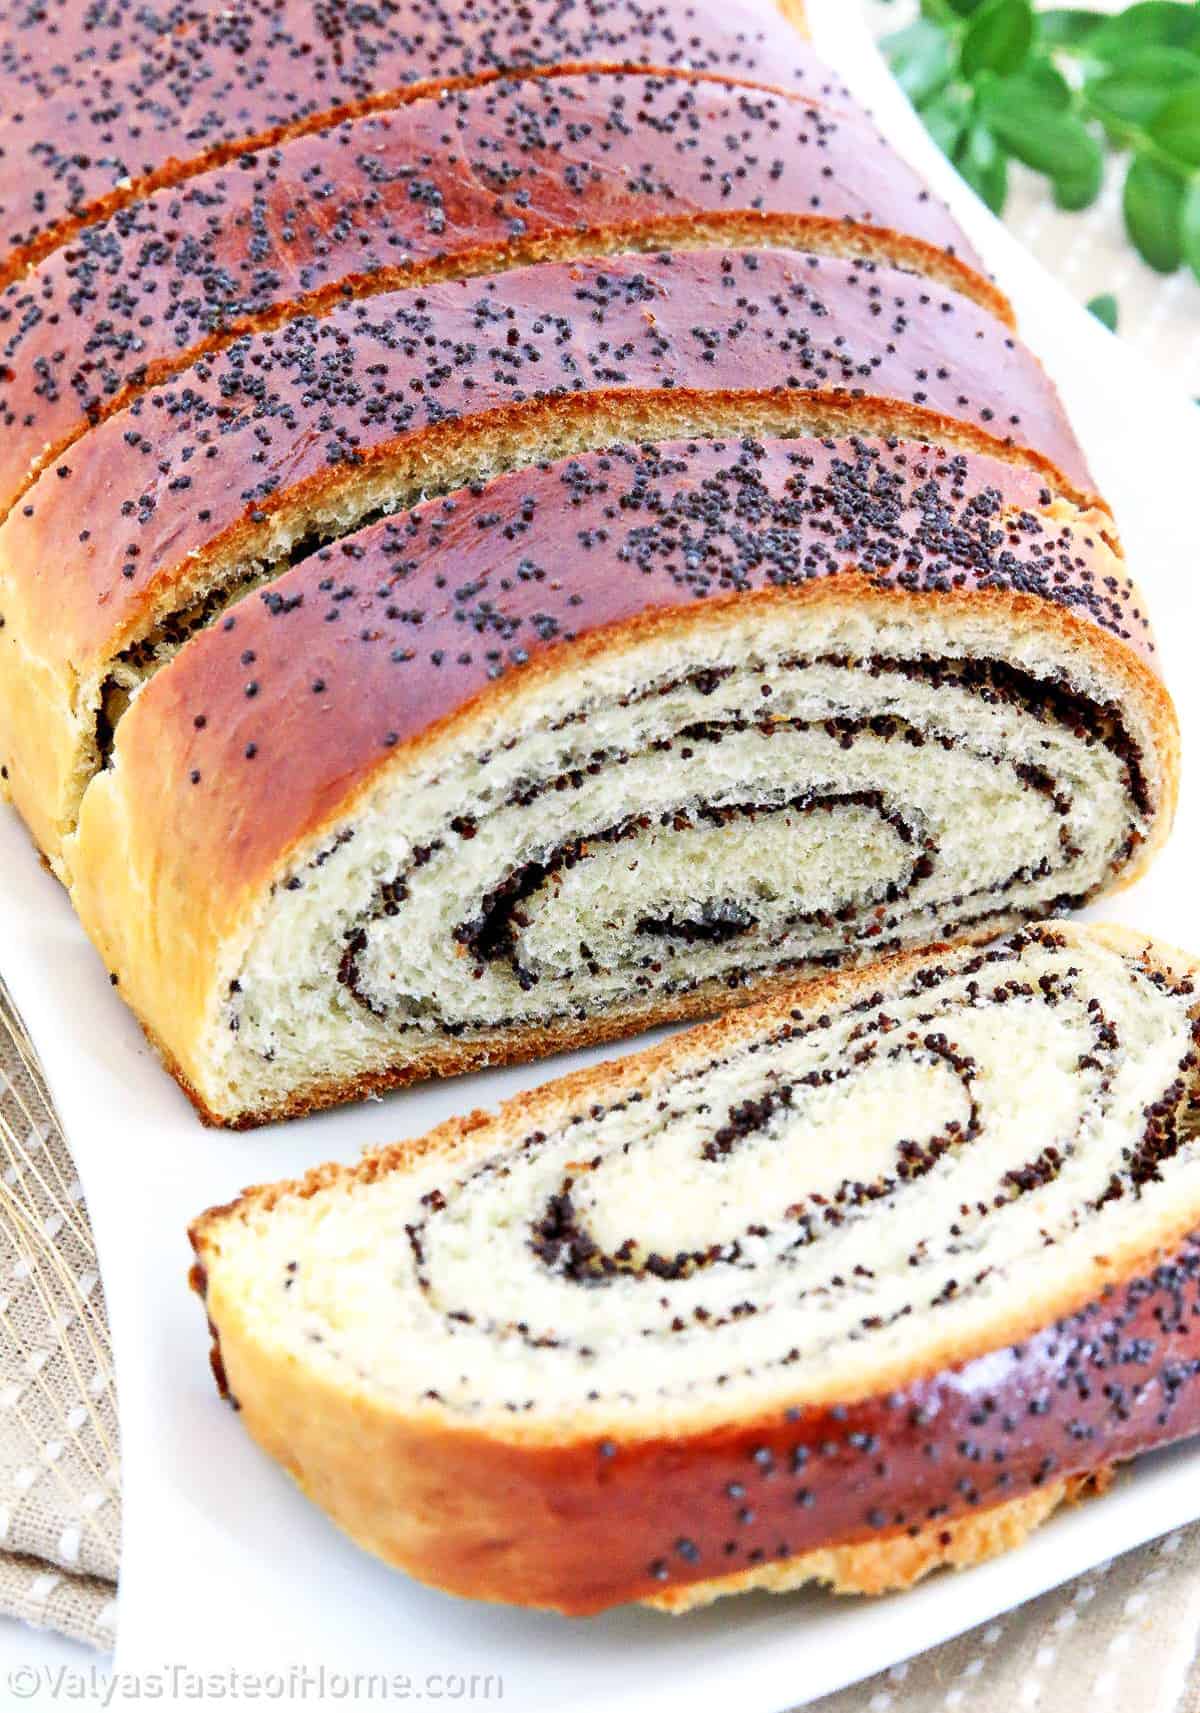
Ukrainian Poppy Seed Roll (Authentic Traditional Recipe)
This traditional Poppy Seed Roll recipe will give you authentic Ukrainian Makowiec that are soft, fluffy, and absolutely delicious! Super easy to make too!
Servings 3 rolls
Ingredients
For the Poppy Seed Roll Batter
- 1.5 cups – organic whole milk
- ¼ cup – organic sugar
- 1 tablespoon – dry yeast
- 5 large – eggs
- ¾ cups – organic sugar
- 1 teaspoon – pure vanilla extract
- ¼ teaspoon – sea salt
- 4 oz. – unsalted butter
- ¼ cup – mayonnaise (I used homemade mayonnaise)
- 6 cups – organic all-purpose flour
For the Poppy Seed Roll Filling and Tipping
- 16 oz. – poppy seed butter
- 1 - egg
- 1 tbsp. – dry poppy seeds
Instructions
How to Make the Poppy Seed Roll Dough
- To start, we'll need to activate our yeast. In a small bowl, add warm milk, sugar, and yeast. Stir them together until both sugar and yeast are dissolved. Set this aside for a few minutes to let the yeast wake up and start working.
- While waiting for the yeast, melt the butter. Once it's melted, let it cool down a bit before stirring in the mayonnaise. This will ensure that the mayo doesn't separate due to the heat. Let this mixture sit until you're ready to use it.
- Next up, we're going to beat the eggs and sugar until they're foamy and pale. This should take about five minutes on high speed. As the mixer is running, add in the salt and vanilla for flavor.
- Now, reduce the mixer speed to medium and slowly pour in the butter and mayo mixture, followed by the yeast mixture.
- Switch to the dough hook attachment at this point and start adding sifted flour, half a cup at a time. Be sure to scrape the sides of the bowl occasionally to ensure an even mix.
- Depending on the size of your eggs, you may need slightly more or less flour. The perfect dough should be soft, but not sticky to the touch.
- Once your dough is ready, cover the bowl with plastic wrap (poke a few holes in it to allow the dough to breathe) and leave it in a warm spot to rise for about an hour. You'll know it's ready when it has tripled in size.
How to Assemble Poppy Seed Rolls
- When the dough has risen sufficiently, transfer it to a well-floured work surface. I recommend using a large cutting board. To keep the board from slipping, place a damp washcloth underneath it.
- Shape the dough into a log and divide it into three equal pieces. Roll out each piece into a square of about a quarter-inch thickness.
- Now it's time to spread the poppyseed filling. Make sure it's at room temperature for easy spreading. If it's too thick, you can dilute it with warm water, milk, or juice.
- Roll up your dough tightly into a log and place it seam-side down on a baking sheet lined with parchment paper. Repeat this process for the remaining dough pieces.
- Cover the baking sheet with a clean, dry towel and let the rolls proof for about half an hour. If you have two ovens, you can use one for proofing and the other for baking.
- Just warm one oven to about a hundred degrees, turn it off, and place the rolls inside to proof. Meanwhile, preheat the second oven to bake the rolls.
How to Bake Poppy Seed Rolls
- Before you bake the rolls, beat an egg in a small bowl and brush each roll with the egg wash. You can also sprinkle some dry poppy seeds on top. Bake the rolls in the preheated oven for about thirty minutes. If you prefer your rolls to be a bit darker, you can extend the baking time to forty minutes.
- Don't worry if the rolls crack a bit on one side during baking or if the tops crinkle slightly once they've cooled. This is completely normal and doesn't affect the taste.
- Once the rolls have cooled to room temperature, you can slice and enjoy them with a cup of coffee, tea, or milk. Enjoy your homemade poppy seed rolls!
Notes
If this recipe is too big for your family size, the good news is that this recipe is freezer friendly. Cut the cooled rolls into preferred portions, wrap each piece in plastic food wrap (or place into individualized Ziploc bags) and place into a freezer container. Freeze up to 3 months.
To thaw, leave it wrapped on a countertop or pantry. Warm a slice in a toaster oven if you prefer it warm, as I do. And enjoy!
To thaw, leave it wrapped on a countertop or pantry. Warm a slice in a toaster oven if you prefer it warm, as I do. And enjoy!