Homemade Candied Cherries (Easy and Delicious Cherries!)
This Candied Cherries recipe features tasty homemade treats that look like cherries but are actually little sugar treats with a cherry extract. You'll love them!
Servings 70 cherries
Ingredients
For the Edible Cherries:
- 2 - large eggs
- 4 ½ cups – powdered sugar
- 1 tsp. – cherry extract
For the Coating:
- 1 cup – granulated sugar
- 2 tbsp. – yellow food coloring
- 1 tbsp. – red food coloring
- 6 tbsp. - water
- A pine tree branch with long needles
Instructions
How to Make Candied Cherries Mixture
- To begin making sugar cherries, start by separating egg yolks from whites and placing the whites into a medium bowl. Then, add one cup of powdered sugar and mix with a spoon (do not use an electric mixer).
- Add the rest of the powdered sugar ½ cup at a time until the mixture becomes pretty thick. Add a teaspoon of cherry extract and mix in with the spoon as well.
- You may need to adjust the amount of powdered sugar using up to a total of 5 cups depending on the size of the egg whites you had.
How to Color Candied Cherries
- Once the sugar mixture is ready, pour 2 tbsp. of yellow food coloring into a small bowl and 1 tbsp. of red food coloring into another small bowl.
- Dilute the food coloring with water. Add 2 tbsp. of water into the bowl of yellow coloring, and 1 tbsp. of water into the bowl of red coloring.
- If you don’t use artificial food coloring at all, you may substitute with red organic beets or juice or black cherries for the red, and organic carrots, which will give you the yellow color. Organic produce gives darker colored juices than non-organic.
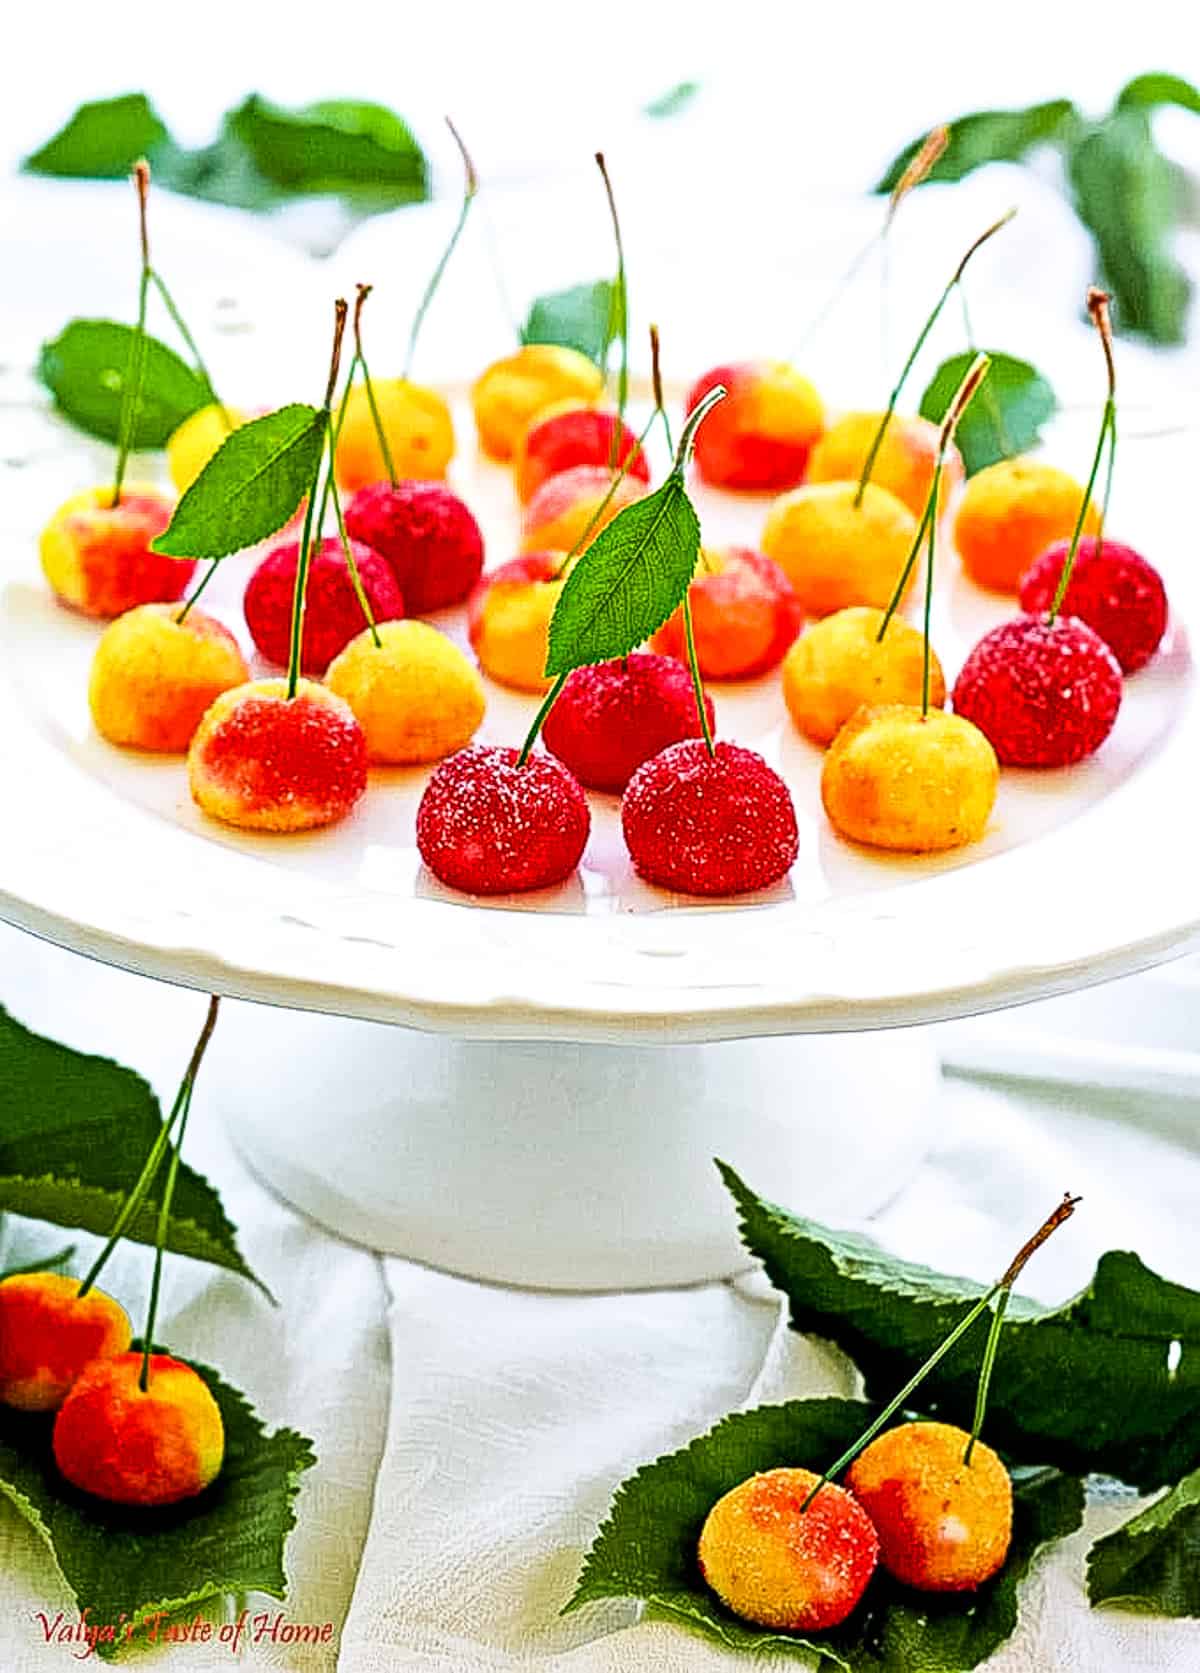
How to Shape Candied Cherries
- To form and coat sugar cherries, prepare your stems first. Remove the needles from the pine branch so that you have two attached needles. Trim the pine needles so that they’re about 1 ½” long. Make one stem slightly longer than the other for a more natural look.
- Pinch off 2 – 4 (max) round balls at a time from the sugar mixture and cover the sugar mixture with a lid. Keep the lid closed during forming and dying to prevent the sugar mixture from drying and hardening.
- Coat the entire ball in yellow with one spoon, then gently drop it into the red bowl, and dip just one side of the ball in red color.
- Use one spoon per bowl for dipping, do not use one spoon for both colors, or place spoons in the wrong bowl, or you will contaminate your food coloring in the bowls, and this will give you different results.
- With the spoon in the red bowl, lift up the ball (do not roll it in the red color) to move it to the sugar coating plate.
How to Decorate Candied Cherries
- Transfer the colored cherry onto the plate with regular granulated sugar. When transferring, lift up the cherry with the red spoon (the red color will be on the bottom), then while transferring, flip the spoon over so that the cherry drops onto the sugar with the yellow side down and red side up.
- That way, the red color will drip down a bit to merge with the yellow, giving it a natural look. Coat one cherry in sugar at a time immediately after transferring.
- Make a little dimple on one side of the cherry where you will insert the stem. This is optional, but it gives the cherry a natural shape.
- Then take the cherry in your hands, sprinkle it with more sugar, and gently roll between your palms into a perfectly round shape.
- If the color bleeds through the sugar too much, add more sugar, and reshape the dimple for the stem at the end, if necessary.
- Finally, insert stems immediately after shaping. Insert stems almost all the way to the bottom of the cherry but don’t puncture it through completely. I usually make the cherries in sets of two or just one stem. Triplet cherries are too heavy and fall off the stems while transferring.
- You can make the cherries smaller if you want to make triples. Set the sugar-coated cherries onto a clean platter to dry and harden. Let them dry for at least 12 hours to make sure they are completely set and ready on the inside then store them in a plastic container.
- Your delicious Candied Cherries are ready to be served!